
Technique and design credit: this is a finger-knitting project, worked with large loops by hand. It is not crochet. The underlying Bernat Cow and Highlander Stuffies design is by Sabrina-Rose Benedict of Sab’s Stuffies, published by Yarnspirations. Croshly provides an AI-assisted written guide; the design is not a Croshly original, and the AI illustrations do not document a tested Croshly sample.
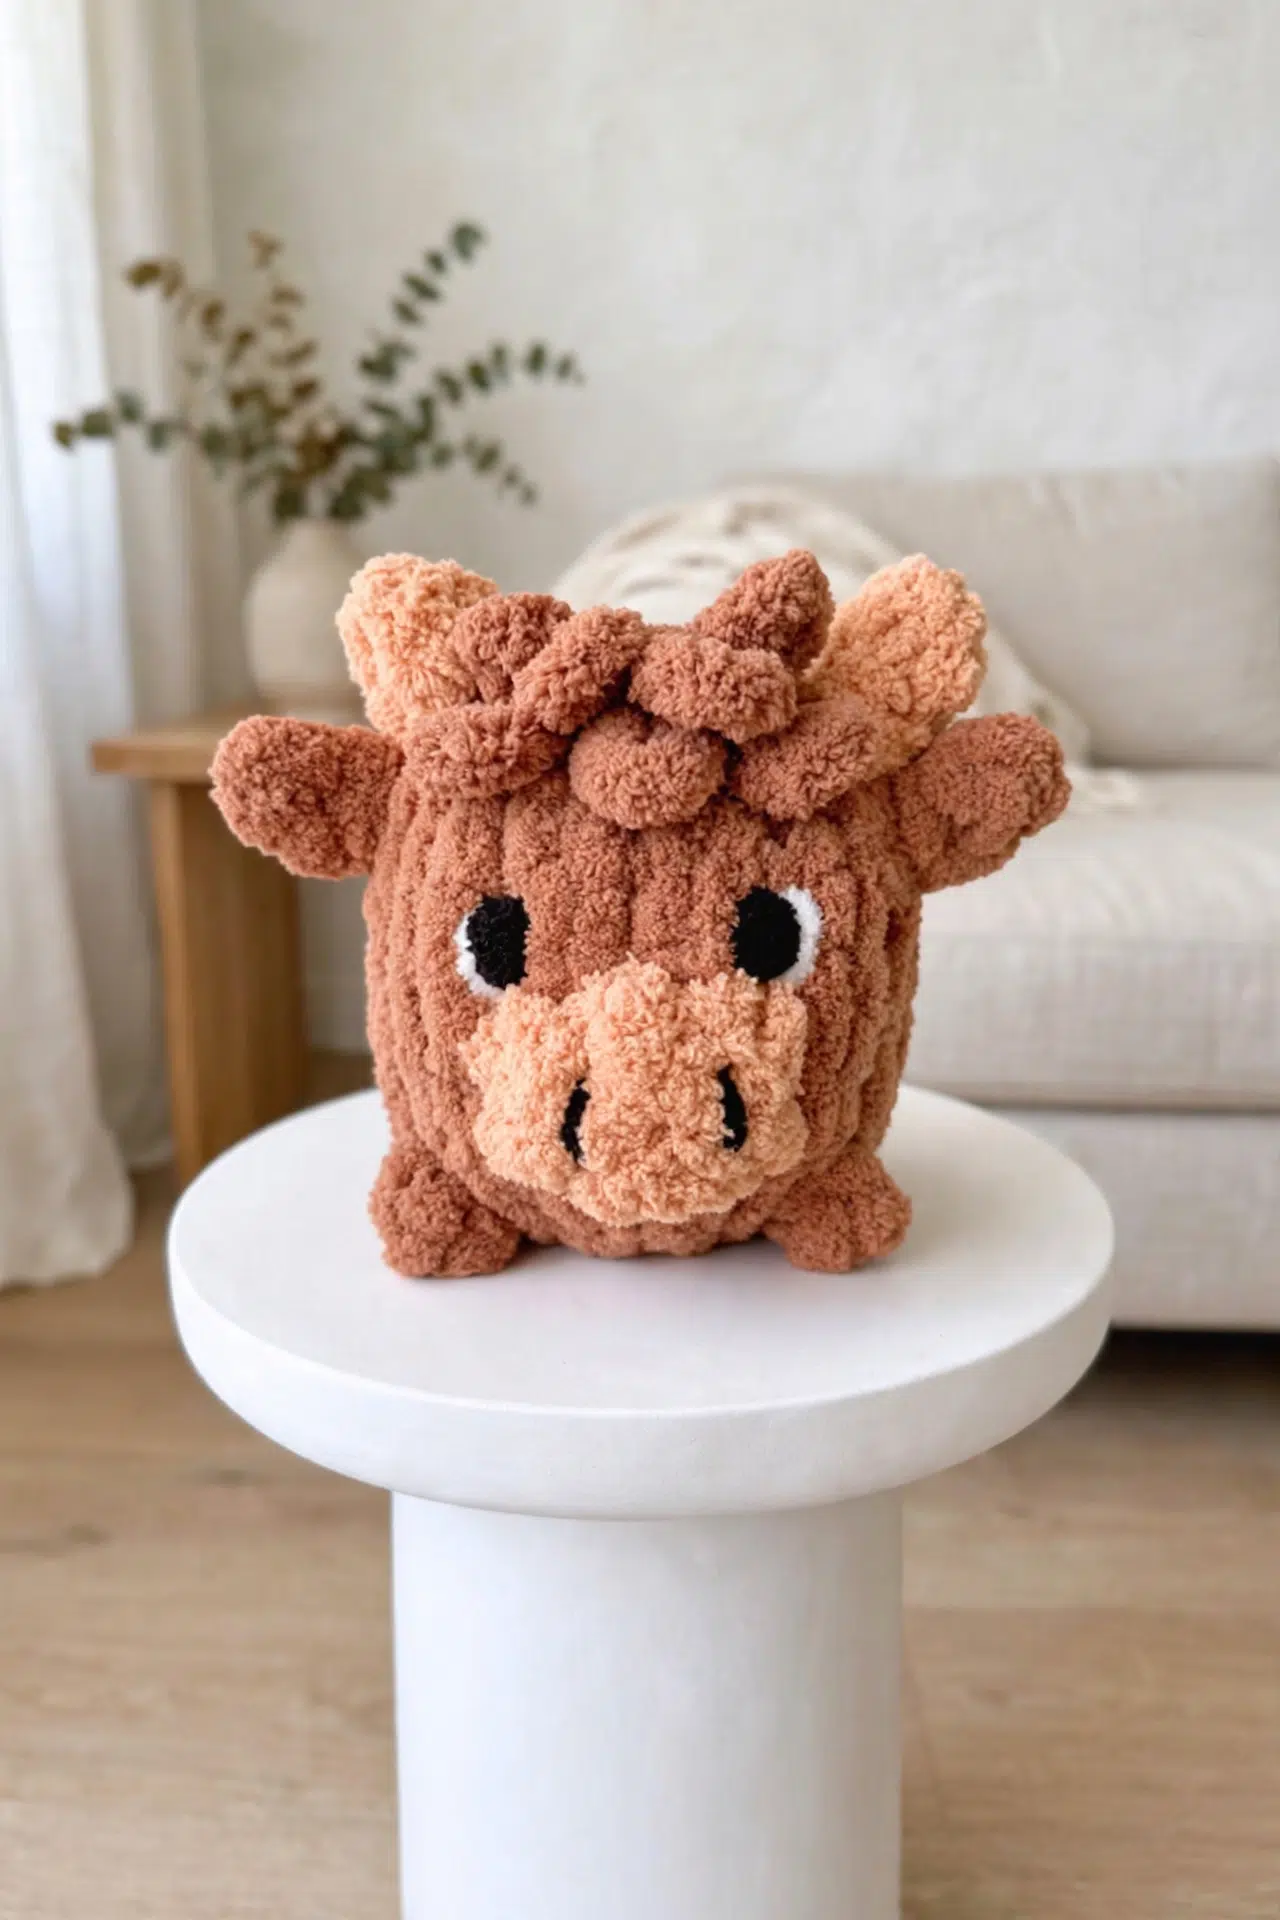
Small stuffed projects can become surprisingly fiddly when every leg, ear, and facial feature needs separate shaping. These Hand-Knit Cow and Highlander Stuffies use a shared construction to keep those little parts manageable while still giving you both animal options in one pattern.

The body uses only a dozen active loops, and the smaller features grow from short chains or loops attached directly to it. You can spend your time placing the details carefully instead of wrestling with complicated shaping.
Jump to:
- What Makes This Pattern Work
- Pattern Details
- Supplies
- Abbreviations
- How to Hand-Knit the Cow and Highlander Stuffies
- My Best Tips
- Yarn and Detail Options for Your Stuffies
- Fixing Loose Loops and Uneven Features
- A Soft Handmade Accent
- Washing & Care
- More Crochet Farm Animal Amigurumi Patterns
- Frequently Asked Questions
What Makes This Pattern Work
- Two animals, one construction: You can use the same basic body and attachment methods for either version. The yarn colors, horn length, and highlander hair are what change.
- A low loop count: Each body round keeps just 12 active loops. That gives your hands a steady rhythm without long stretches of counting.
- Features with minimal assembly: The snout is worked directly onto the body, while the feet, ears, horns, and eyes attach with their own yarn tails. There's no long seam to sew.
- Easy access for secure knots: The feet go on before stuffing and the other features are tucked into the body. This lets you tighten the attachments and hide the ends as you work.
Pattern Details
- Skill Level: Easy
- Finished Size: Cow: 6 in. tall × 6 in. wide at the body and 8 in. wide from ear to ear. Highlander: 7 in. tall × 6 in. wide at the body and 8 in. wide from ear to ear.
- Yarn Weight: Jumbo Yarn (Size 7) and Super Bulky Yarn (Size 6)
- Time to Make: about 3-5 hours
Supplies
Gather your jumbo yarn first, then set aside the short lengths needed for the eyes, highlights, and nostrils. No hook is used for this hand-looped project.
- Cow: 1 ball Jumbo Yarn (Size 7) in Vintage/White, approx. 10 yards: Try to keep the yarn thickness consistent across colors. A noticeably thinner substitute will make the spots or attached features sit differently from the body.
- Cow: 1 ball Jumbo Yarn (Size 7) in Black or Grey, approx. 4 yards
- Cow: 1 ball Jumbo Yarn (Size 7) in Chalk Pink, approx. 1 yard
- Cow: 1 ball Jumbo Yarn (Size 7) in Scone or Caramel, approx. 1 yard
- Cow: 1 ball Super Bulky Yarn (Size 6) in Black, approx. 1.5 feet
- Highlander: 1 ball Jumbo Yarn (Size 7) in Caramel, approx. 15 yards
- Highlander: 1 ball Jumbo Yarn (Size 7) in Scone, approx. 2.5 yards
- Highlander: 1 ball Jumbo Yarn (Size 7) in Black, 1 foot
- Highlander: 1 ball Jumbo Yarn (Size 7) in Vintage/White, 1 foot
- Highlander: 1 ball Super Bulky Yarn (Size 6) in Black, approx. 1.5 feet
- Scissors
- Fiberfill, approx. 4 ounces
- Tapestry needle, if adding nostrils: You'll only need the needle for the Size 6 nostrils. Choose one with an eye large enough for the yarn and a tip that passes through the snout without snagging it.
Abbreviations
- CC - change colors
How to Hand-Knit the Cow and Highlander Stuffies
Read through the placement instructions before stuffing so you can secure the feet while the inside of the body is still easy to reach.
Pattern category: Craft. The body and features are formed by chaining and knitting large yarn loops by hand; no crochet hook is required. Vintage/White is the cow's base color, and Caramel is the highlander's base color.
Body
With the base color, Vintage/White for the cow or Caramel for the highlander, create a slip knot, leaving approximately an 8 in. yarn tail. Make sure the slip-knot loop is about 1.5 in. wide.
- Row 1: Chain on a total of 12 loops, including the slip knot. Make Row 1 into a circle by pulling the tail yarn through loop 12 of the chain row. (12)
- Row 2: With the tail and working yarn pointing away from you, start pulling up loops through each of the top loops from the chain row, working to the right. (12)
- Highlander, Rows 3-11: Knit 12. Work 108 loops total across these rows. Cut the working yarn, leaving an 8 in. tail. (12)
- Cow, Row 3: Knit 3, CC to Black and Knit 3, CC to Vintage/White and Knit 6. (12)
- Cow, Row 4: Knit 2, CC to Black and Knit 4, CC to Vintage/White and Knit 6. (12)
- Cow, Row 5: Knit 2, CC to Black and Knit 3, CC to Vintage/White and Knit 7. (12)
- Cow, Row 6: Knit 2, CC to Black and Knit 2, CC to Vintage/White and Knit 8. (12)
- Cow, Row 7: Knit 12. (12)
- Cow, Row 8: Knit 8, CC to Black and Knit 4. (12)
- Cow, Row 9: Knit 7, CC to Black and Knit 5. (12)
- Cow, Row 10: Knit 6, CC to Black and Knit 5, CC to Vintage/White and Knit 1. (12)
- Cow, Row 11: Knit 6, CC to Black and Knit 4, CC to Vintage/White and Knit 2. Cut the working yarn, leaving an 8 in. tail. (12)
Feet
For the cow, make 4 feet: 1 with Black yarn or the chosen spot color and 3 with Vintage/White yarn or the chosen base color. For the highlander, make 4 feet with Caramel yarn.
- Step 1: Create a slip knot, leaving approximately a 6 in. yarn tail. Make sure the slip-knot loop is about 1.5 in. wide. Chain on 1 more loop for a total of 2 loops. (2)
- Step 2: Cut the working yarn, leaving a 6 in. tail. Pull the cut yarn through the last loop made, then pull gently to tighten and close the chain.
- Step 3: With both strands of yarn, tie a tight single knot to bring the chain together and form the foot.
Closing the Bottom
The bottom is where the beginning chain and tail yarn are, with the closed loops. The top has the open loops, where the cut working yarn is.
- Step 1: Pull the tail yarn through each loop from the outside toward the inside, working to the right and tightening gently as you go.
- Step 2: Tie a knot at the base of the tail yarn, then push the tail and knot through the center of the hole.
Attaching the Feet
For the cow, attach the Black foot where the Black bottom spot is located. Attach the remaining 3 Vintage/White feet in the remaining positions.
- Step 1: Find the 4 center columns at the front and the 4 center columns at the back of the body. The back is the side where the cut working yarn is.
- Step 2: Insert each pair of foot strands vertically on either side of the 4 center columns, starting 1 row up from where the center hole was closed at the bottom. Leave 2 stitches between the 2 strands of each foot.
- Step 3: Position the front pair and back pair of feet with 4 columns between them. Along each side of the body, leave 2 columns between the front and back feet. Make sure all 4 feet are at the same height.
- Step 4: Pull the strands completely through to the inside so each foot sits snugly against the body. Tie the 2 strands of each foot in a tight double knot on the inside, removing any slack so the foot stays firmly against the body.
Stuffing and Closing
- Step 1: Stuff the body with fiberfill.
- Step 2: Close the top by pulling the cut working yarn through each open loop from the inside toward the outside, working to the left.
- Step 3: Make a knot at the base of the tail yarn, then push the tail yarn and knot through the center of the hole.
Snout
Use Chalk Pink yarn for the cow or Scone yarn for the highlander. Position the animal with the top of the head facing toward you, the feet pointing away, and the front of the face facing upward. Find the 2 center columns of the face. Pull the snout loops up on either side of these columns and between the 2 center columns, making 3 loops total in each set.
- Row 1: Starting at about the middle height of the body, pull up 3 loops from left to right. Rotate the project so the feet and bottom face toward you. Two rows below the first set, pull up 3 more loops in the same positions from left to right. Carefully tie the tail yarn and working yarn in a double knot without pulling out the loops. Tuck the knot and tail yarn inside the body, leaving only the working yarn. (6)
- Row 2: Starting in the first loop of the row, work in a circle toward the right and Knit 6. Cut the working yarn, leaving an 8 in. tail. (6)
- Step 1: Close the snout by pulling the tail yarn through each open loop from the inside to the outside, working to the left. Pull the tail to close the opening, tie a knot at its base, then push the knot and remaining tail through the center hole and into the body.
Nostrils
- Step 1: Cut an 18 in. strand of Size 6 Black yarn. Thread it onto a tapestry needle, leaving a 2 in. tail.
- Step 2: Choose the top position for the first nostril on one side of the snout. Insert the needle through this point and bring it out vertically below at the desired bottom position. Pull the yarn through, leaving the 2 in. tail at the starting point.
- Step 3: Bring the needle back through the same top position of the first nostril to create a vertical line, then bring it out at the desired bottom position of the second nostril on the opposite side.
- Step 4: Insert the needle through the desired top position of the second nostril to create the second vertical line, then bring it back out at the starting point in the same space as the tail.
- Step 5: Remove the needle and tie the 2 strands in a tight double knot. Tuck the knot and remaining yarn ends inside the snout.
Ears
For the cow, make 2 ears: 1 with Black yarn or the chosen spot color and 1 with Vintage/White yarn or the chosen base color. For the highlander, make 2 ears with Caramel yarn.
- Step 1: Create a loose slip knot, leaving approximately a 6 in. yarn tail. Make sure the slip-knot loop is about 1.5 in. wide. Chain on 1 more loop for a total of 2 loops. (2)
- Step 2: Cut the working yarn, leaving a 6 in. tail. Pull the cut yarn through the second loop of the chain, then pull gently to tighten and close the chain.
- Step 3: Weave the yarn down the chain, then pull it through the slip-knot knot so it comes out in the same space as the tail yarn.
- Attaching, Step 1: For the cow, place the Black ear on the side of the head with the top Black spot and the Vintage/White ear on the side where the head is Vintage/White.
- Attaching, Step 2: Find the 4 center columns at the front of the face, then move 1 additional column outward on each side. Place the ears in the middle of these outer columns.
- Attaching, Step 3: Starting about 3 rows down from the center hole closed at the top of the head, insert 1 ear strand through the stitch and pull it through vertically until the bottom of the ear sits snugly against the body.
- Attaching, Step 4: Tie both ear strands in a tight double knot on the outside at the base of the ear. Tuck the excess yarn and knot inside the project. Repeat these attachment steps for the second ear.
Horns
Use Scone yarn for the horns. Position the animal with the front of the face toward you.
- Step 1: Working 1 row directly above an ear, leave a 6 in. tail and pull up a loop from back to front. Working into that loop, chain 1 more loop. Pull the tail yarn to tighten the first loop.
- Cow, Step 2: Chain on 2 additional loops.
- Highlander, Step 2: Chain on 4 additional loops.
- Step 3: Bring the last loop of the chain to the front at the chain's starting point. Pull it through the starting space and back out, working from front to back.
- Step 4: Cut the working yarn, leaving a 6 in. tail. Bring the cut yarn toward the back on the side closest to the ear, pull it through the remaining loop, and tighten gently.
- Step 5: Tie both strands in a tight double knot. Tuck the excess yarn and knot inside the body. Repeat to make the second horn.
Highlander's Hair
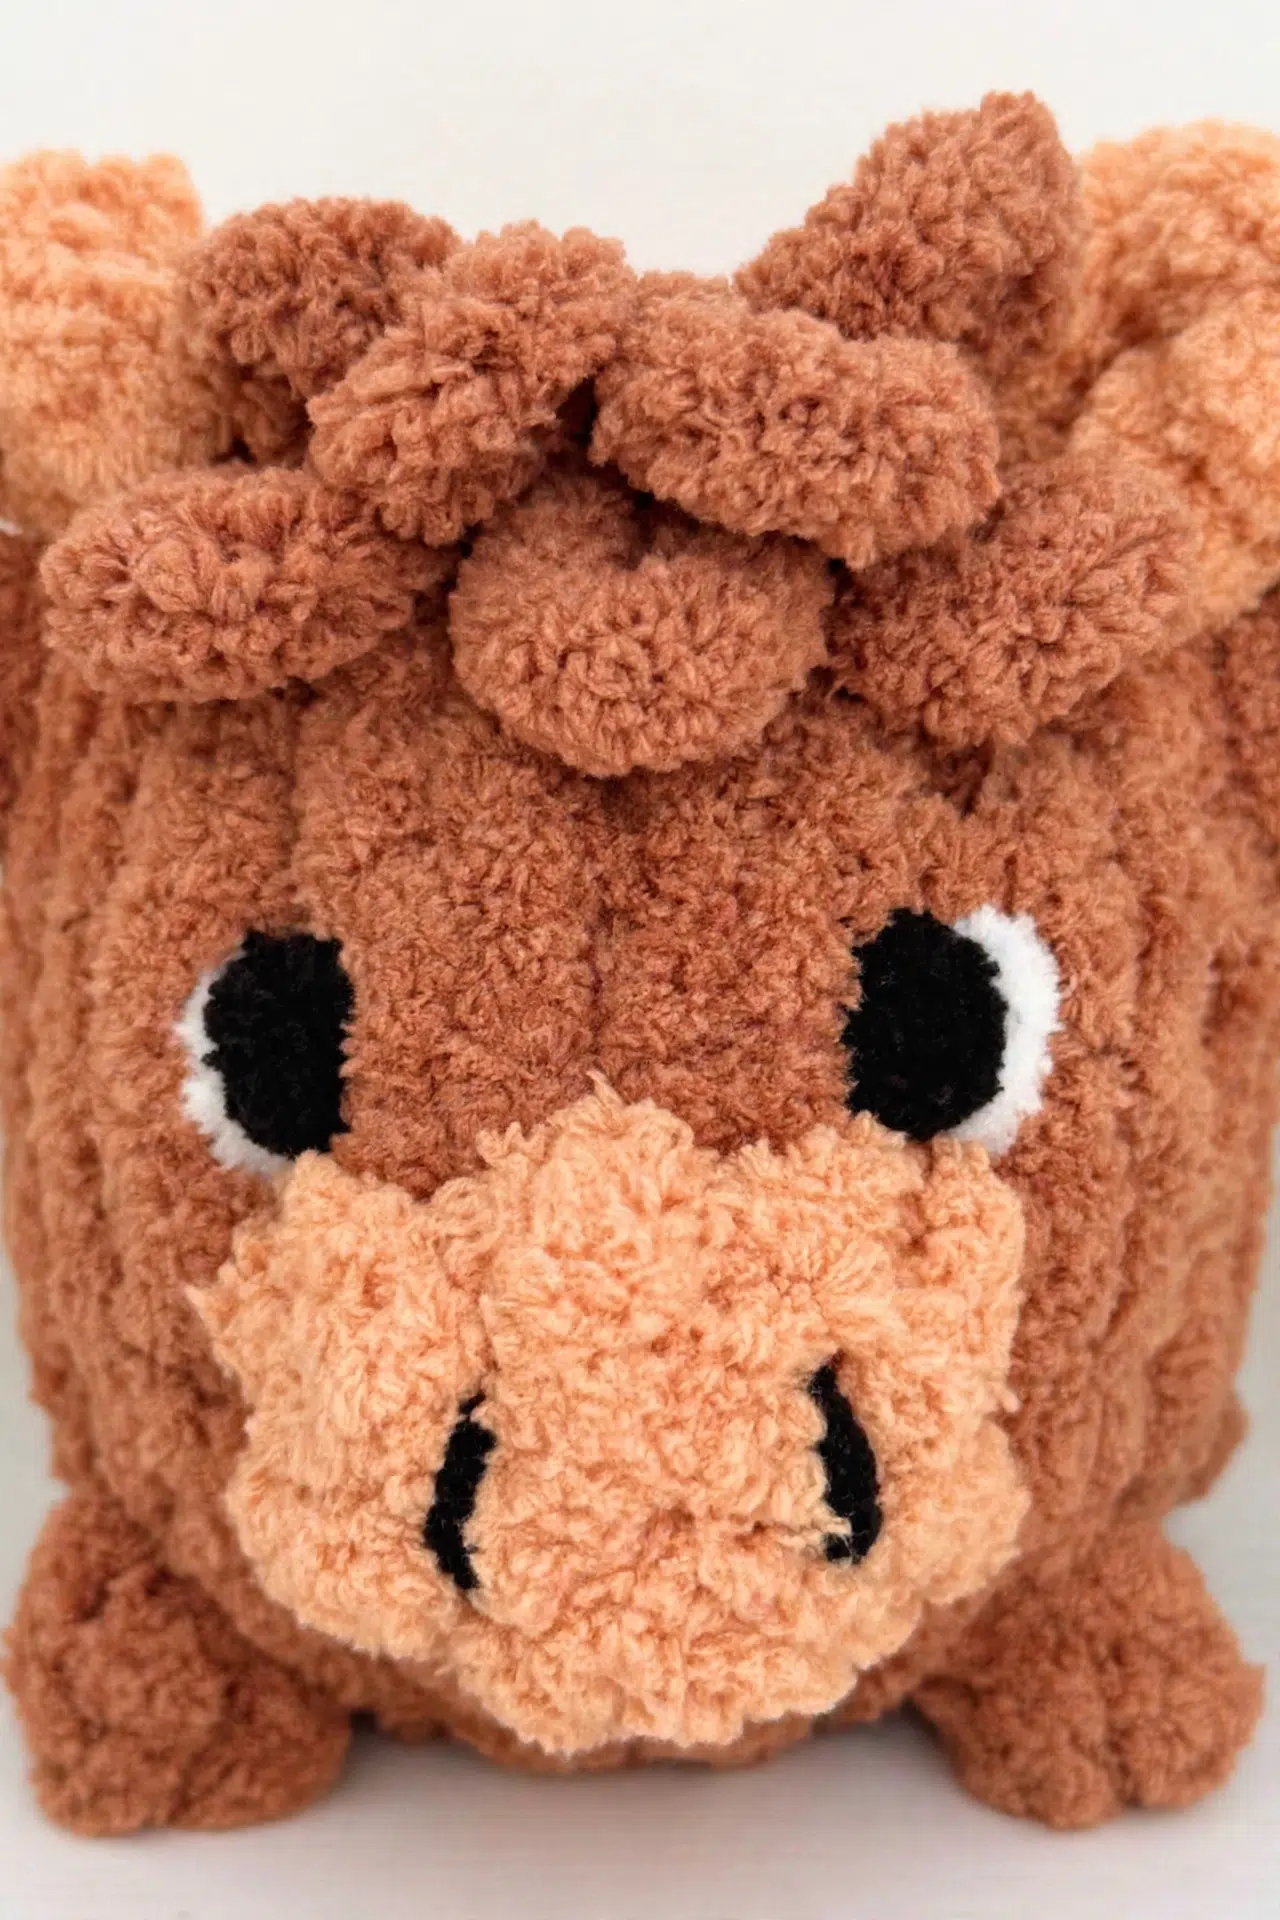
Use Caramel yarn. Position the highlander with the front of the face toward you. Find the 2 center columns of the face. Pull the first hair loops up on either side of these columns and between the 2 center columns.
- Step 1: Starting about 2 rows below the top center hole, leave a 6 in. tail and pull up 3 loops from left to right, making each loop approximately 2-2.5 in. wide. (3)
- Step 2: Move to the top of the loops and find the 2 spaces between the 3 loops. Pull up 2 additional loops from these spaces, working from right to left. (2)
- Optional Step 3: For 1 more row of hair, move to the top of the second set of loops, find the spaces between the previous loops, and pull up 2 additional loops from right to left. (2)
- Step 4: Cut the working yarn, leaving a 6 in. tail. Tie the 2 tails in a tight double knot without pulling out the loops. Tuck the excess yarn and knot inside the project.
Eyes
- Step 1: Cut 2 strands of Size 7 Black yarn, each 6 in. long, and tie a single knot in the center of each strand.
- Step 2: Place the eyes on either side of the 2 center columns, just above the snout. Insert the center knot of 1 eye into the head so the 2 strands remain outside.
- Step 3: Tie the 2 strands in a tight double knot, then flip the excess yarn and double knot to the inside so the single knot sits neatly outside. Repeat for the second eye.
- Highlander Highlights, Step 1: Cut 2 pieces of Size 7 Vintage/White yarn, each 6 in. long. Insert 1 strand next to each eye, on the left side of the left eye and the right side of the right eye.
- Highlander Highlights, Step 2: Tie a double knot on the outside, then flip the knot and excess yarn to the inside so only a small Vintage/White line shows.
My Best Tips
- Measure the first loop: Use the suggested 1.5 in. loop size as your reference for the slip knot and hand-knit loops. Consistent loops help the body stay even from the first row to the last.
- Keep color changes relaxed: On the cow, don't pull the new color tightly when changing yarns. Match the neighboring loops so the spotted rows keep the same circumference as the solid rows.
- Place all four feet before knotting: Check their height and spacing as a group first. Once they line up, pull every strand fully inside and secure the double knots.
- Stuff with the features in mind: Fill the body evenly, but don't pack it so firmly that you can't insert or tuck the remaining feature ends. Shape the stuffing around the snout and eyes with your fingers.
Yarn and Detail Options for Your Stuffies
- Change the cow's spot shade: Black or Grey both work within the pattern. Keep the substitute in Size 7 so the spotted sections match the thickness of the base-color body loops.
- Choose another base color: You can change the animal's main color without altering the instructions. You'll need roughly the same yardage as the listed Vintage/White cow base or Caramel highlander base.
- Swap the jumbo yarn brand: Another Size 7 yarn can work, but compare its actual thickness before beginning. Jumbo yarns vary widely, and a thinner strand will make a smaller, softer body with more open spaces.
- Adjust the highlander's hair: Stop after the first 2 sets of loops for less hair, or add the optional third set for more coverage. Keep the added loops in the existing spaces so you don't distort the top closure.
- Leave off embroidered nostrils: The snout is fully closed before the nostrils are added, so they're optional. Skipping them also removes the need for the Size 6 Black yarn and tapestry needle.
Fixing Loose Loops and Uneven Features
- The body opening won't close: Check that the closing tail passes through every live loop in the stated direction. Ease the loops inward a little at a time rather than pulling one loop tight before the others have moved.
- A foot hangs loosely: Pull both strands completely into the body before tying the double knot. Any slack left between the foot and body will remain after stuffing and make the foot shift.
- The snout loops pull out: Hold the 2 sets of loops with your fingers while tying the first double knot. Tighten the knot gradually and tuck it inside before continuing around the snout.
A Soft Handmade Accent
These stuffies suit a shelf, desk, or nursery display where their small size can be appreciated. For a handmade gift, pair one with its animal counterpart or make the recipient's favorite version on its own.
Washing & Care
The yarn fiber isn't specified, so follow the washing directions on every yarn label you use. Spot cleaning is the safest choice because the stuffies contain fiberfill and several tucked knots. Let the piece dry completely before returning it to display.
More Crochet Farm Animal Amigurumi Patterns
- Highland Cow Crochet Pattern
- Emotional Support Chicken Crochet Pattern
- Crochet Chicken and Chick Set
- Crochet Llama Amigurumi
- Meet Teodoro: A Dapper Amigurumi Goose Pattern Worth Every Single Stitch
Frequently Asked Questions
Do I need a crochet hook for this pattern?
No, this pattern doesn't use a crochet hook. You form the body by chaining and knitting large yarn loops by hand, then create the smaller parts with short loop chains and yarn tails. Keeping the starting loops near the suggested size matters more than matching a hook gauge.
How many body rows does each version have?
Both versions finish with 11 body rows. The highlander works Rows 3-11 entirely in Caramel, while the cow changes between its base and spot colors through those same rows. Each completed row maintains 12 active loops, so neither version requires body increases or decreases.
Why are the feet attached before stuffing?
The feet must be attached before stuffing so you can reach the strands inside the body. Their double knots need to be pulled tight against the inner fabric, and the open top gives your hands room to check spacing, remove slack, and secure all four feet evenly.
Can I add more hair to the highlander?
Yes, one additional row of 2 loops is already included as an option. Place those loops in the spaces at the top of the previous set and work from right to left. Adding many more rows could crowd the top closure or pull the body loops out of shape.
Which version did you make, and what yarn colors did you choose? Tell me about your cow or highlander in the comments!



