
I have made a LOT of crochet toys over the years, but this one genuinely stopped people in their tracks. The Highland Cow Crochet Pattern is one of those projects that just has a personality to it, and once you start, you kind of can't stop. It's a fun, satisfying make that works up into a proper stuffed toy you'll actually be proud to give away or keep for yourself.

Jump to:
About This Project
I designed this one with gift-giving in mind, honestly. Highland cows have this whole devoted fan base, and once I realized how well the character translates into amigurumi form, I was hooked. There's something really satisfying about the way the separate pieces come together into something that feels so complete and full of charm. It's the kind of toy that feels special without being fussy to make.
This is a great one to make for a kid who loves animals, or honestly for any adult who has a soft spot for the real thing. It also makes a genuinely lovely handmade gift for birthdays, baby showers, or just because.
What Makes This Pattern Special
A beginner-friendly toy pattern that actually looks impressive when it's done.
- Easy skill level: If you can crochet in the round and sew pieces together, you can make this no trouble at all.
- Great gift potential: This is the kind of handmade toy people genuinely get excited to receive, for kids and adults alike.
- Generous finished size: It works up into a substantial toy, so it feels like a real keepsake rather than a tiny trinket.
- Technique learning value: A solid project for building confidence with amigurumi construction, especially if you're newer to making stuffed toys.
- Yarn flexibility: Works well with whatever bulky or worsted weight you already have on hand, so it's easy to customize the look.
Materials You'll Need
Two colors and a fairly short notions list, though a couple of the tools are a bit unexpected.
- Bulky weight velvet yarn (100% polyester): Velvet yarn is the right call here because it gives the finished piece that soft, almost plush texture that works really well for an amigurumi animal. It's also forgiving on seams, so the sewn-on parts blend in more naturally than they would with a smooth yarn. You'll need about 200 g of brown for the main color and about 50 g of beige for the foot pads, horns, and nose.
- 4.5 mm crochet hook: This size pairs well with bulky velvet yarn and keeps the fabric tight enough that the stuffing won't show through the stitches.
- 20 mm safety eyes: These are on the larger side, so worth picking up specifically for this project if you don't already have them in your supplies.
- Stuffing: The feet and body are crocheted in one continuous piece, so you'll be stuffing as construction progresses rather than at the end. Keep it within reach the whole time.
- Knitting needles: Used to support body parts while attaching them. A couple of spare needles set aside for this purpose works fine.
- Empty toilet roll or similar tube: This goes inside the head to support its shape while you're attaching pieces. A short cardboard tube is all you need.
- Cardboard: Listed separately in the notions, likely for additional structural support during assembly.
- Also needed: scissors, stitch marker
Alternative Yarns
Velvet yarn isn't something everyone keeps in their stash, and it can be a little tricky to work with if you're not used to it. If you want to substitute, stick with a bulky weight and look for something with a bit of softness to it so the finished toy still has that tactile quality.
- Bulky weight chenille yarn: Very similar in feel to velvet and behaves much the same way on the hook. Chenille tends to be widely available and comes in a good range of colors, so matching the brown and beige shouldn't be a problem.
- Bulky weight plush or fleece-type yarn: A softer spun bulky acrylic with a plush finish can work in a pinch. The texture won't be quite the same, but the stitch definition is actually a little easier to see, which some people prefer.
Color Sequence & Yarn Changes
Brown is the dominant color throughout, used for the head, body, ears, and most of the limbs. Beige comes in at specific points: the feet start in beige before switching to brown at Round 5, the arms follow the same color change structure, and beige is also used for the foot pads, horns, and nose. Having both colors within reach at your work station will save a lot of back-and-forth.
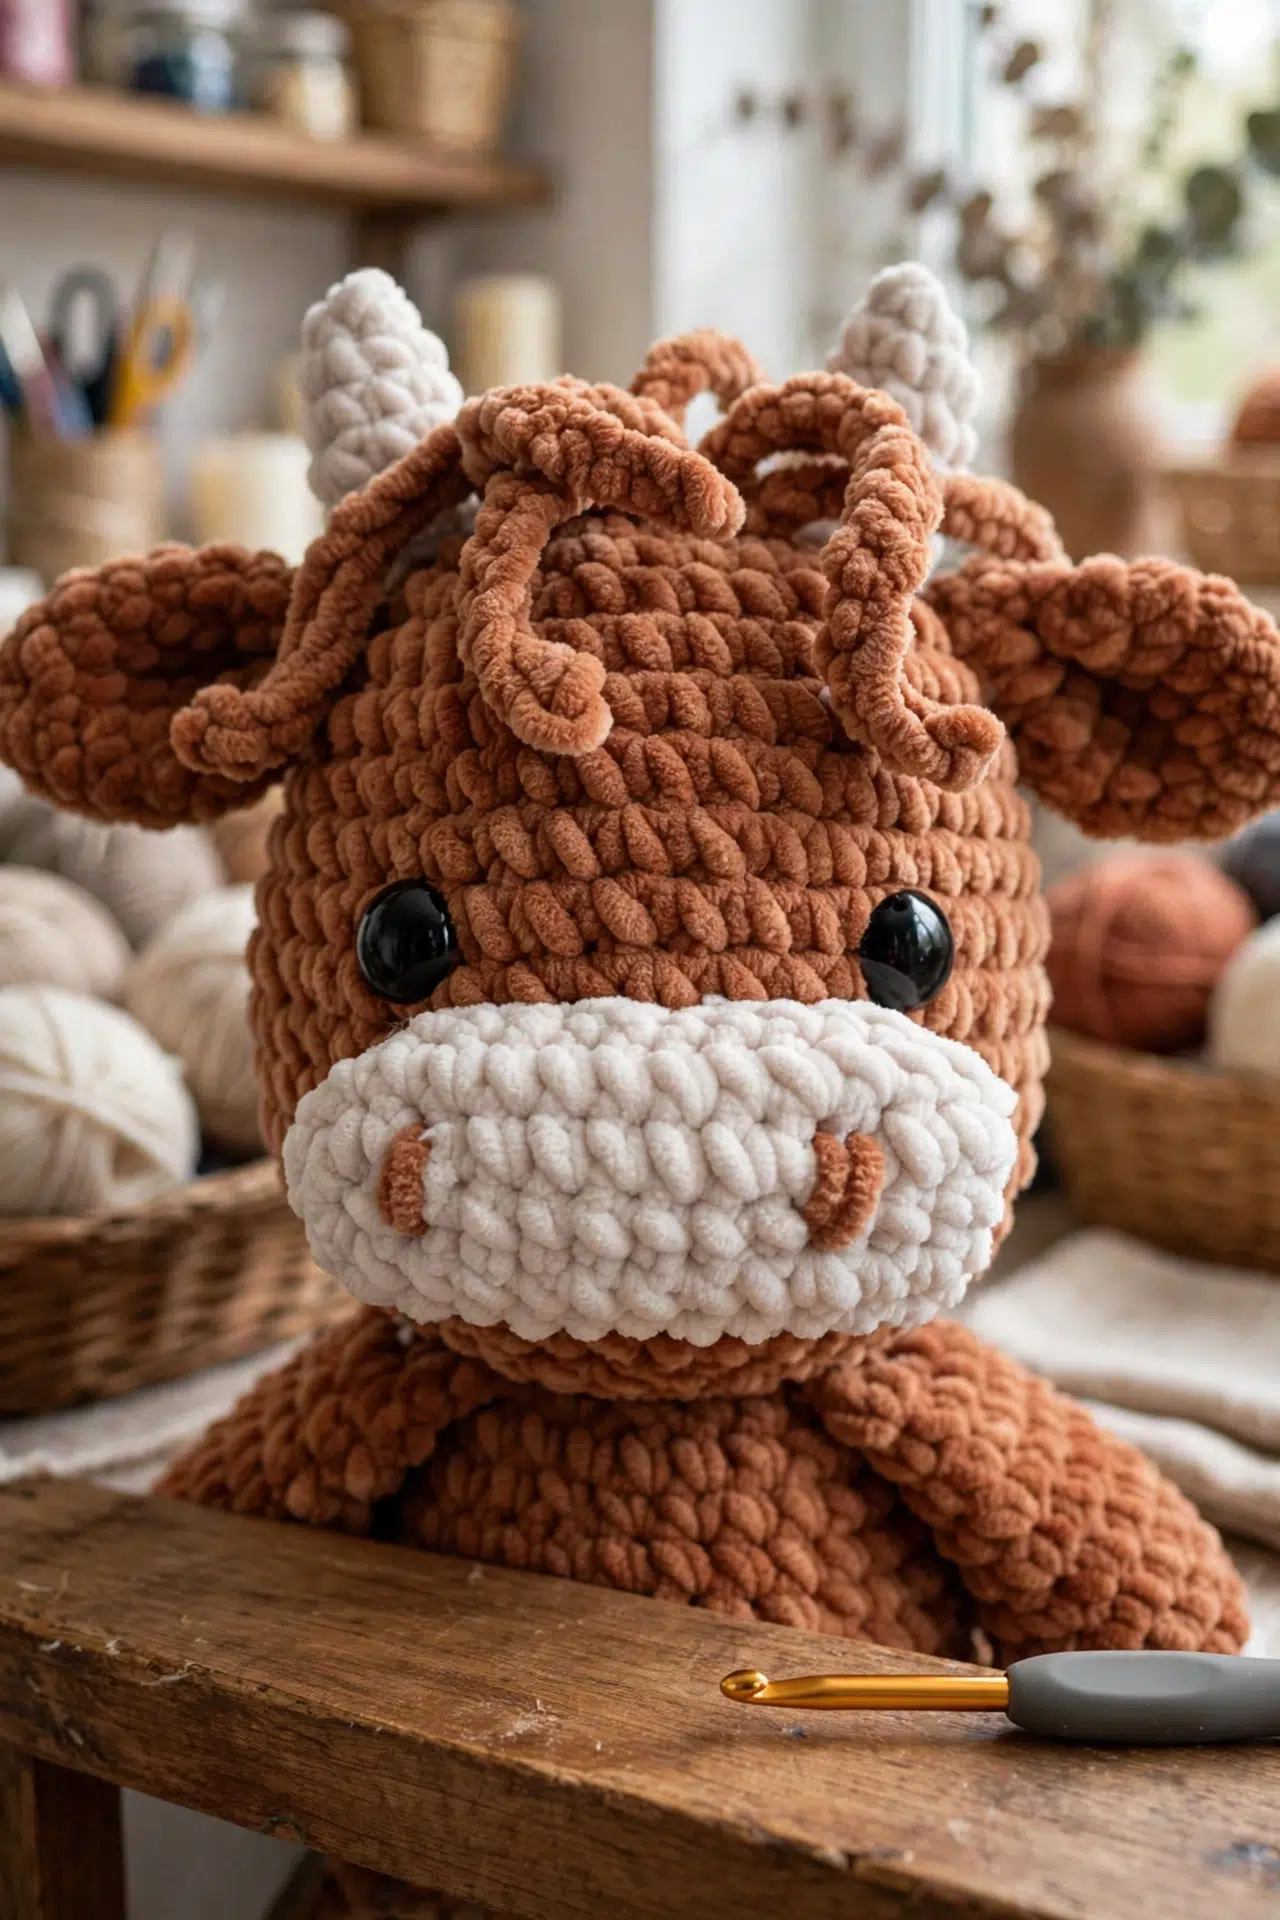
Quick Details
A big, squishy velvet bear worked almost entirely in the round, with the feet and body crocheted as one continuous piece.
| Skill Level | Easy |
| Pattern Gauge | Gauge is not critical for this project. Use a hook size that creates a tight, firm fabric so stuffing does not show through. |
| Finished Size | About 52 cm / 20.4 inches. |
| Yarn Weight | 5 Bulky |
| Fiber | 100% Polyester (velvet yarn) |
| Terminology | US |
Abbreviations & Stitches Used
Short list. All standard stitches you've probably worked a hundred times.
- ch = chain
- dec = decrease
- inc = increase
- mr = magic ring
- rnd = round
- sc = single crochet
- sl st = slip stitch
- st(s) = stitch(es)
Important Notes
Everything in this pattern is worked in continuous rounds. No joining at the end of each round. Just drop a stitch marker into the first stitch of each round and move it up as you go — that's how you'll keep track of where you are.
The feet and body are made as one piece. You crochet the feet first, then join them and build the body straight on top. The other parts — head, ears, arms, and so on — are made separately and sewn on at the end.
Velvet yarn is wonderfully forgiving to look at, but it does hide your stitches. Count carefully, especially during increases and decreases. It's easy to lose a stitch in the pile and not notice until a few rounds later.
Stuff firmly as you go, particularly in the body and head. Velvet yarn has a bit of give, and understuffed sections tend to look soft in the wrong way. A toilet roll or similar tube inside the neck area helps the head sit upright once everything's assembled.
Let's Make the Highland Cow Crochet Pattern
Work through each piece in order and you'll have a fluffy highland cow ready to assemble before you know it.
Head
The head is worked in rounds using Color A. It's the largest piece and the focal point of the whole cow, so take your time with the shaping rounds.
Round 1: 12 sc into a mr. [12 sc]
Round 2: 2 sc in each st around. [24 sc]
Round 3: (3 sc, inc) x 6. [30 sc]
Round 4: (4 sc, inc) x 6. [36 sc]
Round 5: (5 sc, inc) x 6. [42 sc]
Rounds 6–16: 1 sc in each st for 10 rounds. [42 sc]
Round 17: (5 sc, dec) x 6. [36 sc]
Place the safety eyes between rounds 10 and 11, 6 sc apart.
Round 18: (4 sc, dec) x 6. [30 sc]
Round 19: (3 sc, dec) x 6. [24 sc]
Add stuffing.
Round 20: (2 sc, dec) x 6. [18 sc]
Round 21: Sl st into the first st and fasten off. Leave a long tail for sewing.
Sl st into the first st and fasten off. Leave a long tail for sewing.
Horns
Make 2 horns in Color B. They're small and quick — each one starts tight at the tip and widens with a single increase per round.
Round 1: 4 sc in a mr. [4 sc]
Round 2: 4 sc. [4 sc]
Round 3: inc, 3 sc. [5 sc]
Round 4: inc, 4 sc. [6 sc]
Round 5: inc, 5 sc. [7 sc]
Round 6: inc, 6 sc. [8 sc]
Round 7: inc, 7 sc. [9 sc]
Round 8: Sl st into the first sc and fasten off. Leave a tail for sewing.
Sl st into the first sc and fasten off. Leave a tail for sewing.
Feet
Make 2 feet using Color A and Color B — start with Color B for the hoof section. The color change mid-piece gives the feet that classic two-tone look.
Round 1: 6 sc into a mr. [6 sc]
Round 2: 2 sc in each st around. [12 sc]
Round 3: (1 sc, inc) x 6. [18 sc]
Round 4: (2 sc, inc) x 6. [24 sc]
Round 5: (3 sc, inc) x 6. [30 sc]
Change to color A on the last pull-through of the last sc of Round 5.
Rounds 6–8: 1 sc in each st for 3 rounds. [30 sc]
Round 9: 3 sc, (dec, 1 sc) x 6, 9 sc. [24 sc]
Round 10: dec x 6, (1 sc, inc) x 6. [24 sc] This round reduces at the toe and then adds back at the ankle — the count stays the same but the shaping shifts the fabric.
Round 11: 1 sc in each st. [24 sc]
Round 12: dec x 4, 16 sc. [20 sc]
Rounds 13–17: 1 sc in each st for 5 rounds. [20 sc]
Round 18: Sl st into the first sc and fasten off.
Round 18: Sl st into the first sc and fasten off.
Joining the Feet and Continuing with the Body
Once both feet are finished, you'll join them together before building the body up from that base. Don't cut the yarn on the second foot — you'll need it to continue.
Step 1: Do not cut the yarn on the second foot. Place the feet next to each other and join them as follows: Make sure the feet are facing outwards. Join the feet with a sl st. Place a stitch marker at the sl st to mark the beginning of the round.
Step 2: Continue crocheting around both feet, working 1 sc in each st around (work across both feet, including the stitches from the joining sl st if necessary). You should have a total of 40 sc at the end of the round.
Body
The body continues directly from the joined feet in Color A. You're building upward from the base, so keep your stitch marker in place to track the beginning of each round.
Round 1: 1 sc in each st. [40 sc]
Round 2: (3 sc, inc) x 10. [50 sc]
Stuff the feet. Only stuff ⅔ of the feet so the cow can sit.
Rounds 3–11: 1 sc in each st for 9 rounds. [50 sc]
Round 12: (3 sc, dec) x 10. [40 sc]
Round 13: 1 sc in each st. [40 sc]
Round 14: (2 sc, dec) x 10. [30 sc]
Rounds 15–16: 1 sc in each st for 2 rounds. [30 sc]
Start stuffing and from this point stuff as you go.
Round 17: (3 sc, dec) x 6. [24 sc]
Round 18: 1 sc in each st. [24 sc]
Round 19: (2 sc, dec) x 6. [18 sc]
Round 20: Sl st into the first st and fasten off.
Round 20: Sl st into the first st and fasten off.
Nose
The nose is worked in Color B and starts from a foundation chain rather than a magic ring — this gives it that wide, oval shape. Place a stitch marker before Round 2 so you don't lose track of where the round begins.
Round 1: Ch 13, 1 sc in each ch. Work on the opposite side. [12 sc]
Place a stitch marker before Round 2.
Round 2: inc, 11 sc, (inc) x 2, 10 sc, inc. [29 sc]
Round 3: 1 sc, inc, 12 sc, inc, 13 sc, inc. [32 sc]
Round 4: 1 sc in each st. [32 sc]
Round 5: Sl st into the first st and fasten off. Leave a long tail for sewing.
Sl st into the first st and fasten off. Leave a long tail for sewing.
Ears
Make 2 ears in Color A. They expand out and then taper back in, giving them a natural cupped shape that you'll refine with the ear shaping step that follows.
Round 1: 4 sc in a mr. [4 sc]
Round 2: inc x 4. [8 sc]
Round 3: (1 sc, inc) x 4. [12 sc]
Rounds 4–6: 1 sc in each st for 3 rounds. [12 sc]
Round 7: (1 sc, dec) x 4. [8 sc]
Round 8: 1 sc in each st. [8 sc]
Round 9: Sl st into the first sc and fasten off. Leave a long tail for sewing.
Sl st into the first sc and fasten off. Leave a long tail for sewing.
Ear Shaping
This quick step gives the ears their final pinched shape before you sew them on.
Step 1: Grab the tail and pinch the ear together on rounds 1-2. Sew back and forth to shape the ear.
Arms
Make 2 arms using Color A and Color B — start with Color B for the hoof end, then switch to Color A for the main arm. Only the lower portion gets stuffed, which keeps the arms soft and floppy when attached.
Round 1: 6 sc into a mr. [6 sc]
Round 2: 2 sc in each st. [12 sc]
Round 3: (1 sc, inc) x 6. [18 sc]
Change to color A on the last pull-through.
Rounds 4–14: 1 sc in each st for 11 rounds. [18 sc]
Round 15: Fill only the lower part with stuffing. Close the hole with 8 sc to close the arm. Fasten off and leave a long tail for sewing.
Fasten off and leave a long tail for sewing.
Assembly: Head and Details
With all the pieces made, it's time to put the cow together. Work through these steps in order — placing the eyes first makes it much easier to position everything else around them.
Step 1: Place safety eyes between rounds 10 and 11, 6 sc apart.
Step 2: Sew on the nose between rounds 12-14, as close to the eyes as possible. Stuff the nose lightly.
Step 3: Sew on the horns between rounds 2-4.
Step 4: Sew on the ears directly after the horns between rounds 5-6.
Step 5: Use cardboard and place it in the body of the cow to make the head more stable (an empty toilet roll can be used). This gives the neck something to hold against and keeps the head upright once sewn on.
Step 6: Sew around the head into each stitch of the body and the head.
Step 7: Sew on the arms on the neck.
Step 8: A tip is to use knitting needles to place the body parts for easier visualisation.
Nostrils
The nostrils are embroidered directly onto the nose piece after it's attached.
Step 1: Sew back and forth a couple of times with color A on the middle of the nose, 7 sc apart.
Hair
The hair is added directly onto the head with slip stitches and chains — no separate piece to sew on. You've got full control over how full or wild you want it to look.
Step 1: Attach yarn in color A on the head with a sl st. Start on round 1 in the middle of the head, between the horns.
Step 2: Ch 25 for longer strands and about 12-13 for shorter strands of hair.
Step 3: Sl st into each ch and ch your way back to the head.
Step 4: Sl st into the same st as the chain to finish one strand of hair.
Step 5: Sl st into the next st and repeat for the next strand of hair and all the rest.
Step 6: It is up to you how many strands of hair you want. I made 7 strands, 2 longer ones and 5 shorter ones. I made a few strands in round 1 and the rest in round 2.
Tail
The tail is a simple chain attached at the back — quick to do and easy to adjust placement if you want it higher or lower.
Step 1: Attach some yarn on the back on round 3 (or the position you see fitting) and ch 8. Cut the yarn and weave in ends.
Finishing
All the main assembly happens around the head. I sew the nose on between rounds 12 and 14, keeping it as close to the eyes as possible, and stuff it lightly before closing it off. The horns go on between rounds 2 and 4, and the ears sit directly after them between rounds 5 and 6. Before attaching the head to the body, I tuck a piece of cardboard or an empty toilet roll into the body — it keeps the head stable and sitting upright once sewn on. I then sew around the head into each stitch of both the body and the head to secure it. The arms get sewn on at the neck last.
Care Instructions
Because this cow is made with 100% polyester velvet yarn, it holds up surprisingly well to a gentle machine wash on a cool, delicate cycle. That said, I'd pull it out before the spin cycle gets aggressive and reshape it by hand while it's still damp. The stuffing can clump and shift if the toy gets thrown around wet, so lay it flat to air dry rather than hanging it. Once it's fully dry, give the velvet a gentle brush with your fingers to bring the pile back up if it's gone a bit flat.
Baby & Child Safety Notes
This highland cow uses 20 mm safety eyes, which are large but still worth taking seriously if the toy is going to a young child. Safety eyes should be secured tightly through the fabric with the washer snapped firmly on the back post before you stuff and close the head. Once the head is fully assembled and sewn to the body, it's very hard to reach in and check them, so do that step carefully the first time. For children under three, I'd recommend embroidering the eyes with yarn instead of using the safety eyes at all. Also check the seams where the arms, ears, and nose are sewn on periodically, especially if the toy gets a lot of handling.
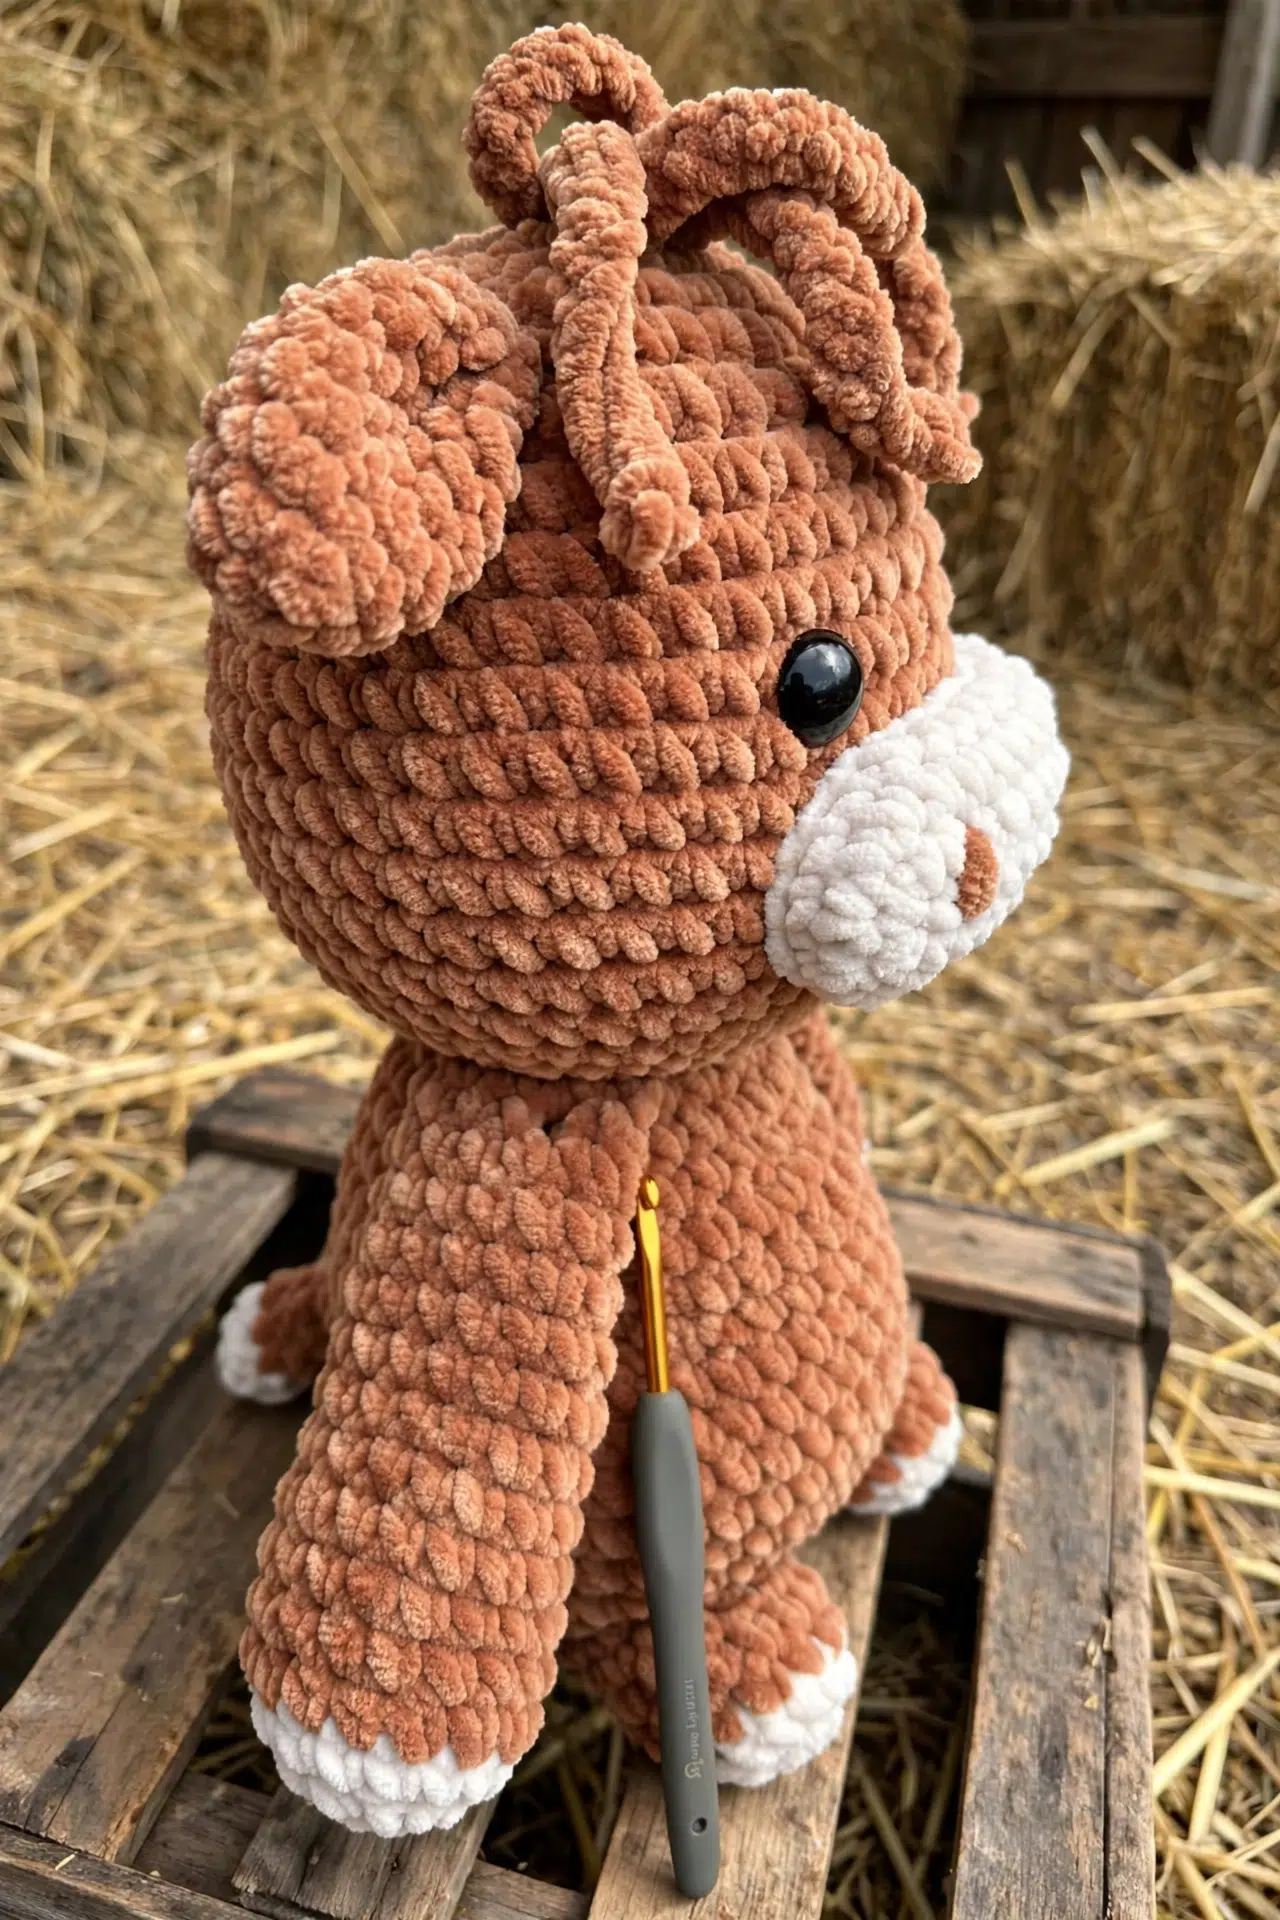
Frequently Asked Questions
Place the safety eyes between rounds 10 and 11, 6 stitches apart, before you start decreasing the head. Once the washer snaps on, they are not coming back off without damaging the fabric, so position them carefully before you commit. I find it helps to pin them in place first and step back to check the look before locking them in.
Stuffing only ⅔ of the feet is what lets the cow sit upright on its own rather than toppling forward. If you pack the feet too firmly all the way through, the bottom gets too rigid and the cow won't balance. I stuff mine lightly at the base and more firmly toward the top of the foot, and that seems to give the best result.
It goes inside the body before you attach the head, and it acts as an internal support so the head doesn't flop around after sewing. A toilet roll tube works well because it fits the neck opening naturally. Without it, the head can sit at an odd angle, especially because velvet yarn has a bit of give to it.
You need about 200 g of the brown and 50 g of the beige. Most bulky velvet yarns come in 100 g skeins, so plan on two skeins of brown and one of beige. The beige covers the foot pads, arm bases, nose piece, horns, and nostrils, so that 50 g gets used across quite a few small parts.
The number of strands is completely up to you. I made 7 strands total: 2 longer ones chained to about 25 stitches and 5 shorter ones at around 12 to 13 chains. I placed a few strands in round 1 and the rest in round 2, working between the horns. The longer strands give it that shaggy highland look, so I wouldn't skip those.
Before You Go
If you make your own highland cow, I'd love to see how it turns out. Tag me on Instagram or drop a photo in the comments below, because honestly the variations people come up with always surprise me. And if you're saving this for later, pinning it to your amigurumi board is the best way to find it again when you're ready to cast on. Happy crocheting!



