If you've been wanting a useful crochet project with an easy rhythm and playful construction, this Mushroom Crochet Bag is the one you were hoping to find. It's approachable, practical, and satisfying to build one round at a time!
Pattern credit: this project follows the Forest Forage Crochet Bag design by the Red Heart Design Team, published by Yarnspirations. The materials, crochet steps, assembly guide, and troubleshooting notes are provided below so you can follow along on this page.
Terminology: US crochet terms. This article is AI-assisted; the illustrations are visual references and do not document a physically tested Croshly sample.

You'll work mainly in single crochet with three strands held together, so the fabric grows steadily without complicated stitch changes. Separate pieces keep the process manageable, while the drawstring, cap, and adjustable strap give your hands just enough variety.
Jump to:
Why You'll Love This Pattern
- A steady spiral rhythm: Most of the bag is worked in continuous rounds of single crochet. Once the base increases are complete, you can settle into an easy stretch of even stitching.
- Firm fabric from ordinary yarn: Holding three strands of medium-weight yarn together creates a substantial fabric with an 8 mm hook. You don't need to search for an unusual yarn weight to get the intended gauge.
- Length you can choose: The strap begins with a suggested chain count, but you can continue until it suits you. That makes it easy to choose how you want the finished bag to sit.
- Simple shaping with clear counts: The cap grows through regular increases and closes through matching decreases. The stitch counts give you useful checkpoints all the way through the shaped rounds.
Pattern Details
- Skill Level: Easy
- Finished Size: Approx 8 in. [20.5 cm] tall × 6 in. [15 cm] wide
- Gauge: 9 sc and 10 rows = 4 in. [10 cm] with 3 strands of yarn held together
- Yarn Weight: Medium (4)
- Time to Make: about 8-12 hours
Supplies
Gather both contrast colors before you begin, since the project uses multiple strands at once and changes color during the cap.
- Red Heart Super Saver, 7 oz / 198 g; 364 yds / 333 m: Keep all three working strands feeding at the same rate. Winding separate cakes or arranging the strands in separate containers can help prevent tangles.
- Contrast A: Aran (0313), 574 yds / 525 m total; allow 2 balls when using 364-yard balls
- Contrast B: Claret (0378), 1 ball or 210 yds / 192 m
- Size U.S. L/11 (8 mm) Susan Bates Silvalume crochet hook, or size needed to obtain gauge
- Susan Bates stitch markers: The marker identifies the beginning of each spiral round, so choose one that's easy to move and won't slip out of the thick fabric.
- Susan Bates yarn needle
Stitches & Abbreviations
- approx - approximately
- ch - chain(s)
- cont - continue or continuity
- dc - double crochet
- pm - place marker
- rep - repeat
- rnd(s) - round(s)
- sc - single crochet
- st(s) - stitch(es)
- tog - together
- yo - yarn over
sc2tog: Draw up a loop in each of next 2 sc, yo and draw through all 3 loops on hook.
How to Crochet the Mushroom Bag
Work the stipe and cap separately, then add the embroidery, drawstring, strap, and final assembly.
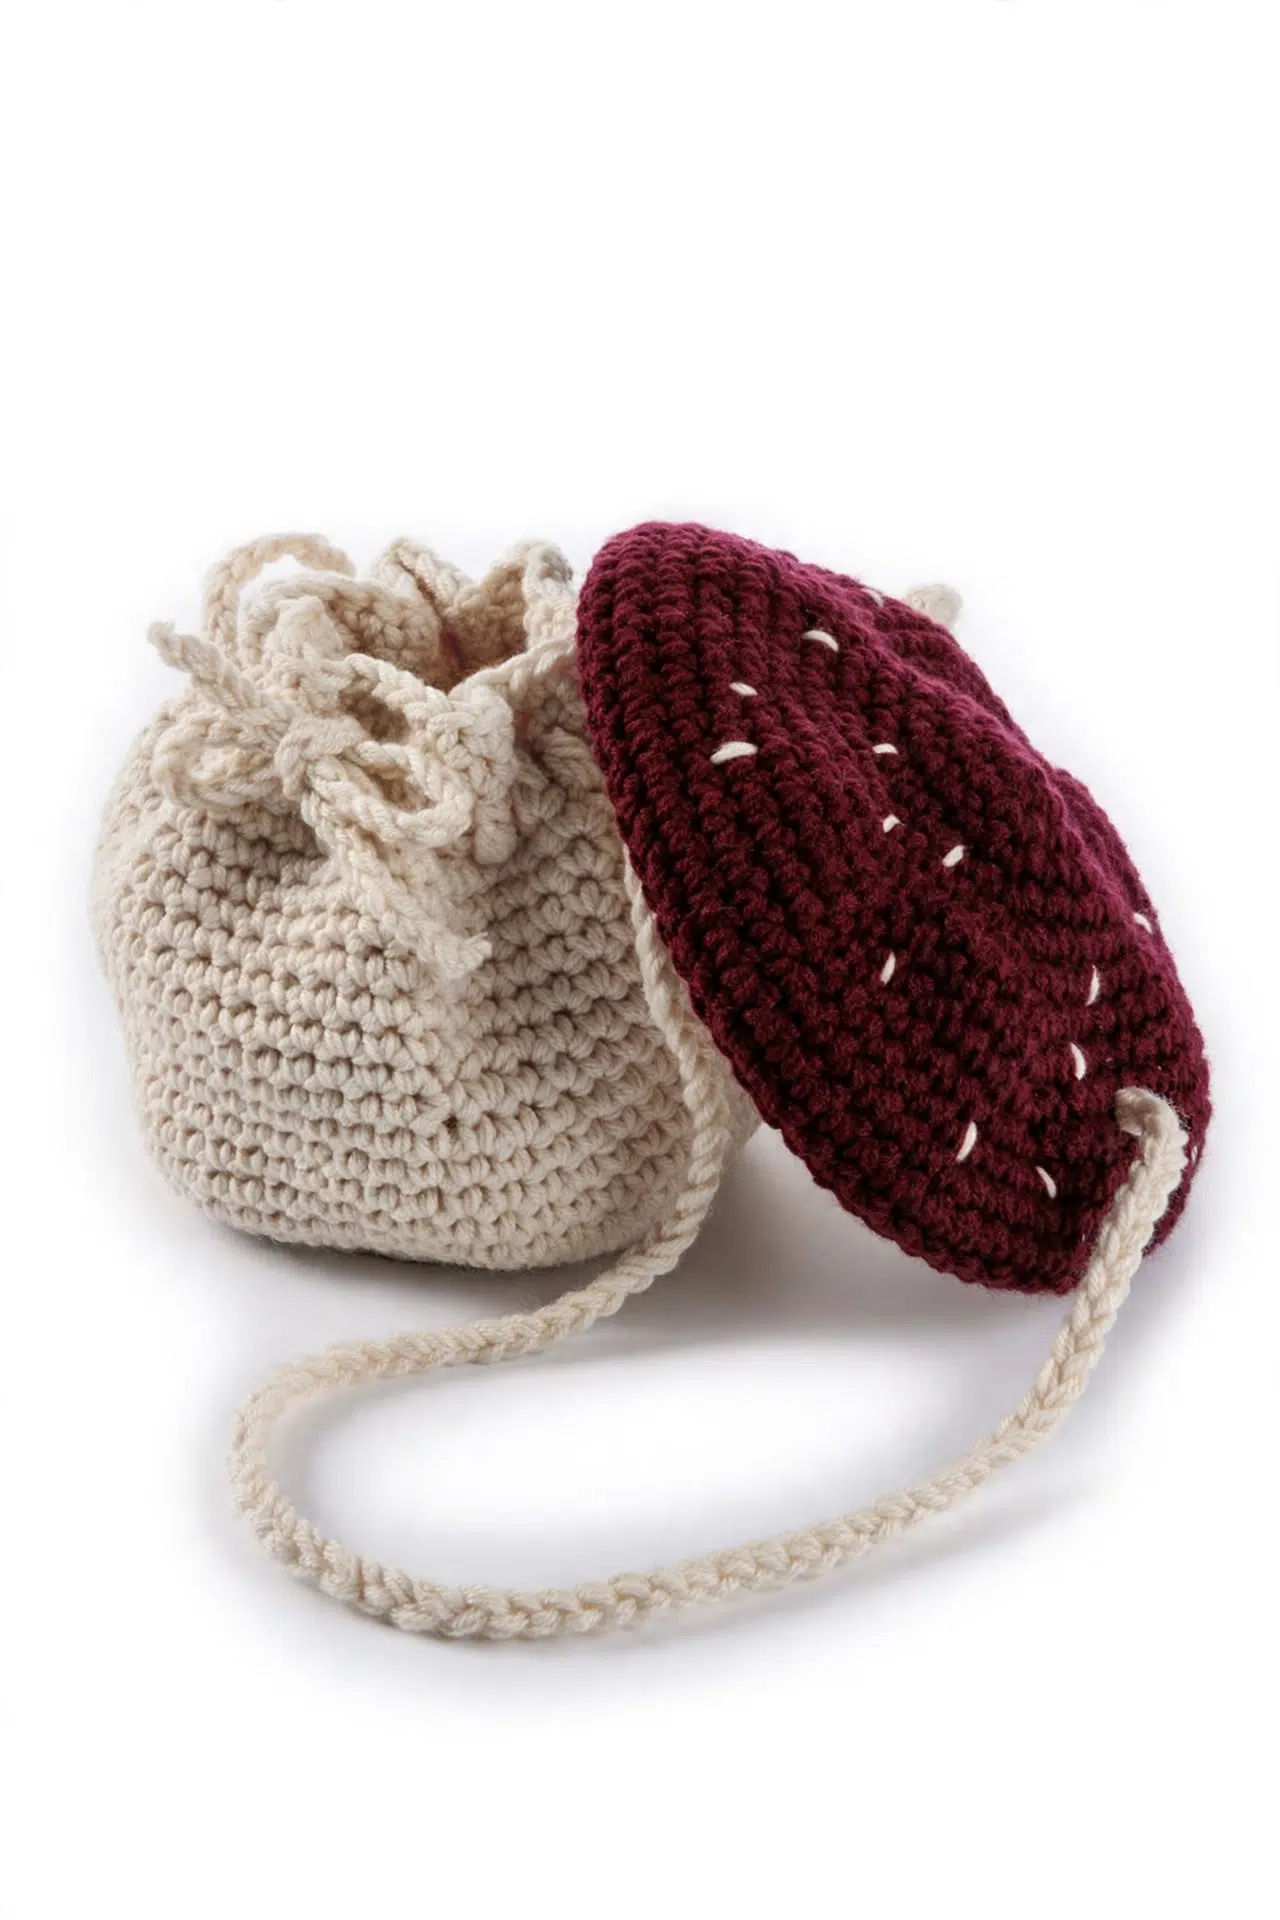
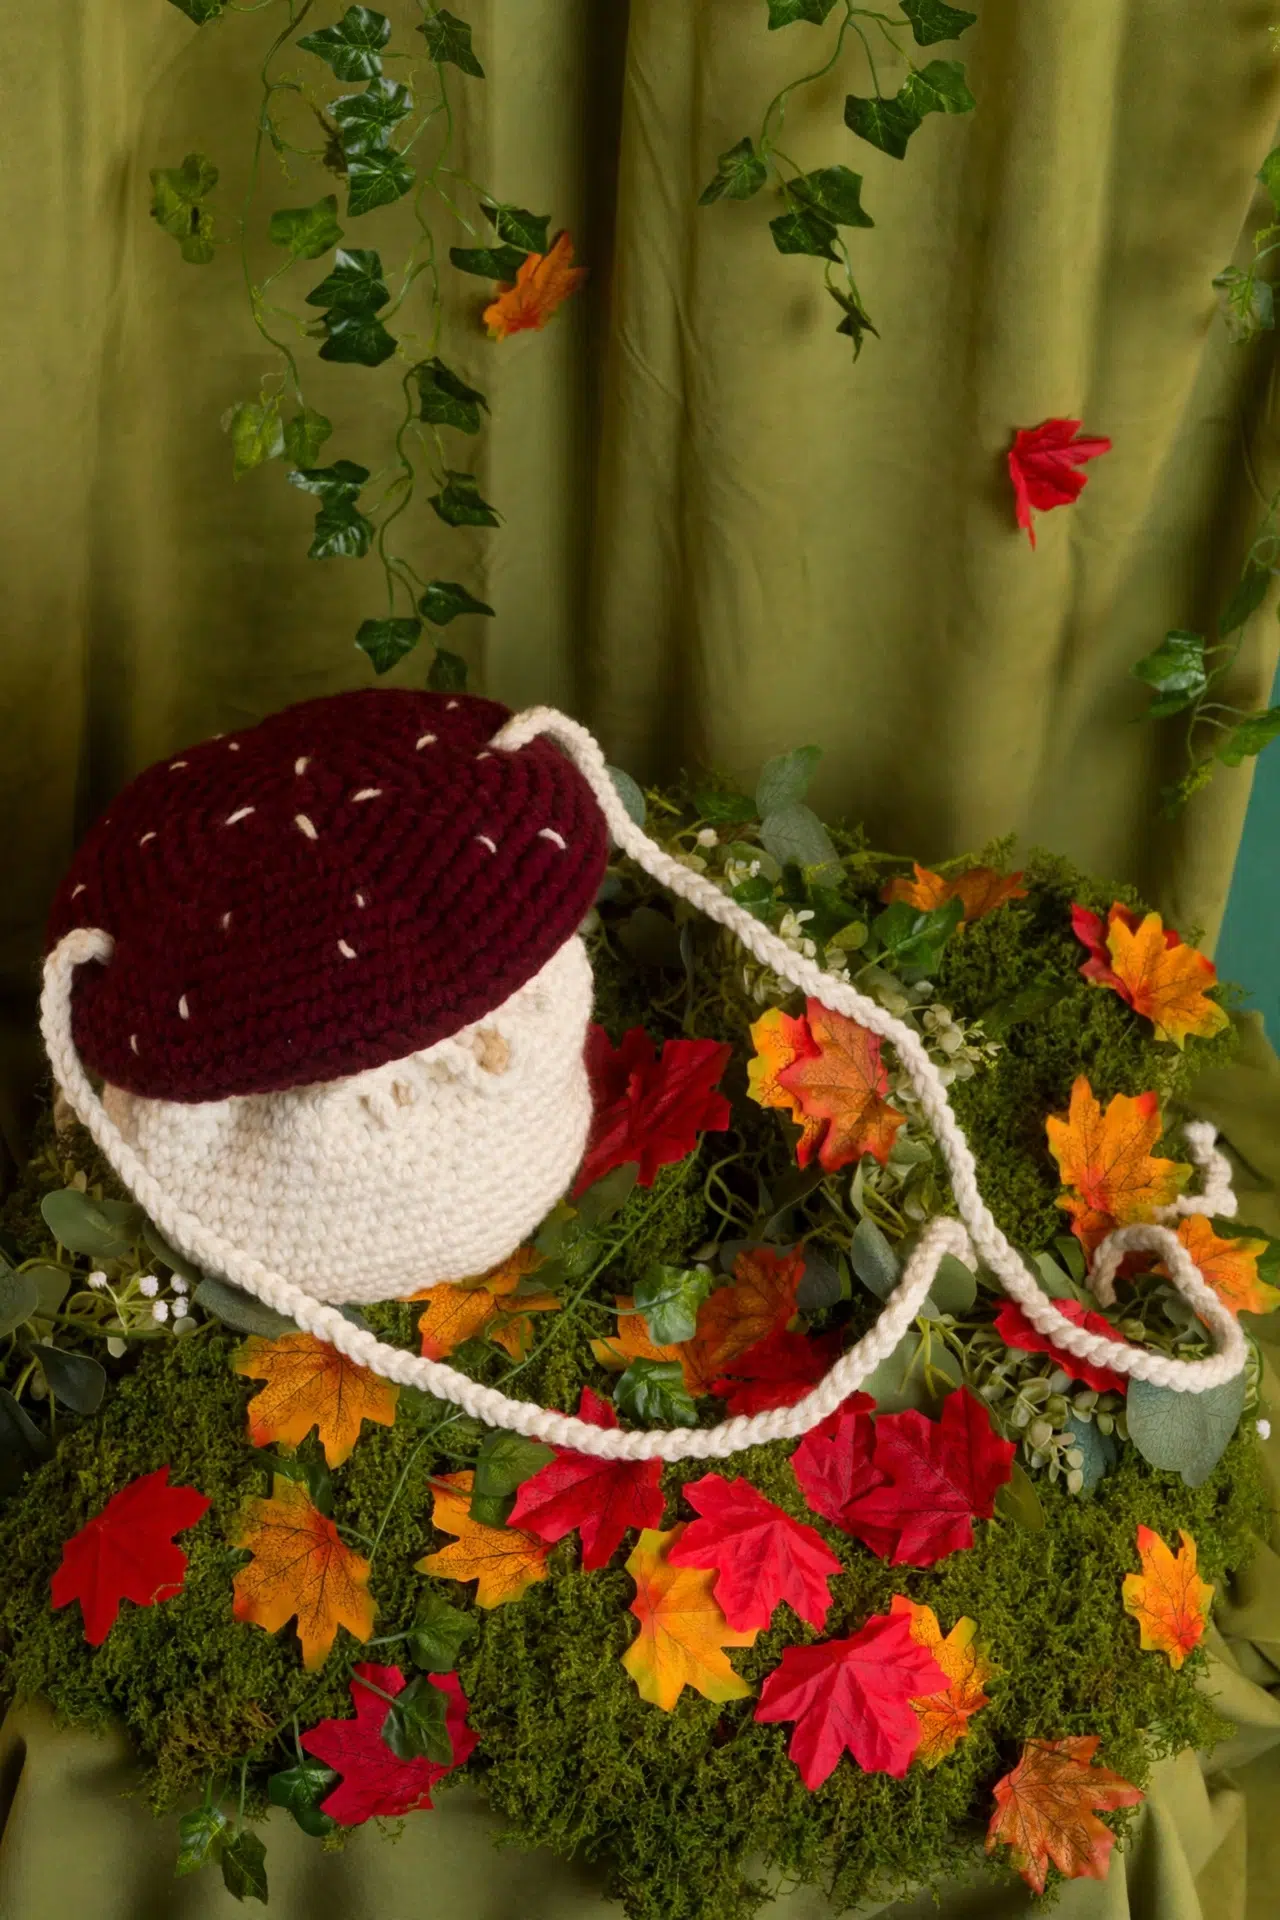
Do not join at the ends of rounds unless otherwise stated. Continue working in a spiral, placing a stitch marker in the first st of each round for easier counting. To change color, work to the last 2 loops on the hook and draw the new color through the last 2 loops, then proceed in the new color. Contrast A is used for the stipe, drawstring, strap, lower cap, and cap embroidery. Contrast B is used for the upper cap. Placement of the embroidered cap spots is guided by the project photo.
Mushroom Stipe (Bag Body)
- Foundation: With 3 strands of A held together, ch 2.
- Round 1: Work 8 sc in 2nd ch from hook. PM. (8)
Do not join. Continue working in a spiral. Keep the marker at the beginning of the round and move it up as the work progresses.
- Round 2: Work 2 sc in each sc around. (16)
- Round 3: *1 sc in next sc, 2 sc in next sc; rep from * around. (24)
- Round 4: *1 sc in each of next 2 sc, 2 sc in next sc; rep from * around. (32)
- Round 5: *1 sc in each of next 3 sc, 2 sc in next sc; rep from * around. (40)
- Round 6: *1 sc in each of next 4 sc, 2 sc in next sc; rep from * around. (48)
- Round 7: *1 sc in each of next 5 sc, 2 sc in next sc; rep from * around. (56)
- Round 8: Working in back loops only, work 1 sc in each sc around. PM at end of round.
- Round 9: Work 1 sc in each sc around.
- Rounds 10 onward: Rep Round 9 until the work measures 6 in. [15 cm] from the marked round.
- Next Round (Eyelet Round): Ch 2. Work 1 dc in each sc around. Do not join.
- Next Round (Single Crochet in Double Crochet): Work 1 sc in each dc around.
- Next Round (Single Crochet): Work 1 sc in each sc around. Fasten off.
Drawstring
- Step 1: With 3 strands of A held together, ch 70. Fasten off.
- Step 2: Weave the drawstring back and forth through the dc eyelet round.
Mushroom Cap
- Foundation: With 3 strands of B held together, ch 2.
- Round 1: Work 6 sc in 2nd ch from hook. PM. (6)
- Round 2: Work 2 sc in each sc around. (12)
- Round 3: *1 sc in next sc, 2 sc in next sc; rep from * around. (18)
- Round 4: *1 sc in each of next 2 sc, 2 sc in next sc; rep from * around. (24)
- Round 5: *1 sc in each of next 3 sc, 2 sc in next sc; rep from * around. (30)
- Round 6: *1 sc in each of next 4 sc, 2 sc in next sc; rep from * around. (36)
- Round 7: *1 sc in each of next 5 sc, 2 sc in next sc; rep from * around. (42)
- Round 8: *1 sc in each of next 6 sc, 2 sc in next sc; rep from * around. (48)
- Round 9: *1 sc in each of next 7 sc, 2 sc in next sc; rep from * around. (54)
- Round 10: *1 sc in each of next 8 sc, 2 sc in next sc; rep from * around. (60)
- Round 11: *1 sc in each of next 9 sc, 2 sc in next sc; rep from * around. (66)
- Rounds 12-15: Work 1 sc in each sc around. Join A at the end of Round 15. Break B.
- Round 16: With A and working in back loops only, work 1 sc in each sc around.
- Round 17: Work 1 sc in each sc around.
- Round 18: *1 sc in each of next 9 sc, sc2tog; rep from * around. (60)
- Round 19: *1 sc in each of next 8 sc, sc2tog; rep from * around. (54)
- Round 20: *1 sc in each of next 7 sc, sc2tog; rep from * around. (48)
- Round 21: *1 sc in each of next 6 sc, sc2tog; rep from * around. (42)
- Round 22: *1 sc in each of next 5 sc, sc2tog; rep from * around. (36)
- Round 23: *1 sc in each of next 4 sc, sc2tog; rep from * around. (30)
- Round 24: *1 sc in each of next 3 sc, sc2tog; rep from * around. (24)
- Round 25: *1 sc in each of next 2 sc, sc2tog; rep from * around. (18)
- Round 26: *1 sc in next sc, sc2tog; rep from * around. (12)
- Round 27: (Sc2tog) 6 times. (6)
- Finishing: Fasten off, leaving a long end. Draw the end tightly through the remaining sts and fasten off.
Cap Embroidery
- Step 1: With 2 strands of A, embroider spots on the cap with short straight stitches as shown in the photo, tacking both thicknesses of the cap together every few stitches.
Strap and Assembly
- Step 1: With 3 strands of A held together, ch 150 or continue until the desired length is achieved. Fasten off.
- Step 2: Fold the mushroom stipe in half with the center front, where the drawstring ends meet and tie, in the middle and facing up.
- Step 3: Sew the strap to one folded side of the stipe, thread it up through one side of the cap, then down through the other side of the cap.
- Step 4: Sew the other end of the strap to the second folded side of the stipe.
Tips for the Best Results
- Check your three-strand tension: Treat the three strands as one yarn and make sure your hook catches all of them in every stitch. A missed strand can leave a loose loop in the fabric.
- Move the marker immediately: Transfer the marker as soon as you make the first stitch of a new round. Continuous rounds have no joining seam to show where a round begins.
- Count before decreasing: Confirm that the cap has the correct stitch count before Round 18. Every decrease round relies on the previous count, so an early correction is much easier than undoing several rounds.
- Use the embroidery to secure the cap: Pass the short straight stitches through both cap thicknesses every few stitches as directed. This adds the spots while also holding the two layers together.
Ways to Adapt Your Mushroom Bag
- Try another medium-weight yarn: You can replace the listed yarn with another medium-weight option, but continue to hold three strands together. Fiber and twist can change the fabric, so make a gauge swatch before committing to the bag.
- Use one heavier strand cautiously: A bulky or super bulky yarn may approximate the three-strand bundle, but the match isn't automatic. Choose your hook by gauge and check that the resulting fabric is firm enough for a bag.
- Choose your strap length: Stop the strap chain when it reaches the length you want rather than relying only on the suggested count. Remember that the strap travels through the cap before both ends are sewn to the stipe.
- Adjust the drawstring: A longer drawstring gives you more length for tying, while a shorter one reduces the loose ends. It still needs to pass back and forth through the complete eyelet round without pulling the bag closed prematurely.
- Switch the contrast colors: Any two colors can take the places of A and B. Mark the replacements clearly and keep A assigned to the stipe, lower cap, strap, drawstring, and embroidery so the construction instructions remain easy to follow.
Keeping the Spiral and Cap on Track
- The beginning of the round keeps moving: Keep the marker in the first stitch of each round rather than in the space before it. Move it every round, and don't join unless an instruction specifically tells you to do so.
- The cap decreases don't line up: Recount at the end of the current round and compare it with the stated total. Each decrease round removes six stitches, so one missed or extra decrease will affect every round that follows.
- The final cap opening won't close: Check that Round 27 contains six sc2tog stitches and leaves six sts. Thread the long end through all six remaining stitches, pull evenly, and secure it only after the opening has closed firmly.
Caring for Your Bag
Because this bag is made with acrylic yarn, follow the current yarn label's washing directions and use gentle handling to protect the embroidery and assembly points. Place the bag in a mesh laundry bag if machine washing, then reshape it and let it dry flat. Avoid high heat, which can permanently change acrylic fibers.
More Crochet Bag Patterns
- Mushroom House Bag Crochet Pattern
- Sunflower Granny Stitch Phone Bag Crochet Pattern
- Chevron Fall Bag Crochet Pattern
- Matyó Crochet Granny Square Bag
- Crochet Japanese Knot Bag (Mosu Bag) Using the Moss Stitch
Frequently Asked Questions
Why are three strands held together?
Three strands are required to produce the stated gauge and substantial bag fabric with the 8 mm hook. Hold them together as though they're one yarn throughout the stipe, cap, drawstring, and strap. Using fewer strands will usually make the fabric thinner and the finished measurements smaller unless you make other adjustments.
Where do I measure the stipe height?
Measure 6 in. [15 cm] upward from the marked Round 8. That back-loop round marks the transition from the base to the sides, so measuring from it tracks the usable body height rather than including the circular base.
Does the cap attach directly to the top of the stipe?
No, the strap connects the pieces during assembly. Sew one strap end to a folded side of the stipe, pass the strap up through one side of the cap and down through the other, then sew its remaining end to the opposite side of the stipe.
Should I join the eyelet round?
No, leave the eyelet round unjoined as instructed. The body is worked as a continuous spiral, and the dc stitches create the openings used by the drawstring. Continue directly into the following sc round rather than closing the dc round with a sl st.
Why does the cap embroidery pass through both layers?
The embroidery also tacks the two cap thicknesses together. Every few stitches, take the short straight stitch through both layers rather than only the outer surface. This keeps the folded cap layers connected while you add the spots shown in the project photo.
What colors, strap length, or drawstring adjustment did you choose for your bag? Tell me about your changes in the comments.