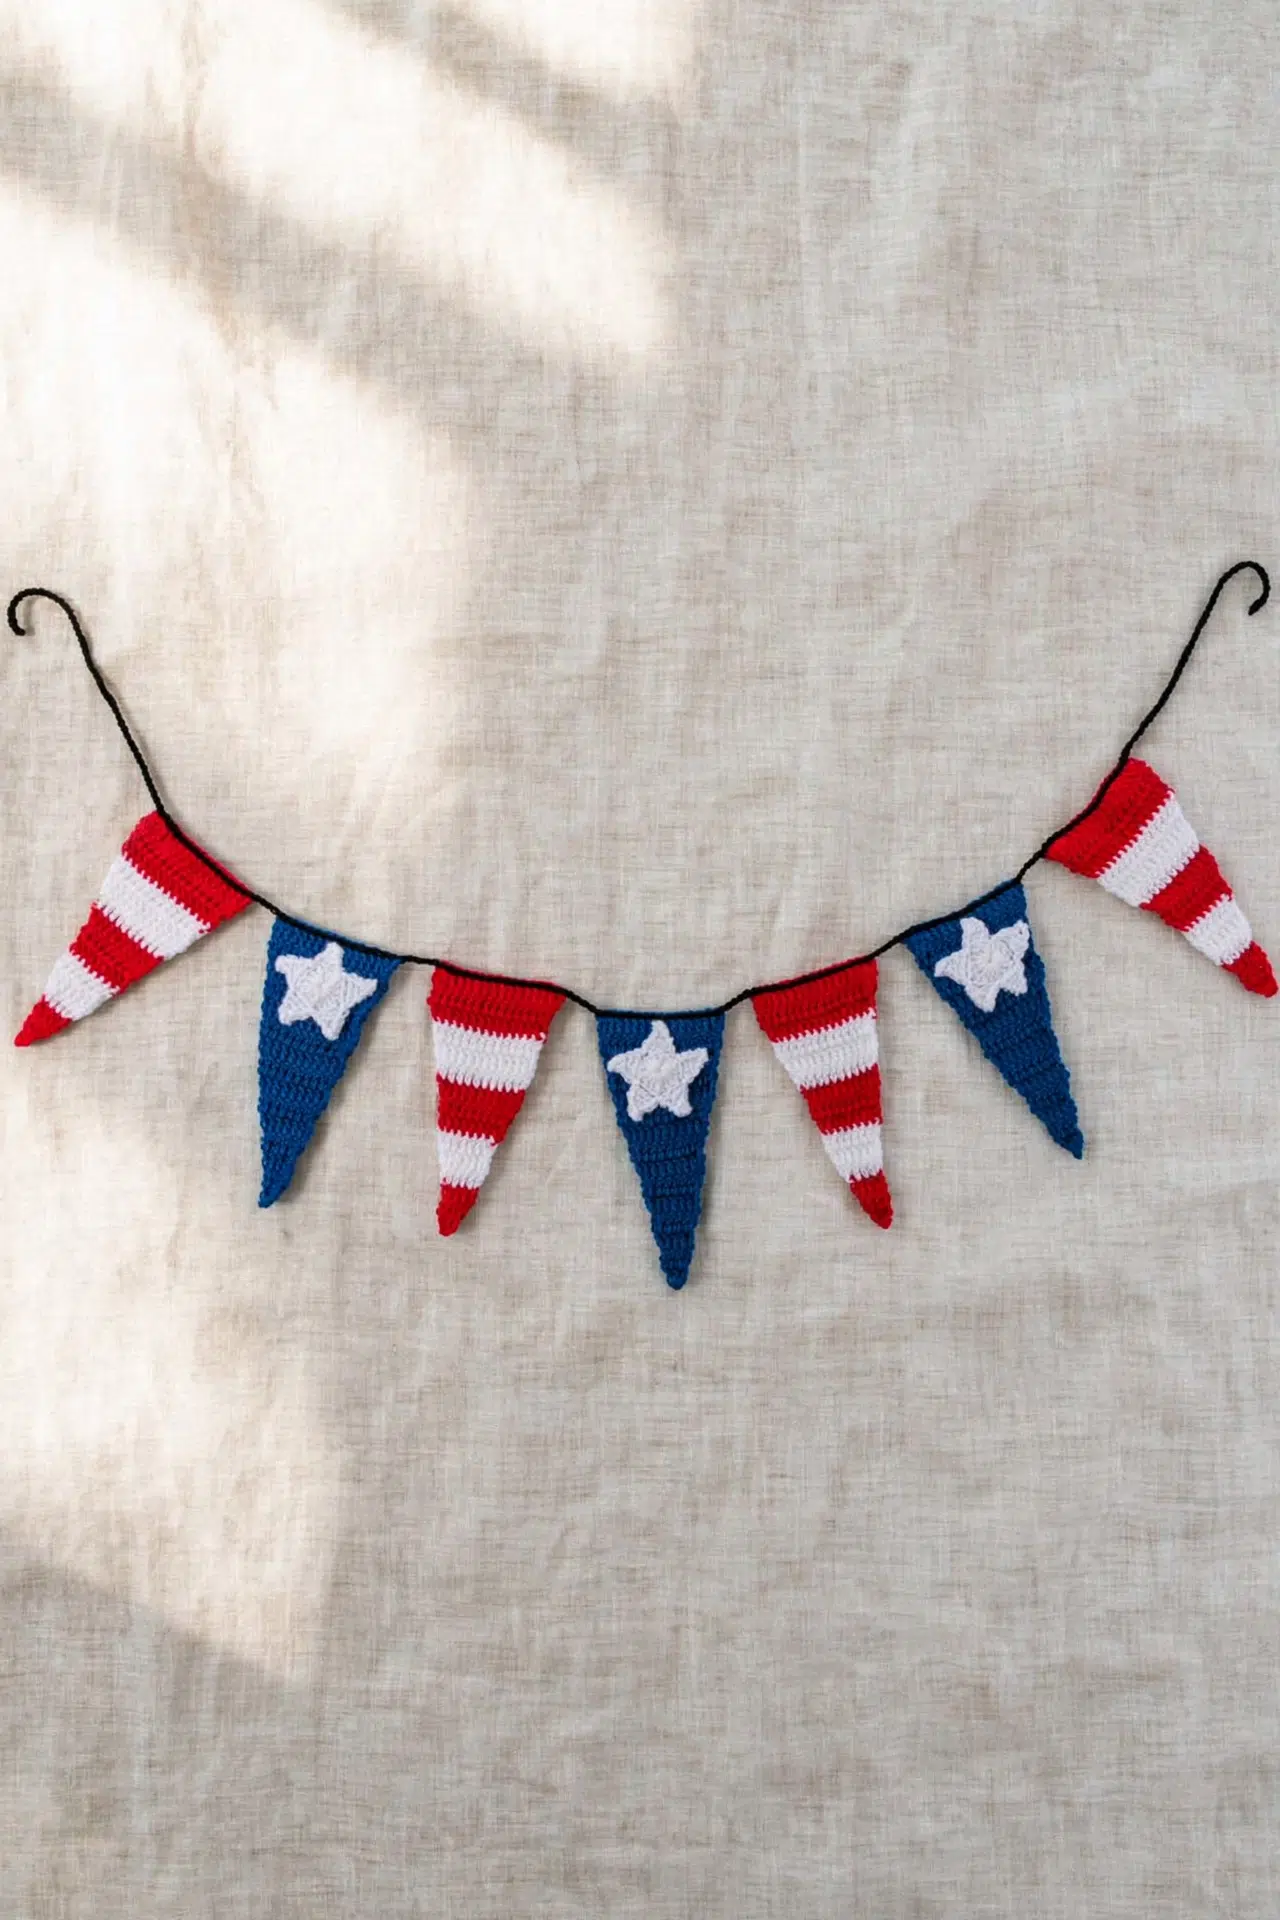
If you've been wanting a relaxing decoration that's easy to make and simple to give, this Patriotic Crochet Pennant Banner is the project you just found. You'll build it from small pieces, so every finished pennant gives your hands a satisfying stopping point.
Design credit: this guide follows the Red Heart Stars and Stripes Crochet Pennant Banner pattern published by Yarnspirations. The underlying design is not a Croshly original. This page includes AI-assisted editorial explanations and imagery; the images do not document a physically tested Croshly sample.

The pennants grow one stitch per row with no complicated shaping, while the appliqués use one compact round of points. Once the pieces are ready, a slip-stitch cord joins everything into a finished banner!
Jump to:
- What Makes This Pattern Work
- Pattern Details
- Materials You'll Need
- Abbreviations
- How to Crochet the Patriotic Pennant Banner
- Crochet Tips
- Ways to Adapt Your Pennant Banner
- Keeping the Pennants and Cord on Track
- Banner Spots for Seasonal Decorating
- Washing & Care
- More Seasonal Crochet Home Decor Patterns
- Frequently Asked Questions
What Makes This Pattern Work
- Predictable shaping: Each pennant begins at the lower tip and gains one stitch per row. Once you've settled into Row 2, most of the shaping is handled by repeating that same instruction.
- Manageable pieces: You make each pennant separately, so there isn't a large section of fabric sitting in your lap. It's easy to pause after a row, a color section, or a complete pennant.
- Simple assembly: The joining cord is worked directly across the pennant tops. You don't need a separate length of cord or a long sewing session to connect all seven pieces.
- Useful yarn amounts: The individual contrasts use modest yardage, including only a small amount for the joining cord. That gives you some practical room to work from suitable medium-weight leftovers.
Pattern Details
- Skill Level: Easy
- Finished Size: Pennant: Approx 8 in. [20.5 cm] long. Finished banner: Approx 48 in. [122 cm] long.
- Gauge: 12 sc and 15 rows = 4 in. [10 cm].
- Yarn Weight: Medium (4)
- Time to Make: about 6-9 hours
Materials You'll Need
Gather your four contrasts, a gauge-matched hook, and a yarn needle before you begin. Keeping the colors labeled A through D will make the row changes and assembly much easier to follow.
- Red Heart Super Saver Super Craft Kit America: 1 Kit containing 12 balls, 1.7 oz / 50 g and 93 yds / 85 m each; 21 oz / 600 g and 1116 yds / 1020 m total
- Contrast A: White, 1 ball or 74 yds / 68 m
- Contrast B: Cherry Red, 1 ball or 59 yds / 54 m
- Contrast C: Royal, 1 ball or 74 yds / 68 m
- Contrast D: Black, 1 ball or 8 yds / 7 m
- Size U.S. I/9 (5.5 mm) Susan Bates Silvalume crochet hook, or size needed to obtain gauge: The listed hook is the starting point, but use the size that gives you the stated sc gauge. Consistent gauge matters most because all seven pennants need to match.
- Susan Bates yarn needle: You'll use the needle to attach the three appliqués and weave in the color-change tails. Leaving the instructed long tail on each appliqué means you won't need to join another sewing strand.
Abbreviations
- approx - approximately
- beg - beginning
- ch - chain(s)
- dc - double crochet
- hdc - half double crochet
- pat - pattern
- rem - remaining
- rep - repeat
- rnd(s) - round(s)
- RS - right side
- sc - single crochet
- sl st - slip stitch
- st(s) - stitch(es)
- tog - together
- tr - treble crochet
- WS - wrong side
- yo - yarn over
How to Crochet the Patriotic Pennant Banner
Make the four striped pennants, three solid pennants, and three appliqués before joining the pieces with the cord row.
Pennants are worked back and forth in rows from the bottom tip to the widest top point. To change colors, work to the last 2 loops on the hook with the first color, yo with the new color, and draw through. Join all rounds with a sl st to the first stitch. Ch 3 at the beginning of a row counts as a dc.
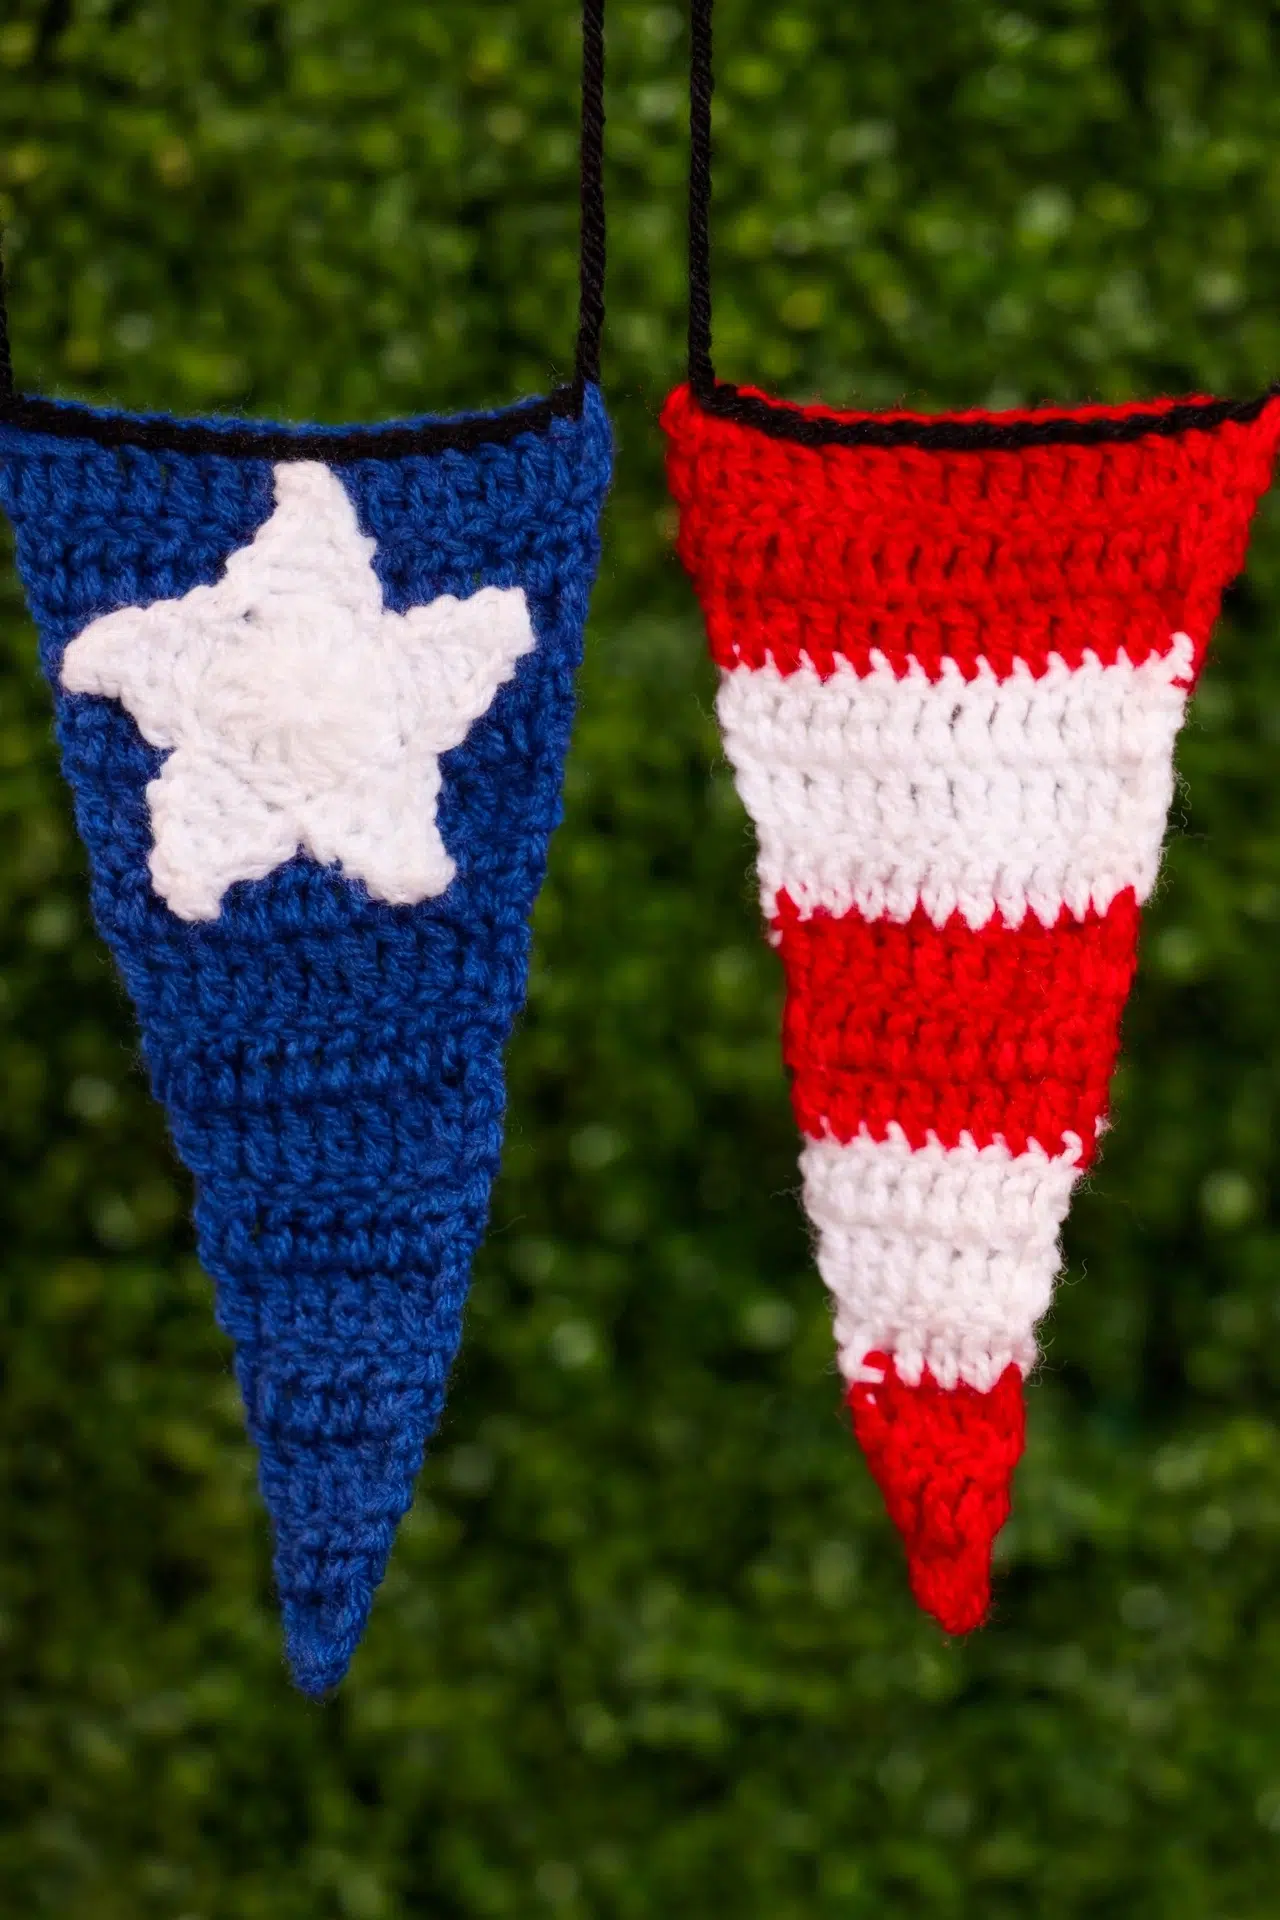
Striped Pennant
Make 4.
- Step 1: With B, ch 4.
- Row 1: Work 2 dc in 4th ch from hook. Turn. (3)
- Row 2: Ch 3. Work 1 dc in first dc and 1 dc in each dc to end of row. Turn. (4)
- Row 3: Rep Row 2. Break B. Join A. (5)
- Rows 4-6: With A, rep Row 2 3 more times. Break A. Join B. (8)
Count is for the end of Row 6.
- Rows 7-9: With B, rep Row 2 3 more times. Break B. Join A. (11)
Count is for the end of Row 9.
- Rows 10-12: With A, rep Row 2 3 more times. Break A. Join B. (14)
Count is for the end of Row 12.
- Rows 13-15: With B, rep Row 2 3 more times. (17)
Count is for the end of Row 15.
- Step 2: Fasten off.
Star Pennant
Make 3.
- Rows 1-15: With C only, work Rows 1-15 as given for the Striped Pennant without color changes. (17)
- Step 1: Fasten off.
Star Appliqué
Make 3.
- Step 1: With A, ch 4.
- Round 1: Work 14 dc in 4th ch from hook. Join with sl st. (15)
The skipped 3 chains count as a dc.
- Round 2: (Ch 5, 1 sc in 2nd ch from hook, 1 hdc in next ch, 1 dc in next ch, 1 tr in next ch, skip next 2 dc, sl st in next dc) 5 times. Sl st in first ch. Fasten off, leaving a long tail for sewing.
The final sl st is worked into the first ch made in this round, which is ch 1 of the opening ch-5.
Attaching the Star Appliqués
- Step 1: Sew one Star Appliqué to the center of each of the 3 Star Pennants.
Joining Cord Row
- Step 1: With D, ch 16.
- Step 2: *Sl st across the top of a Striped Pennant, ch 4, sl st across the top of a Star Pennant, ch 4; rep from * 2 more times.
- Step 3: Sl st across the top of the last Striped Pennant.
- Step 4: Ch 16.
- Step 5: Fasten off and weave in all yarn ends.
Crochet Tips
- Count the turning chain: The ch-3 at the start of each pennant row counts as a dc. Include it in your stitch count, then work the first dc into the first dc to create the increase.
- Check each color section: The striped pennant should have 8 stitches after Row 6, 11 after Row 9, and 14 after Row 12. Checking at each color change catches a missed increase before several more rows are added.
- Keep the points defined: In each appliqué point, work back along the ch-5 from the second chain through sc, hdc, dc, and tr. Skipping two stitches in the center ring before the slip stitch gives every point its allotted space.
- Lay out before joining: Arrange all seven pennants in their joining order before starting with D. The cord alternates three striped-and-star pairs, then finishes with the fourth striped pennant.
Ways to Adapt Your Pennant Banner
- Use another medium yarn: A different medium (4) yarn can work well, but make a gauge check first. A thicker or firmer substitute will change the pennant length and may also make the appliqué harder to sew flat.
- Work from leftovers: The separate contrast amounts make this a practical scrap-yarn project when your leftovers are all a similar medium weight. Avoid combining yarns with noticeably different thicknesses, since the pennant tops need to sit evenly on one cord.
- Change the four contrasts: You can assign any colors you like to A, B, C, and D. Write the assignments down before starting so the striped sections, appliqués, solid pennants, and joining cord remain consistent.
- Alter the hanging ends: The cord begins and ends with ch 16. Add chains for longer ties or remove chains for shorter ends, but make the same adjustment at both ends if you want balanced hanging lengths.
- Adjust the banner length: For a shorter banner, remove a striped-and-star pair before working the cord. For a longer one, add matching pairs and repeat the same ch-4 spacing between adjacent pennants.
Keeping the Pennants and Cord on Track
- The pennant count is short: Check whether you counted the beginning ch-3 as a dc and worked a dc in the first dc. Those two stitches form the row-edge increase; missing either one prevents the count from growing by one.
- The star has fewer than five points: Round 1 has 15 stitches when the starting chain is counted as a dc. Each point uses three ring stitches through the skip-two-and-slip-stitch placement, so five points need the full 15-stitch ring.
- The cord order goes off track: Place the pieces in order before joining and move each completed pennant aside. The sequence uses three striped pennants paired with three star pennants, followed by the remaining striped pennant.
Banner Spots for Seasonal Decorating
Use the finished banner on a wall, mantel, shelf edge, or party table where its cord can be supported at both ends. The beginning and ending chains provide the hanging sections, while the slip-stitched pennant tops keep the pieces together.
It also makes a thoughtful seasonal decoration to share with someone who enjoys handmade home accents. If it's displayed for only part of the year, fold it loosely along the cord rather than sharply creasing the pennants.
Washing & Care
Red Heart Super Saver is acrylic, so follow the yarn label's laundering directions and use a gentle cycle when washing the completed banner. Place it in a mesh laundry bag to protect the appliqué stitching and cord, then reshape the pennants before drying. Avoid high heat, which can affect acrylic fibers.
More Seasonal Crochet Home Decor Patterns
- Skull Motif Crochet Wreath
- Spring Crochet Flower Chains
- Halloween Crochet Spider Web
- Pumpkin Vines Home Decor Crochet Pattern
Frequently Asked Questions
Why does Round 1 of the appliqué have 15 stitches when I work only 14 dc?
The starting ch-3 counts as the fifteenth dc. Round 2 needs that 15-stitch ring because each of its five points uses three ring stitches: two are skipped, and the third receives the anchoring slip stitch. If you overlook the starting chain, the final point won't have enough stitches available.
Where does the final slip stitch of appliqué Round 2 go?
It goes into the first chain made at the start of Round 2, which is ch 1 of the opening ch-5. This closes the round after all five point sequences have been completed. Don't mistake it for an instruction to make another chain, since you're joining into an existing one.
How should I arrange the pennants on the joining cord?
Use three striped-and-star pairs, followed by the fourth striped pennant. Beginning after the first ch-16, slip stitch across a striped top, ch 4, cross a star top, and ch 4. Repeat that pair sequence two more times before attaching the final striped piece and making the ending ch-16.
Can I make the banner longer?
Yes, add matching striped-and-star pairs and continue the established cord sequence. Each additional pair requires one more pennant of each type, with ch 4 between neighboring pieces. You'll also need extra yarn beyond the listed amounts, and your finished banner will be longer than the stated measurement.
Share this pattern with a crocheter who enjoys making seasonal decorations one small piece at a time. I'd love to hear which part you enjoyed most in the comments.