
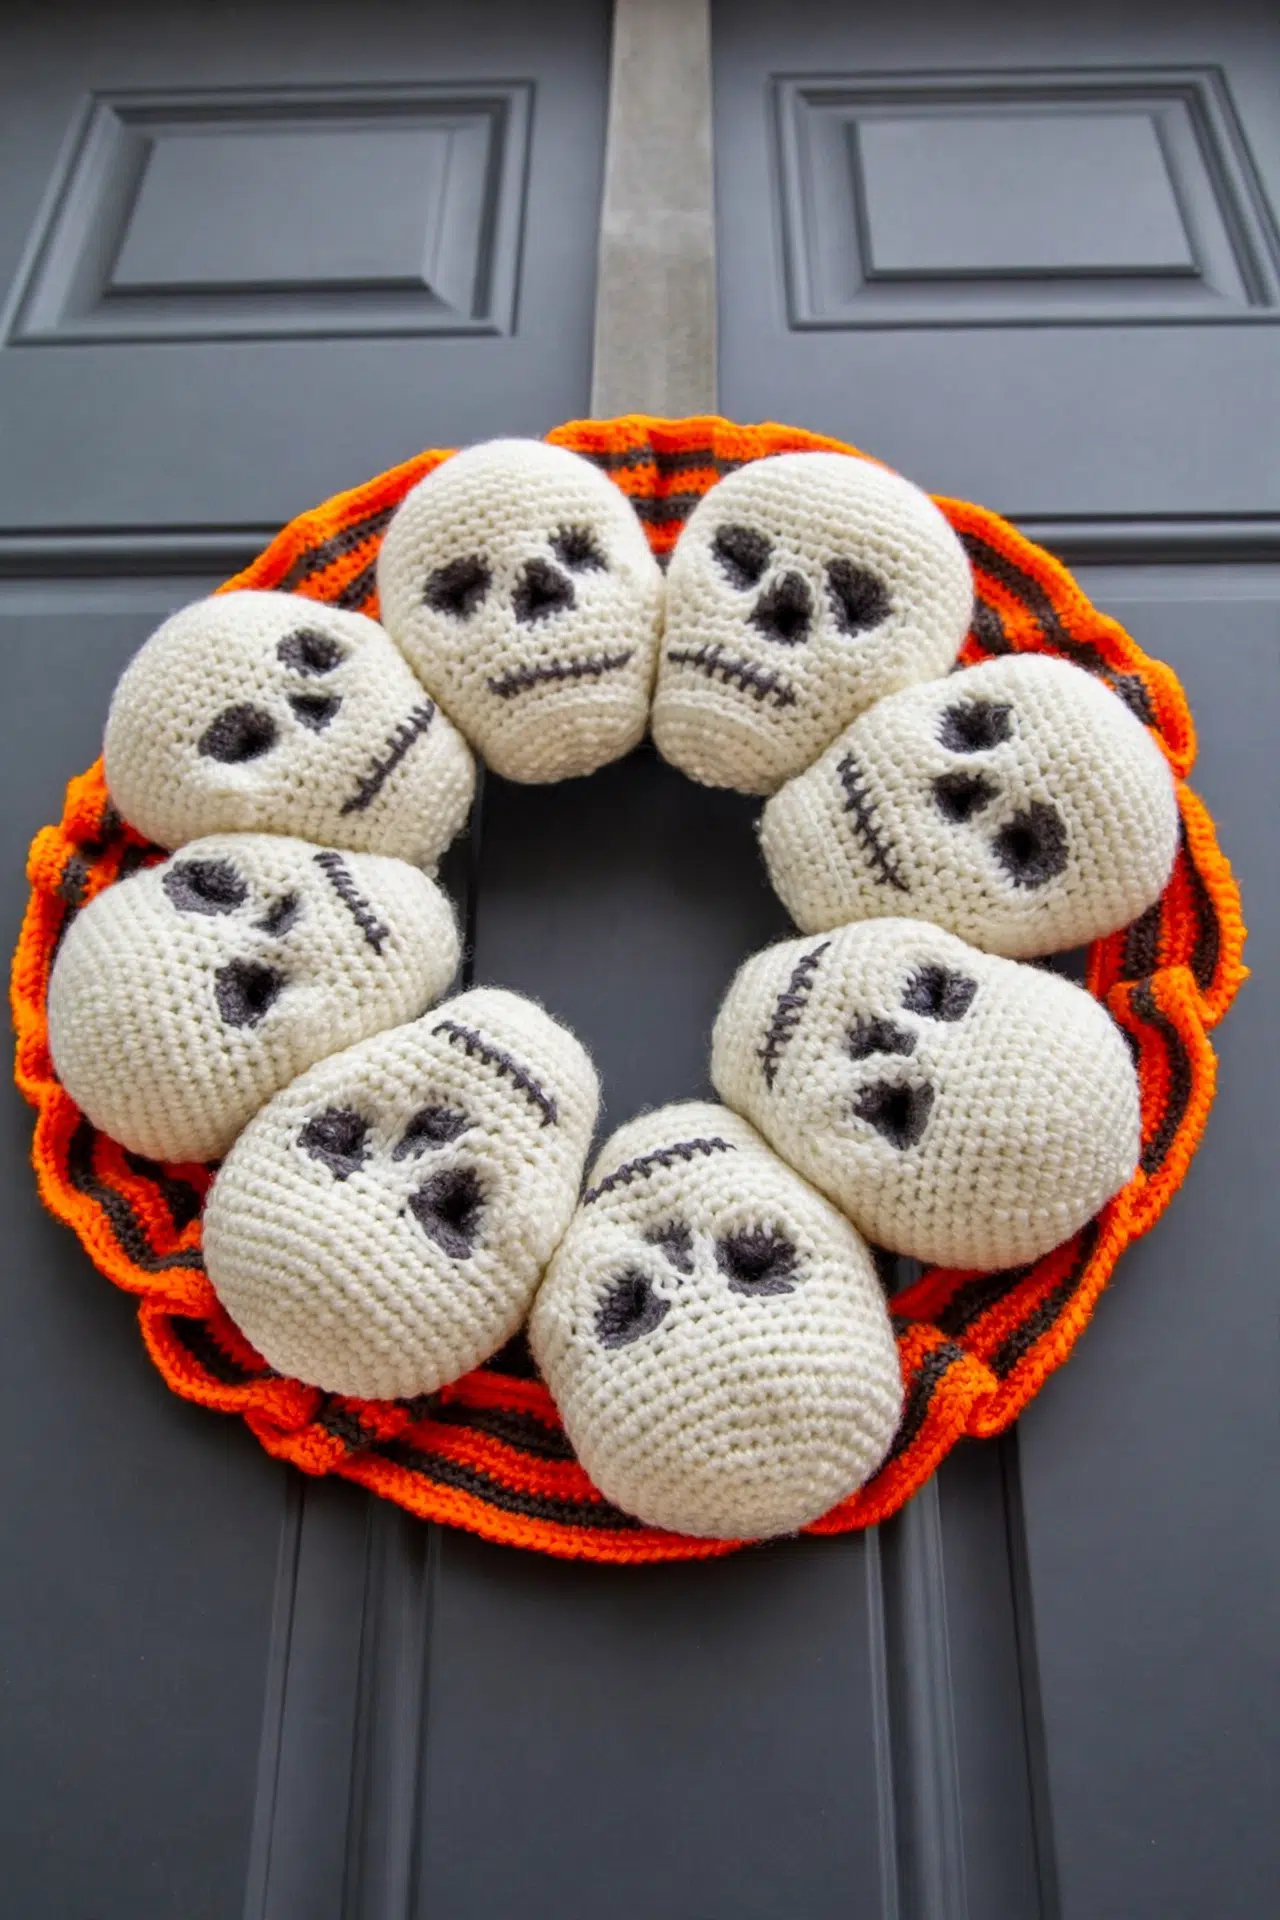
If you've been wanting a detailed seasonal project that gives your hands plenty of satisfying repetition, this Skull Motif Crochet Wreath may be exactly what you had in mind. It's a substantial make with smaller parts you can finish one at a time.

You'll work mostly in single crochet, shaping each Skull through increases, decreases, openings, and turned rows. Once the pieces are ready, the ruffle and secure tab construction bring everything together on the wire frame.
Jump to:
- Why You'll Love This Pattern
- Pattern Details
- Materials for This Wreath
- Stitches & Abbreviations
- How to Crochet the Skull Motif Wreath
- Tips for Success
- Ways to Adapt Your Crochet Wreath
- Fixing Wreath Count and Shaping Problems
- Wreath Display Ideas for the Season
- Care Instructions
- More Halloween and Autumn Crochet Decor
- Frequently Asked Questions
Why You'll Love This Pattern
- Repeatable pieces: Each Skull follows the same instructions, so the construction becomes more familiar as you work through the set.
- Straightforward stitchwork: Single crochet does most of the work here. The interest comes from shaping, placement, and assembly rather than a long list of specialty stitches.
- Useful shaping practice: You'll work continuous rounds, turned rows, skipped stitches, decreases, inset openings, stuffing, and sculpting in one focused project.
- Secure assembly: Separate crocheted tabs wrap around the inner wires, letting you sew every Skull firmly to the frame instead of relying on glue.
Pattern Details
- Skill Level: Intermediate
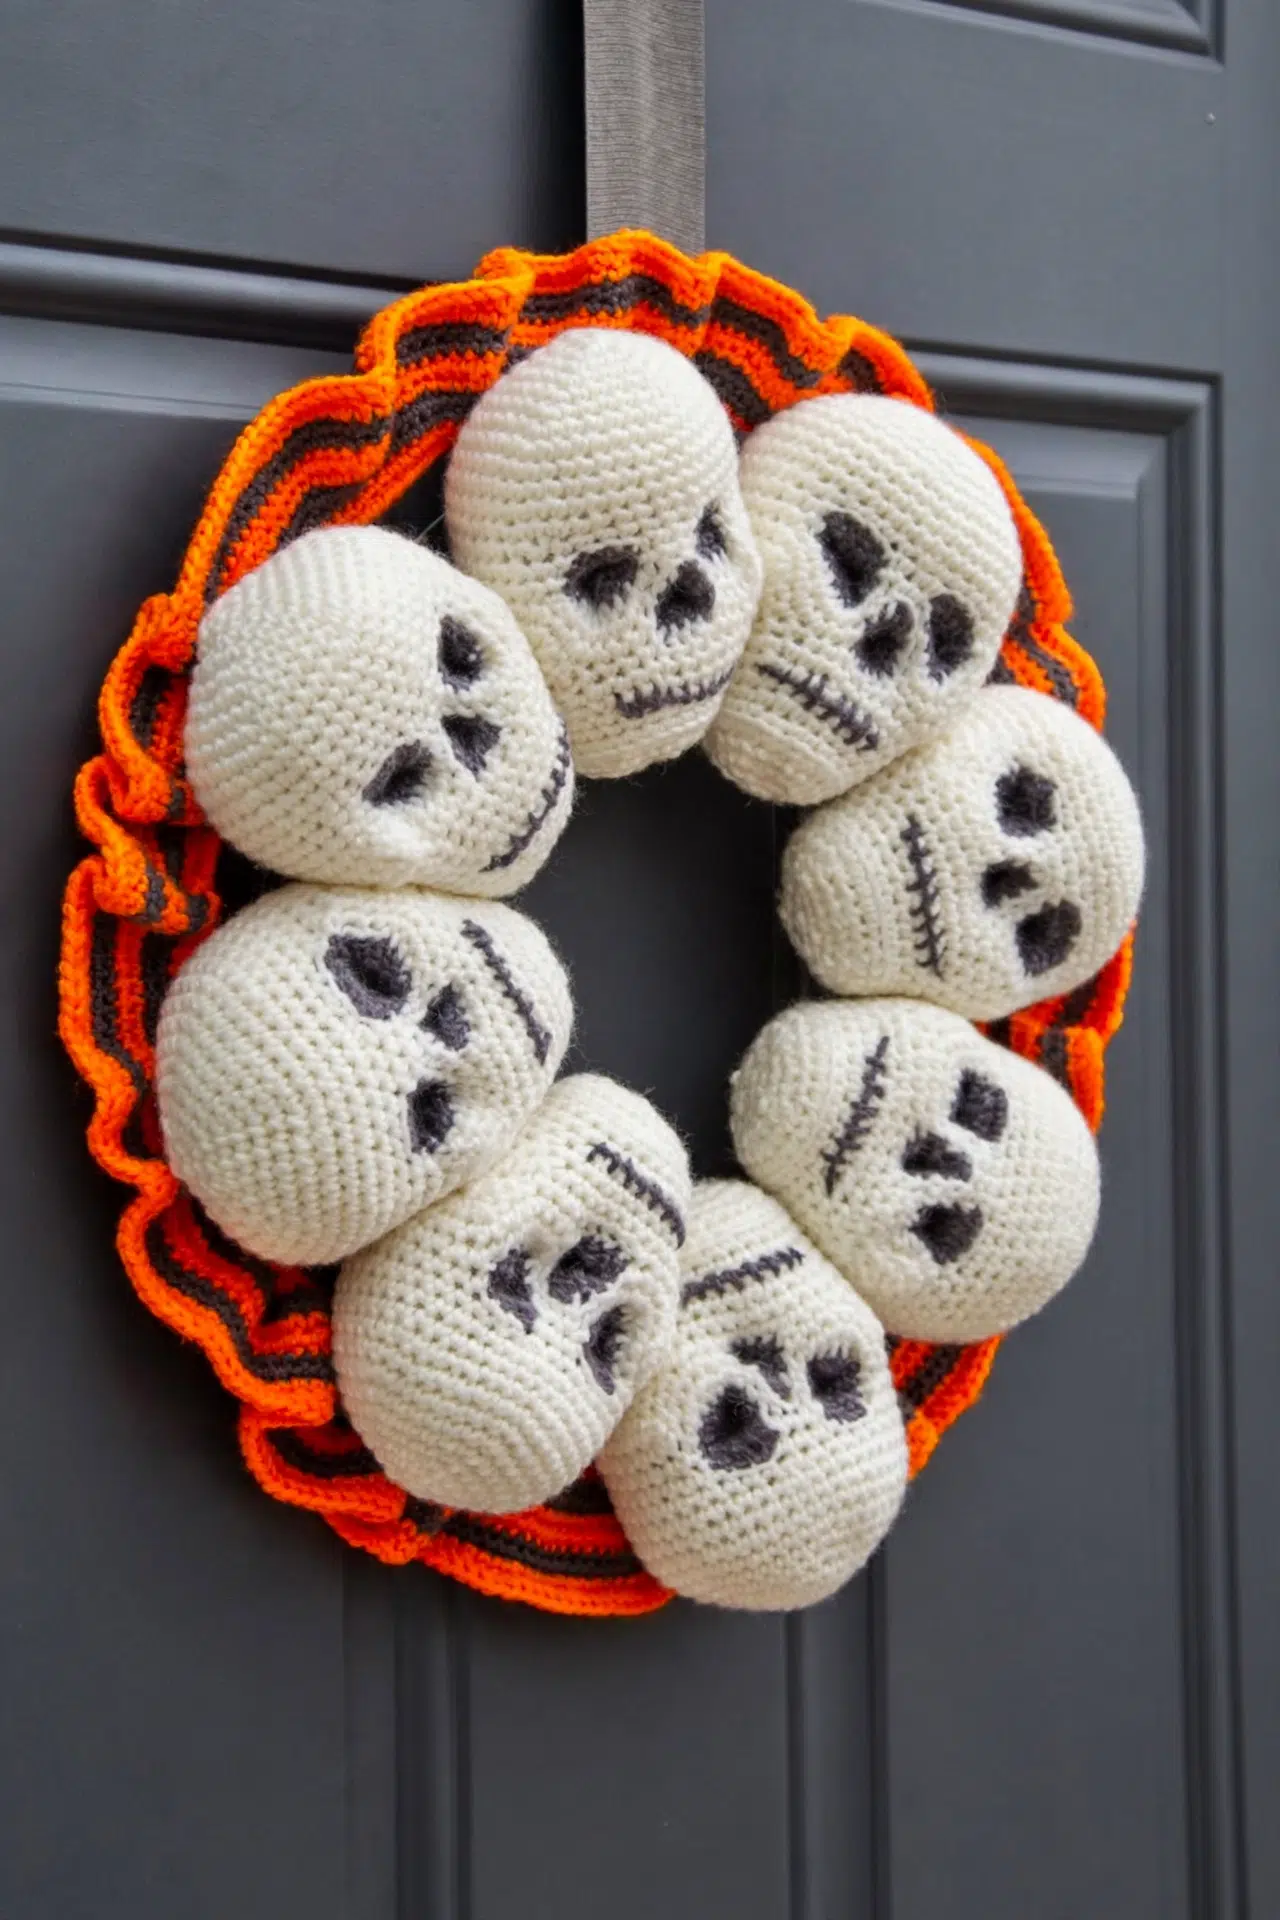
- Finished Size: Each skeleton skull measures approx 4 in. [10 cm] wide × 5 in. [12.5 cm] tall. The skulls are mounted on a 12 in. [30 cm] diameter metal wire wreath form.
- Gauge: 20 sc and 20 rows = 4 in. [10 cm] using the smaller hook (3.75 mm).
- Yarn Weight: Medium (4)
- Time to Make: about 24-32 hours
Materials for This Wreath
Gather all three yarn colors, both hook sizes, the wire form, and your stuffing before you begin. You'll also want the safety pin close by when it's time to pause the live loop and work the facial insets.
- Red Heart Super Saver (solid colors: 7 oz / 198 g; 364 yds / 333 m; heathers: 5 oz / 141 g; 236 yds / 215 m)
- Color A: 316 Soft White, 1 skein
- Color B: 3950 Charcoal, 1 skein
- Color C: 254 Pumpkin, 1 skein
- Size U.S. F-5 (3.75 mm) Susan Bates crochet hook
- Size U.S. G-6 (4 mm) Susan Bates crochet hook, or size needed to obtain gauge
- 12 in. [30 cm] diameter metal wire wreath form: The ruffle is crocheted directly over the outer wire, while the Skull tabs wrap around the inner wires. A form with a different construction may require tab adjustments.
- Polyester fiberfill stuffing: Add the stuffing in stages after the side openings have been sewn closed. Firm, even filling supports the later socket-sculpting step.
- Stitch markers
- Safety pin
- Yarn needle
Stitches & Abbreviations
- A - Color A
- B - Color B
- C - Color C
- ch - chain
- sc - single crochet
- sl st - slip stitch
- st(s) - stitch(es)
- sc2tog - single crochet 2 together
- WS - wrong side
sc2tog: (Draw up a loop in next st) 2 times, yarn over and draw through all 3 loops on hook.
How to Crochet the Skull Motif Wreath
Make all 8 Skulls and their tabs before arranging the pieces evenly around the completed frame.
Skulls are worked in continuous rounds in some sections and turned rows in others. Eye Sockets and the Nose Hole are worked on the WS of the Skull to create a hollow, recessed effect. Skulls are mounted to the wire wreath frame using crocheted tabs sewn to the back of each Skull and secured around the frame.
Skulls (Make 8)
Work in continuous rounds. Do not join rounds unless specified.
- Round 1: With A and smaller hook (3.75 mm), ch 2. Work 6 sc in 2nd ch from hook. Place marker for beginning of round. (6)
- Round 2: 2 sc in each st around. (12)
- Round 3: (Sc in next st, 2 sc in next st) 6 times. (18)
- Round 4: (Sc in next 2 sts, 2 sc in next st) 6 times. (24)
- Round 5: (Sc in next 3 sts, 2 sc in next st) 6 times. (30)
- Round 6: (Sc in next 4 sts, 2 sc in next st) 6 times. (36)
- Round 7: (Sc in next 5 sts, 2 sc in next st) 6 times. (42)
- Round 8: (Sc in next 6 sts, 2 sc in next st) 6 times. (48)
- Rounds 9-12: Sc in each st around.
- Round 13: (Sc in next 6 sts, sc2tog) 6 times. (42)
- Round 14: Sc in next 4 sts, ch 10, skip next 2 sts, sc in next 4 sts, ch 10, skip next 2 sts, sc in next 4 sts, (sc in next 5 sts, sc2tog) 3 times, sc in last 5 sts. (55)
This round shapes the Eye Sockets.
- Round 15: Sc in next 4 sts, sc in each of next 10 ch, skip next st, sc in next 2 sts, skip next st, sc in each of next 10 ch, skip next st, sc in remaining 26 sts. (52)
- Round 16: Sc in next 12 sts, ch 4, skip next 6 sts, sc in next 34 sts. (50)
This round shapes the Nose Hole.
- Row 17: Sc in next 4 sts and move marker to last st just worked, ch 1, turn; working along back of Skull, sc across next 30 sts, leave remaining sts unworked. (30)
The back of the head is worked in turned rows.
- Row 18: Ch 1, turn, sc in next 30 sts, leave remaining sts unworked.
- Row 19: Ch 1, turn, (sc in 3 sts, sc2tog) 3 times, (sc2tog, sc in 3 sts) 3 times. (24)
Before proceeding with the rest of the head, fill in the Eye Sockets and Nose Hole. Place the live Color A loop on a safety pin to prevent unravelling. Turn the Skull inside out.
Eye Sockets (Make 2)
Work in continuous rounds while the Skull is inside out.
- Round 1: Join B in front loop of any st in Eye Socket opening, ch 1, sc in same space, sc in 13 sts evenly spaced around. Place marker for beginning of round. (14)
- Round 2: (Sc in next st, sc2tog) 4 times, sc in last 2 sts. (10)
- Round 3: (Sc in next st, sc2tog) 3 times, sc in last st. (7)
- Step 1: Fasten off, leaving a long end. Weave the yarn tail through remaining sts to cinch closed. Secure end. Repeat Rounds 1-3 and this finishing step for the second Eye Socket.
Nose Hole
Work in continuous rounds while the Skull is inside out.
- Round 1: Join B in front loop of any st in Nose Hole opening, ch 1, sc in same place, sc in 9 sts evenly spaced around. Place marker for beginning of round. (10)
- Round 2: (Sc in next st, sc2tog) 3 times, sc in last st. (7)
- Round 3: (Sc in next st, sc2tog) 2 times, sc in last st. (5)
- Step 1: Fasten off, leaving a long end. Weave tail through remaining sts to cinch closed and secure.
Head Completion
Turn Skull right side out. Place the live loop back on the hook to resume working.
- Round 20: Ch 1, turn, sc across next 24 sts, skip first 4 sts along side of Eye Socket, sc in next 4 sts, sc across 4 ch of Nose Hole, sc in next 4 sts, skip next 4 sts along side of second Eye Socket, join with sl st in first sc. (36)
- Round 21: Ch 1, sc2tog, sc in next 22 sts, sc2tog, sc in last 10 sts. (34)
- Round 22: (Sc in next 6 sts, sc2tog) 4 times, sc in last 2 sts. (30)
Turn the Skull inside out and sew closed the holes beside the Eye Sockets using matching yarn scrap and matching edges. Secure ends. Turn right side out and begin stuffing firmly with fiberfill.
- Round 23: (Sc2tog, sc in next 8 sts) 2 times, sc in last 10 sts. Continue adding fiberfill firmly as work progresses. (28)
- Round 24: Sc in each st around. (28)
- Round 25: Sc in next 28 sts, sc in next 10 sts and move marker here for new beginning of round.
- Round 26: Working in back loops only, sc in each st around. (28)
- Round 27: (Sc in next 5 sts, sc2tog) 4 times. (24)
- Round 28: (Sc in next 2 sts, sc2tog) 6 times. (18)
- Round 29: (Sc in next st, sc2tog) 6 times. (12)
- Step 1: Fasten off, leaving a long end. Weave tail through remaining sts, cinch closed, and secure.
Wreath Tabs (Make 8)
- Row 1: With smaller hook (3.75 mm) and A, ch 7. Sc in 2nd ch from hook and each ch across. (6)
- Rows 2-10: Ch 1, turn, sc in each st across.
- Step 1: Fasten off, leaving long yarn ends for sewing.
Striped Ruffle
Work in joined rounds directly around the outer ring of the wire frame.
- Round 1: With right side facing, using larger hook (4 mm) and C, working over the outer wire of the wreath frame, sc 270 sts, or any multiple of 5 sts, evenly around; sl st in first sc to join. (270)
- Round 2: Ch 1, sc in each st around; sl st in first sc. Fasten off.
- Round 3: With right side facing, join B in any st with sl st, ch 1, sc in same st, sc in next 3 sts, 2 sc in next st, *sc in 4 sts, 2 sc in next st; rep from * around. Sl st in first sc. (324)
- Round 4: Ch 1, sc in each st around; sl st in first sc to join. Fasten off.
- Round 5: With right side facing, join C with sl st in any st, ch 1, sc in each st around; sl st in first sc. (324)
- Round 6: Ch 1, sc in same st, sc in next 4 sts, 2 sc in next sc, *sc in 5 sts, 2 sc in next sc; rep from * around. Sl st in first sc. Fasten off. (378)
- Round 7: With right side facing, join B with sl st in any st, ch 1, sc in each st around; sl st in first sc.
- Round 8: Ch 1, sc in each st around; sl st in first sc. Fasten off.
- Round 9: With right side facing, join C with sl st in any st, ch 1, sc in same st, sc in next 5 sts, 2 sc in next sc, *sc in next 6 sts, 2 sc in next sc; rep from * around. Sl st in first sc. (432)
- Round 10: Ch 1, sc in each st around; sl st in first sc. Fasten off.
Finishing and Assembly
- Step 1: Using B and a yarn needle, embroider a straight horizontal line across the lower muzzle of each Skull for the mouth, then add short vertical straight stitches perpendicular across the line for teeth.
- Step 2: With B, insert the yarn needle through the back of the Skull up to the middle of one Eye Socket, skip ½ in. [6 mm], and reinsert through the socket to the back of the Skull. Pull firmly to indent the socket and tie the ends securely at the back. Repeat for the second Eye Socket and the Nose Hole.
- Step 3: Sew one short end of a Wreath Tab to the back of each Skull. Fold the tab over the inner wires of the frame, and sew the opposite end of the tab to the back of the Skull to secure it tightly in place. Repeat for all 8 Skulls, evenly encircling the wreath.
Tips for Success
- Move your marker promptly: The Skull begins in continuous rounds, so move the beginning-of-round marker every time you reach it. Round 25 deliberately shifts that marker to a new position.
- Secure the live loop: Don't remove the safety pin until both Eye Sockets and the Nose Hole are finished. Those insets are worked while the Skull is inside out, and the pin keeps Color A from unravelling during the pause.
- Close the side gaps first: Sew the openings beside the Eye Sockets before adding the main stuffing. Matching the edges neatly now prevents fiberfill from pushing through later.
- Divide the ruffle into sections: Use spare markers to break the wire ring into manageable intervals as you place the first round. An evenly distributed multiple of 5 keeps the increase rounds on track.
Ways to Adapt Your Crochet Wreath
- Try another medium-weight yarn: Choose a yarn that can meet the Skull gauge with a firm fabric. A looser fabric may let stuffing show or make the sculpted openings less stable.
- Use cotton for firmer pieces: Medium-weight cotton can work, but it has less stretch than acrylic and may feel denser in your hands. Swatch first and adjust the smaller hook only if needed to match gauge.
- Reassign the three colors: You can choose different yarn colors and keep the pattern roles labeled A, B, and C. Assign them before starting so the insets, embroidery, ruffle rounds, and main pieces remain easy to track.
- Change the wreath-form size: A different frame diameter changes the number of stitches needed around the outer wire and the spacing available for the Skulls. Keep the first ruffle round divisible by 5, then expect every stated ruffle count to change.
- Adjust the tabs for the frame: Forms with thicker or differently spaced inner wires may need longer tabs. Add rows until a tab wraps around the wire and reaches the back of the Skull without stretching tightly.
- Alter the ruffle starting count: You don't have to begin with 270 sc, but the number must be a multiple of 5. The later increase rounds still follow their written spacing, while their ending counts will differ from the listed totals.
Fixing Wreath Count and Shaping Problems
- The insets won't stay recessed: Make sure each inset is cinched completely closed and secured before stuffing. During finishing, pull the sculpting strand firmly from the back and knot it securely so the indentation doesn't relax.
- The ruffle count is drifting: Check the stitch spacing in each increase round. Round 3 increases once per 5 stitches, Round 6 once per 6 stitches, and Round 9 once per 7 stitches.
- Stuffing peeks beside the sockets: Turn the Skull inside out after Round 22 and sew the side openings closed with matching yarn. Stuffing before closing those gaps makes the edges harder to align.
- A Skull rotates on the frame: Pull its tab snugly over the inner wires before sewing the second end to the back. Add several secure stitches at both ends rather than attaching only through one small spot.
Wreath Display Ideas for the Season
Hang the wreath on an interior door or wall where the yarn, stuffing, and metal frame won't be exposed to rain. A sturdy wreath hook supports the frame without placing pressure on one Skull.
For seasonal rotation, lift it down by the wire frame rather than by a tab or stuffed piece. Store it flat so the stuffing and ruffle aren't compressed.
Care Instructions
Spot-clean the wreath with cool water and a small amount of mild detergent. Avoid soaking it because the project contains a metal frame and firmly stuffed pieces. Blot away moisture and let it air-dry completely while supported flat.
More Halloween and Autumn Crochet Decor
Frequently Asked Questions
How many Skulls and tabs do I need?
You need 8 Skulls and 8 Wreath Tabs. Each Skull receives one tab, and the completed pieces are spaced evenly around the frame. Making the full set before mounting lets you compare their stuffing and shape, then arrange them without discovering a mismatch after several pieces are already sewn down.
When should I begin stuffing each Skull?
Begin stuffing after Round 22, once you've turned the Skull inside out, sewn the holes beside the Eye Sockets closed, and returned it to the right side. Continue adding fiberfill during the remaining decrease rounds. Waiting until the opening is nearly closed makes it difficult to distribute the stuffing firmly and evenly.
Why is the live Color A loop placed on a safety pin?
The safety pin holds the active loop while you work the Eye Socket and Nose Hole insets with Color B. You need to turn the Skull inside out during this stage, so leaving the loop on the hook would be awkward and easy to pull loose. Return it to the hook before beginning Round 20.
Can I change the ruffle's first-round stitch count?
Yes, use any multiple of 5 and distribute those stitches evenly around the outer wire. The listed totals of 324, 378, and 432 apply only when Round 1 begins with 270 sc. With another starting number, follow the same increase spacing instead of trying to force the printed totals.
Which hook is used for each part?
Use the 3.75 mm hook for the Skulls and Wreath Tabs, and use the 4 mm hook for the ruffle around the frame. The Skull gauge is measured with the smaller hook. Keeping that gauge consistent matters because all 8 stuffed pieces need comparable measurements before they're arranged around the wreath.
Tell me in the comments how your wreath turned out and which part you enjoyed making most! 🧶



