
If you've been wanting a useful, giftable crochet project with plenty of playful details, you've found it in this Crochet Treasure Chest Play Set. You get the satisfaction of building a complete chest, then filling it with coins, pearls, and soft gemstones.

The crochet itself relies on approachable stitches, steady rows, and repeated shaping. You can enjoy each piece in manageable stages, with the plastic canvas added during assembly to support the finished chest and lid.
Jump to:
- Why I Make These on Repeat
- Pattern Details
- Yarn and Supplies
- Stitches & Abbreviations
- How to Crochet the Treasure Chest Play Set
- Tips for the Best Results
- Get a Neater Texture Pattern
- Ways to Adapt Your Treasure Chest
- Fixing Fit and Assembly Problems
- Fill and Enjoy Your Finished Chest
- Care Instructions
- More Crochet Toy Patterns
- Frequently Asked Questions
Why I Make These on Repeat
- It stays interesting: The project moves between textured panels, simple lining pieces, shaped lid sections, straps, and small treasure pieces. That variety keeps your hands busy without relying on complicated stitchwork.
- The structure is built in: Plastic canvas sits between the outer crochet and lining, so you aren't asking yarn alone to hold the chest's form. I like this construction because the support is hidden as you join the layers.
- You can work in stages: Each panel and treasure piece is made separately. It's easy to finish a pair of sides, a handful of coins, or one gemstone color whenever you have a shorter crochet session.
- The details have a purpose: The holding strap controls how far the lid opens, while the belts, loops, horizontal straps, and metal-pin bobbles are attached after the main structure is assembled.
Pattern Details
- Skill Level: Easy
- Finished Size: Approx 12 in. [30.5 cm] long × 9 in. [23 cm] wide × 12 in. [30.5 cm] tall, including Lid.
- Gauge: 9 sc and 10 rows = 4 in. [10 cm] with larger hook and Bernat Blanket; 10 sts and 10.5 rows = 4 in. [10 cm] in Texture Pat with larger hook and Bernat Blanket; 14 sc and 16 rows = 4 in. [10 cm] with smaller hook and Bernat Velvet Minis.
- Yarn Weight: Super Bulky (6) for the main yarns; Bernat Velvet Minis as specified for the treasure pieces.
- Time to Make: about 30-40 hours
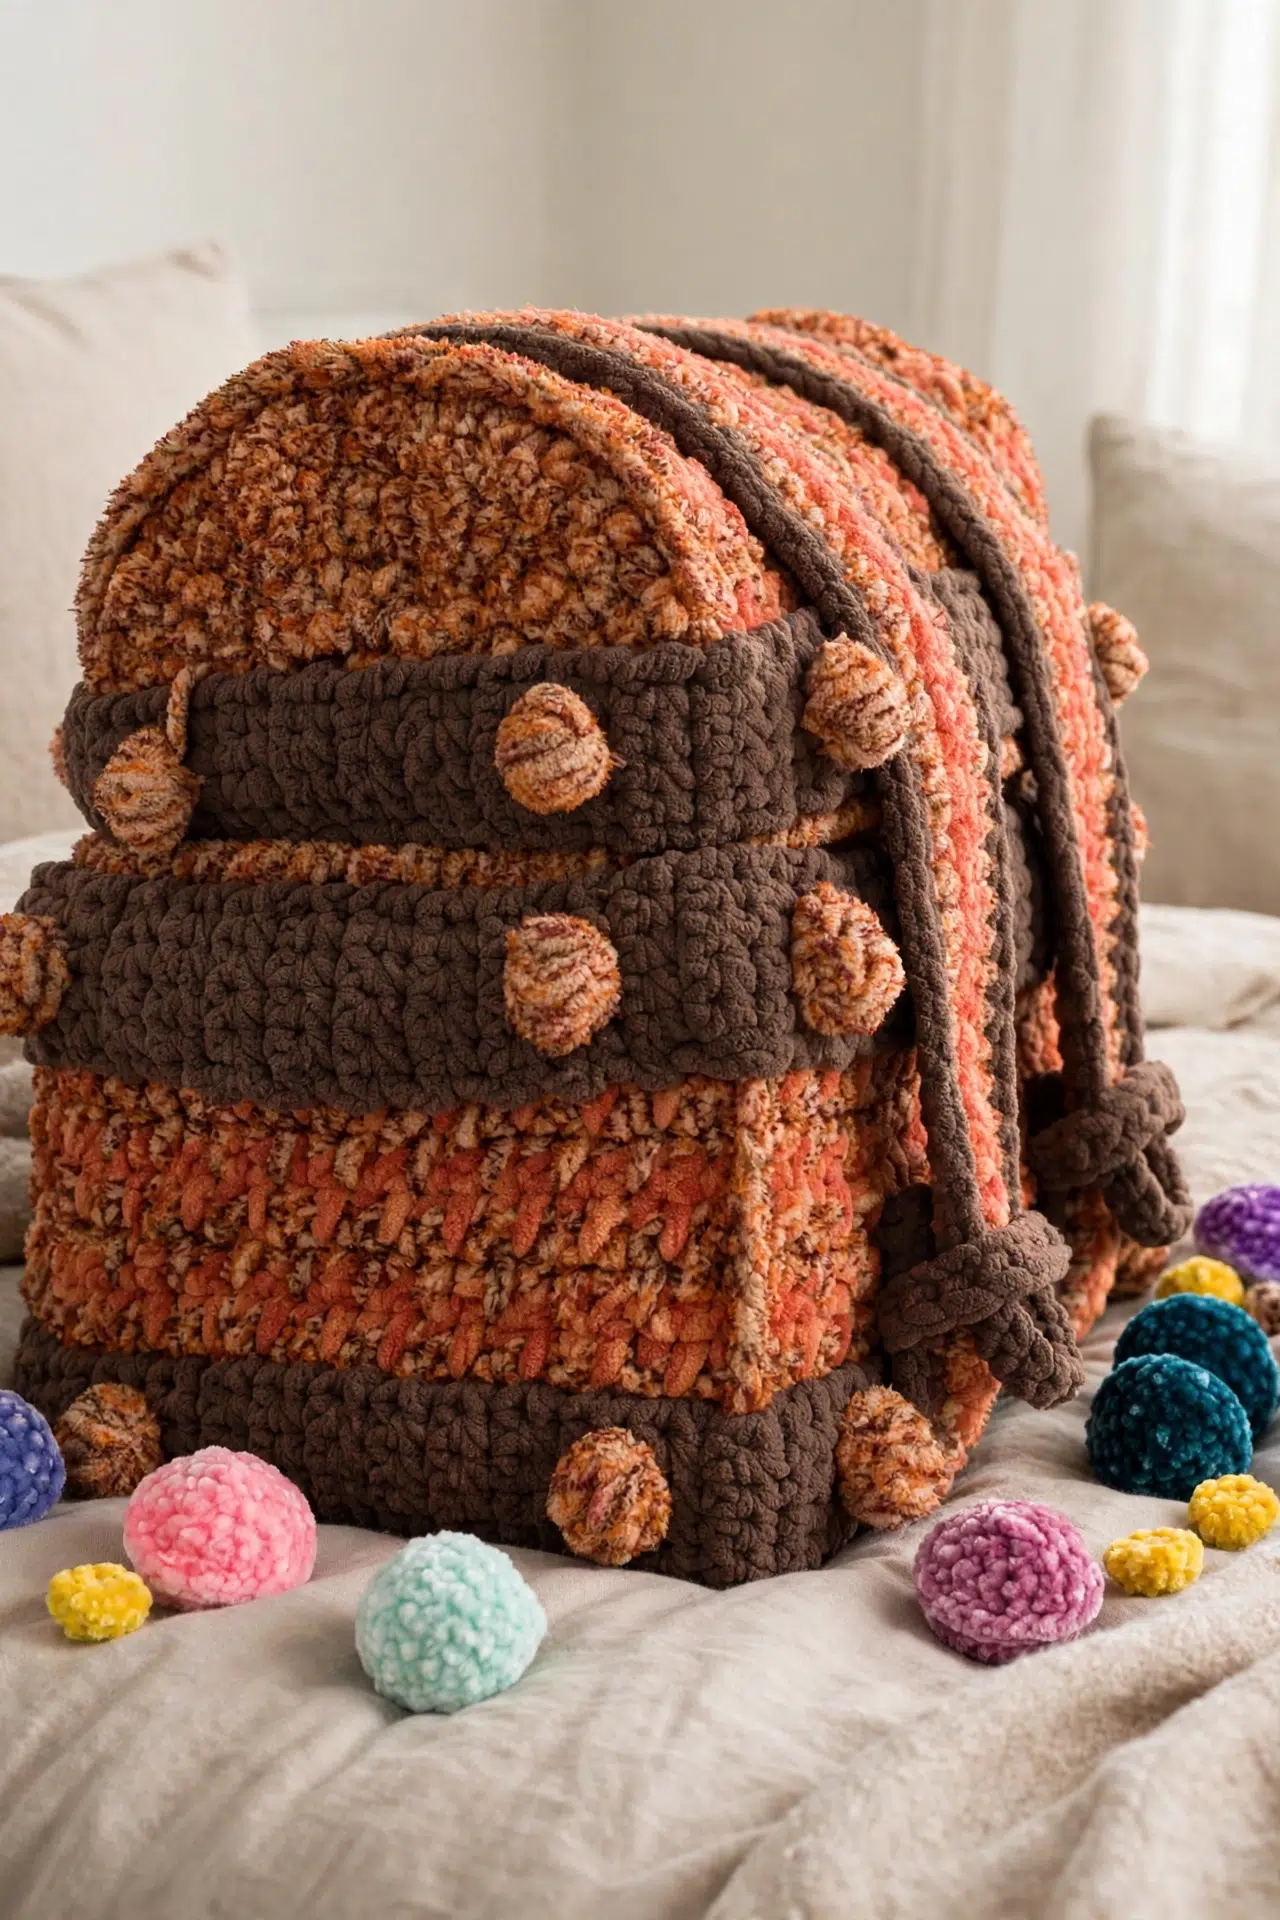
Yarn and Supplies
Gather all yarn, hooks, canvas, and sewing supplies before you begin. There are several fitted layers, so keeping each contrast and its matching pieces together will make assembly much calmer.
- Bernat Blanket (10.5 oz / 300 g; 220 yds / 201 m), Contrast A: Taupe (00029), 4 balls or 755 yds / 687 m
- Bernat Blanket Tweeds (10.5 oz / 300 g; 220 yds / 201 m), Contrast B: Sandy Tweed (38004), 3 balls or 510 yds / 465 m
- Bernat Blanket Mist-Ical (10.5 oz / 300 g; 220 yds / 201 m), Contrast C: Canyon (13007), 1 ball or 205 yds / 187 m
- Bernat Velvet Minis 1 Kit (25 oz / 700 g; 820 yds / 750 m; 20 balls, each 1.2 oz / 35 g and 41 yds / 38 m), Contrast D: Joyful Gold, 1 ball or 28 yds / 25 m
- Bernat Velvet Minis 1 Kit, Contrast E: Sandy Cream, 1 ball or 18 yds / 16 m
- Bernat Velvet Minis 1 Kit, Contrast F: Mushroom, 1 ball or 13 yds / 12 m
- Bernat Velvet Minis 1 Kit, Contrast G gemstones: Smokey Blue, Purple Pansy, Orchid Hush, Velveteal, Red, Bleached Aqua, Ever After Pink, and Burgundy Plum, 1 ball or 24 yds / 22 m each
- Length of worsted weight yarn for joining plastic canvas pieces: Cut carefully to the listed dimensions and check each piece against its crochet panel before joining the frame. Rough or uneven edges can catch the lining.
- Size U.S. G/6 (4 mm) Susan Bates Silvalume crochet hook
- Size U.S. K/10½ (6.5 mm) Susan Bates Silvalume crochet hook, or size needed to obtain gauge
- Susan Bates stitch markers
- Susan Bates yarn needle
- 8 sheets of Mesh Plastic Canvas, each 10½ in. × 13½ in. [26.5 × 34.5 cm], for the frame between layers
- Blunt sewing needle
Stitches & Abbreviations
- approx - approximately
- beg - beginning
- ch - chain(s)
- cont - continue or continuity
- dc - double crochet
- hdc - half double crochet
- inc - increase
- pat - pattern
- PM - place marker
- rem - remaining
- rep - repeat
- rnd(s) - round(s)
- RS - right side
- sc - single crochet
- sl st - slip stitch
- sp(s) - space(s)
- st(s) - stitch(es)
- tog - together
- WS - wrong side
- yo - yarn over
- Running St - running stitch
Bobble: (Yo and draw up a loop, maintaining length of ch-3) 5 times in indicated sp. Yo and draw through all loops on hook. Ch 1 to close Bobble.
sc2tog: Draw up a loop in each of next 2 stitches. Yo and draw through all loops on hook.
scbp: Single crochet back post: Draw up a loop around back of post of next stitch. Yo and draw through 2 loops on hook.
reverse sc: Working from left to right instead of from right to left as usual, work 1 sc in each indicated sc.
How to Crochet the Treasure Chest Play Set
Make the outer panels and lining first, then build and enclose the frame before adding the lid, straps, and treasure pieces.
Ch 2 at beginning of row does not count as a stitch. To change color, work to last 2 loops on hook of previous color. Yo with new color, draw through 2 loops, and proceed with new color. The plastic canvas frame is enclosed between the outer chest or lid and its lining. For pieces worked to fit another section, compare the pieces as you crochet and stop at the specified matching measurement.
Chest Front and Back
Make 2 alike with B and the larger hook.
- Step 1: Ch 30.
- Row 1: RS: 1 sc in 2nd ch from hook and each ch to end of chain. Turn. (29)
- Row 2: Ch 1. 1 sc in first sc. *Ch 1, skip next sc, 1 sc in next sc; rep from * to end of row. Join C. Turn.
- Row 3: With C, ch 1. 1 sc in first sc. *1 sc in skipped sc 2 rows below, pulling loop to maintain height of row, 1 sc in next sc; rep from * to end of row. Turn.
- Row 4: Ch 1. 1 sc in each of first 2 sc. *Ch 1, skip next sc, 1 sc in next sc; rep from * to last sc. 1 sc in last sc. Join B. Turn.
- Row 5: With B, ch 1. 1 sc in first sc. *1 sc in next sc, 1 sc in skipped sc 2 rows below, pulling loop to maintain height of row; rep from * to last 2 sc. 1 sc in each of last 2 sc. Turn.
- Row 6: With B, work as given for Row 2.
- Rows 7 onward: Rep Rows 3-6 for Texture Pat until work from beg measures approx 7 in. [18 cm], ending on a RS row. Fasten off.
Chest Sides
Make 2 alike with B and the larger hook.
- Step 1: Ch 24.
- Row 1: RS: 1 sc in 2nd ch from hook and each ch to end of chain. Turn. (23)
- Rows 2 onward: Work Rows 2-6 and then rep Rows 3-6 as given for Chest Front and Back until work from beg measures approx 7 in. [18 cm], ending on a RS row. Fasten off.
Chest Base
Use A and the larger hook.
- Step 1: Ch 28.
- Row 1: 1 sc in 2nd ch from hook and each ch to end of chain. Turn. (27)
- Row 2: Ch 1. 1 sc in each sc to end of row. Turn.
- Rows 3 onward: Rep Row 2 until work from beg measures approx 9 in. [23 cm] or the same length as Chest Side. Fasten off.
Lining Base
Use A and the larger hook.
- Step 1: Work as given for Chest Base.
Lining Front and Back
Make 2 alike with A and the larger hook.
- Step 1: Ch 28.
- Row 1: 1 sc in 2nd ch from hook and each ch to end of chain. Turn. (27)
- Row 2: Ch 1. 1 sc in each sc to end of row. Turn.
- Rows 3 onward: Rep Row 2 until work from beg measures approx 7 in. [18 cm] or the same height as Chest Front or Back. Fasten off.
Lining Sides
Make 2 alike with A and the larger hook.
- Step 1: Ch 22.
- Row 1: 1 sc in 2nd ch from hook and each ch to end of chain. Turn. (21)
- Row 2: Ch 1. 1 sc in each sc to end of row. Turn.
- Rows 3 onward: Rep Row 2 until work from beg measures approx 7 in. [18 cm] or the same height as Chest Sides. Fasten off.
Chest Frame and Outer Body Assembly
Take your time aligning the panel corners here, since the frame, outer shell, and lining all need to meet evenly at the top.
- Step 1: Cut one Mesh Plastic Canvas piece 8¾ in. × 11½ in. [22 × 29 cm] for Chest Base.
- Step 2: Cut two Mesh Plastic Canvas pieces 6¾ in. × 11½ in. [17 × 29 cm] for Chest Front and Back.
- Step 3: Cut two Mesh Plastic Canvas pieces 6¾ in. × 8¾ in. [17 × 22 cm] for Chest Sides.
- Step 4: With worsted weight yarn and a blunt sewing needle, join the plastic canvas pieces for Chest Front, Back, Sides, and Base into a frame.
- Step 5: Place the side edge of Front and 1 Side with WS together. With larger hook, join B with sl st to bottom right corner. Ch 1. Working through both thicknesses, work 1 row of sc evenly up to top edge. Fasten off. Rep for remaining 3 seams of Front, Back, and Sides.
- Step 6: Place lower edge of joined Sides behind Base with WS together, aligning corners of Base with side seams. With larger hook, join A with sl st to any corner.
- Round 1: Ch 1. Working through both thicknesses, work 1 rnd of sc evenly around all 4 sides of Base, having 3 sc in each corner. Join with sl st to first sc. Fasten off.
This round joins the Chest Base to the Sides.
- Step 7: Place side edge of Lining Front and 1 Lining Side with RS together. With larger hook, join A with sl st to bottom right corner. Ch 1. Working through both thicknesses, work 1 row of sc evenly up to top edge. Fasten off. Rep for remaining 3 seams of Lining Front, Back, and Sides.
- Step 8: Place lower edge of joined Lining Sides behind Lining Base with RS together, aligning corners of Base with side seams. With larger hook, join A with sl st to any corner.
- Round 1: Ch 1. Working through both thicknesses, work 1 rnd of sc evenly around all 4 sides of Lining Base, having 3 sc in each corner. Join with sl st to first sc. Fasten off.
This round joins the Lining Base to the Lining Sides.
- Step 9: Insert assembled plastic canvas frame into assembled Chest. Place Lining inside Chest and plastic canvas frame with WS together, making sure all corners are aligned properly and top edges are even.
- Round 1: With RS of Chest facing you and larger hook, join B with sl st to any sc at corner. Working through both thicknesses, work 1 rnd of sc evenly around top edge to join Chest and Lining, enclosing plastic canvas frame. Join with sl st to first sc.
- Round 2: Ch 1. Working from left to right instead of from right to left as usual, work 1 rnd of reverse sc in each sc around. Join with sl st to first sc. Fasten off.
Horizontal Straps
Make 3 alike with A and the larger hook.
- Step 1: Ch 6.
- Row 1: 1 sc in 2nd ch from hook and each ch to end of chain. Turn. (5)
- Row 2: Ch 1. 1 sc in each sc to end of row. Turn.
- Rows 3 onward: Rep Row 2 until Strap measures the length needed to fit horizontally around Chest. Fasten off.
- Step 2: Beginning at a corner, sew first Strap around bottom edge of Chest.
- Step 3: Sew second Strap around top edge of Chest, right below joining rnd, using Running St.
Leave the third Strap for Lid finishing.
Metal Pins
Make 24 with B and the larger hook.
- Step 1: Ch 4, leaving a long end.
- Row 1: Bobble in 4th ch from hook. Ch 1. Sl st in Bobble base. Fasten off, leaving a long end.
- Step 2: Sew 8 Metal Pins onto each of the first 2 Horizontal Straps, placing them 1 in. [2.5 cm] from each corner.
The remaining 8 Metal Pins are used on the third Strap for the Lid.
Lid Sides
Make 2 alike with B and the larger hook.
- Step 1: Ch 2.
- Row 1: RS: 4 sc in 2nd ch from hook. Turn. (4)
- Row 2: Ch 1. 2 sc in each sc to end of row. Turn. (8)
- Row 3: Ch 1. 2 sc in first sc. (1 sc in next sc, 2 sc in next sc) 3 times. 1 sc in last sc. Turn. (12)
- Row 4: Ch 1. 2 sc in first sc. (1 sc in each of next 2 sc, 2 sc in next sc) 3 times. 1 sc in each of last 2 sc. Turn. (16)
- Row 5: Ch 1. 2 sc in first sc. (1 sc in each of next 3 sc, 2 sc in next sc) 3 times. 1 sc in each of last 3 sc. Turn. (20)
- Rows 6 onward: Cont in same manner, increasing 4 sc every row until straight edge of Chest Lid measures approx 9 in. [23 cm] or the same length as Chest Side, ending on a RS row.
Lid Top
Make 1 with B and the larger hook.
- Step 1: Ch 30.
- Row 1: RS: 1 sc in 2nd ch from hook and each ch to end of chain. Turn. (29)
- Rows 2-6: Work Rows 2-6 as given for Chest Front and Back.
- Rows 7 onward: Rep Rows 3-6 for Texture Pat until work from beg measures the length needed to fit along curved edge of Lid Side, ending on a RS row. Fasten off.
Lining for Lid Sides
Make 2 alike with A.
- Step 1: Work as given for Lid Sides.
Lining for Lid Top
Make 1 with A and the larger hook.
- Step 1: Ch 28.
- Row 1: 1 sc in 2nd ch from hook and each ch to end of chain. Turn. (27)
- Row 2: Ch 1. 1 sc in each sc to end of row. Turn.
- Rows 3 onward: Rep Row 2 until work from beg measures the length needed to fit along curved edge of Lid Side, ending on a RS row. Fasten off.
Chest Lid Frame Assembly
- Step 1: Cut a Mesh Plastic Canvas circle 8¾ in. [22 cm] in diameter, then cut circle in half for 2 Lid Sides.
- Step 2: Cut two Mesh Plastic Canvas pieces 7 in. × 13½ in. [18 × 34.5 cm] for curved Lid Top.
- Step 3: Overlap the 2 Lid Top pieces by 1¼ in. [3 cm] to create a piece 11½ in. × 13½ in. [22 × 34.5 cm]. With worsted weight yarn and a blunt sewing needle, sew pieces together.
- Step 4: Join longer sides of Lid Top to shaped Lid Sides. The shaped length of Lid Side should measure approx 13½ in. [34.5 cm].
Lid Assembly and Finishing
- Step 1: Pin side edge of Lid Top to curved edge of one Lid Side with WS together. With Side facing you and larger hook, join B with sl st to bottom right corner. Ch 1. Working through both thicknesses, work 1 row of sc evenly along curved edge. Fasten off. Rep for other Side.
- Step 2: Pin side edge of Lining Top to curved edge of one Lining Side with RS together. With larger hook, join A with sl st to bottom right corner. Ch 1. Working through both thicknesses, work 1 row of sc evenly along curved edge. Fasten off. Rep for other Side.
- Step 3: Place Lining inside Chest Lid and plastic canvas frame of Lid with WS together, ensuring all curved edges are aligned properly and even.
- Round 1: With RS of Lid facing you and larger hook, join B with sl st to any sc at corner. Working through both thicknesses, work 1 rnd of sc evenly around bottom edge to join Lid to Lining, enclosing plastic canvas frame. Join with sl st to first sc.
- Round 2: Ch 1. Working from left to right instead of from right to left as usual, work 1 rnd of reverse sc in each sc around. Join with sl st to first sc. Fasten off.
- Step 4: Beginning at a corner, sew third Horizontal Strap along bottom edge of Chest Lid, right above joining rnd.
- Step 5: Sew remaining 8 Metal Pins to Horizontal Strap, placing them 1 in. [2.5 cm] from each corner.
- Step 6: Place Chest Lid on top of Chest. Sew Lid to Body of Chest across long side using Running St.
Vertical Belts
Make 2 alike with the larger hook and C.
- Step 1: Ch 107.
- Round 1: 2 sc in 2nd ch from hook. 1 sc in each ch to last ch. 3 sc in last ch. PM on first sc of 3-sc group just made. Do not turn. Working across remaining loops of foundation ch, 1 sc in each ch to end. 1 sc in sp where first 2 sc were made. Join B with sl st to first sc. (214)
- Round 2: With B, ch 1. 2 sc in same sp as sl st. 2 sc in next sc. 1 sc in each sc to next marked sc. 2 sc in marked sc. PM on first sc of 2-sc group just made. 2 sc in each of next 2 sc. 1 sc in each sc to last sc. 2 sc in last sc. Join A with sl st to first sc.
- Round 3: With A, ch 1. 2 sc in same sp as sl st. 1 sc in next sc. 2 sc in next sc. 1 sc in each sc to next marked sc. 2 sc in marked sc. (1 sc in next sc, 2 sc in next sc) 2 times. 1 sc in each sc to last 2 sc. 2 sc in next sc. 1 sc in last sc. Join with sl st to first sc. Fasten off.
Belt Loops
Make 2 alike with the larger hook and A.
- Step 1: Ch 15.
- Row 1: 1 sc in 2nd ch from hook and each ch to end of chain. Fasten off, leaving a long end. (14)
- Step 2: Wrap Belt Loop loosely around Vertical Belt approx 2 in. [5 cm] from one end of Belt and sew in place on WS at last rnd of Belt.
- Step 3: Beginning at Chest Front, 1 in. [2.5 cm] below top Horizontal Strap and 1½ in. [4 cm] from side edge, sew end of Vertical Belt with Loop in place using Running St. Rep for second Vertical Belt.
- Step 4: Wrap remaining length down Front, across Base, up Back, and over Chest Lid, allowing ends of Vertical Belts to buckle up through Belt Loops. Tack in place, leaving ends free, if desired.
Holding Strap
Make 1 with the larger hook and A.
- Step 1: Ch 40.
- Row 1: 1 sc in 2nd ch from hook and each ch to end of chain. Fasten off, leaving a long end. (39)
- Step 2: Open Chest Lid 90 degrees and attach Holding Strap to inner sides of Chest and Lid, allowing Lid to open no more than 95 degrees.
Large Gold Coins
With D, make 10. With F, make 5. Use the smaller hook.
- Step 1: Ch 4. Work 11 dc in 4th ch from hook. Join with sl st to top of ch-3. Fasten off.
Small Gold Coins
With D, make 10. With F, make 5. Use the smaller hook.
- Step 1: Ch 3. Work 8 hdc in 3rd ch from hook. Join with sl st to first hdc. Fasten off.
String of Pearls
Make 2 with the smaller hook and E.
- Step 1: Ch 4.
- Row 1: *Bobble in 4th ch from hook, ch 1, sl st in 2nd ch from hook, ch 5; rep from * until work measures 10 in. [25.5 cm], ending with Bobble in 4th ch from hook. Fasten off.
Gemstones
Finish each gemstone through Round 5 before adding its light stuffing, then work the decrease rounds to close it. Make 2 in each Contrast G color: Smokey Blue, Purple Pansy, Orchid Hush, Velveteal, Red, Bleached Aqua, Ever After Pink, and Burgundy Plum. Use the smaller hook.
- Step 1: Ch 3, leaving a long tail for stuffing.
- Round 1: 6 hdc in 3rd ch from hook. Join with sl st to first hdc. (6)
- Round 2: Ch 2. 2 hdc in each hdc around. Join with sl st to first hdc. (12)
- Round 3: Ch 2. *2 hdc in next hdc, 1 hdc in next hdc; rep from * around. Join with sl st to first hdc. (18)
- Round 4: Ch 2. *2 hdc in next hdc, 1 hdc in each of next 2 hdc; rep from * around. Join with sl st to first hdc. (24)
- Round 5: Ch 1. 1 scbp around each hdc around. Join with sl st to first sc.
- Step 2: Stuff lightly with a strand of the same yarn used.
- Round 6: Ch 1. (Sc2tog) 12 times. (12)
- Round 7: Ch 1. (Sc2tog) 6 times. (6)
- Round 8: Ch 1. (Sc2tog) 3 times. Fasten off, leaving a long tail. Weave tail through rem 3 sts, pull tightly, and fasten off. (3)
Working to Fit
The Horizontal Straps, Lid Top, and Lining for Lid Top are worked to fit adjoining pieces rather than to a fixed row count. Check their fit regularly and stop at the measurements specified in their instructions.
Optional Belt Tacking
After wrapping the Vertical Belts around the Chest and Lid, tack them in place if desired while leaving the ends free to pass through the Belt Loops.
Tips for the Best Results
- Check both gauges: The main chest and the small treasure pieces use different hooks and gauge measurements. Make separate swatches so the panels fit their frame and the smaller pieces don't become unexpectedly loose.
- Mark fitted pieces: When a strap or lid panel reaches the correct length, place a marker in the working loop and test it against the assembled section before fastening off.
- Distribute joining stitches evenly: When joining around an edge without a fixed stitch count, spread the sc evenly and avoid crowding the corners. Three sc in each base corner gives the turn enough room.
- Stuff the gemstones lightly: Use only the strand of matching yarn specified. Heavy stuffing can stretch the velvet stitches and make the decrease rounds harder to close.
Get a Neater Texture Pattern
For the long sc worked into a skipped stitch 2 rows below, draw the loop up to the height of the current row before completing the stitch. If that loop is too short, the panel can pucker; if it's too loose, the stitch may sit away from the fabric.
Keep the color not in use relaxed at each change, and turn consistently. The chest panels need to lie flat enough to wrap smoothly around their plastic canvas pieces.
Ways to Adapt Your Treasure Chest
- Change the main yarn: You can use another super bulky yarn for A, B, and C if it meets both listed main-fabric gauges. A thinner or less substantial yarn may leave the frame more noticeable and can change the panel measurements.
- Use different treasure colors: The coin, pearl, and gemstone colors are easy to vary. Keep the same yarn type and hook when you want the pieces to remain close to the listed scale.
- Adjust the number of play pieces: Make fewer or more coins and gemstones as desired. The chest construction doesn't depend on their quantity, although every additional stuffed gemstone adds more finishing time.
- Make fixed straps removable: The Vertical Belts may be left less heavily tacked so their free ends can still pass through the loops. Don't omit the secure attachment points at the front or allow the belts to interfere with the lid hinge.
- Resize with caution: A different chest size requires coordinated changes to every outer panel, lining panel, strap, and plastic canvas piece. Keeping the listed size is the safest choice unless you're comfortable drafting all of those parts together.
Fixing Fit and Assembly Problems
- The panel puckers: Check the long sc worked 2 rows below and pull its loop up to the current row height before finishing the stitch. Also make sure your color changes aren't drawing the side edge inward.
- The lining won't sit flat: Confirm that the lining seams face the intended direction and that each lining panel matches its corresponding outer panel. Ease small differences around the top edge instead of gathering all the excess in one place.
- The lid top doesn't meet the sides: Measure the crocheted Top along the curved edge before fastening off. Add or remove a full Texture Pat repeat when possible, then check that both Lid Sides have been increased to the same straight-edge length.
- The frame twists: Recheck the plastic canvas dimensions and corner alignment before enclosing it. A frame joined with one panel reversed or offset will pull the crochet layers out of line.
Fill and Enjoy Your Finished Chest
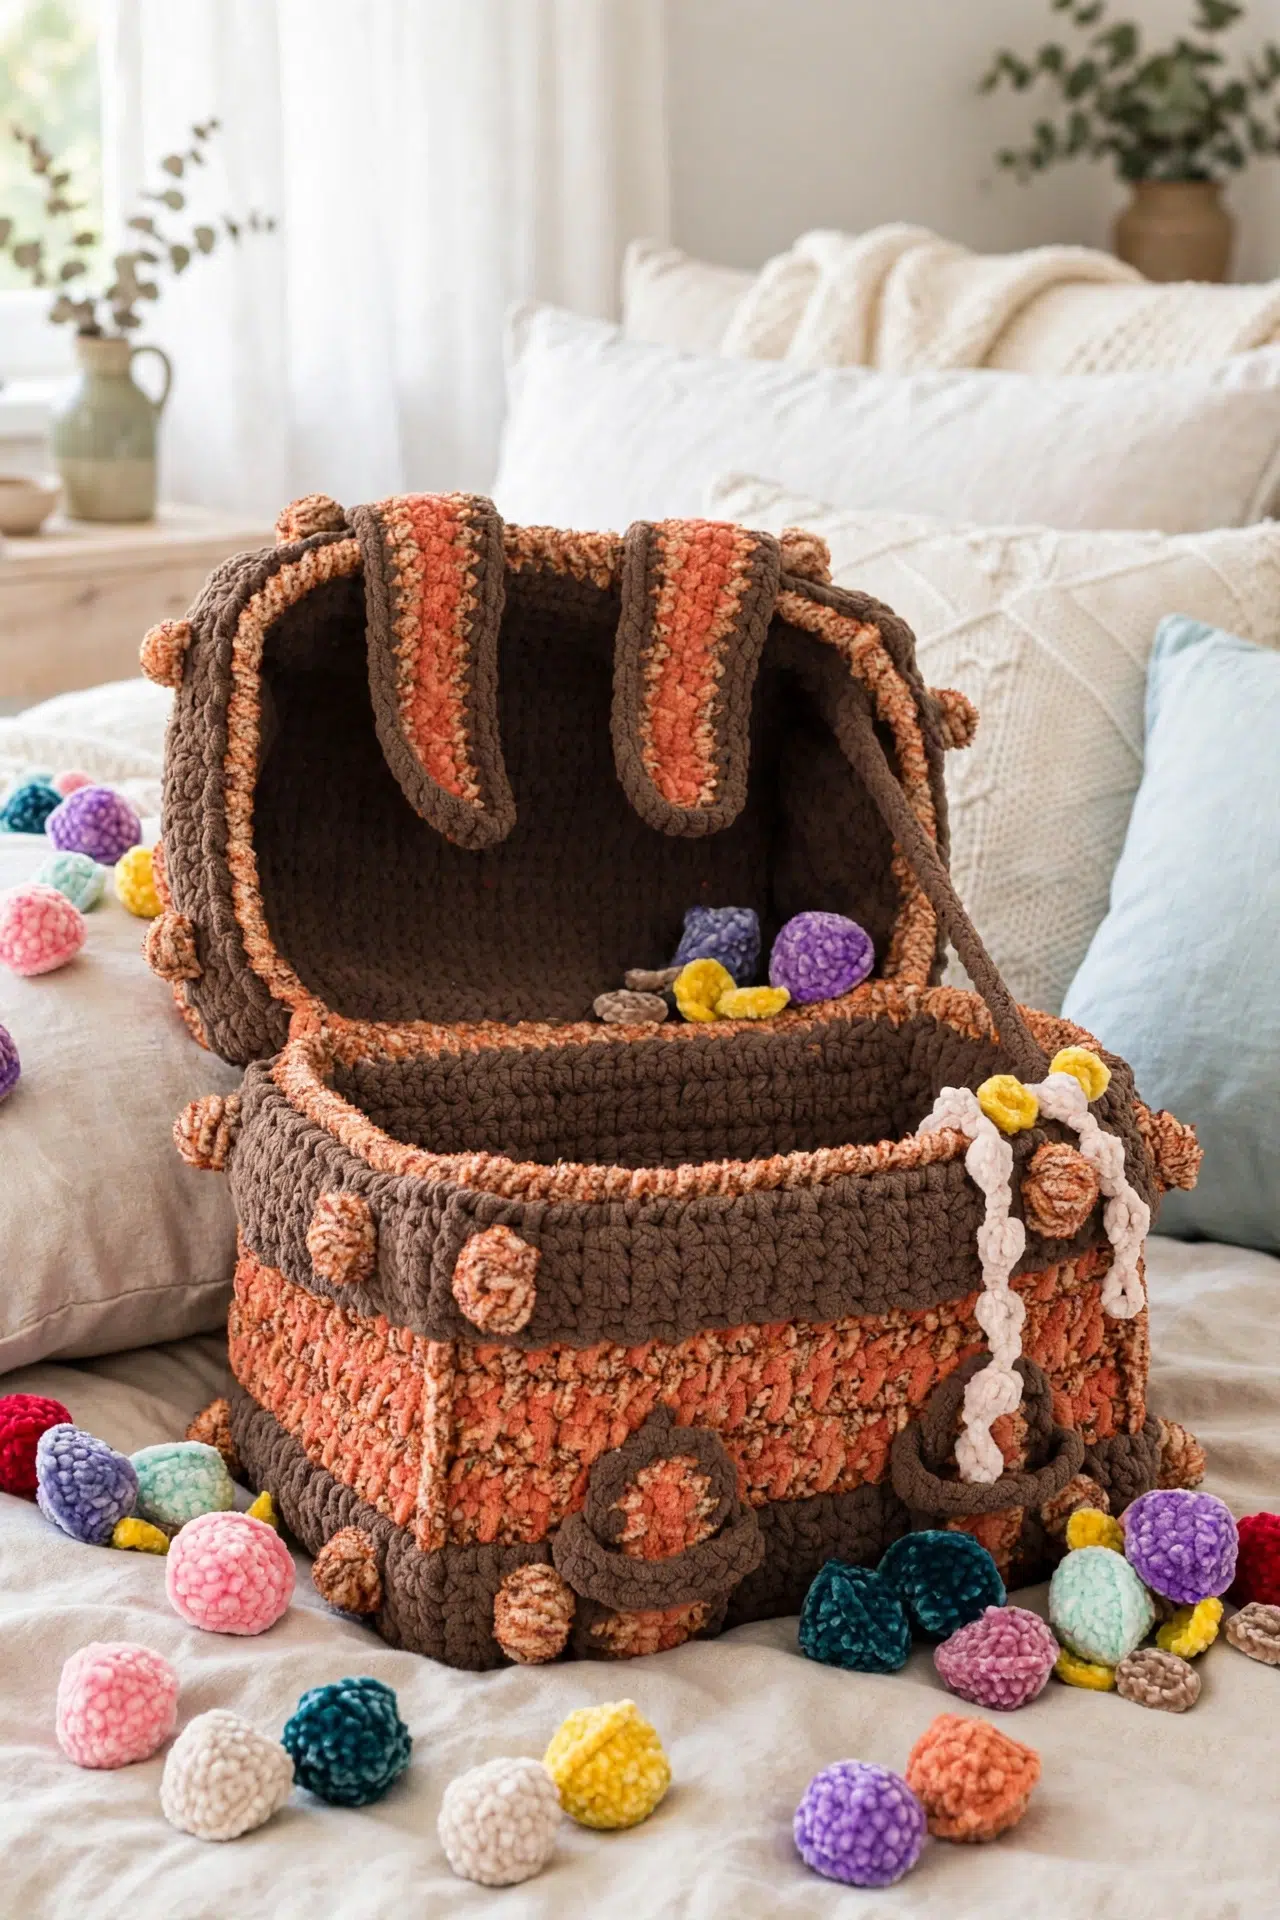
Fill the completed chest with its crocheted coins, pearl strings, and gemstones so all the pieces stay together between play sessions. The lid's holding strap is designed to limit how far it opens.
Give the set as one complete handmade gift, with every small piece placed inside the chest. If it will be used around young children, consider the size of the loose pieces and provide age-appropriate supervision.
Care Instructions
Because the assembled chest encloses plastic canvas, don't put it in a washing machine or dryer. Spot clean the chest with a damp cloth and mild cleaner, then let it air-dry completely. Follow the yarn labels when cleaning removable treasure pieces, and avoid heat that could affect the yarn or plastic canvas.
More Crochet Toy Patterns
- Pocket Parrot Amigurumi: A Low-Sew Crochet Pattern With Just Two Seams
- Pocket Alien & UFO Amigurumi: A Two-Piece Crochet Pattern With Puff Stitch Details
- Crochet Chicken and Chick Set
Frequently Asked Questions
When should I insert the plastic canvas frame?
Insert the body frame after both the outer chest and lining have been assembled. The frame sits inside the outer chest, and the lining goes inside the frame with wrong sides together. Round 1 at the top edge joins both crochet layers while enclosing the canvas, so check every corner before you begin that round.
How do I know when the Lid Top is long enough?
Stop when the piece fits along the full curved edge of a completed Lid Side. Row count can vary because this length depends on your actual gauge and the final shaping of the side. Pin the Top in place temporarily, making sure it reaches both bottom corners without stretching or rippling, before you fasten off.
Why does the lid need a Holding Strap?
The Holding Strap limits the lid to an opening of no more than 95 degrees. Attach it while the lid is open at 90 degrees so you can judge the length and placement accurately. Without that limit, the lid can pull backward against the crocheted hinge seam.
Can I stuff the gemstones with regular toy stuffing?
The pattern uses a strand of the same yarn for light stuffing. That small amount supports the shape without forcing apart the velvet stitches or making the decrease rounds bulky. If you substitute another filling, use very little and keep it away from the working loops as you close the final rounds.
Share this pattern with a crocheter who'd enjoy building a whole play set one satisfying piece at a time. Tell me which treasure piece you most enjoyed making!



