
A tiny alien with a giant head and a UFO he can actually sit inside — this one is really two patterns in one, and together they make one of those projects that looks far more complicated than it actually is. Every limb, antenna, and little UFO foot is built with the same simple puff stitch, so once you've got that technique down, the rest is just repetition.
Quick Overview
You'll crochet two separate pieces here: a small alien (head and body worked as one continuous piece, plus puff stitch arms, legs, and antennae) and a UFO he sits inside (a two-tone seat that becomes an inner lining, wrapped in a shaped exterior shell, finished with a slip-stitch trim, a middle ring, and a few puff stitch feet). Once both pieces are done, your alien simply sits down inside the UFO — no extra assembly stitching is needed to join them.
Hook size: Neither piece specifies an exact hook size, so pick one that suits your yarn weight. If you're working with a plush or velvet-style bulky yarn like the one used here, a 5mm or 6mm hook is a reasonable starting point — just make sure your tension is tight enough that no stuffing peeks through the stitches.
A couple of things worth knowing before you start:
- If you're working with a Chanel-style velvet yarn, some shedding is completely normal as you crochet. Just pinch away the loose fibers as you go — it settles down once the piece is finished.
- Attaching plastic safety eye backings can be fiddly. A dedicated safety-eye insertion tool makes this much easier and faster than pressing them on by hand.
Materials
- Plush or velvet-style bulky yarn in green (for the alien)
- Plush or velvet-style bulky yarn in dark gray and light gray (for the UFO)
- 12mm plastic safety eyes
- Polyester stuffing
- Yarn needle
- Scissors
- A stitch marker, or a scrap of contrasting yarn to mark your rounds
- Optional: a safety-eye insertion tool, to make attaching the eye backings quicker and easier
Stitch Abbreviations
- ch – chain
- sc – single crochet
- inc – increase (2 sc into the same stitch)
- dec – decrease (sc 2 stitches together — invisible or regular, your choice)
- sl st – slip stitch
- yo – yarn over
- st / sts – stitch / stitches
- rnd – round
- FLO – front loops only
- BLO – back loops only
Part One: The Alien

Head & Body (worked as one continuous piece, in green)
Rnd 1: Ch 2, then work 8 sc in the 2nd chain from your hook. (If you'd rather use a magic ring, that works equally well — just work 8 sc into the ring.) (8 sts)
Rnd 2: Increase in every stitch around (2 sc in each of the 8 sts). (16 sts)
Rnd 3: *Sc 1, increase in the next stitch; repeat from * around, for a total of 8 repeats. (24 sts)
Rnds 4–6: Sc around with no increases or decreases (three straight rounds). (24 sts each round)
Rnd 7: Decrease all the way around. This round is still fairly wide, so an invisible decrease (working into the front loop of each of the next two stitches, then completing them together) gives the neatest result here, though a regular decrease works too. (12 sts)
Now attach the safety eyes. Place 12mm eyes between rounds 5 and 6, about 5 stitches apart, positioned to the sides of the face. Once you're happy with the placement, secure the backings. This is also a good point to add a small amount of stuffing to the head — pack it firmly, but don't stretch the stitches so much that the stuffing shows through.
Rnd 8: Decrease all the way around. At this tighter stage, a regular decrease (pull up a loop in each of the next 2 stitches, then yarn over and pull through all 3 loops) is easier to manage than an invisible one. (6 sts)
Rnd 9: Increase in every stitch around. (12 sts)
Rnd 10: *Sc 3, increase in the next stitch; repeat from * around, for a total of 3 repeats. (15 sts)
Rnd 11: Sc around (one straight round). (15 sts)
Rnd 12: *Sc 3, decrease; repeat from * around, for a total of 3 repeats.
Add stuffing to the body now, before the opening gets too small to work with. (12 sts)
Rnd 13: Decrease all the way around (6 decreases total). (6 sts)
Fasten off, leaving a fairly long tail — you'll use this to sew the opening closed later.
Arms (puff stitch — make 2)
Attach the arms between rounds 9 and 10, positioned out to the sides of the body. It's worth waiting until after the eyes are placed to add these, since arm placement depends on knowing exactly where the front of the face is — you don't want one arm ending up around the back.
Using green yarn (or whichever color you'd like the arms to be):
- Yarn over, insert your hook into your chosen stitch, yarn over, and pull through a loop to attach your yarn.
- Yarn over, insert your hook into the same stitch, yarn over, pull through a loop. Repeat this two more times into the same stitch (3 repetitions total — you'll have 7 loops on your hook).
- Yarn over and pull through all 7 loops.
- Chain 1 to secure the puff.
- Fasten off with a long tail.
Pull the fastening-off tail back into the body — this draws the puff stitch down against the body for a nice rounded arm shape. Pull the starting tail in as well, so both ends disappear inside. Repeat for the second arm, matching the placement on the opposite side.
Legs (puff stitch — make 2)
Attach the legs between rounds 11 and 12. Positioning them slightly toward the front of the body (rather than out to the sides) gives the alien a cute seated look. Use the same puff stitch method as the arms:
- Attach yarn with a yarn over and pulled-through loop.
- Yarn over, insert into the same stitch, yarn over, pull through a loop — repeat a total of 3 times (7 loops on your hook).
- Yarn over and pull through all 7 loops.
- Chain 1 to secure.
- Fasten off with a long tail and pull it into the body, along with the starting tail.
Repeat for the second leg.
Antennae (make 2)
Antennae sit between rounds 2 and 3 of the head, positioned to the sides. Insert your hook under a stitch in that spot, attach your yarn, then chain 3. Pull the tail firmly to help the tiny chain hold its shape without unraveling, then either snip the end or tie a small knot at the top for extra security. Repeat on the opposite side of the head for the second antenna.
Finishing the Alien
Weave in all remaining loose ends. Thread your long fastening-off tail (from round 13) onto a yarn needle and close the body opening with a running stitch through the front loops only — in one front loop, out the next, all the way around — keeping the stitches loose until you've gone all the way around, then pulling tight to cinch the hole shut. Weave in the last of the tail and snip.
Part Two: The UFO
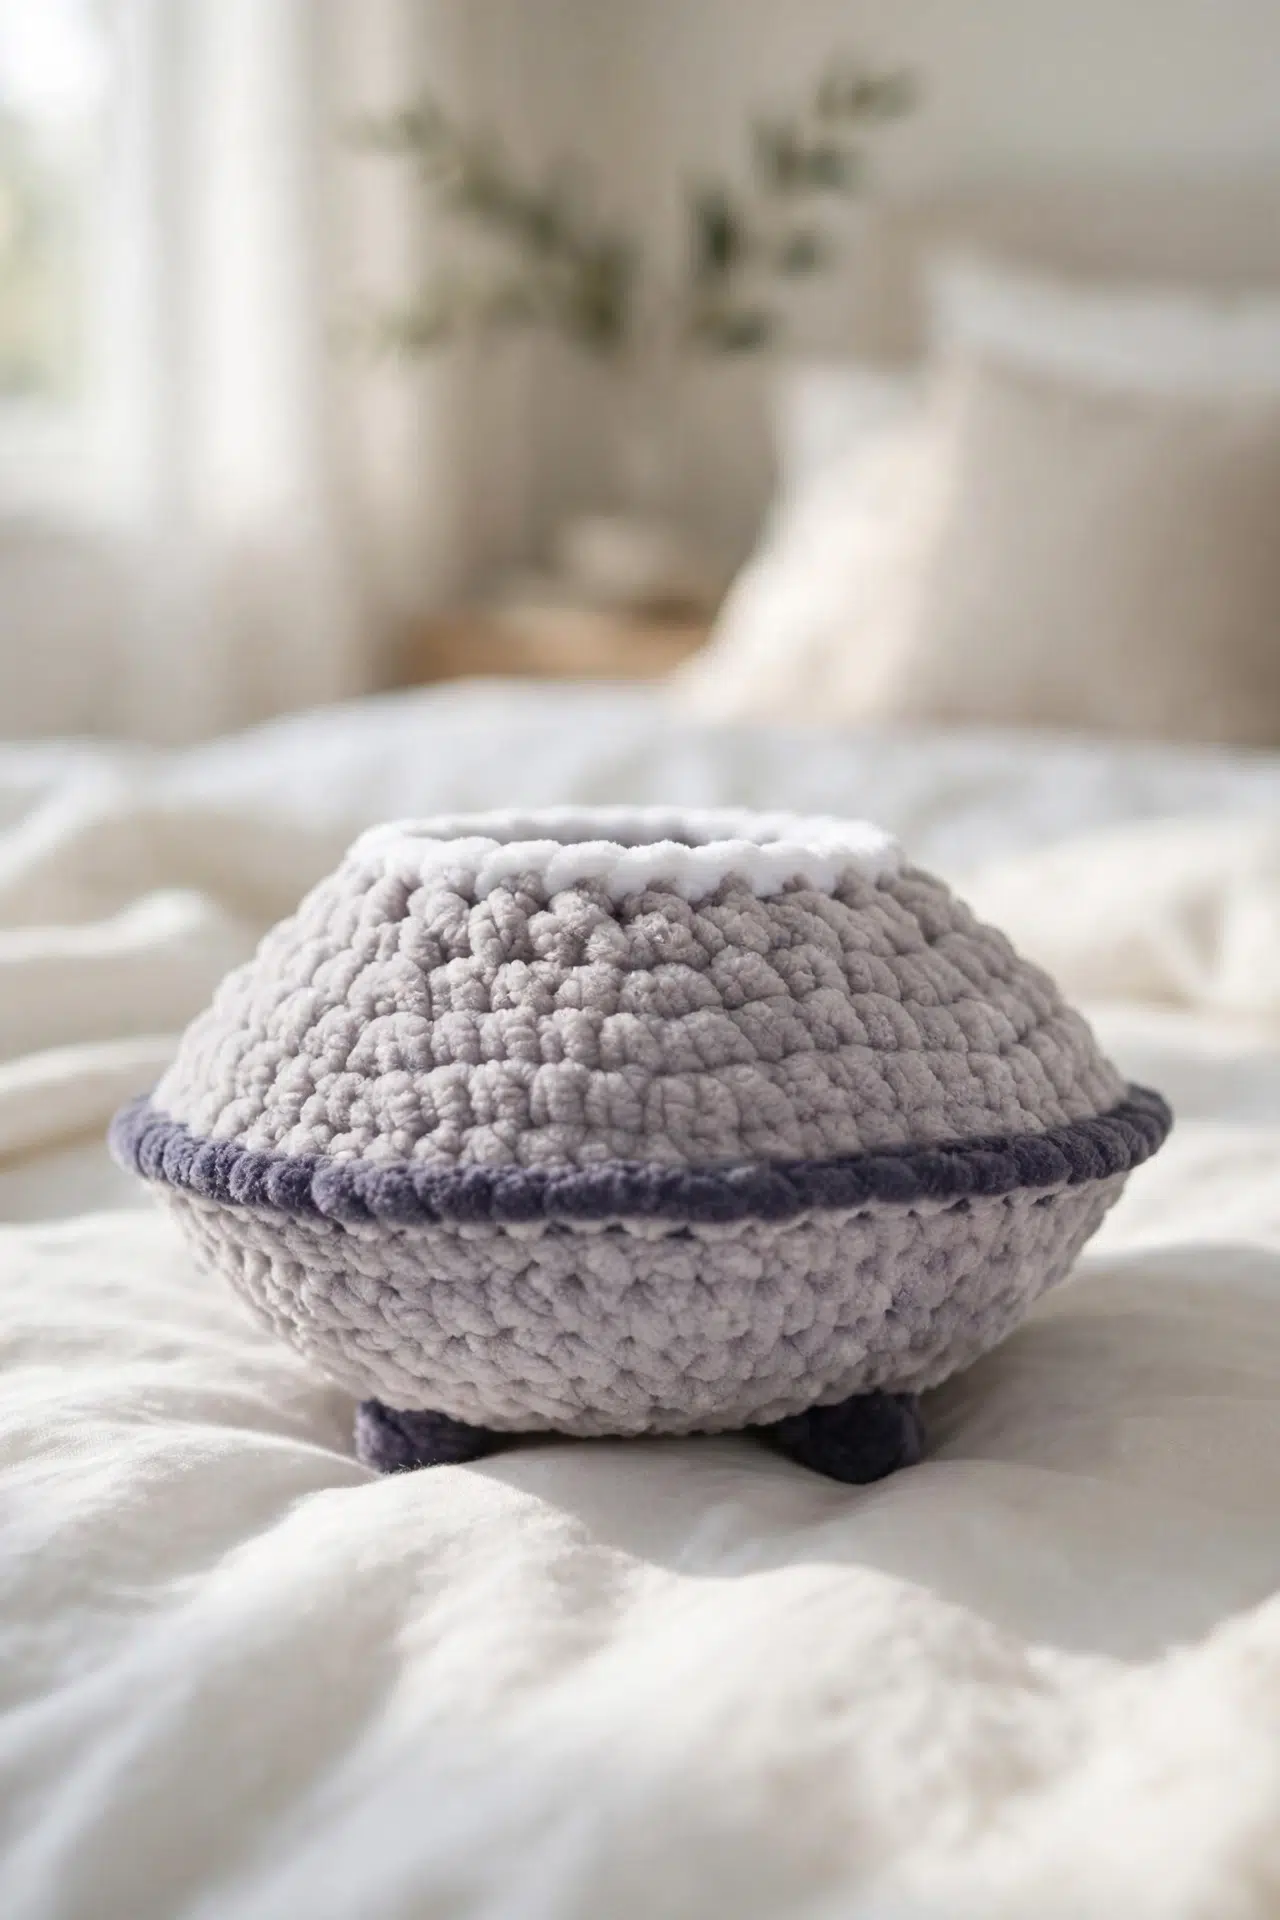
The Seat (interior lining, worked in dark gray then light gray)
Rnd 1: Ch 2, then work 8 sc in the 2nd chain from your hook (or 8 sc into a magic ring). (8 sts)
Rnd 2: Increase in every stitch around. (16 sts)
Rnd 3: *Sc 1, increase; repeat from * around, for a total of 8 repeats. (24 sts)
Rnds 4–8: Sc around with no shaping (five straight rounds) — this is what gives the seat its height. (24 sts each round)
Rnd 9: Switch to light gray here (finish the last stitch of round 8 by pulling the new color through). Sc around. (24 sts)
Fasten off the dark gray once round 9 is complete. Unlike a typical amigurumi piece, don't turn this one right side out — leave the right side facing in. The seat becomes the inner lining of the finished UFO, and only its wrong side will ever be visible once the exterior shell is added.
The Exterior Shell (continuing directly from the seat, in light gray)
Rnd 10: Working in back loops only, *sc 2, increase in the next stitch; repeat from * around. (32 sts)
Rnd 11: Back to working through both loops as normal. *Sc 3, increase; repeat from * around, for a total of 8 repeats. (40 sts)
Rnd 12: *Sc 4, increase; repeat from * around. (48 sts)
Rnd 13: *Sc 5, increase; repeat from * around. (56 sts)
Rnd 14: Sc around, both loops as normal (one straight round). (56 sts)
Rnd 15: Sc around, this time working in back loops only. (56 sts)
You'll notice an unworked front loop ridge left behind from rounds 10 and 15 — set those aside mentally, since you'll come back to both of them later for the trim and the middle ring.
Rnd 16: *Sc 5, decrease; repeat from * around, for a total of 8 repeats. An invisible decrease (working into the front loop of the next two stitches before completing them together) keeps this nice and neat. (48 sts)
Rnd 17: *Sc 4, decrease; repeat from * around. (40 sts)
Rnd 18: *Sc 3, decrease; repeat from * around. (32 sts)
Rnd 19: *Sc 2, decrease; repeat from * around. (24 sts)
Rnd 20: *Sc 1, decrease; repeat from * around. (16 sts)
At this point the piece will look a bit misshapen — that's normal. Lightly stuff the bottom of the UFO now, using your fingers to round out the shape as you go. Stuff gently rather than firmly, and make sure the seat stays pressed down into place rather than puffing outward — your alien needs somewhere to actually sit.
Rnd 21 (final round): Decrease all the way around, for a total of 8 decreases. A regular decrease is easiest to manage at this tight stage. (8 sts)
Fasten off with a long tail for sewing the opening closed later. Working this last round can distort the shape a little, so gently reshape the UFO afterward — round out the bottom and make sure the seat is still pressed down rather than pushed inward.
Upper Trim
Find the unworked front loops left behind from round 10. Starting at the first one, pull your yarn through (continuing in your exterior light gray, or any accent color you'd like), then slip stitch into each front loop all the way around. Fasten off and weave in the ends.
Middle Ring (dark gray)
Find the unworked front loops left behind from round 15. Pull dark gray yarn through the first one, then slip stitch into each following front loop all the way around. When you reach the beginning again, you can add one more slip stitch into that very first stitch to close the ring neatly. Fasten off and weave in the ends.
Feet (puff stitch — make 3 or 4)
The feet sit between rounds 19 and 20, spaced around the bottom of the UFO. Three feet is the minimum for good balance, though four works nicely too — use dark gray, or any color you like.
For each foot:
- Pull yarn through your chosen spot to attach it.
- Yarn over, insert your hook into the same stitch, yarn over, pull up a loop. Repeat this two more times into the same stitch (3 repetitions total — you'll have 7 loops on your hook).
- Yarn over and pull through all 7 loops.
- Chain 1 to secure the puff.
- Fasten off, then pull the tail back into that same stitch — this draws the puff down snugly against the body for a chubby little foot shape.
Pull the starting tail in as well, and knot the starting and ending tails together on the inside for extra security. Repeat for each additional foot, spacing them evenly around the bottom.
Finishing the UFO
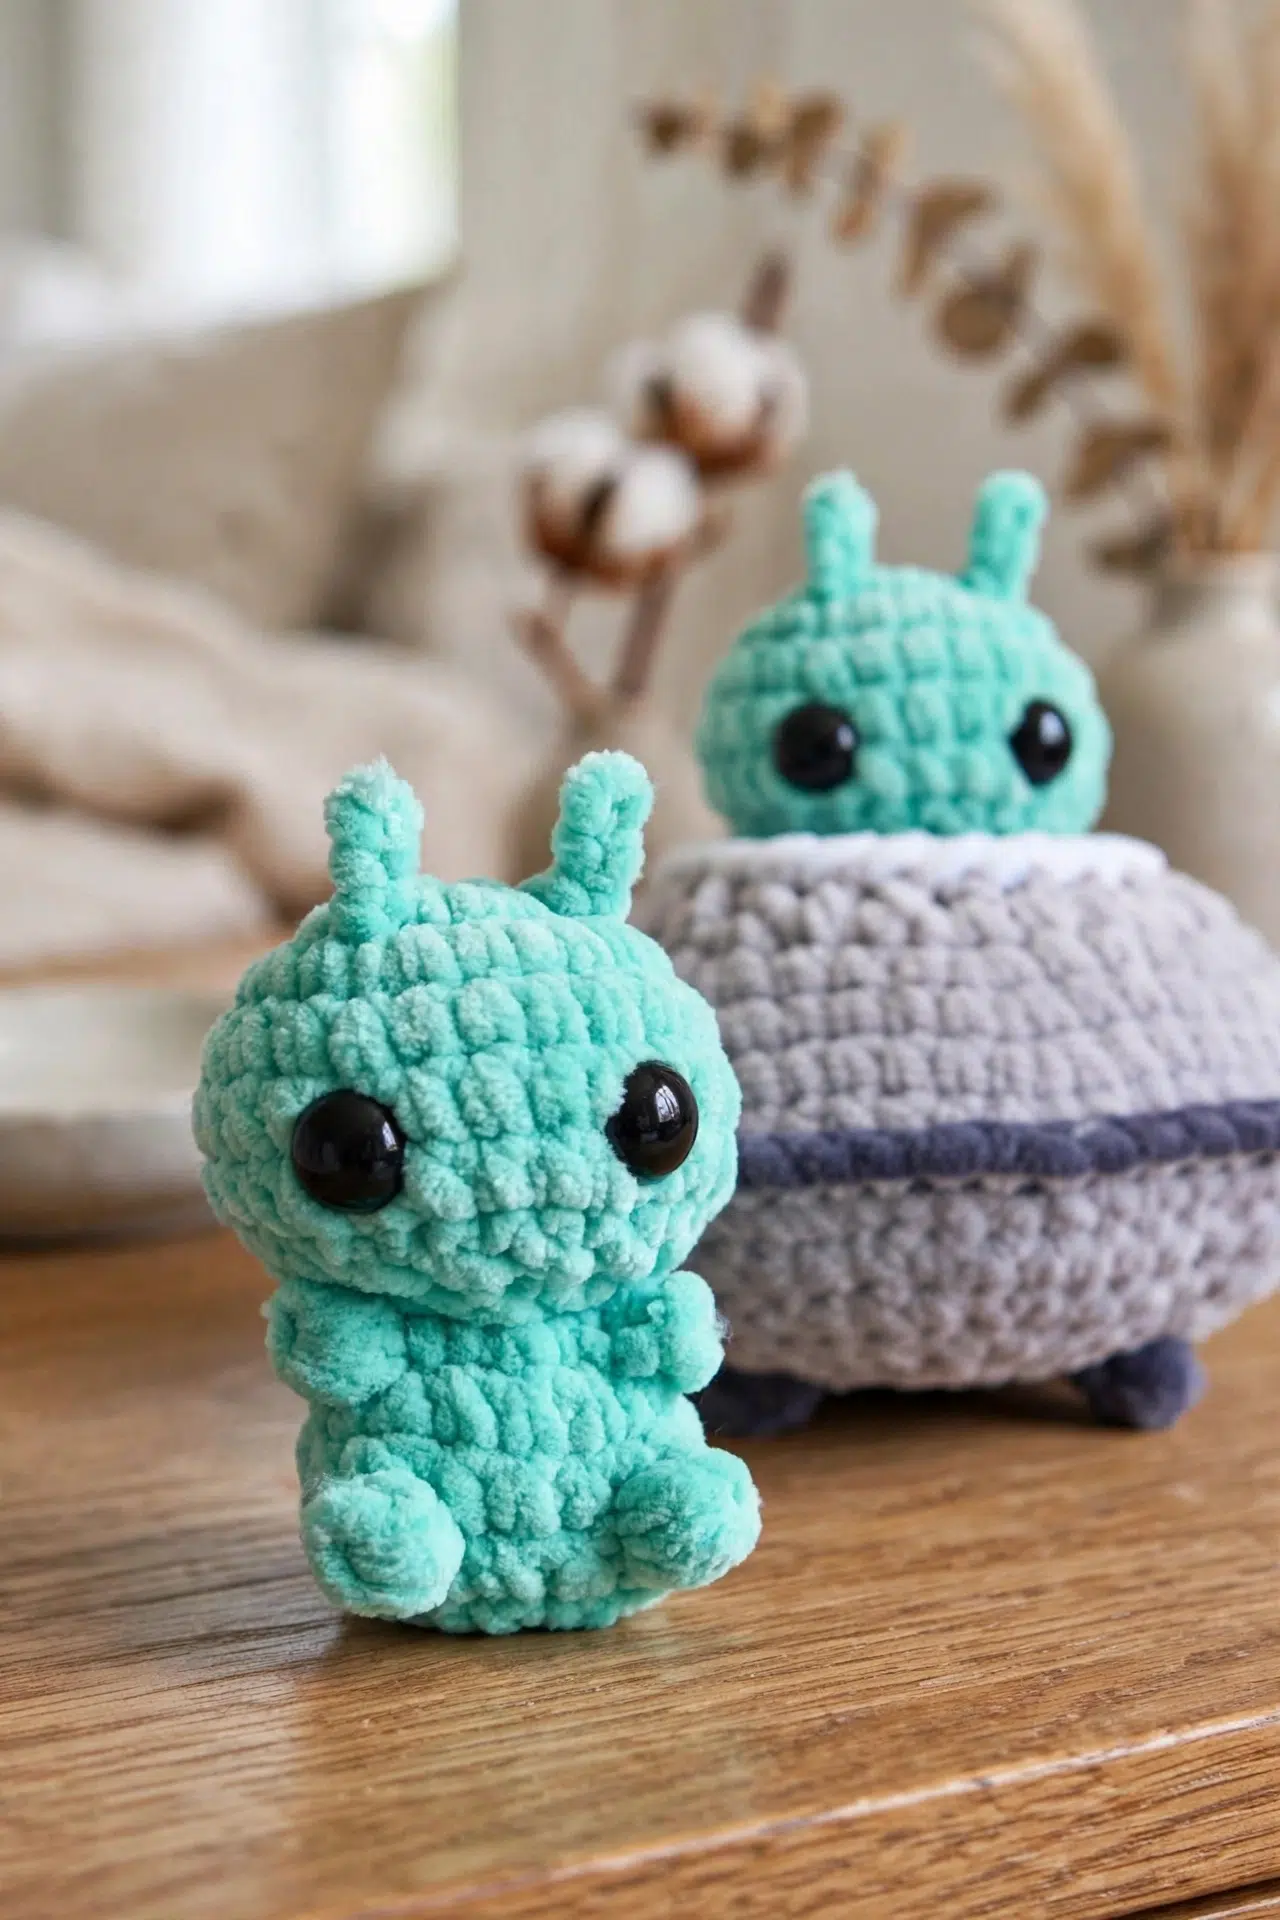
Weave in all remaining loose ends from the trim and middle ring before closing the opening. Thread your long fastening-off tail (from round 21) onto a yarn needle and close the hole with a running stitch through the front loops only, going in and out around the opening while keeping the yarn loose. Once you've gone all the way around, pull the tail tight to cinch the hole shut, then weave in the last bit of tail and snip.
Check the overall shape one more time — closing up the hole can leave things a little lopsided. Gently push and reshape until the bottom is nicely rounded and the seat sits properly pressed down.
Bringing It Together
Once both pieces are finished, simply set your alien down inside the seat of the UFO — no sewing needed to join them, since the seat shape holds him in place on its own. Make a few of these in different color combinations and you've got yourself a whole little outer-space colony.
If you're sharing your finished project as part of a designer's creator challenge, tagging it with the relevant challenge hashtag is a nice way to get it added to the community showcase.



