
When you're after a quick, cheerful Easter project that uses small amounts of yarn, this Crochet Chicken and Chick Set is ready for your hook. The two pieces are worked separately, so you can finish the full set or enjoy one small make at a time.

Simple joined rounds do most of the work, with steady increases, straightforward decreases, and details added from short lengths of yarn. There's no complicated shaping or long assembly session, which keeps the project friendly and satisfying!
Jump to:
Why I Love This Pattern
- Two complete pieces: You get separate instructions for the mama chicken and baby chick, making it easy to work through the set in manageable stages.
- Approachable shaping: The bodies grow and close through regular increases and sc2tog decreases. Clear stitch counts help you check your work before moving on.
- Minimal notions: The eyes, beaks, comb, and wattles all use yarn, so you don't need extra plastic features or specialized findings.
- Scrap-friendly details: Several colors are used in short sections, giving you a practical place to use smaller amounts left from other projects.
Pattern Details
- Skill Level: Beginner
- Yarn Weight: Sport/Baby
- Time to Make: about 4-6 hours
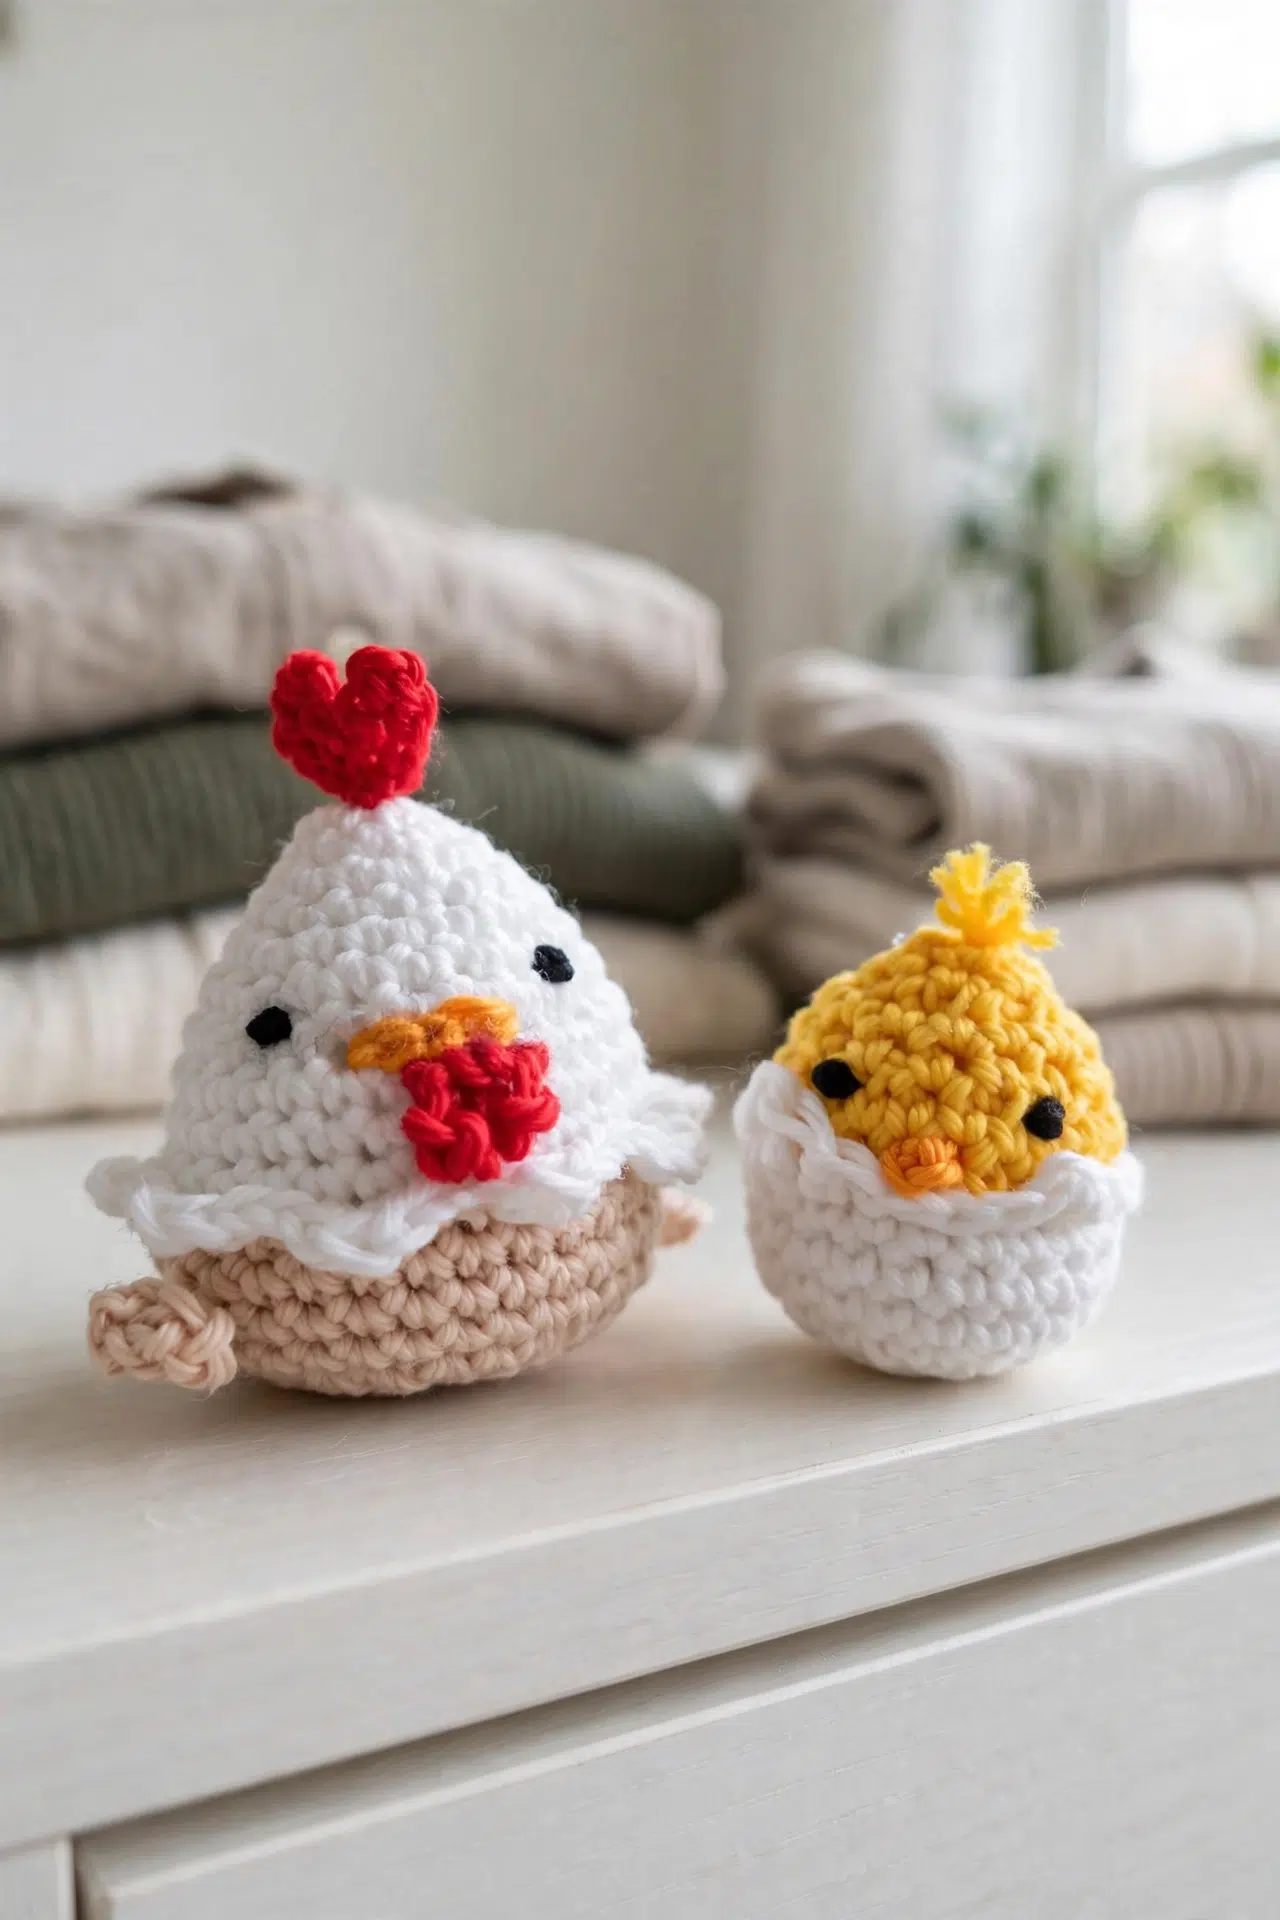
Yarn and Supplies
Gather your Sport/Baby weight yarn, a 3.00 mm hook, stuffing, and basic finishing tools before you begin. Keeping every color nearby makes the small detail sections easy to complete as soon as each body is closed.
- Sport/Baby weight yarn in White, Yellow, Orange, Black, Brown and Red: The eyes are made with knotted yarn rather than separate safety eyes, so leave enough length on both ends to sew each knot securely into the head.
- 3.00 mm crochet hook or similar
- Toy stuffing or yarn scraps for stuffing: Either option works, but add yarn scraps in small pieces so you can distribute them evenly and avoid firm lumps.
- Yarn needle
- Scissors
Abbreviations
- ch - chain
- chs - chains
- st - stitch
- sts - stitches
- sl st - slip stitch
- sc - single crochet
- hdc - half double crochet
- dc - double crochet
- sc2tog - single crochet 2 stitches together for decrease
How to Crochet the Chicken and Chick Set
Work each body in joined rounds, then add its sewn and embroidered details as directed.
Always start each round in the same stitch as the previous sl st. The beginning ch 1 does not count as a stitch throughout either body. Repeat instructions between asterisks for as long as stated.
Mama Chicken
- Round 1: Using white yarn, crochet 7 sc into a magic circle or ch 4 loop, sl st in first sc to join. Ch 1. (7)
- Round 2: 1 sc in each st around, sl st in first sc to join. Ch 1. (7)
- Round 3: 2 sc in each st around, sl st in first sc to join. Ch 1. (14)
- Round 4: 1 sc in each st around, sl st in first sc to join. Ch 1. (14)
- Round 5: *1 sc in next st, 2 sc in next st; rep from * around. Sl st in first sc to join. Ch 1. (21)
- Round 6: 1 sc in each st around, sl st in first sc to join. Ch 1. (21)
- Round 7: *1 sc in next 2 sts, 2 sc in next st; rep from * around. Sl st in first sc to join. Ch 1. (28)
- Rounds 8-10: 1 sc in each st around, sl st in first sc to join. Ch 1. (28)
- Round 11: In front loops only, sl st in first st, *[1 sc, 1 hdc, 1 sc] in next st, sl st in next 2 sts; rep from * around. Sl st in first skipped back loop to finish, join brown yarn with a ch 1, and fasten off white yarn.
- Round 12: In skipped back loops only, 1 sc in each st around, sl st in first sc to join. Ch 1. (28)
- Round 13: 1 sc in first 7 sts, ch 6, 1 dc in 4th ch from hook and in last 2 chs, 1 sc in next 14 sts, ch 6, 1 dc in 4th ch from hook and in last 2 chs, 1 sc in last 7 sts, sl st in first sc to join. Ch 1. (28)
The count does not include the wings.
- Rounds 14-15: 1 sc in each st around, skipping wings on the first round, sl st in first sc to join. Ch 1. (28)
- Round 16: *1 sc in next 2 sts, sc2tog; rep from * around. Sl st in first sc to join. Ch 1. (21)
- Round 17: *1 sc in next st, sc2tog; rep from * around. Sl st in first sc to join. Ch 1. (14)
Stuff at this point.
- Round 18: Sc2tog until end, sl st in first sc to join. Fasten off and sew the remaining hole closed. (7)
Mama Chicken Beak
- Step 1: Join orange yarn on the front of the face in the white part and work 3 sl sts across the face. Fasten off and sew in ends.
Mama Chicken Wattles
- Step 1: Using red yarn, *ch 5, sl st in first ch; rep from * once more. Fasten off and sew under the beak.
Mama Chicken Comb
- Step 1: Using red yarn, *ch 6, sl st in first ch; rep from * 2 more times. Fasten off and sew onto the head.
Mama Chicken Eyes
- Step 1: Cut 2 short lengths of black yarn and tie 2 knots in the centre of each. Sew the ends into the head so the knots catch on the outside.
Baby Chick
- Round 1: Using white yarn, crochet 7 sc into a magic circle or ch 4 loop, sl st in first sc to join. Ch 1. (7)
- Round 2: 2 sc in each st around, sl st in first sc to join. Ch 1. (14)
- Round 3: *1 sc in next st, 2 sc in next st; rep from * around. Sl st in first sc to join. Ch 1. (21)
- Rounds 4-6: 1 sc in each st around, sl st in first sc to join. Ch 1. (21)
- Round 7: In front loops only, 1 sc in first st, 1 hdc in next st, 1 dc in next st, ch 1, sl st in top of previous dc, 1 hdc in next st, 1 sc in next st, sl st in next 2 sts, 1 sc in next st, 1 hdc in next st, ch 1, sl st in top of previous hdc, 1 sc in next st, sl st in next 2 sts, 1 sc in next st, 1 hdc in next st, 1 dc in next st, ch 1, sl st in top of previous dc, 1 hdc in next st, 1 sc in next st, sl st in next 2 sts, 1 sc in next st, sl st in last st, sl st in first skipped back loop to join. Join yellow yarn with a ch 1 and fasten off white yarn. (21)
- Round 8: In skipped back loops only, 1 sc in each st around, sl st in first sc to join. Ch 1. (21)
- Round 9: 1 sc in each st around, sl st in first sc to join. Ch 1. (21)
- Round 10: *1 sc in next st, sc2tog; rep from * around. Sl st in first sc to join. Ch 1. (14)
- Round 11: 1 sc in each st around, sl st in first sc to join. Ch 1. (14)
Stuff at this point.
- Round 12: Sc2tog until end, sl st in first sc to join. Fasten off and sew the remaining hole closed. (7)
Use the tail ends to create some fluffy hair.
Baby Chick Beak
- Step 1: Join orange yarn on the front of the face and ch 3. Fasten off and sew in ends to create a little picot.
Baby Chick Eyes
- Step 1: Cut 2 short lengths of black yarn and tie 2 knots in the centre of each. Sew the ends into the head so the knots catch on the outside.
Tips for the Best Results
- Mark the first stitch: Place a removable marker in the first sc of each round. You must begin in the same stitch as the previous sl st, and the marker helps you avoid accidentally working into the joining slip stitch.
- Protect the back loops: When working the front-loop detail rounds, tilt the work toward you and check that every back loop remains free. Those loops become the foundation for the next body round.
- Count around the wings: The mama chicken still has 28 body stitches after the wings are formed. On the following round, work into the body stitches and pass behind each wing rather than crocheting into its chains or dc stitches.
- Stuff before the final decrease: Add filling at the stated round and shape it with your fingers before closing. Once only 7 stitches remain, there isn't much room to adjust the stuffing.
Ways to Adapt Your Chicken and Chick Set
- Use a different fiber: Another Sport/Baby weight yarn can work in cotton, acrylic, or a blend. Choose a fiber that makes a dense fabric at your tension so the stuffing doesn't work through the stitches.
- Adjust the hook carefully: Move down a hook size if your fabric has open gaps, or move up slightly if your hands are straining. A hook change will also alter the finished size because no gauge or finished measurement is specified.
- Fill with yarn scraps: Small yarn trimmings can replace toy stuffing as suggested. Cut long strands into shorter pieces and add them gradually, since tightly packed scraps can make the body heavier and less even.
- Choose your starting loop: Use either a magic circle or the ch 4 loop given in Round 1. The magic circle closes more tightly, while the chain loop may feel easier if you're still getting comfortable with adjustable rings.
- Make just one piece: The mama chicken and baby chick are constructed and finished independently. You can stop after either one without changing its instructions or needing parts from the other.
Keep the Joined Rounds on Track
- The stitch count keeps growing: Don't work into the joining sl st or count the beginning ch 1 as a stitch. Start the new round in the same stitch as the previous join and place a marker there.
- The next round has no free loops: You may have worked the decorative round through both loops. The front-loop details must leave the back loops unused because the next round is worked directly into them.
- The wings are being pulled inward: Skip over the wing stitches during the first round after they are made. Continue through the 28 body stitches behind them rather than crocheting into the wing chains or dc stitches.
Set Out Your Easter Pair
Place the finished set together on an Easter shelf, table, or mantel, or tuck the pair beside a seasonal basket. Since the pieces are separate, you can also spread them between two small display spots.
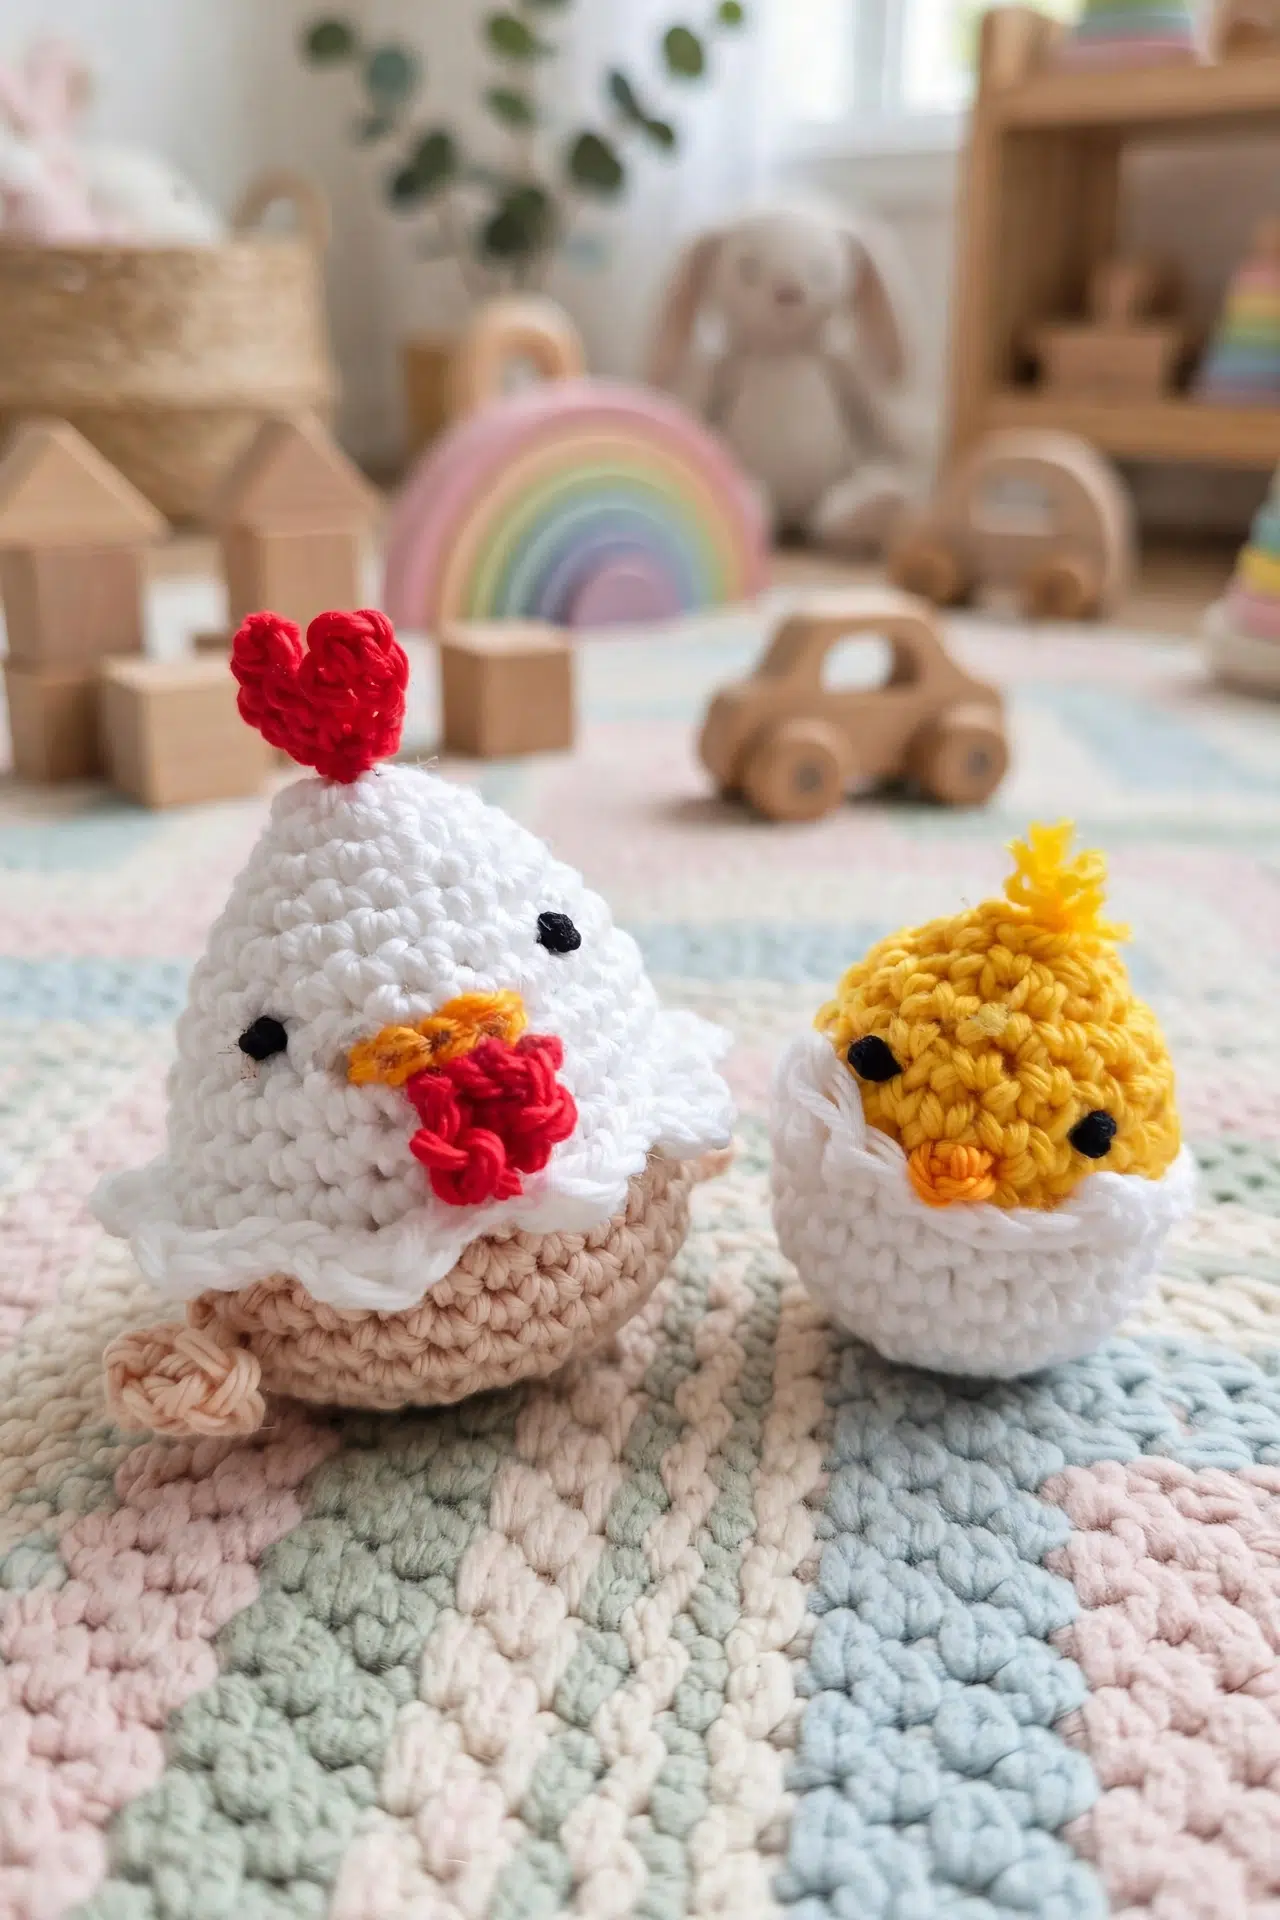
Washing & Care
The fiber content isn't specified, so follow the washing directions on your yarn label. Spot-cleaning is the safest choice for the stuffing and sewn yarn details. Reshape gently and let both pieces air-dry completely.
More Crochet Bird Amigurumi
- Emotional Support Chicken Crochet Pattern
- Meet Teodoro: A Dapper Amigurumi Goose Pattern Worth Every Single Stitch
- Pocket Parrot Amigurumi: A Low-Sew Crochet Pattern With Just Two Seams
Frequently Asked Questions
When should I stuff each body?
Stuff the mama chicken after Round 17 and the baby chick after Round 11. At those points, each opening still has 14 stitches, which gives your fingers enough room to distribute the filling. The final round decreases to 7 stitches, so waiting any longer makes it difficult to adjust the shape or fill the lower areas evenly.
Do I work in continuous spirals?
No, both bodies are worked in joined rounds. Finish each round with a sl st in the first sc, make the instructed ch 1, and begin the next round in that same stitch. The ch 1 never counts as a stitch, so working into it or the joining sl st will cause the stitch count to grow.
Are the mama chicken's wings included in the body count?
No, the wings aren't included in the 28-stitch body count. Round 13 forms each wing with a chain and dc stitches between sections of sc. During Round 14, skip those wing stitches and continue into the body stitches behind them so the main round remains at 28 stitches.
Why must the decorative rounds use front loops only?
The unused back loops provide the working path for the next body round. After completing the front-loop details, join into the first skipped back loop and work the following round through those saved loops. Catching both loops too early removes that foundation and can make the transition difficult to follow.
Can I use the ch 4 loop instead of a magic circle?
Yes, either starting method works for both bodies. Crochet the first 7 sc into your chosen centre, then join in the first sc. A magic circle lets you tighten the opening after the stitches are made, while the ch 4 loop gives you a fixed ring with no adjustable tail to manage.
Share how your chicken and chick turned out in the comments because I'd love to hear about your set! 🧶



