
If you've been hoping for a satisfying, giftable toy project with plenty of interesting details, this Crochet Llama Amigurumi is the one you just found. You'll make every part by hand, right down to the embroidered face, paired ears, little blanket, and tassels.

The crochet moves between cotton and chenille, with simple rounds broken up by shaping, leg joins, and a few thoughtful finishing steps. It's engaging enough for an intermediate maker without asking you to manage complicated colorwork or a long list of specialty stitches.
Jump to:
- Why This Pattern Is a Keeper
- Pattern Details
- Materials You'll Need
- Abbreviations
- How to Crochet the Llama Amigurumi
- Tips for Success
- Ways to Adapt Your Crochet Llama
- Fixing Joins, Counts, and Edges
- A Special Spot for Your Finished Llama
- Washing & Care
- More Farm Animal Crochet Patterns
- Frequently Asked Questions
Why This Pattern Is a Keeper
- Two yarn weights with clear roles: The DK cotton and super bulky chenille are each paired with a specific hook and used in defined sections, so every change has a purpose.
- The body joins as you crochet: All four legs connect directly during Round 14. That reduces separate sewing and gives you one continuous body construction to shape and stuff.
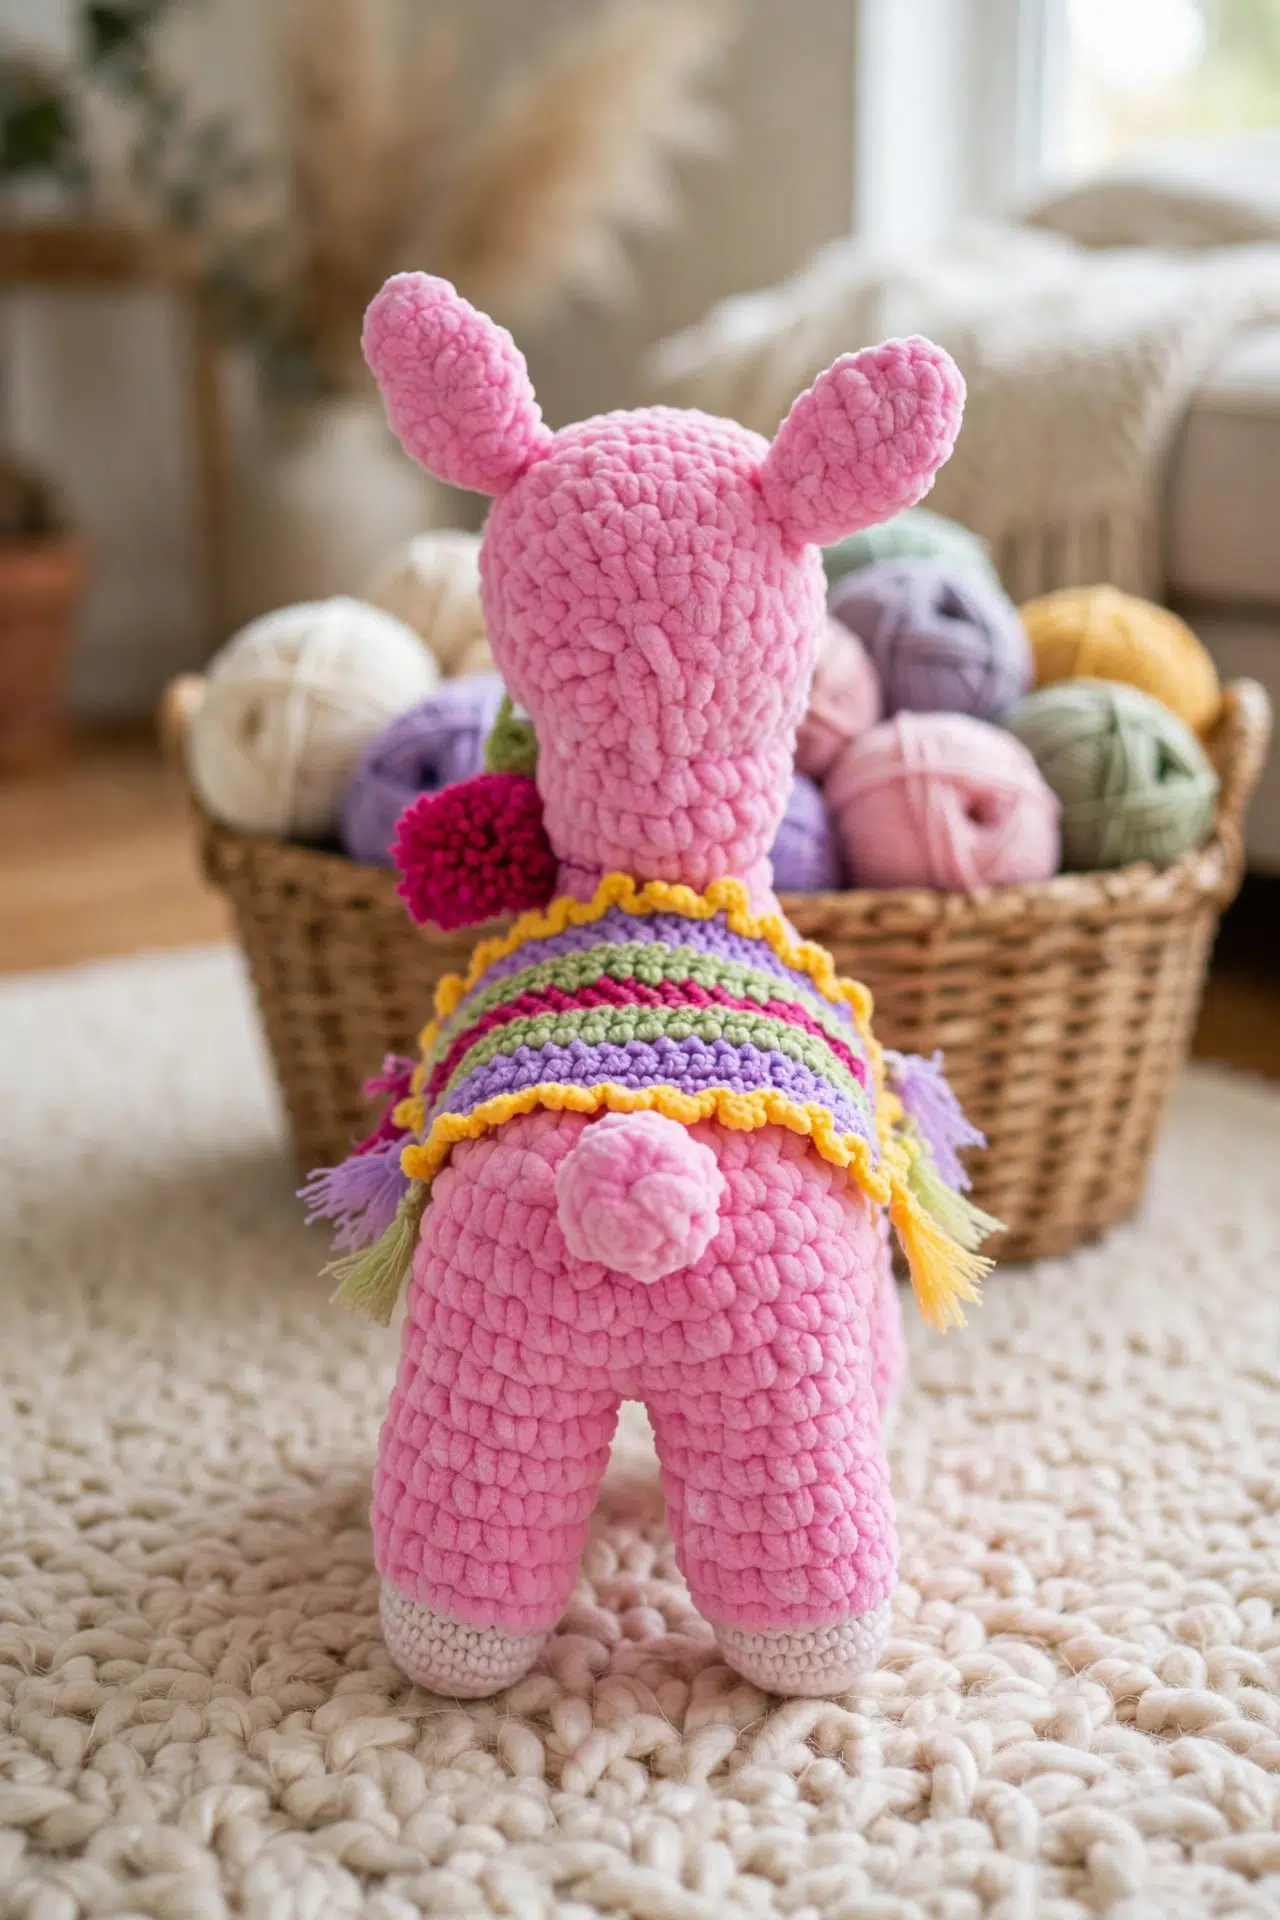
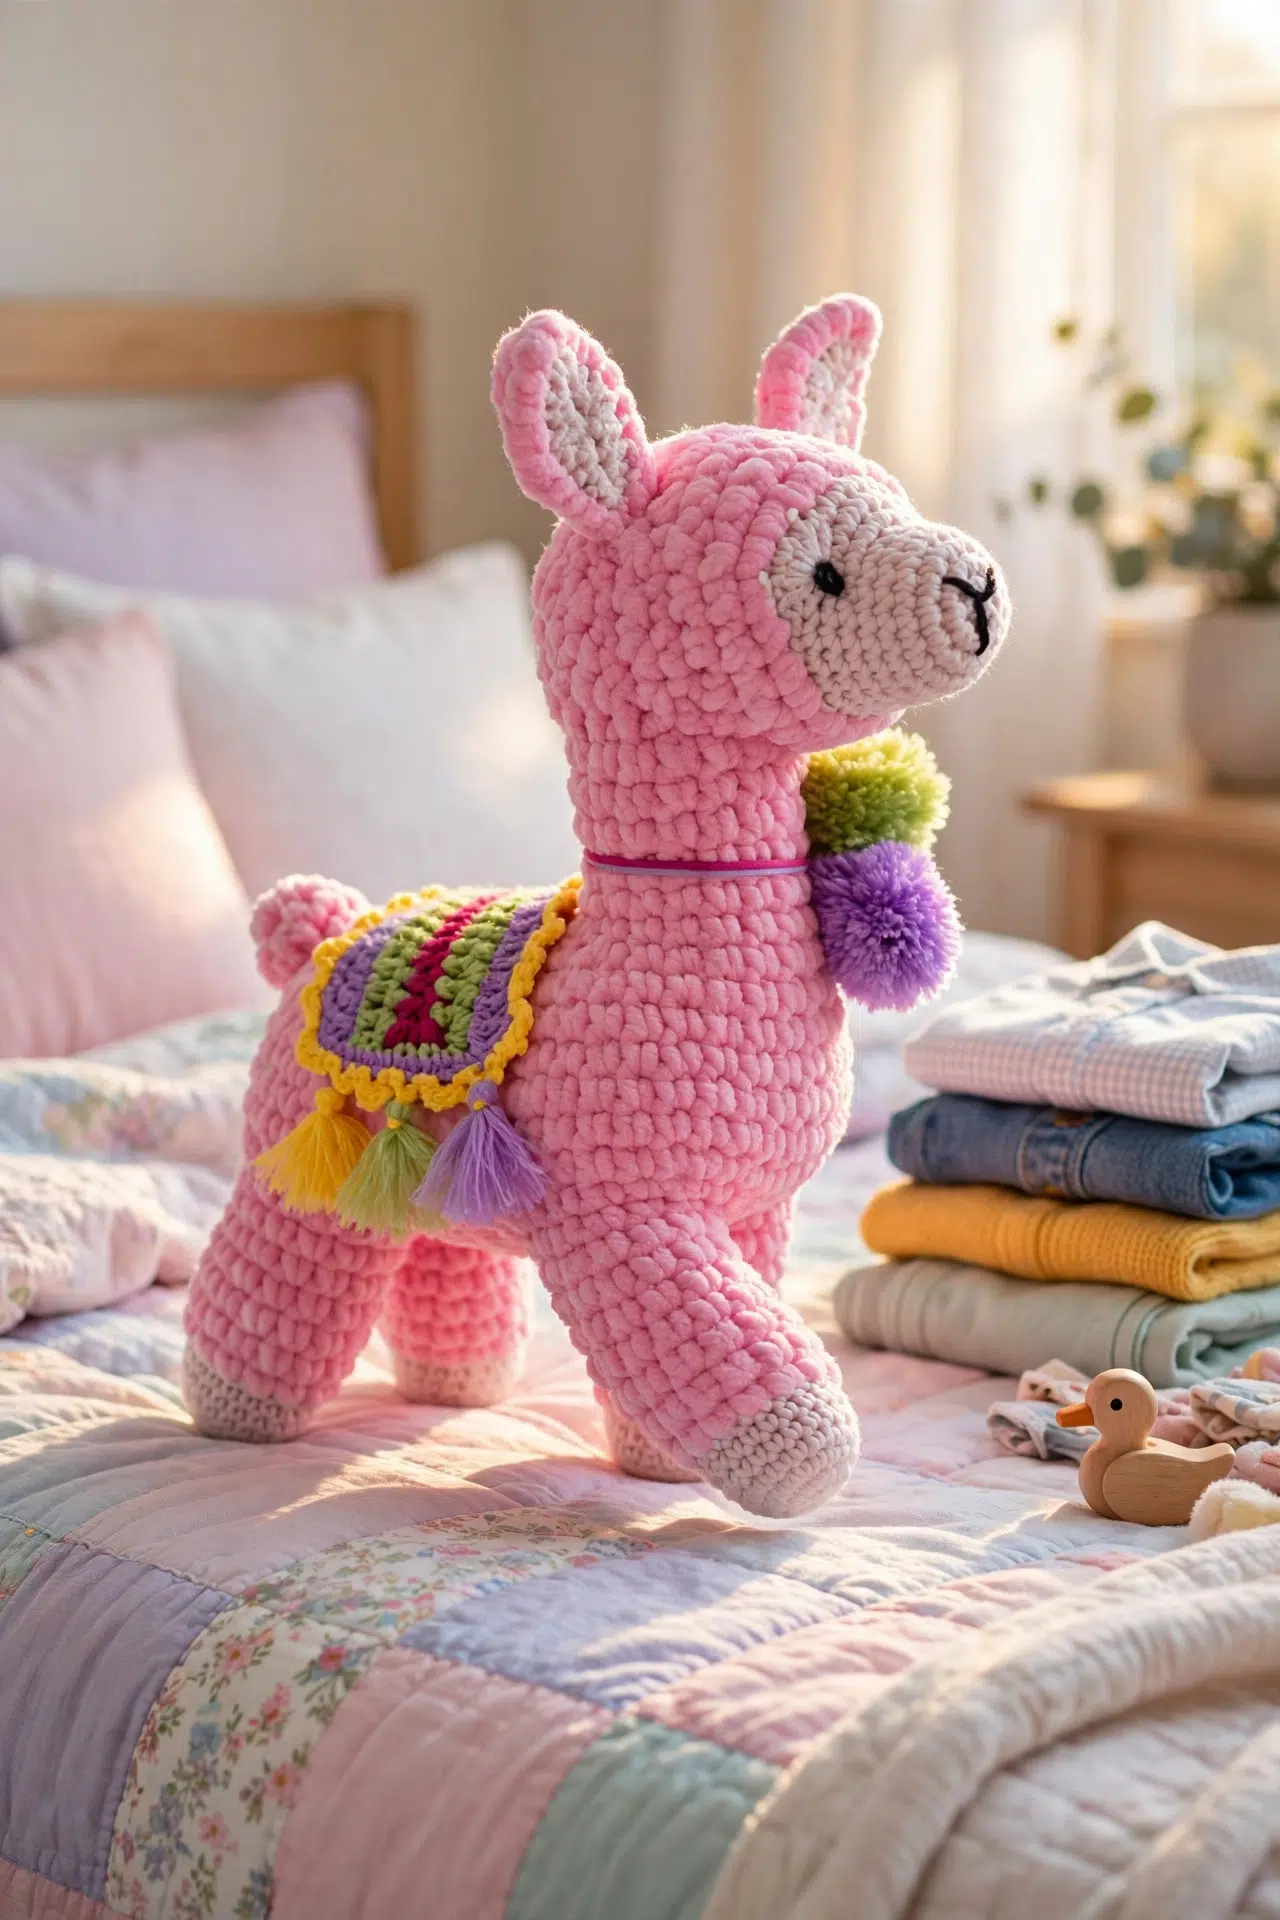
- Small details are included: You won't stop after making the main animal. Paired ears, an embroidered face, a stuffed tail, and a tasseled blanket complete the project.
- Stuffing happens at useful pauses: The feet, body, head, and tail each have their own stuffing point, making it easier to distribute the filling before openings become difficult to reach.
Pattern Details
- Skill Level: Intermediate
- Yarn Weight: DK/light worsted weight (3) and super chunky/super bulky weight (6)
- Time to Make: about 8-12 hours
Materials You'll Need
Gather both yarn weights before you begin, since the hook and yarn changes are built directly into the shaping.
- DK/light worsted weight cotton yarn (3), including black yarn for the face: Use this with the 4mm hook for the lower leg rounds, the first part of the head, two ears, and the facial details.
- Super chunky/super bulky weight chenille yarn (6): Pair this yarn with the 6mm hook for the upper legs, body, belly, later head rounds, and tail. The chenille ears are the exception and use the 4mm hook.
- 4mm crochet hook
- 6mm crochet hook
- Yarn needle
- Scissors
- Toy stuffing
Abbreviations
- ch - chain
- chs - chains
- st(s) - stitch(es)
- sl st - slip stitch
- sc - single crochet
- sc2tog - single crochet two stitches together for decrease
- hdc - half double crochet
- dc - double crochet
- rep - repeat
How to Crochet the Llama Amigurumi
Keep a stitch marker nearby, then follow the sections in order so the belly and stuffing steps happen at the right time.
This pattern uses US terminology. Numbers in parentheses indicate ending stitch counts.
Legs
Make 4. Begin with DK/light worsted weight cotton yarn and a 4mm crochet hook.
- Round 1: Ch 4, sl st in first ch to form a loop, and crochet 7 sc into center of loop. (7)
Do not join rounds. Alternatively, crochet 7 sc into a magic loop.
- Round 2: 2 sc in each st around. (14)
- Round 3: *1 sc in next st, 2 sc in next st; rep from * around. (21)
- Rounds 4-7: 1 sc in each st around. (21)
- Round 8: Change to super chunky/super bulky weight chenille yarn and a 6mm crochet hook. *1 sc in next 2 sts, skip next st; rep from * around. (14)
- Rounds 9-13: 1 sc in each st around. (14)
Fasten off and tie in all ends for 3 legs. Do not fasten off the fourth leg; continue with the body.
Body
Round 14 is where the separate legs become one piece, so lay all four legs out before you begin and check that none are twisted.
- Round 14: 1 sc in next 10 sts, skip last 4 sts, join next leg, 1 sc in next 10 sts, skip last 4 sts, ch 2, join next leg, 1 sc in next 10 sts, skip last 4 sts, join next leg, 1 sc in next 10 sts, skip last 4 sts, ch 2. (44)
- Round 15: Join with first leg, 1 sc in next 9 sts, sc2tog, 1 sc in next 9 sts, 1 sc in next 2 chs, 1 sc in next 9 sts, sc2tog, 1 sc in next 9 sts, 1 sc in last 2 chs. (42)
- Round 16: 1 sc in next 6 sts, 2 sc in next 2 sts, 1 sc in next 3 sts, 2 sc in next 2 sts, 1 sc in next 29 sts. (46)
- Rounds 17-20: 1 sc in each st around. (46)
- Round 21: 1 sc in next 28 sts, (sc2tog) 7 times, 1 sc in next 4 sts. (39)
- Round 22: 1 sc in next 24 sts, (sc2tog) 7 times, 1 sc in next st. (32)
- Round 23: (Sc2tog) 2 times, 1 sc in next 18 sts, (sc2tog) 5 times. (25)
Pause here and crochet the belly underneath.
Belly
Rejoin super chunky/super bulky weight chenille yarn in any first skipped stitch from Round 14 and use the 6mm crochet hook.
- Round 1: *1 sc in next 4 sts, sc2tog over gap between sts, 1 sc in next 4 sts, sc2tog over gap between sts, 1 sc in next 2 sts, sc2tog over gap between sts; rep from * once more. (26)
- Round 2: Sc2tog until end. (13)
- Round 3: Sc2tog until last st, 1 sc in last st. (7)
Fasten off and tie in all ends.
Body Continued
Stuff the feet before continuing with the body.
- Round 24: (Sc2tog) 2 times, 1 sc in next 14 sts, (sc2tog) 4 times, working the last decrease over the last st in the round and the first st of the next round. (19)
- Round 25: Sc2tog, 1 sc in next 13 sts, (sc2tog) 2 times. (16)
- Rounds 26-29: 1 sc in each st around. (16)
Fasten off and tie in all ends. Stuff the body.
Head
Use DK/light worsted weight cotton yarn and a 4mm crochet hook.
- Round 1: Ch 4, sl st in first ch to form a loop, and crochet 7 sc into center of loop. (7)
Do not join rounds. Alternatively, crochet 7 sc into a magic loop.
- Round 2: 2 sc in each st around. (14)
- Round 3: *1 sc in next st, 2 sc in next st; rep from * around. (21)
- Rounds 4-6: 1 sc in each st around. (21)
- Round 7: 1 sc in next 9 sts, 2 sc in next 3 sts, 1 sc in next 9 sts. (24)
- Round 8: 1 sc in next 11 sts, 2 sc in next 2 sts, 1 sc in next 11 sts. (26)
- Round 9: 1 sc in next 6 sts, skip next st, 6 dc in next st, skip next st, 1 sc in next 8 sts, skip next st, 6 dc in next st, skip next st, 1 sc in next 6 sts. (32)
- Round 10: Change to super chunky/super bulky weight chenille yarn and a 6mm crochet hook. *1 sc in next 2 sts, skip next st; rep from * until 2 sts remain, 1 sc in last 2 sts. (22)
- Round 11: 1 sc in next 7 sts, 2 sc in next st, 1 sc in next 7 sts, 2 sc in next st, 1 sc in next 6 sts. (24)
- Round 12: 1 sc in next 7 sts, sc2tog, 1 sc in next 7 sts, sc2tog, 1 sc in next 4 sts, skip last 2 sts. (20)
- Row 13: Turn, 1 sc in next 17 sts, skip last 3 sts. (17)
- Rows 14-17: Turn, 1 sc in each st along. (17)
- Row 18: Turn, *1 sc in next st, sc2tog; rep from * until 2 sts remain, 1 sc in last 2 sts. (12)
- Row 19: Turn, sc2tog until end. (6)
- Row 20: Turn, sc2tog until end. (3)
Fasten off and sew the head onto the body, stuffing as you go.
Ears
Make 4 ears: 2 in DK/light worsted weight cotton yarn and 2 in super chunky/super bulky weight chenille yarn. Use the 4mm crochet hook for all ears.
- Round 1: Ch 7, 1 sc in second ch from hook, 1 hdc in next ch, [1 hdc, 1 dc] in next ch, [1 dc, 1 hdc] in next ch, 1 hdc in next ch, 1 sc in last ch, sl st in same last ch, rotate work with right side facing and crochet into the opposite side of the chs: 1 sc in same last ch as previous sl st, 1 hdc in next ch, [1 hdc, 1 dc] in next ch, [1 dc, 1 hdc] in next ch, 1 hdc in next ch, 1 sc in last ch, ch 2, sl st in same last ch. (20)
Fasten off and tie in all ends.
Ear Finishing
- Step 1: Sew 1 cotton ear and 1 chenille ear together, then sew the paired ear into the head. Repeat for the other ear.
Tail
Use super chunky/super bulky weight chenille yarn and a 6mm crochet hook.
- Round 1: Ch 4, sl st in first ch to form a loop, and crochet 7 sc into center of loop. (7)
Do not join rounds. Alternatively, crochet 7 sc into a magic loop.
- Rounds 2-3: 1 sc in each st around. (7)
Fasten off and sew onto the body, adding a little stuffing.
Face Finishing
Use DK/light worsted weight cotton yarn and a 4mm crochet hook.
- Step 1: Using black yarn, sew on a nose.
- Step 2: Cut 2 short lengths of black yarn and tie 3 knots into the center of each length. Sew each tail end into the head so the knots catch on the outside, forming an eye.
Blanket
- Row 1: Ch 21, 1 dc in second ch from hook and in each ch along. (20)
- Rows 2-5: Turn, 1 dc in each st along. (20)
- Round 6: Crochet 1 sc neatly around the edge, using 2 or 3 sc on the corners to help it lie flat.
- Round 7: *Ch 4, sl st in next 2 sts; rep from * around.
Fasten off and tie in all ends.
Tassels
- Step 1: Using Lark's Head Knots like those used in macramé, add small tassels along the edge.
Tips for Success
- Mark the beginning of each round: The legs, head, and tail begin in continuous rounds. Move your marker every time you pass the first stitch, especially before the decreases and yarn changes.
- Count the leg joins carefully: Round 14 uses only part of each leg and leaves four stitches skipped on every leg. Check each ten-stitch section before moving to the next leg.
- Stuff in small portions: Add toy stuffing gradually and press it into the feet before filling the body. Dense clumps are harder to redistribute once the body opening narrows.
- Match the ear layers first: Pair one cotton ear with one chenille ear before attaching either to the head. Sewing each pair together first keeps all four ear pieces accounted for.
Ways to Adapt Your Crochet Llama
- Swap fibers within the same weight: You can replace cotton or chenille with another yarn in the stated weight. The fabric may feel different, so choose a hook that still creates a firm surface that holds stuffing without gaps.
- Use different shades for separate sections: The yarn changes already divide the legs, body, head, ears, face, and blanket into clear working areas. You can change shades at those same transitions without altering the stitch counts.
- Make a different blanket size: Add or remove foundation chains to change the blanket width, then adjust the number of rows for its length. Your row counts and border stitch total will change, so space the final ch-4 edging evenly.
- Leave off the tassels: The blanket is complete after Round 7, so the Lark's Head tassels are optional. Omitting them also removes loose fringe from the finished piece.
- Begin with a magic loop: A magic loop can replace the ch-4 starting ring on the legs, head, and tail. Pull it closed firmly before continuing so the center remains secure beneath the stuffing.
Fixing Joins, Counts, and Edges
- Gaps between the legs: Check that Round 14 includes every ten-stitch leg section and both ch-2 spaces. The belly is added through the skipped stitches and gaps later, so don't try to sew those openings closed before completing its three rounds.
- The body count shifts after Round 24: The last decrease of Round 24 crosses the round boundary by using the final stitch and the first stitch of the next round. Move your marker after completing that decrease, then begin Round 25 from the new starting point.
- The blanket border ripples: Change the number of sc worked at each corner in Round 6. Use two if three makes the corner flare, or use three if two pulls it inward, while keeping the straight edges evenly spaced.
A Special Spot for Your Finished Llama
Place your finished llama on a shelf, desk, or craft-room chair with its blanket nearby or arranged over the body. The separate blanket also gives you an easy detail to change when you want a small seasonal update.
For a handmade gift, include the llama and blanket together so the recipient gets the complete set of crocheted pieces.
Washing & Care
Because this project combines cotton, chenille, stuffing, embroidery, and tassels, gentle hand washing is the safest choice unless every yarn label permits machine washing. Use cool water, avoid twisting the chenille, reshape the pieces, and dry them flat. Make sure the stuffing is completely dry before storing or displaying the llama.
More Farm Animal Crochet Patterns
- Highland Cow Crochet Pattern
- Emotional Support Chicken Crochet Pattern
- Crochet Chicken and Chick Set
- This Chenille Yarn Baby Duck Might Be the Softest Amigurumi You'll Ever Make
- Meet Teodoro: A Dapper Amigurumi Goose Pattern Worth Every Single Stitch
Frequently Asked Questions
Why does the pattern use two hook sizes?
Use the 4mm hook with the DK cotton sections and the 6mm hook with the super bulky chenille sections, except for the chenille ears, which also use the 4mm hook. These pairings help the differently weighted yarns follow the intended construction and keep the stuffed fabric firm.
When should I add the stuffing?
Stuff the feet after finishing the belly and before Round 24, then stuff the body after Round 29. Add filling to the head while sewing it onto the body, and place only a little in the tail before attachment. Following this order keeps each opening accessible while you work.
Does the last decrease of Body Round 24 cross into the next round?
Yes, the fourth and final decrease uses the last stitch of Round 24 together with the first stitch of the following round. This is deliberate and produces the stated count of 19. Mark the new beginning carefully before moving into Round 25 so the next shaping sequence stays aligned.
How are the four ear pieces assembled?
Pair one cotton ear with one chenille ear to make each finished ear. Sew the two layers together first, then attach that completed pair to the head. Repeat with the remaining two pieces, giving you two assembled ears from the four crocheted components.
Can I change the blanket dimensions?
Yes, change the foundation chain for width and work more or fewer dc rows for length. The printed stitch count of 20 will no longer apply, and the sc border will also have a different total. When working Round 7, distribute the ch-4 loops evenly and adjust the final spacing if necessary.
What did you change or add to your llama, whether it was the yarn shades, blanket size, or edging? Tell me about your version in the comments.



