
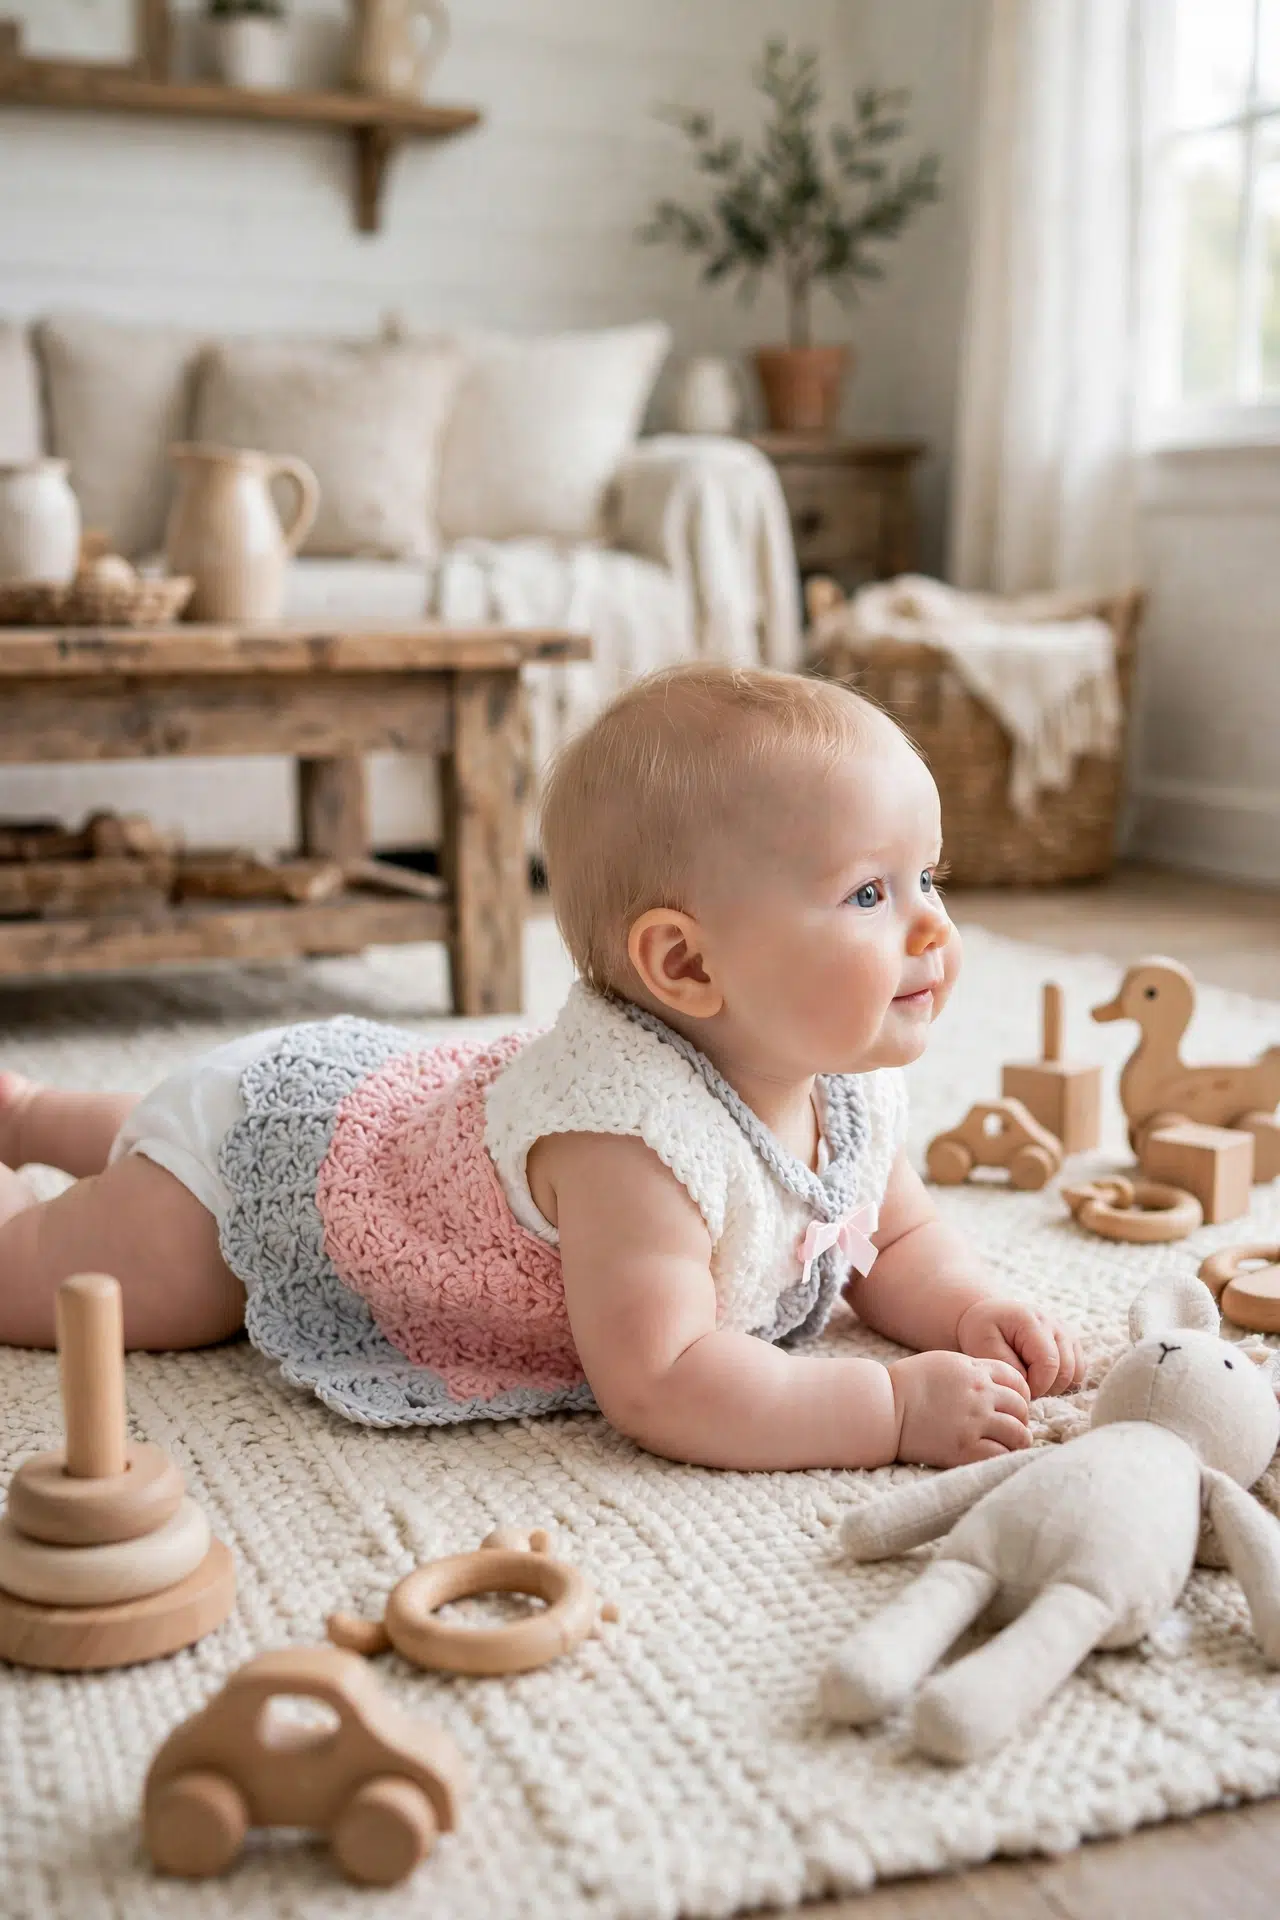
A few waiting balls of aran yarn are reason enough to begin the Pastel Crochet Baby Cardigan when you want a satisfying break between larger projects. Its one-piece construction and repeating rows keep your hands moving without complicated assembly.

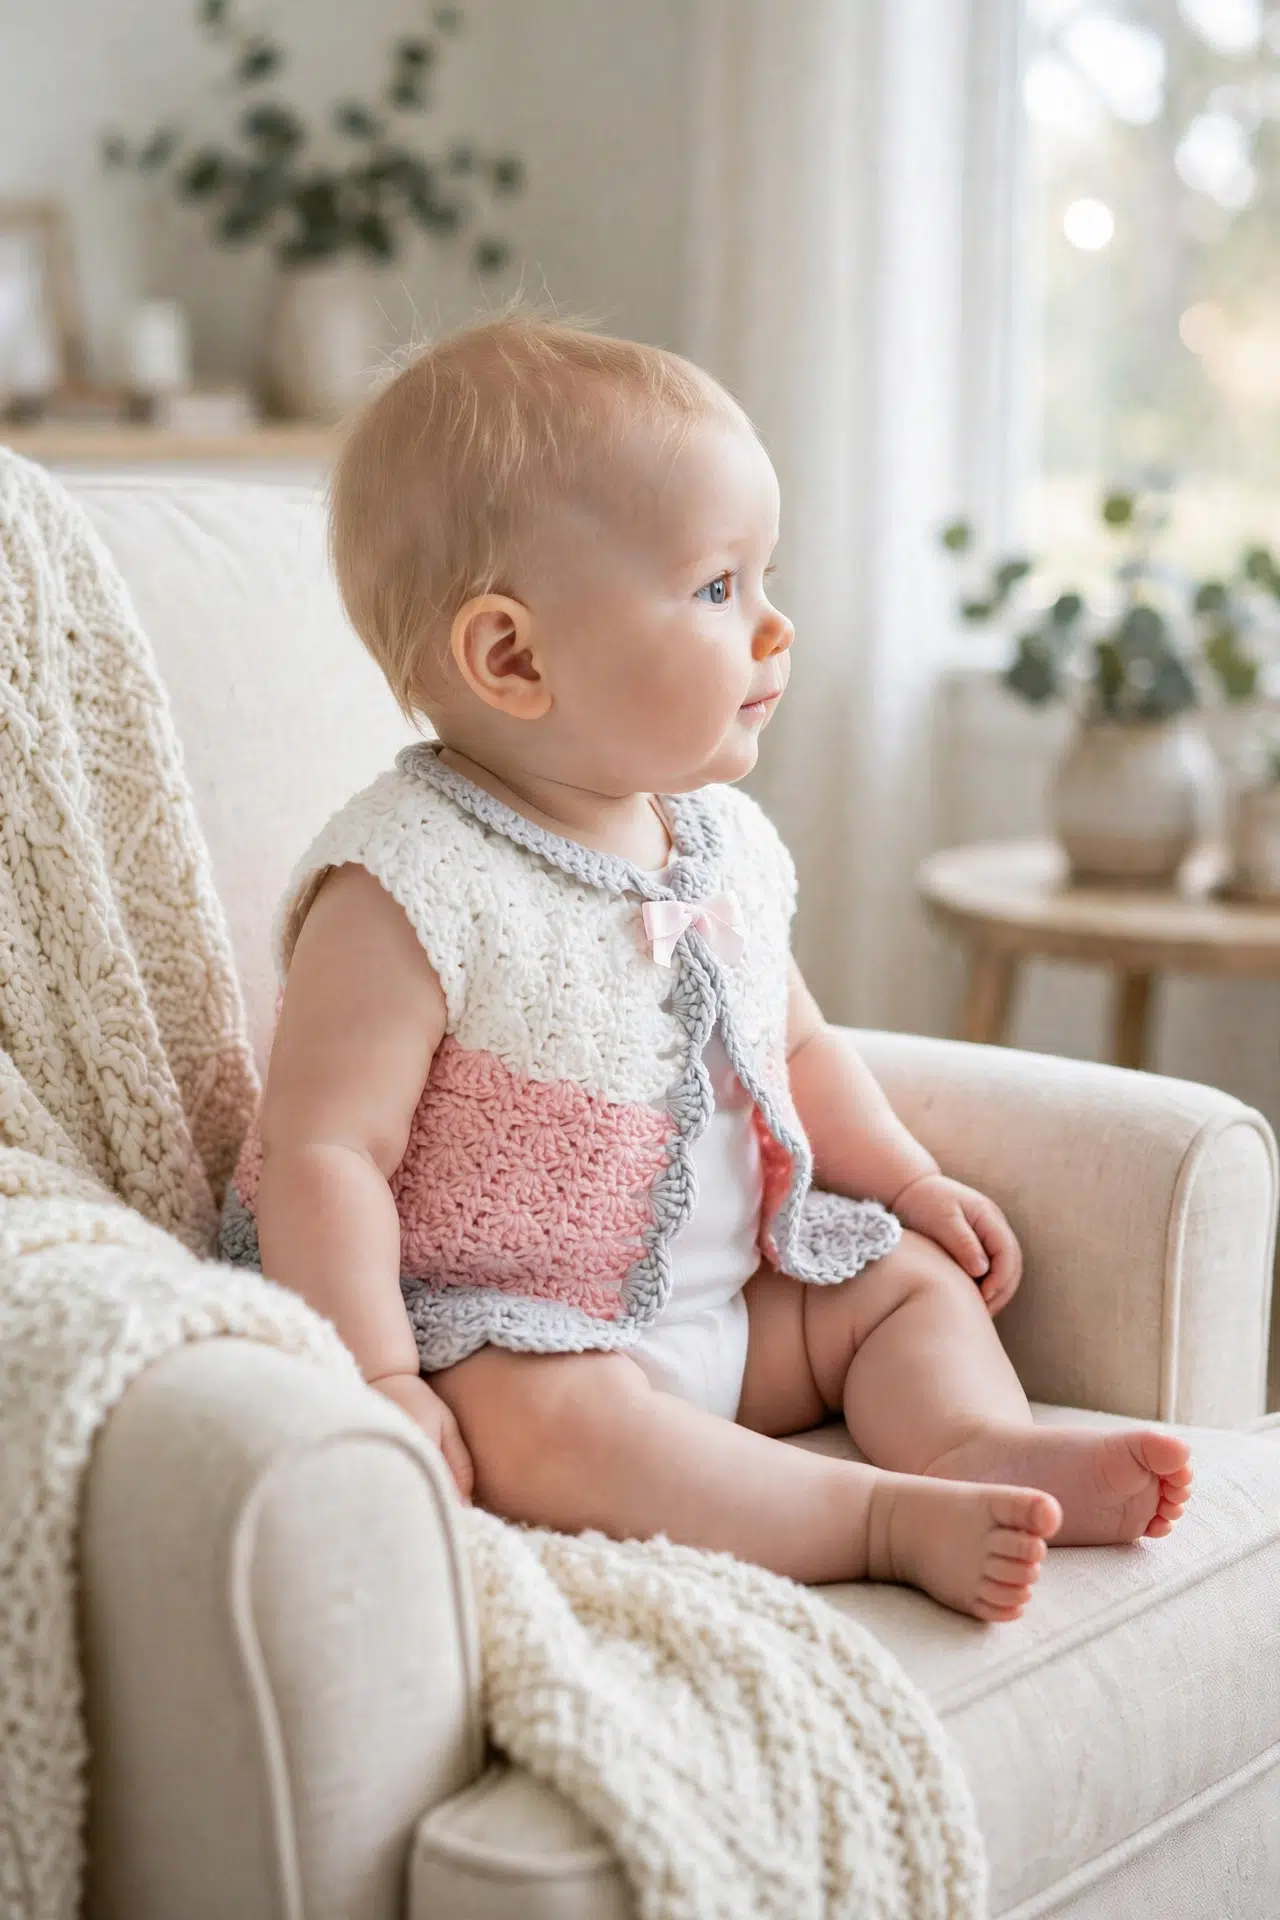
Once the ends are woven in, you'll have a baby cardigan with your choice of buttoned gaps or a ribbon fastening. The shaping is built into the rows, so there's no pile of separate pieces waiting to be joined.
Jump to:
Why I Love This Pattern
- One-piece construction: I designed the cardigan as one continuous piece, which means you can skip seaming and move straight from the main fabric to the edging.
- A steady repeat: Most of the body settles into Rows 5 and 6. Once your hands know that rhythm, there's far less pattern checking.
- Simple armhole shaping: The openings are formed with chain spaces and skipped fans in Row 12. You don't need to make or attach separate sections.
- Your choice of fastening: The finished edging gaps can serve as buttonholes, or you can add a ribbon at the top instead.
Pattern Details
- Skill Level: Beginner
- Finished Size: 0-6 months only
- Yarn Weight: Aran / Worsted
- Time to Make: about 6-10 hours
Supplies
You'll need aran or worsted yarn, a suitable hook, and just a few basic finishing supplies. Gather every colour before starting so the Row 11 change is ready when you reach it.
- Paintbox Yarns Simply Aran in Champagne White, Blush Pink and Stormy Grey: A different yarn in the same weight can work, but the pattern doesn't give a gauge. Compare the developing cardigan with a well-fitting 0-6 month garment and adjust your hook if the fabric is unusually firm or loose.
- Aran (worsted) weight yarn
- 4.00 mm hook or a similar hook suitable for the yarn being used
- Yarn needle
- Scissors
- Ribbon or buttons, optional: Either fastening is optional. If you use buttons on a baby garment, sew them on very securely; keep any ribbon ties short and secure as well.
Stitches & Abbreviations
- ch - chain
- ch sp - chain space
- ch sps - chain spaces
- ea - each
- sl st - slip stitch
- sk - skip
- prev - from previous row
- rep - repeat
- sc - single crochet
- dc - double crochet
- tr - treble crochet
- st - stitch
- sts - stitches
fan: Work 5 dc in the same stitch or chain space.
How to Crochet the Pastel Baby Cardigan
Work the cardigan in rows as one piece, then continue directly into the front and neckline edging.
The cardigan is crocheted as one piece. Instructions between asterisks are repeated for as long as stated. Numbers in parentheses indicate total stitches when provided.
Cardigan
- Row 1: Ch 62. 5 dc in 5th ch from hook, *sk 2, 1 sc in next st, sk 2, 5 dc in next st; rep from * until last 3 sts, sk 2, 1 sc in last st, turn.
- Row 2: Ch 5, *[1 sc, ch 2, 1 sc] in centre of next fan, ch 2, 1 sc in prev sc, ch 2; rep from * until end, ending 1 sc in top of ch 5, turn.
- Row 3: Ch 3, 2 dc in prev sc below, *1 sc in next prev sc, 5 dc in next prev sc; rep from * until end, skipping chs in between and ending 1 sc in last prev sc, 3 dc in 3rd ch of 5, turn.
- Row 4: Ch 5, *1 sc in next prev sc, ch 2, [1 sc, ch 2, 1 sc] in centre of next fan, ch 2, 1 sc in next prev sc, ch 2, 1 sc in centre of next fan, ch 2; rep from * until end, ending 1 sc in last prev sc, ch 2, 1 sc in top of ch 3, turn.
- Row 5: Ch 3, 4 dc in prev sc below, *1 sc in next prev sc, 5 dc in next prev sc; rep from * until end, skipping chs in between and ending 1 sc in 3rd ch of 5, turn.
- Row 6: Ch 5, *1 sc in centre of next fan, ch 2, 1 sc in next prev sc, ch 2; rep from * until end, ending 1 sc in top of ch 3, turn.
- Rows 7-10: Repeat Rows 5 and 6.
- Row 11: Join next colour in 1st ch and repeat Row 5.
- Row 12: Ch 5, *1 sc in centre of next fan, ch 2, 1 sc in next prev sc, ch 2; 1 sc in centre of next fan, ch 2, 1 sc in next prev sc, ch 11, sk 5 fans, 1 sc in next prev sc, ch 2, rep from * 5 more times, ending 1 sc in next prev sc, ch 11, sk 5 fans, 1 sc in next prev sc, ch 2, 1 sc in centre of next fan, ch 2, 1 sc in next prev sc, ch 2, 1 sc in top of ch 3, turn.
- Row 13: Ch 3, 4 dc in prev sc below, 1 sc in next prev sc, 5 dc in next prev sc, 1 sc in next prev sc, sk 2 chs, 5 dc in next ch, sk 2 chs, 1 sc in next ch, sk 2 chs, 5 dc in next ch, sk 2 chs, *1 sc in next prev sc, 5 dc in next prev sc; rep from * 4 more times, 1 sc in next prev sc, sk 2 chs, 5 dc in next ch, sk 2 chs, 1 sc in next ch, sk 2 chs, 5 dc in next ch, sk 2 chs, 1 sc in next prev sc, 5 dc in next prev sc, 1 sc in next prev sc, 5 dc in next prev sc, 1 sc in 3rd ch of 5, turn.
- Rows 14-25: Repeat Rows 5 and 6, starting with Row 6 and ending with Row 5.
Finishing
- Step 1: Crochet up to the top of the cardigan neckline, working into the large gaps or ch sps. Sk 1st ch sp, *5 dc in next ch sp, 1 sc in next ch sp; rep from * to the top of the cardigan, ending with 5 dc in last ch sp.
- Step 2: Crochet along the neckline to the opposite side with [1 sc, 1 dc, 2 tr] in same ch as prev 5 dc from Row 1, 3 tr in same ch as prev sc from Row 1, 3 tr in same ch as prev 5 dc, [2 tr, 1 dc, 1 sc] in same ch as prev sc, *sl st in same ch as prev 5 dc, sl st in same ch as prev sc; rep from * 4 more times, sl st in same ch as prev 5 dc, [1 sc, 1 dc, 2 tr] in same ch as prev sc, 3 tr in same ch as prev 5 dc, 3 tr in same ch as prev sc, [2 tr, 1 dc, 1 sc] in last same ch as prev 5 dc.
- Step 3: Turn and crochet back down to the bottom as neatly as possible with *5 dc in next gap, 1 sc in next gap; rep from * to the bottom of the cardigan, ending with 1 sc in last gap. Sl st in top of ch 3 to join. Fasten off and tie in all tails.
- Step 4: Add buttons, using the gaps or ch sps just worked into as buttonholes, or tie a little ribbon at the top.
Crochet Tips
- Find the centre of each fan: The centre is the third dc of a 5 dc fan. Identifying that stitch before inserting your hook will keep the sc placement even through the repeat.
- Check Row 12 before turning: Count both ch-11 spaces and confirm that each one skips exactly five fans. This row forms the two openings, so fixing a missed fan now is much easier than after Row 13.
- Watch the turning-chain tops: Several rows finish in the top of a ch 3 or ch 5. Mark that chain when you make it if you tend to lose it, because a misplaced final stitch can shift the fan pattern.
- Let the edging follow the gaps: When working up and down the cardigan fronts, place each fan and sc in the stated gaps rather than forcing stitches into the row ends. Consistent placement helps the edging lie evenly.
Ways to Adapt Your Baby Cardigan
- Make it in one colour: You can continue with the same yarn at Row 11 instead of joining another colour. The construction and stitch sequence stay unchanged, and you'll have fewer ends to weave in.
- Choose another aran yarn: An aran or worsted substitute is the safest option. Fibres with less spring may make the fabric feel firmer, so use a hook that produces comfortable drape and check the size as you work.
- Adjust the hook carefully: A slightly larger hook loosens the fans, while a smaller hook makes denser fabric and may reduce the finished size. Since no gauge is specified, compare the width and length with a garment that fits the intended baby.
- Use buttons: Work the finishing as written and use suitable edging gaps as buttonholes. Check button placement against those gaps before sewing, then attach every button securely.
- Add a ribbon tie: Skip the buttons and thread or attach a short ribbon at the top edge. This keeps the finishing simple, but the ribbon should be secured carefully and kept appropriately short for a baby garment.
Fixing Fan and Armhole Alignment
- The fans are drifting sideways: Check that each sc and fan is being worked into the stated prev sc rather than into a nearby chain. Also confirm that you're skipping the chains where instructed in the fan rows.
- The two openings don't match: Return to Row 12 and count five skipped fans beneath each ch-11 space. Missing one fan or placing the anchoring sc in the wrong prev sc will make the openings uneven.
- The edging is pulling: Make sure you're working into every indicated large gap and aren't tightening the sc stitches. If your natural tension is firm, relax each loop before completing the stitch rather than adding unlisted stitches.
Care Instructions
Follow the washing and drying directions on the yarn label, since care depends on the fibre you choose. Secure buttons or ribbon before use and check them regularly. After washing, gently reshape the cardigan and allow it to dry as the yarn label recommends.
More Crochet Baby Wearables
- Simple Crochet Baby Cardigan
- Parquet Crochet Baby Cardigan
- Bumblebee Baby Booties Crochet Pattern
- Baby Aviator Hat Crochet Pattern
Frequently Asked Questions
Is the cardigan made in separate pieces?
No, the cardigan is crocheted as one piece. The main fabric is worked in rows, with the two openings formed directly in Row 12 by chaining and skipping fans. After the final body row, you continue around the fronts and neckline to complete the edging, so there's no separate seaming stage.
How are the two openings formed?
Each opening uses ch 11 and skips five fans in Row 12. Row 13 then places stitches into selected chains across those spans to reconnect the pattern above them. Count the skipped fans before turning, because an incorrect anchor point changes both the opening size and the alignment of the remaining rows.
When should I change colour?
Join the next colour at the beginning of Row 11 in the first chain. That row repeats Row 5, after which Row 12 begins the opening construction. You can keep using the same colour if preferred; changing yarn doesn't alter any stitch counts or shaping instructions.
How many rows are worked after Row 13?
Work 12 more rows, numbered Rows 14-25. Begin that range with a repeat of Row 6, then alternate Rows 5 and 6 until the final Row 5. Keeping that starting order matters because the two repeat rows place stitches differently across the fans and chain spaces.
Do I need both buttons and ribbon?
No, choose buttons, a ribbon tie, or no added fastening. The finishing creates gaps that can be used as buttonholes, so separate buttonhole rows aren't needed. If you select buttons or ribbon for a baby garment, attach them securely and check the fastening regularly during use.
Candyfloss Baby Cardigan is the kind of steady, satisfying project I expect you'll return to whenever a small one-piece make fits your plans. Tell me in the comments which fastening and yarn combination you chose.



