
Baby gifts are honestly some of my favorite things to make, and this Baby Aviator Hat Crochet Pattern has become one of my go-to projects when I need something that feels a little more special than a basic beanie. It's quick enough to finish in a sitting, but it has that extra something that makes people stop and ask where you got it.

Jump to:
Behind the Pattern
I made this for the first time when a friend announced she was expecting, and I wanted something that felt thoughtful without being precious. There's something about the aviator style that just works for babies. It's playful, it photographs beautifully, and it has that classic look that feels timeless rather than trendy. I find the construction really satisfying too. The ear flap shaping is the kind of thing that looks complicated but actually comes together in a pretty logical way once you're in it.
This is also just a genuinely good gift pattern. It works for baby showers, newborn gifts, fall babies, winter babies. Pretty much any baby, honestly.
What Makes This Pattern Special
A sweet, easy-to-finish baby hat that looks like you really went the extra mile.
- Beginner-Friendly Build: This is rated Easy, so if you're still building confidence with hats, this one is no trouble at all.
- Fast to Finish: It's a small project sized for 6 to 12 months, which means you can realistically complete it in one or two sessions.
- Gifting Sweet Spot: The aviator style makes it feel more considered than a plain hat, so it wraps up into a really lovely handmade gift.
- Technique Value: The ear flap construction is a great skill to have in your back pocket for future hat patterns.
Gather Your Supplies
Three colors, one hook, and two small buttons — that is the whole list.
- Super Bulky Weight Yarn (Blue): You need one ball of super bulky weight yarn in blue. This weight works well for a baby hat because it crochets up fast and produces a thick, cozy fabric without being stiff. Look for something with a bit of softness to it since this is going up against a baby's skin.
- Super Bulky Weight Yarn (White): One ball in white covers the front flap and the finishing edging. Same weight as the blue, so the tension stays consistent across the whole hat. Matching the fiber content between your two colors really does help here, especially if you're planning to wash it.
- Super Bulky Weight Yarn (Grey, optional): A small amount of grey if you want the buttons to blend into a grey colorway instead of blue. No specific yardage needed — this is just for the button color decision, not the crochet itself.
- I/9 (5.5 mm) Crochet Hook: This size pairs well with super bulky yarn at this scale. It keeps the fabric tight enough to hold its shape on a small head without making the stitches hard to work.
- 2 Buttons (blue or grey), approx. 1.5 cm diameter: These are decorative on the ear flaps. Blue matches the main hat color; grey gives a slightly more neutral look. Either works — it comes down to what you have on hand or prefer.
- Similar colored thread (to match blue yarn): You'll use this to sew the buttons on. It doesn't need to be an exact match, just close enough that the stitching doesn't stand out against the blue fabric.
- Also needed: yarn needle, scissors
Color Sequence & Yarn Changes
The blue yarn carries most of the work: the hat body, both ear flaps, and the ties. White comes in for the front flap and the finishing edging around the whole piece. Keep both balls accessible as you work because you'll switch between them more than once — there's no long stretch where one color sits completely idle.
Essential Info
A super bulky baby hat worked in the round with two colors — it works up fast and fits the 6–12 month head nicely.
| Skill Level | Easy |
| Pattern Gauge | After Round 3, hat should measure 8 cm in diameter |
| Finished Size | Size: 6–12 months |
| Yarn Weight | 6 Super Bulky |
| Fiber | Not specified — check the yarn label |
| Terminology | US |
Abbreviations & Stitches Used
Short list, all familiar stitches.
- B = Blue
- W = White
- ch = chain
- sl st = slip stitch
- sc = single crochet
- dc = double crochet
- RS = right side
- * * = repeat instructions between asterisks as directed
Special Stitches
- Magic circle: Work the first round stitches into an adjustable loop, then pull the tail to tighten the center closed.
Read Before Starting
The hat is worked in seamless continuous rounds, so there's no joining at the end of each round and no seam to deal with later. I start from the top with a magic circle and work outward and down. Ch 1 does not count as a stitch here and throughout, so don't work into it at the end of a round. Gauge matters more than usual with baby sizing: after Round 3, your work should measure 8 cm in diameter. If it's running larger or smaller, adjust your hook before you get any further in.
The Baby Aviator Hat Crochet Pattern Steps
Work through each section in order and you'll have a finished baby aviator hat with ear flaps and a buttoned front panel.
Crocheting the Hat Crown
This section builds the main hat body, worked in seamless continuous rounds from the crown down. You'll start at the top with a magic circle and increase outward before working the straight sides of the hat.
Round 1: Using B, work 10 sc into a magic circle, pull tight, sl st to join. [10 sc]
Round 2: 2 dc in next st and in each st around. [20 dc] Note that you're switching from sc to dc starting here — the hat body is worked in double crochet throughout.
Round 3: *1 dc in next st, 2 dc in next st* repeat around. [30 dc]
After Round 3, hat should measure 8 cm in diameter
Round 4: *1 dc in next 2 sts, 2 dc in next st* repeat around. [40 dc]
Rounds 5–11: 1 dc in next st and in each st around; do not fasten off. [40 dc] These seven straight rounds form the sides of the hat — no shaping, just even dc all the way around. The "do not fasten off" matters here because you'll continue directly into the first ear flap.
First Ear Flap
Continuing in B, you'll now work the first ear flap directly off the hat brim. This section turns back and forth in rows rather than rounds, tapering down to a point with each pass.
Round 1: Continuing in B, 1 dc in next 10 sts. [10]
Round 2: Ch 1, turn, 1 dc in 2nd st from hook and in next 7 sts, 1 sc in last st. [9] The sc at the end of each row creates the taper — you're effectively losing one stitch per row by working into the 2nd st from the hook rather than the first.
Round 3: Ch 1, turn, 1 dc in 2nd st from hook and in next 6 sts, 1 sc in last st. [8]
Round 4: Ch 1, turn, 1 dc in 2nd st from hook and in next 5 sts, 1 sc in last st. [7]
Round 5: Ch 1, turn, 1 dc in 2nd st from hook and in next 4 sts, 1 sc in last st. [6]
Round 6: Ch 1, turn, 1 dc in 2nd st from hook and in next 3 sts, 1 sc in last st; fasten off and tie in tails. [5]
Fasten off and tie in tails.
Second Ear Flap
The second ear flap mirrors the first. You'll skip 9 stitches from the end of Round 1 on the first ear flap before rejoining B — that gap becomes the back of the hat between the two flaps.
Round 1: Skip 9 sts from end of Round 1 on first ear flap and rejoin B, 1 dc in next 10 sts. [10] Count those 9 skipped stitches carefully before you rejoin — it's easy to miscount here and end up with the flaps unevenly spaced.
Round 2: Ch 1, turn, 1 dc in 2nd st from hook and in next 7 sts, 1 sc in last st. [9]
Round 3: Ch 1, turn, 1 dc in 2nd st from hook and in next 6 sts, 1 sc in last st. [8]
Round 4: Ch 1, turn, 1 dc in 2nd st from hook and in next 5 sts, 1 sc in last st. [7]
Round 5: Ch 1, turn, 1 dc in 2nd st from hook and in next 4 sts, 1 sc in last st. [6]
Round 6: Ch 1, turn, 1 dc in 2nd st from hook and in next 3 sts, 1 sc in last st; fasten off and tie in tails. [5]
Fasten off and tie in tails.
Front Flap and Finishing
This final section adds the white front flap that buttons onto the hat. Work with the hat upside down and right side facing you. The ch 1 at the start of turning rows does not count as a stitch here and throughout this section.
Step 1: With hat upside down and RS facing you, join W in the corner of the right ear flap where it meets the main hat and work 1 sc neatly around the edge in a clockwise direction until you rejoin where you started. This edging round tidies up the brim before you build the front flap — take your time placing the sc evenly so the edge lies flat.
Step 2: 1 sc in next 13 sts along front of main hat.
Step 3: Ch 1 (does not count as a st here and throughout), turn, 1 dc in 1st st and in next 12 sts.
Steps 4–6: Repeat Step 3. These three rows repeat the same 13-dc row to build up the depth of the front flap. The dc stitches will serve as the buttonholes when you fasten the flap to the hat.
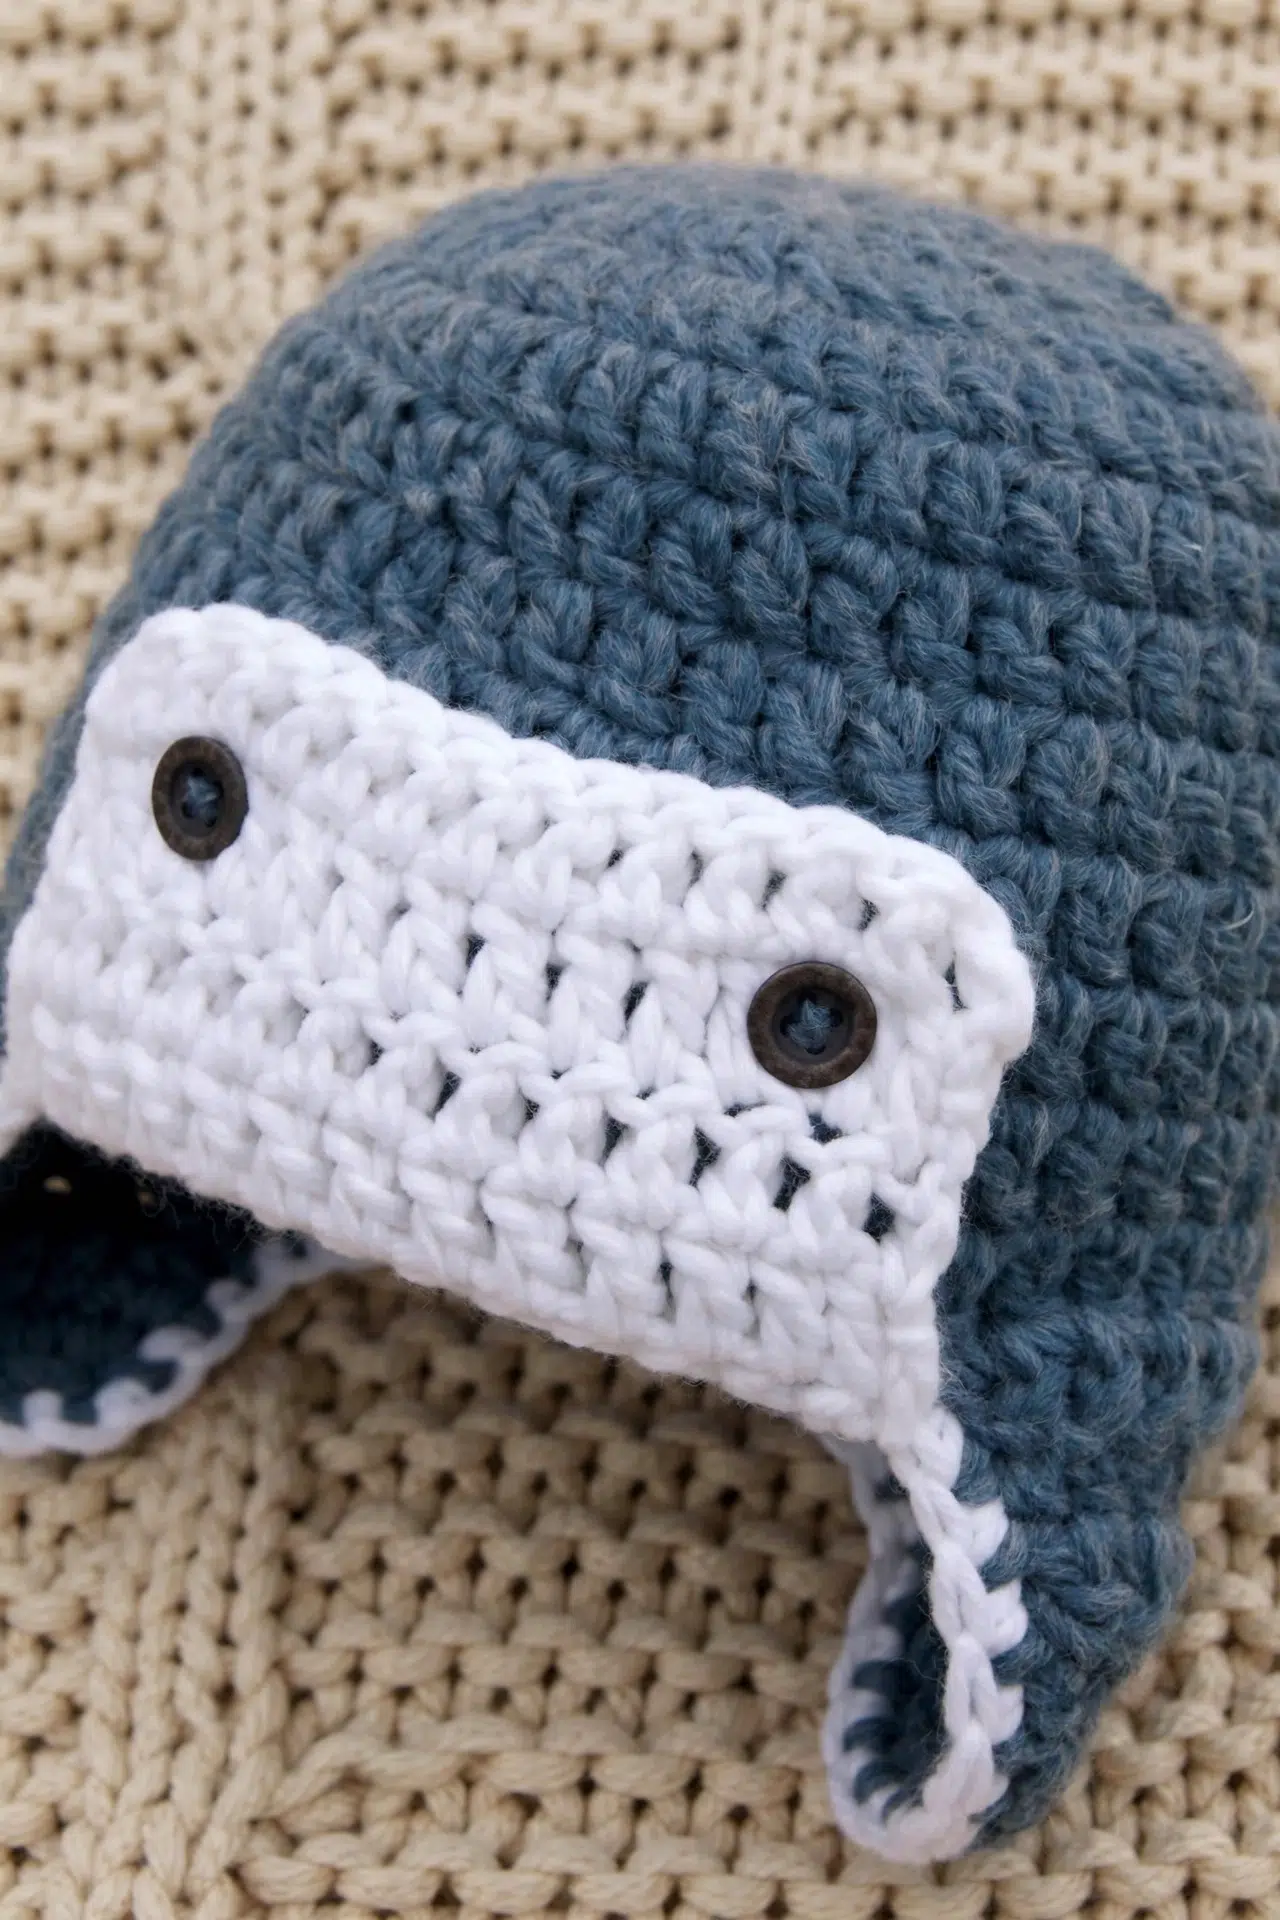
Step 7: Using similar colored thread as the blue yarn, sew 2 buttons onto the front of your hat. Button up your flap by passing the buttons through the dc stitches of the white flap.
Fasten off, weave in ends.
Blocking
This hat generally holds its shape well without any blocking, especially in a super bulky yarn. That said, if the brim or ear flaps are curling more than you'd like after finishing, a light steam block works well. Hold a steam iron a few centimetres above the surface, let the steam do its thing, and gently press the flaps flat with your hand. Let it cool completely before moving it. Skip the full wet block here: super bulky yarn takes forever to dry and tends to go a bit limp in the process.
Care Instructions
Since the fiber isn't specified on this pattern, check your yarn label before washing. Most super bulky yarns in this category are either acrylic or an acrylic blend, so a gentle machine wash on cold and a flat dry is usually safe. The part worth paying attention to is the buttons: the thread holding them is sewn through the crochet stitches, and repeated machine washing can loosen that over time. Every few washes, give the buttons a quick tug to make sure they're still secure. If you notice any loosening, resew them before the hat goes back into rotation.
Baby & Child Safety Notes
This hat is sized for 6 to 12 months, and it uses two buttons on the front flap. Buttons are a choking hazard for babies and young children, so make sure they're sewn on VERY securely with strong thread before putting the hat on a little one. Use a double thread when attaching them and knot it thoroughly. Check the buttons regularly for any loosening, and if a button ever comes off, don't put the hat back on until it's been resewn. If you're making this for a very young baby or as a gift where you're not sure how closely it'll be supervised, you could skip the buttons entirely and just use the white flap as a decorative brim instead.
Frequently Asked Questions
The ear flaps aren't sewn on separately. You work them directly off the hat in the same blue yarn, picking up stitches from the final round of the main hat section. The first ear flap uses the next 10 stitches, and the second ear flap picks up 10 stitches after skipping 9. They taper down over six rows, finishing at 5 stitches wide.
The white flap is a separate panel worked in rows along the front edge of the hat. You join white yarn at the corner of the right ear flap and sc around the whole edge first, then work 13 stitches across the front of the hat for four rows of double crochet. The buttons on the hat body pass through the dc stitches of this white panel to hold it in place.
You need one ball of blue and one ball of white. The blue covers the entire hat body and both ear flaps. The white is used for the front flap and the finishing edging. Super bulky yarn at this scale works up fast, so you won't use anywhere near a full ball of either color, but having one of each is the safe call.
After Round 3, the hat should measure 8 cm in diameter. That's your gauge checkpoint. For a fitted baby hat, it's worth pausing to measure here rather than finishing the whole thing and finding it's too big or too small. If you're off, try adjusting your tension before starting over with a different hook.
Grey is listed as an optional button color right in the pattern, so yes. The hat uses two buttons about 1.5 cm in diameter, and either blue or grey works with the color scheme. Grey gives it a slightly more neutral, vintage-aviator look. Just make sure whatever buttons you choose are sewn on very securely given the age range this hat is made for.
Final Thoughts
There is something about a tiny aviator hat that just gets people. Every time I've made one of these, someone in the room asks for the pattern before it's even finished. If you make yours, I'd love to see it: tag me on Instagram or drop a photo in the comments below. And if you're saving this for later, the Pinterest button is right there waiting for you. I hope the little one in your life wears this hat for every single outing this season.



