
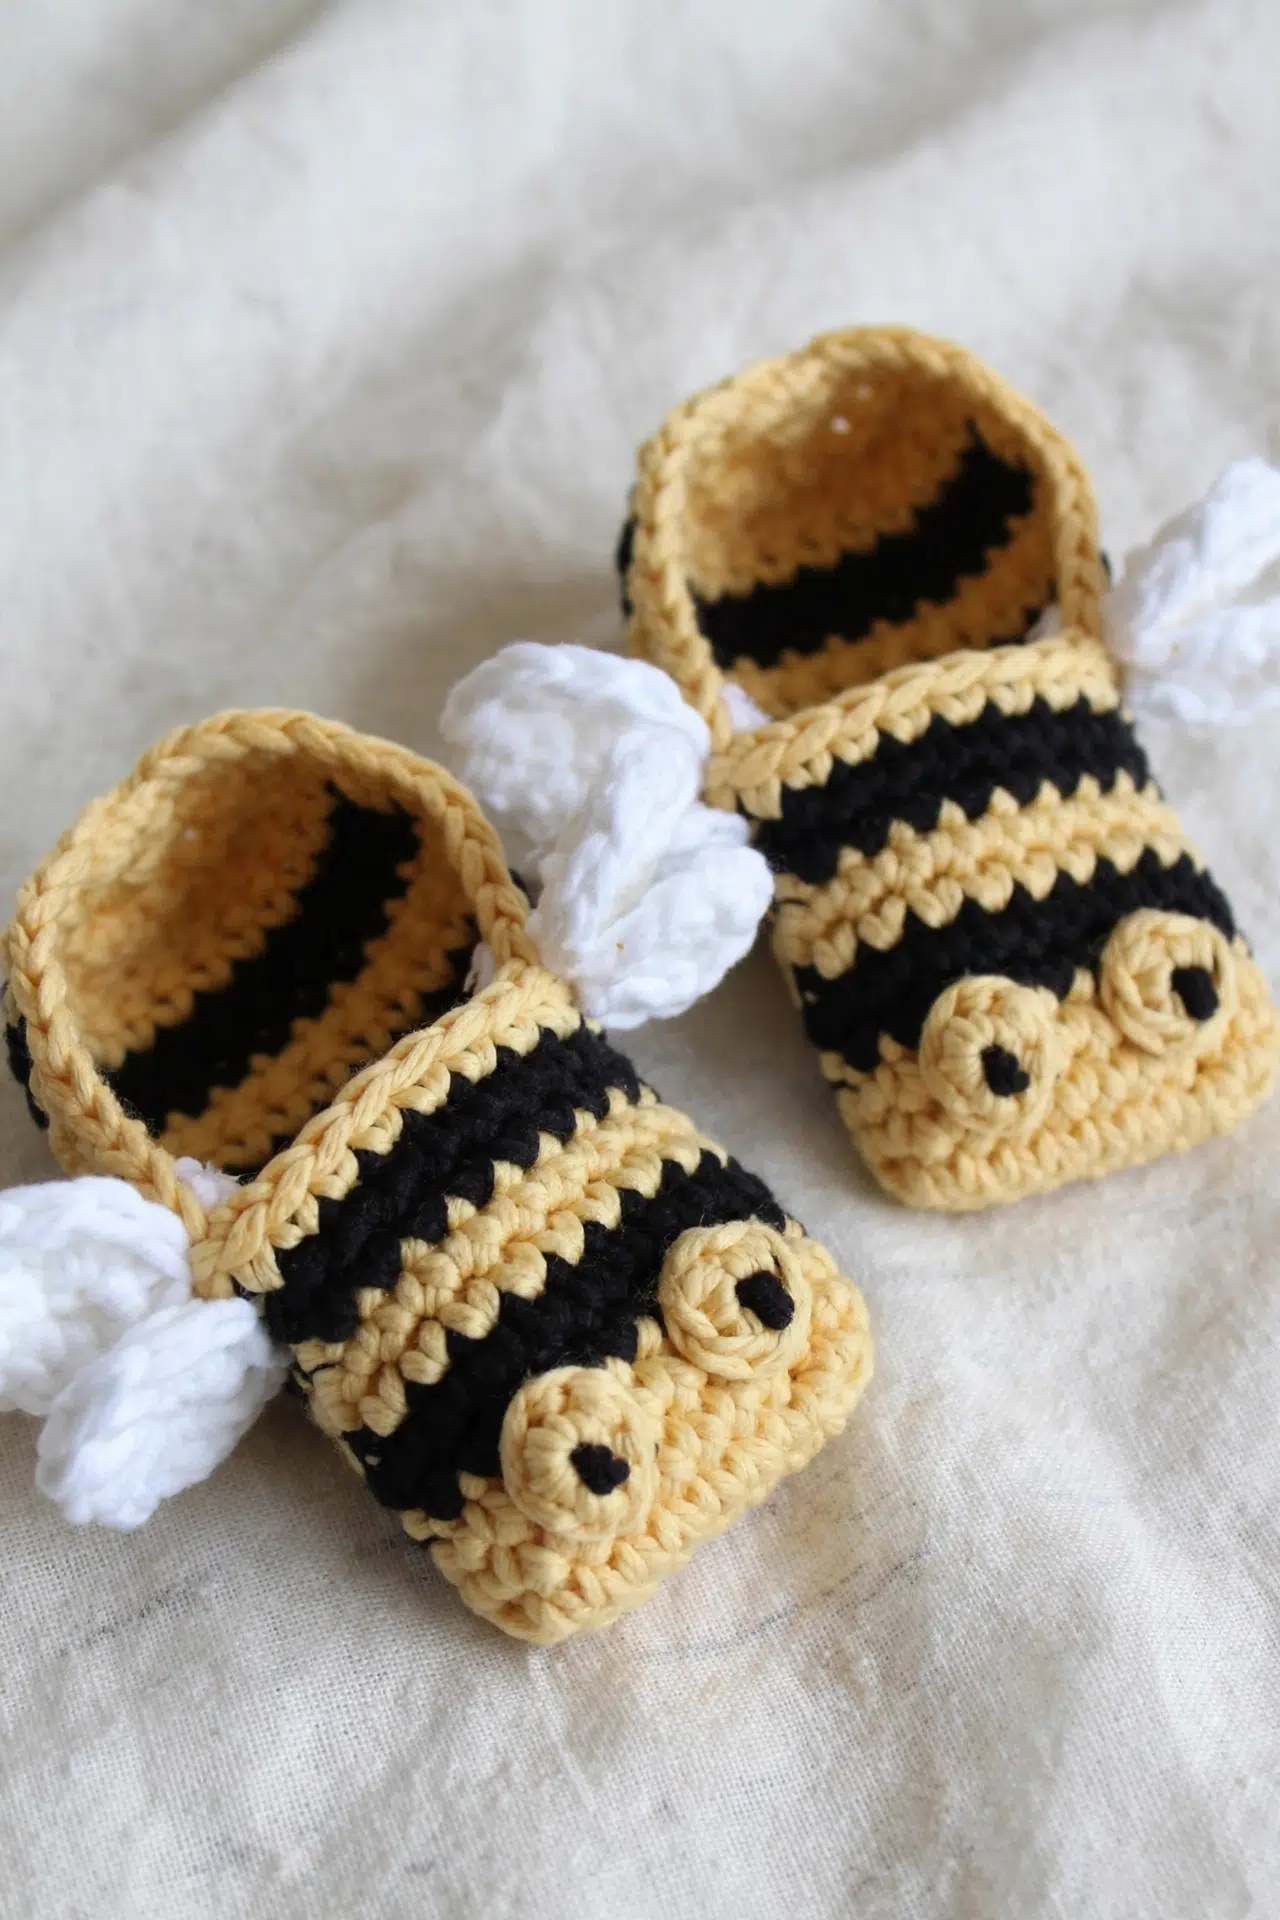
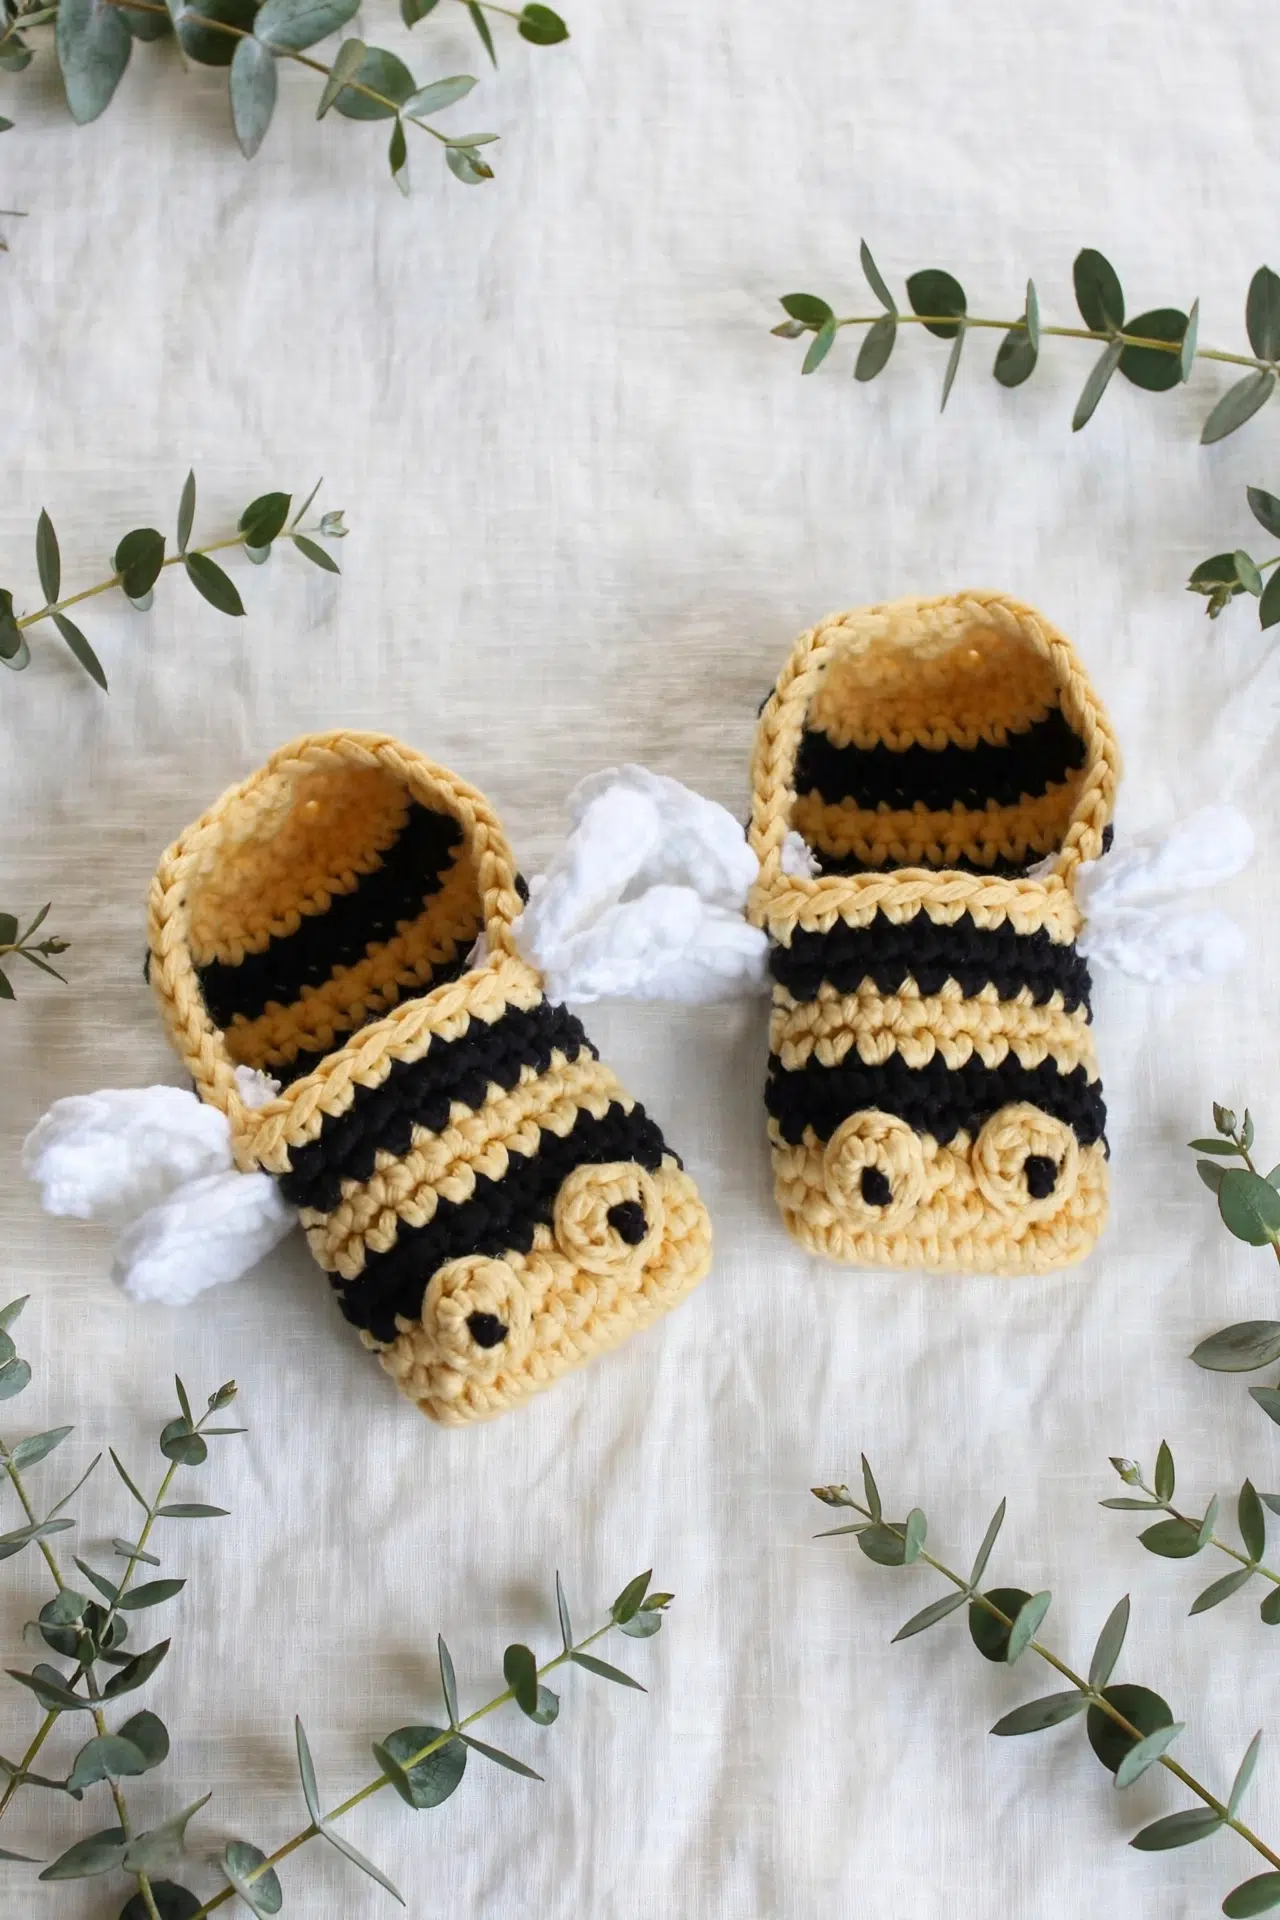
I made these for a friend's baby shower and honestly they were such a hit that I've made them three more times since. This Bumblebee Baby Booties Crochet Pattern is one of those beginner-friendly projects that actually feels worth making, not just easy for the sake of easy. Little baby accessories are pretty much always a good idea, but there's something about a bumblebee theme that just gets people.

Jump to:
About the Design
What I really like about this one is that the construction is straightforward but the finished result feels intentional. It's the kind of thing you can whip up in an evening and still feel proud to wrap up and give someone. I'd make these for a baby shower gift no trouble at all, or honestly just to have on hand because babies arrive on short notice sometimes and you want something ready to go.
The bumblebee angle makes it work for any season, too. It's not a Christmas thing or a winter thing. It's just sweet and a little playful, which is pretty much always appropriate for a newborn gift.
Why You'll Want to Make This
These booties are the baby gift you'll actually want to make again and again.
- True beginner level: No tricky techniques here, so if you're newer to crochet this is a really solid project to build confidence with.
- Quick to finish: Small accessories like booties don't ask much of your time, which makes them great for last-minute gifting.
- Perfect gift project: Baby shower, newborn arrival, a friend who just found out she's expecting. These fit every occasion.
- Year-round appeal: The bumblebee theme isn't tied to a holiday or season, so you can make and gift these any time.
- Great stash buster: Booties use so little yarn that this is a no-guilt way to use up smaller amounts you've been holding onto.
What You'll Need
Three colors, one hook, and small enough yardage that you could probably pull this off with scraps alone.
- Worsted Weight Yarn (Yellow, Black, and White): Worsted weight is the right call here. It's substantial enough to give the booties some structure without being stiff, and it works up quickly at this scale. You won't need much of any color. Yellow and white are your main players, so a partial skein of each is plenty. Black is used for stripes and the knotted eye detail, so a short length is all you need to cut off and set aside.
- 4.0 mm Crochet Hook: A 4.0 mm pairs well with worsted weight and keeps the fabric tight enough that the bootie holds its shape. You don't want a loose, floppy fabric on something this small.
- Also needed: yarn needle, scissors
Color Sequence & Yarn Changes
This pattern works across three separate components: the main bootie, the eyes, and the wings. Each piece is worked in its own color, so you're not doing a lot of mid-row color switching. The stripe detail on the bootie does involve yellow and black together, so it's worth having both colors ready to go before you start that section rather than hunting for the black mid-round.
Essential Info
Three colors, three separate components, and a pair of tiny bee booties for a newborn.
| Skill Level | Beginner |
| Pattern Gauge | Approx. 5 sc x 6 rows = 1 inch with 4.0 mm hook in single crochet |
| Finished Size | Baby 0–6 months to fit up to 10 cm |
| Yarn Weight | 4 Medium / Worsted |
| Terminology | US |
Stitch Guide & Abbreviations
Everything here is standard stuff you've probably worked before.
- B = Black
- ch = chain
- dc = double crochet
- hdc = half double crochet
- sc = single crochet
- sc2tog = single crochet 2 stitches together (insert hook in next st, yarn over, pull up a loop; insert hook in next st, yarn over, pull up a loop; yarn over, pull through all loops on hook)
- sc3tog = single crochet 3 stitches together (insert hook in next st, yarn over, pull up a loop; insert hook in next st, yarn over, pull up a loop; insert hook in next st, yarn over, pull up a loop; yarn over, pull through all loops on hook)
- sl st = slip stitch
- st(s) = stitch(es)
- TURN = turn work
- W = White
- Y = Yellow
Helpful Tips
This pattern is written in US terminology throughout. The color key is simple: Y = Yellow, B = Black, W = White. You'll make two booties, two eyes, and four wings total, so each component has its own make count. The bootie, eyes, and wings are worked as separate pieces. Gauge is estimated at approximately 5 sc x 6 rows to 1 inch using a 4.0 mm hook in single crochet. The finished size targets 0–6 months, fitting up to 10 cm. Fiber content isn't specified for this pattern, so check your yarn label directly. Any worsted weight yarn in the three colors will get you there.
The Pattern
Here's everything you need to make these bumblebee baby booties crochet pattern, worked from the sole up with the little wings and eyes added at the end.
Main Bootie
Make 2. The bootie starts flat at the sole, then joins into the round for the sides, and finishes with the toe worked back and forth in rows. The color striping runs through the upper section, so keep your yarn ends manageable as you go — I tend to carry the unused color loosely up the inside rather than cutting after every stripe.
Row 1: Using Y, ch 9, 2 sc in 2nd ch from hook, 1 sc in next 6 ch, 2 sc in last ch. [10 sc]
Row 2: Crocheting back in your chains again, 2 sc in 1st ch (same ch as last st), 1 sc in next 6 ch, 2 sc in last ch. [20 sts total from Rows 1 and 2] You're working into the underside of the foundation chain here, so by the end of Row 2 you'll have stitches running all the way around the sole edge.
Round 3: Sl st in next st, ch 1 (counts as st here and onwards until it says otherwise), 1 sc in next st and in each st around, sl st in ch 1 to join. [20 sc] This is where the piece transitions from flat rows into working in the round.
Round 4: Ch 1, 1 sc in next st and in each st around, join B with sl st in ch 1 to join. [20 sc] The color join happens at the very end of this round — have B ready before you reach that last sl st.
Rounds 5–6: Repeat Round 4, but join Y with sl st in ch 1 to join at end of last round. [20 sc]
Rounds 7–8: Repeat Round 4, but join B with sl st in ch 1 to join at end of last round. [20 sc]
Rounds 9–10: Repeat Round 4, but join Y with sl st in ch 1 to join at end of last round. [20 sc]
Round 11: Ch 1, 1 sc in next st and in each st around, sl st in ch 1 to join. [20 sc]
Round 12: Ch 1, 1 sc in next st and in next 12 sts. [14 sc] You're stopping partway around here — this sets up the toe section, and the remaining stitches from the round just sit unworked for now.
Round 13: Join B with ch 1 (do not count as st here and onwards), TURN, 1 sc in 1st st and in next 12 sts, 1 sc in previous ch 1. [14 sc] From here the toe works back and forth in rows rather than in the round. The ch 1 no longer counts as a stitch from this point forward.
Round 14: Ch 1, TURN, 1 sc in next st and in each st along. [14 sc]
Round 15: Join Y with ch 1, TURN, 1 sc in 1st st and in each st along. [14 sc]
Round 16: Ch 1, TURN, 1 sc in 1st st and in each st along. [14 sc]
Round 17: Join B with ch 1, TURN, 1 sc in 1st st and in each st along. [14 sc]
Round 18: Ch 1, TURN, 1 sc in 1st st and in each st along. [14 sc]
Round 19: Join Y with ch 1, TURN, 1 sc in 1st st and in each st along. [14 sc]
Round 20: Ch 1, TURN, 1 sc in 1st st and in each st along. [14 sc]
Round 21: Ch 1, TURN, *sc2tog* repeat around. [7 sc] The toe shaping starts here — you're halving the stitch count in one round.
Round 22: Ch 1, TURN, sc2tog, sc3tog, sc2tog. [3 sc]
Round 23: Sc3tog. [1 sc]
Round 24: Without fastening off, ch 1 and crochet 1 sc neatly around top edge, sl st in ch 1 to join. Fasten off and tie in all tails. Repeat for second bootie.
Eyes
Make 2. These are small and quick — a knotted length of dark yarn for the pupil set into a little crocheted circle. If you're not comfortable with a magic circle, the alternative start works just as well.
Step 1: Take a short length of B, and tie two knots into the center of the yarn length, one on top of the other. The double knot gives a little raised bump that reads as a pupil once it's sewn in.
Step 2: Using Y, crochet 6 sc into a magic circle, sl st in first sc to join. [6 sc] Fasten off leaving enough yarn for sewing.
Step 2 (Alternative): Ch 4, sl st in 1st ch to form a loop and crochet 6 sc into the loop just created. [6 sc]
Finishing the Eyes
This section attaches the eyes to the booties. It's a small step but it's what brings the bumblebee face together.
Step 1: Sew each end of your black knotted length into your yellow circle, tie on the back and use remaining Y yarn to sew your eye onto front of bootie. Repeat for second eye.
Wings
Make 4 — two wings per bootie. Each wing is worked in a single round from a center ring, using a mix of sc, hdc, and dc to create the curved shape. They work up fast.
Round 1: Using W, crochet 5 sc into a magic circle, sl st in first sc to join. [5 sc]
Round 1 (Alternative): Ch 4, sl st in 1st ch to form a loop and crochet 5 sc into the loop just created. [5 sc]
Round 2: Without chaining, 2 sc in next st, 2 hdc in next st, 3 dc in next st, 2 hdc in next st, 2 sc in last st. [11 sts] Fasten off and sew wing onto side of bootie. Repeat for remaining wings. The stitch progression from sc through hdc to dc and back is what gives the wing its curve — keep your tension even so it doesn't pull flat.
Putting It All Together
Once both booties are finished and the eyes and wings are all made, it's time to assemble. I sew the eyes onto the front of each bootie first, positioning them on the toe area before securing — it's easier to adjust placement before the wings are on. For the eyes, thread the tails from the yellow circle through to the back and knot them off neatly. Then attach two wings to each side of the bootie, one on each side. I find pinning them in place before sewing helps keep them symmetrical, especially since you're doing two booties and want them to match.
Care Instructions
Since the fiber isn't specified on this pattern, check your yarn label before washing. Most worsted weight yarns used for baby items do fine on a gentle machine cycle in a mesh laundry bag, but if the label says hand wash, do that. Lay the booties flat to dry so they keep their shape. Because these are so small, they can get lost in a dryer and come out misshapen, so air drying is the safer call.
Baby & Child Safety Notes
The eyes on these booties are made by knotting a short length of black yarn and sewing it into a crocheted yellow circle. There are no hard safety eyes, buttons, or beads involved, so that's one less thing to worry about for a newborn. That said, do check that all your sewn ends are secure before gifting or using these. A tail that works loose on a baby item is a hazard, so weave in every end thoroughly and give the eyes and wings a gentle tug to make sure nothing shifts.
Frequently Asked Questions
Each eye is a small crocheted circle worked in yellow, with a knotted length of black yarn sewn through the center to create the pupil detail. You sew the whole finished eye onto the front of the bootie using the yarn tail. No safety eyes or buttons are involved, so the look comes entirely from the yarn knots and your sewing.
More than you might expect for such a small project. You make 2 main booties, 2 eyes, and 4 wings. The wings are worked in pairs, two per bootie, so crochet all four before you start assembling. Each wing only takes two rounds, so they come together quickly.
Yes, and it's worth knowing about before you start. The sole and sides of the bootie are worked in joined rounds, but the toe section switches to working back and forth in rows. This is how the toe gets its shaped, slightly narrowed look. The pattern tells you when to turn, so follow those cues carefully and it makes sense as you go.
The pattern includes both options for every piece that starts in the round. The magic circle gives a tighter center with no visible hole, but the chain loop alternative works fine, especially if you're not comfortable with magic circles yet. Pull the chain loop snug before you join and it closes up well enough on something this small.
The stripes are created by joining a new color at the end of each two-round section. You work two rounds in black, join yellow, work two rounds in yellow, join black again, and so on. The joins happen at the slip stitch that closes each round, so the color change is built into the pattern instructions rather than carried up the side.
Happy Crocheting
These little booties are one of those projects that look far more involved than they actually are, and that moment when you sew the wings on and suddenly it clicks into a bumblebee is SO satisfying. If you make a pair, I'd love to see them. Tag me on social media or drop a photo in the comments below. And if you're saving this for later, pin it to your baby crochet board so you can find it when you need it.



