
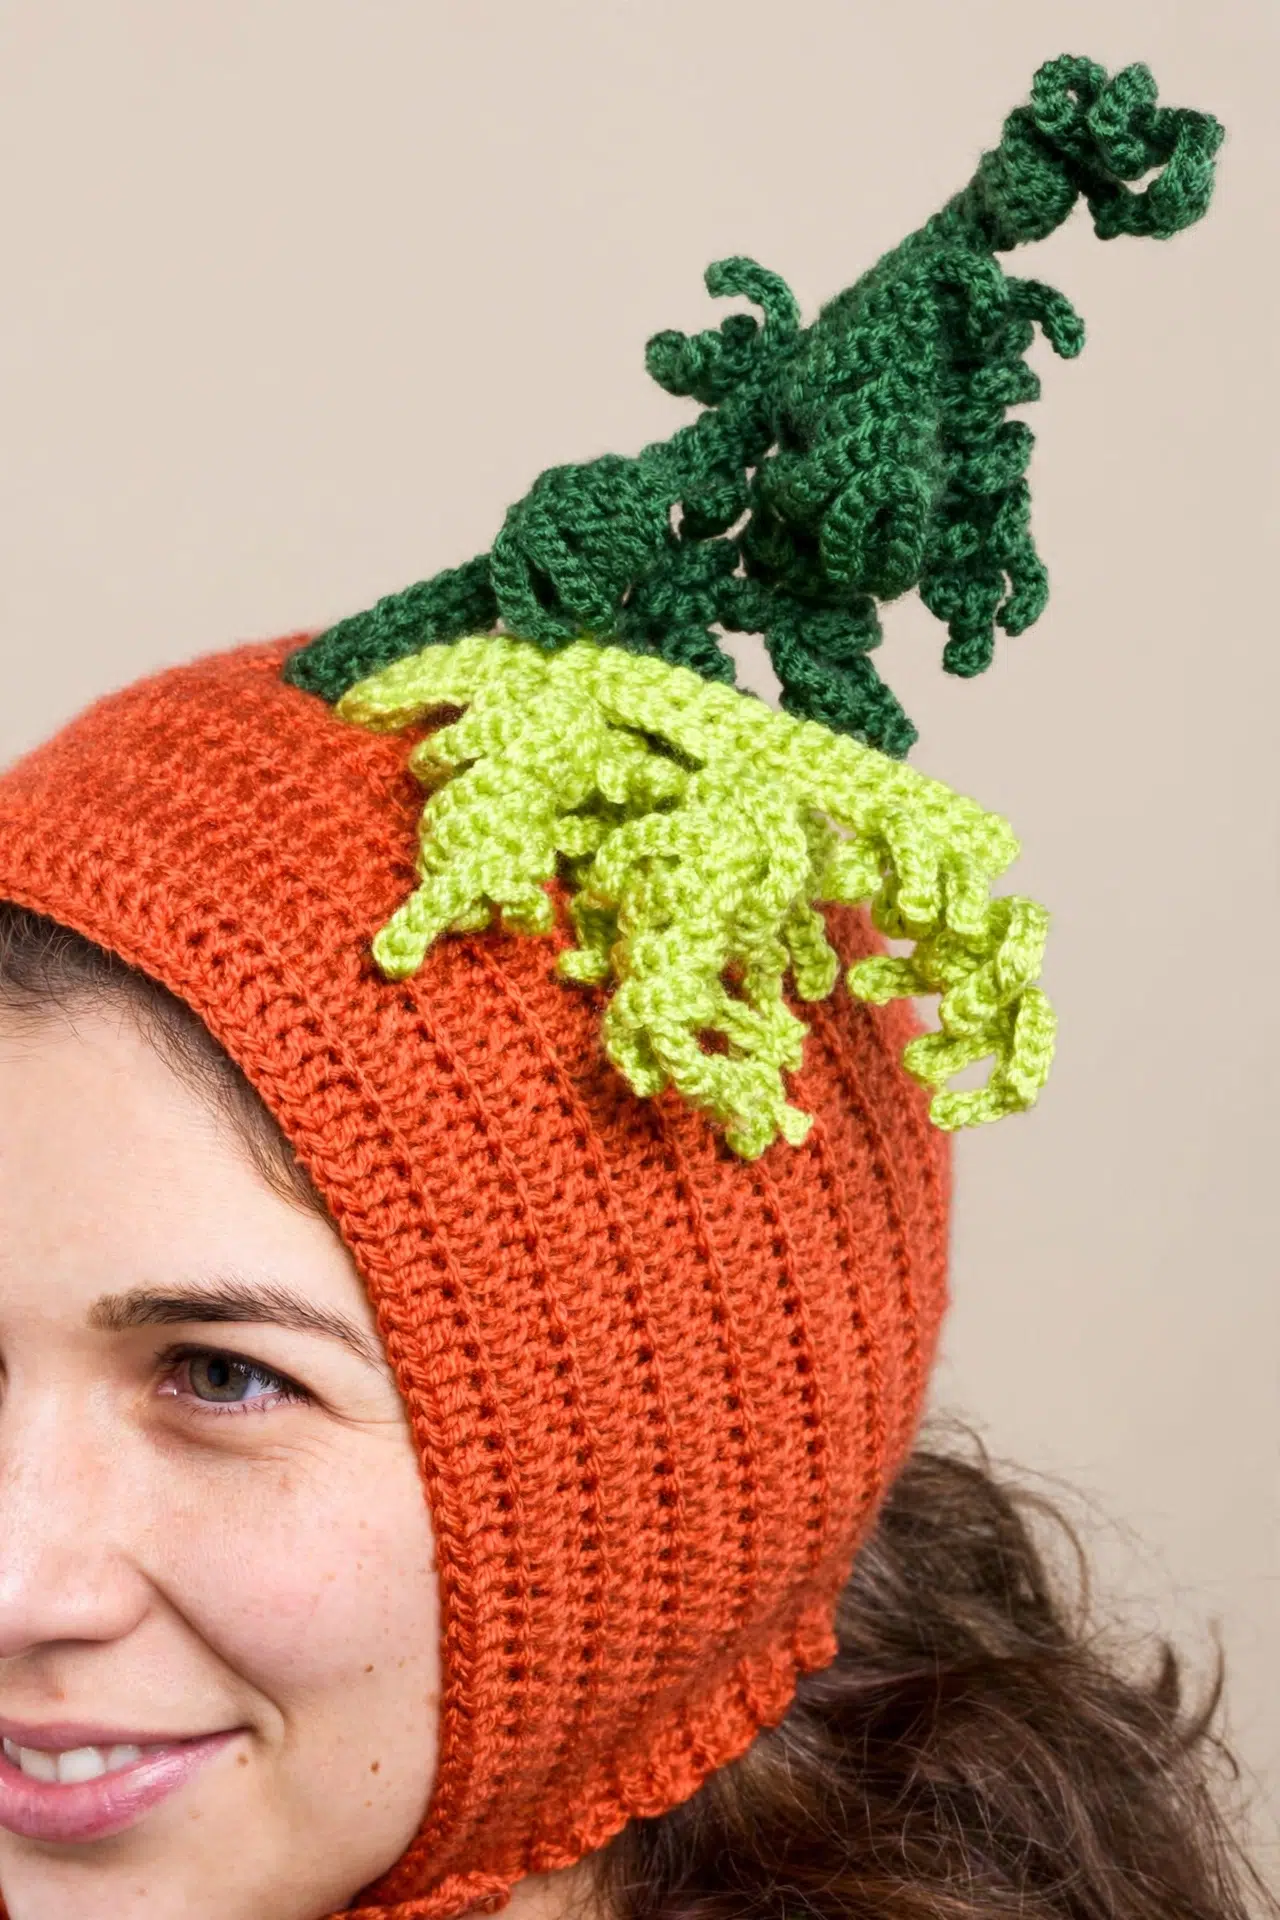
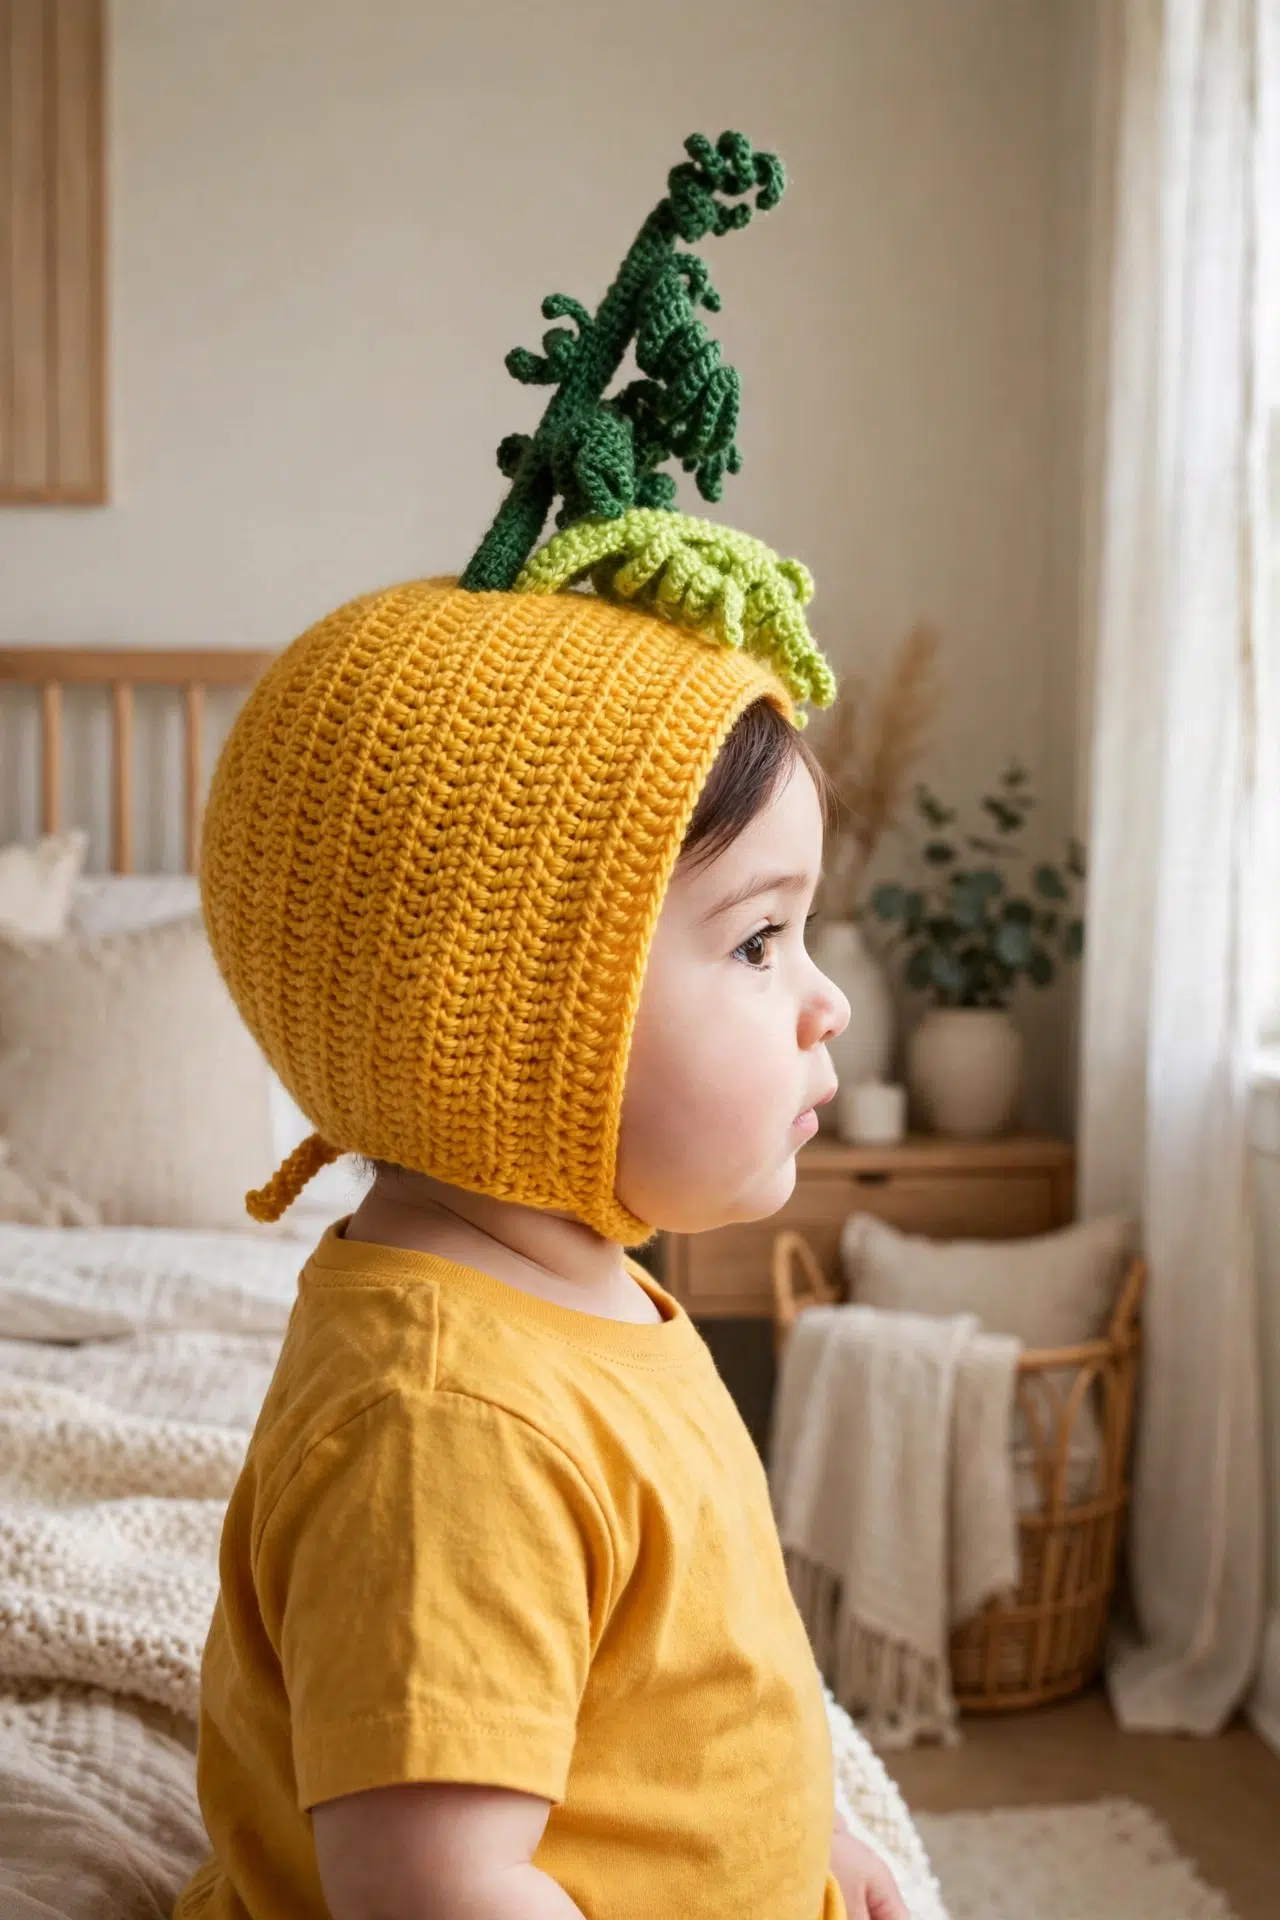
A playful project feels even better when it earns a real job afterward, and Fruit & Veggie Crochet Bonnets do exactly that. Keep one ready for dress-up play, add it to a themed costume, or reach for it when a classroom activity calls for a wearable fruit or vegetable piece.

The bonnet begins with steady dc rounds, then settles into simple rows for an easy rhythm in your hands. The toppers bring in sc, taller stitches and a little structured assembly, so the work stays interesting without asking you to tackle complicated bonnet shaping.
Jump to:
Why You'll Love This Pattern
- A broad size range: You can make these bonnets for babies, children, tweens or adults using six written size options and an adjustable button strap.
- Three topper choices: The shared bonnet construction works with Pineapple, Beet or Carrot topper instructions, giving you three distinct projects from one fitted base.
- Comfortable stitch rhythm: Most of the bonnet is worked in dc, while repeated sc rows form the Pineapple leaves and support covers. That mix gives your hands long, predictable stretches of stitching.
- Built-in structure: Crocheted covers conceal the plastic canvas supports, and the separate Base Cover closes the interior once assembly is complete.
Pattern Details
- Skill Level: Easy
- Finished Size: To fit head circumference: 6/12 mos: 14 ½ in. [37 cm]; 18/24 mos: 16 in. [40.5 cm]; 2/4 yrs: 17 ½ in. [44.5 cm]; 5/10 yrs: 20 ¼ in. [51.5 cm]; Tween/Adult S: 22 in. [56 cm]; Adult L: 23 ¼ in. [59 cm].
- Gauge: 16.5 dc and 10 rows = 4 in. [10 cm].
- Yarn Weight: Medium 4
- Time to Make: about 8-14 hours, depending on size and topper
Materials for These Bonnets
Gather your Medium 4 yarn, a G/6 hook and the small finishing supplies before you begin. The plastic canvas matters here because it supports the topper rather than serving as optional decoration.
- Medium 4 yarn, 6 oz/170 g and 315 yds/288 m per skein.
- Bonnet MC for Pineapple: Gold. 6/12 mos: 1 ball or 112 yds / 102.5 m; 18/24 mos: 1 ball or 123 yds / 112.5 m; 2/4 yrs: 1 ball or 149 yds / 136 m; 5/10 yrs: 1 ball or 173 yds / 158 m; Tween/Adult S: 1 ball or 217 yds / 198.5 m; Adult L: 1 ball or 232 yds / 212 m.
- Bonnet MC for Beet: Burgundy. 6/12 mos: 1 ball or 112 yds / 102.5 m; 18/24 mos: 1 ball or 123 yds / 112.5 m; 2/4 yrs: 1 ball or 149 yds / 136 m; 5/10 yrs: 1 ball or 173 yds / 158 m; Tween/Adult S: 1 ball or 217 yds / 198.5 m; Adult L: 1 ball or 232 yds / 212 m.
- Bonnet MC for Carrot: Pumpkin. 6/12 mos: 1 ball or 112 yds / 102.5 m; 18/24 mos: 1 ball or 123 yds / 112.5 m; 2/4 yrs: 1 ball or 149 yds / 136 m; 5/10 yrs: 1 ball or 173 yds / 158 m; 2/4 yrs: 1 ball or 149 yds / 136 m; 5/10 yrs: 1 ball or 173 yds / 158 m; Tween/Adult S: 1 ball or 217 yds / 198.5 m; Adult L: 1 ball or 232 yds / 212 m.
- Pineapple Topper A, Chartreuse: 1 ball or 28 yds / 25.5 m.
- Pineapple Topper B, Dark Sage: 1 ball or 191 yds / 174.5 m.
- Beet Topper MC, Burgundy: 1 ball or 15 yds / 14 m.
- Beet Topper A, Chartreuse: 1 ball or 10 yds / 9 m.
- Beet Topper B, Dark Sage: 1 ball or 17 yds / 15.5 m.
- Carrot Topper A, Chartreuse: 1 ball or 30 yds / 27.5 m.
- Carrot Topper B, Dark Sage: 1 ball or 45 yds / 41 m.
- Size U.S. G/6 [4 mm] crochet hook or size needed to obtain gauge.
- Yarn needle.
- Stitch marker.
- One ½ in. [12 mm] button.: Check that the button passes securely between two dc posts on the strap without slipping back through during wear.
- #7 plastic canvas with 7 holes per in. for internal support.: Keep the stated hole counts when cutting the supports. The doubled strips need enough firmness to hold the topper upright without making the bonnet unnecessarily bulky.
Stitches & Abbreviations
- approx - approximately
- beg - beginning
- ch - chain or chains
- cont - continue or continuity
- dc - double crochet
- dtr - double treble crochet
- hdc - half double crochet
- inc - increase or increases
- MC - main color
- PM - place marker
- rem - remain or remaining
- rep - repeat
- rnd - round
- rnds - rounds
- RS - right side
- sc - single crochet
- sc2tog - single crochet 2 together
- sl st - slip stitch
- sp - space
- sps - spaces
- st - stitch
- sts - stitches
- tr - treble crochet
- WS - wrong side
- yo - yarn over
dtr: Yo 3 times and draw up a loop in indicated st; [yo and draw through 2 loops on hook] 4 times.
sc2tog: Draw up a loop in each of next 2 sts; yo and draw through all loops on hook.
How to Crochet the Fruit & Veggie Bonnets
Choose your size and topper before starting, then follow the shared bonnet and Base Cover instructions before moving to the matching assembly section.
Instructions are written for 6/12 mos. Size changes are written as 6/12 mos (18/24 mos, 2/4 yrs, 5/10 yrs, Tween/Adult S, Adult L). When only one number is provided, it applies to all sizes. The bonnet begins at the back in rounds and then transitions to rows to form the sides. Ch 3 at the beginning of a round or row counts as 1 dc. Join all bonnet and Base Cover rounds with a sl st in the first dc unless instructed otherwise. The same topper size is used for every bonnet size. The Pineapple Small Leaf refers to marked portions of the Large Leaf instructions that aren't fully specified here. Use the accompanying marked leaf directions for those portions. The Carrot Large and Small Leaf branch layouts depend on marked repeat sequences that aren't fully specified here. Use the accompanying marked leaf directions wherever a marked sequence is referenced.
Bonnet Back
- Step 1: With MC, ch 4.
- Round 1: Work 11 dc in 4th ch from hook; join with sl st. (12)
- Round 2: Ch 3, 1 dc in same sp as last sl st, 2 dc in each dc around; join. (24)
- Round 3: Ch 3, *2 dc in next dc, 1 dc in next dc; rep from * around, ending with 2 dc in last dc; join. (36)
- Round 4: Ch 3, 1 dc in next dc, *2 dc in next dc, 1 dc in each of next 2 dc; rep from * around, ending with 2 dc in last dc; join. (48)
- Round 5: Ch 3, 1 dc in each of next 2 dc, *2 dc in next dc, 1 dc in each of next 3 dc; rep from * around, ending with 2 dc in last dc; join. (60)
- Next Round, 18/24 mos only: Ch 3, 1 dc in each of next 8 dc, *2 dc in next dc, 1 dc in each of next 9 dc; rep from * around, ending with 2 dc in last dc; join. (66)
- Round 6, 2/4 yrs, 5/10 yrs, Tween/Adult S and Adult L only: Ch 3, 1 dc in each of next 3 dc, *2 dc in next dc, 1 dc in each of next 4 dc; rep from * around, ending with 2 dc in last dc; join. (72)
- Round 7, 5/10 yrs, Tween/Adult S and Adult L only: Ch 3, 1 dc in each of next 4 dc, *2 dc in next dc, 1 dc in each of next 5 dc; rep from * around, ending with 2 dc in last dc; join. (84)
- Round 8, Tween/Adult S and Adult L only: Ch 3, 1 dc in each of next 12 (5) dc, *2 dc in next dc, 1 dc in each of next 13 (6) dc; rep from * around, ending with 2 dc in last dc; join. 90 (96) dc.
Numbers in this step read Tween/Adult S (Adult L).
Bonnet Sides
The sides are worked back and forth in rows, leaving an opening at the front.
- Step 1: PM on first st of last rnd. The last rnd has 60 (66, 72, 84, 90, 96) dc.
- Row 1: Ch 3, 1 dc in each of next 55 (61, 65, 77, 81, 87) dc; turn. Leave remaining 4 (4, 6, 6, 8, 8) dc unworked. 56 (62, 66, 78, 82, 88) dc.
RS.
- Row 2: Ch 3, 1 dc in each dc to end of row; turn. 56 (62, 66, 78, 82, 88) dc.
- Rows 3 onward: Rep Row 2 until work from marker along side edge measures 5 in. (5 in., 5 ½ in., 5 ½ in., 6 ½ in., 6 ½ in.) [12.5 (12.5, 14, 14, 16.5, 16.5) cm], ending on a WS row; turn.
- Next Row: Ch 12 (12, 16, 16, 20, 20), 1 dc in 4th ch from hook, 1 dc in each of next 8 (8, 12, 12, 16, 16) ch to make Buttonhole Strap; 1 dc in each dc to end of row. 66 (72, 80, 92, 100, 106) sts. Fasten off.
Bonnet Finishing
- Step 1: Sew button at front bottom corner of bonnet opposite the Buttonhole Strap.
- Step 2: Button the strap between any 2 dc posts along the strap to adjust the fit.
Base Cover
The Base Cover is sewn inside the bonnet to enclose the plastic canvas support.
- Step 1: With MC, ch 4.
- Round 1: Work 11 dc in 4th ch from hook; join. (12)
- Round 2: Ch 3, 1 dc in same sp as last sl st, 2 dc in each dc around; join. (24)
- Round 3: Ch 3, *2 dc in next dc, 1 dc in next dc; rep from * around, ending with 2 dc in last dc; join. Fasten off. (36)
Pineapple Topper Middle Leaf
Make 2 with B.
- Step 1: With B, ch 7.
- Row 1: 1 sc in 2nd ch from hook, 1 sc in each ch to end; turn. (6)
RS.
- Row 2: Ch 1, 1 sc in each sc to end; turn. (6)
- Rows 3 onward: Rep Row 2 until piece measures 6 in. [15 cm], ending on a RS row.
- Shape Top, Row 1: Ch 1, sc2tog, 1 sc in each of next 2 sc, sc2tog; turn. (4)
- Shape Top, Row 2: Ch 1, (sc2tog) 2 times; turn. (2)
- Shape Top, Row 3: Ch 1, sc2tog; fasten off. (1)
Pineapple Topper Large Leaf
Make 3 with B.
- Step 1: With B, ch 11.
- Row 1: 1 sc in 2nd ch from hook, 1 sc in each ch to end; turn. (10)
RS.
- Row 2: Ch 1, 1 sc in each sc to end; turn. (10)
- Rows 3 onward: Rep Row 2 until piece measures 6 in. [15 cm], ending on a RS row.
- Shape Top, Row 1: Ch 1, sc2tog, 1 sc in each sc to last 2 sc, sc2tog; turn. (8)
- Shape Top, Rows 2-4: Ch 1, 1 sc in each st to end; turn. (8)
- Shape Top, Rows 5-12: Rep Shape Top Rows 1-4 2 more times. (4)
- Shape Top, Row 13: Ch 1, (sc2tog) 2 times; turn. (2)
- Shape Top, Row 14: Ch 1, sc2tog; fasten off. (1)
Pineapple Topper Small Leaf
Make 2 with B and 1 with A.
- Step 1: Work the marked foundation and straight-row portion as given for Large Leaf.
This step depends on the marked portion of the Large Leaf directions.
- Rows onward: Rep the last row until piece measures 4 in. [10 cm], ending on a RS row.
- Next Rows: Work the marked shaping portion as given for Large Leaf.
This step depends on the marked portion of the Large Leaf directions.
Pineapple Leaf Edging
Work around every Pineapple leaf with its matching yarn color.
- Step 1: With RS facing, join matching yarn color with sl st to bottom right corner of leaf.
- Step 2: Ch 1; sc evenly up side edge of leaf to top.
- Step 3: Work (1 sc, 1 dc, 1 sc) in st at top.
- Step 4: Sc evenly down opposite side edge; fasten off.
Pineapple Central Support Cover
- Step 1: With B, leave a tail and ch 6; join with sl st to work in the round without twisting.
- Round 1: Ch 1, 1 sc in first ch, 1 sc in each ch around. Do not join; work in a spiral and PM on first st. (6)
- Round 2: 1 sc in each sc around. (6)
- Rounds 3 onward: Rep Round 2 until piece measures 6 in. [15 cm]; fasten off, leaving a sewing tail.
Pineapple Topper Assembly
- Step 1: Cut 2 Central Support strips measuring approx ⅜ in. x 6 in. [1 x 15 cm], each 2 x 40 holes, and 1 circular Base Support approx 2 ¼ in. [5.5 cm] in diameter, using a 15-square diameter with 5 x 5 corner triangles cut away.
- Step 2: Double the 2 support strips for stability and attach them to center of base.
- Step 3: Push support up through bonnet center, pull crocheted cover over it and sew closed.
- Step 4: Sew 2 Middle Leaves to either side, arrange 3 Large Leaves evenly around them and finish with 3 Small Leaves.
- Step 5: Turn bonnet inside out and sew circular Base Cover over plastic base to hide ends.
Beet Topper Leaves
Make 1 with Color 1 as A and 2 with Color 1 as B.
- Stem: With MC, ch 40. Sl st in 2nd ch from hook; sl st in each of next 11 ch; 1 sc in each of next 9 ch; 1 hdc in each of next 6 ch; 1 dc in each of next 6 ch; 1 tr in each of next 6 ch; fasten off.
- Leaf, Row 1: Skip first 10 ch of foundation stem chain. Join Color 1 with sl st to remaining loop of next foundation ch.
RS.
- Leaf, First Side: Working in rem foundation loops: 1 sc in next ch, 1 hdc in next ch, 1 dc in each of next 2 ch, 1 tr in each of next 2 ch, 1 dc in each of next 2 ch, 1 hdc in next ch, 1 sc in each of next 2 ch, 1 hdc in each of next 2 ch, 1 dc in each of next 3 ch, 1 tr in each of next 3 ch, 1 dtr in each of next 3 ch, 1 tr in each of next 2 ch, 1 dc in each of next 2 ch, 1 hdc in next ch, 1 sc in last ch, 2 sc in turning ch.
- Leaf, Opposite Side: Do not turn. Working across opposite side in back loops only: 1 sc in next sl st, 1 hdc in next sl st, 1 dc in each of next 2 sl sts, 1 tr in each of next 2 sl sts, 1 dtr in each of next 3 sl sts, 1 tr in each of next 3 sl sts, 1 dc in each of next 3 sc, 1 hdc in each of next 2 sc, 1 sc in each of next 2 sc, 1 hdc in next sc, 1 dc in each of next 2 sts, 1 tr in each of next 2 hdc, 1 dc in each of next 2 hdc, 1 hdc in next hdc, 1 sc in next dc, sl st in next dc; fasten off.
Beet Central Support Covers
Make 3 with MC.
- Step 1: Leave a tail and ch 6; join in a ring.
- Round 1: Ch 1, 1 sc in first ch, 1 sc in each ch around; work in a spiral. (6)
- Round 2: 1 sc in each sc around. (6)
- Rounds 3 onward: Rep Round 2 until work measures 8 in. [20.5 cm]; fasten off with a tail.
Beet Topper Assembly
- Step 1: Cut 3 Central Support strips measuring ⅜ in. x 8 in. [1 x 20.5 cm], each 2 x 54 holes, and 1 circular Base Support approx 2 ¼ in. [5.5 cm] in diameter, using a 15-square diameter with 5 x 5 corner cutouts.
- Step 2: Join 3 strips upright to base.
- Step 3: Feed supports through top center of bonnet, slide crocheted covers over each arm and secure.
- Step 4: Sew stem of 1 leaf along each upright support.
- Step 5: Turn bonnet inside out and sew circular Base Cover to underside.
Carrot Topper Large Leaf
Work with B.
- Row 1: Ch 12 for Branch.
RS.
- First Petal: Ch 8; sl st in 2nd ch from hook, sl st in each of next 5 ch, leaving rem stem ch unworked.
- Second Through Fifth Petals: (Ch 8, sl st in 2nd ch from hook, sl st in each of next 5 ch, leaving rem stem ch unworked) 4 times.
- Next Petals: (Ch 7, sl st in 2nd ch from hook, sl st in each of next 5 ch) 2 times.
- Opposite Side of Stem: Working down opposite sides of stem, sl st in next stem ch from Fifth Petal.
- Next Branch Section: (Sl st in 6th sl st of next petal, ch 7, sl st in 2nd ch from hook, sl st in each of next 5 ch, sl st in next stem ch) 3 times.
- Next Branches: (Ch 6 to continue branch; work the marked sequence once) 2 times.
The marked sequence is required to complete this portion.
- Last Branch: Ch 3 to continue branch; work the marked sequence once, ending with last sl st in last branch ch.
The marked sequence is required to complete this portion.
- Opposite Side of Branch: Working down opposite side of branch, sl st in each of next 2 branch ch, sl st in base of next stem.
- Next Section: Work the marked sequence once.
The marked sequence is required to complete this portion.
- Remaining Sections: (Sl st in each of next 6 branch ch, sl st in next stem ch, work the marked sequence once) 2 times.
The marked sequence is required to complete this portion.
- Finish: Sl st in each ch to end; fasten off.
Carrot Topper Small Leaf
Work with A.
- Row 1: Ch 12 for Branch.
RS.
- First Section: Work the marked sequence as defined for Large Leaf.
The marked sequence is required to complete this portion.
- Next Branch: Ch 6 to continue branch; work the marked sequence once.
The marked sequence is required to complete this portion.
- Last Branch: Ch 3 to continue branch; work the marked sequence once, ending last sl st in last branch ch.
The marked sequence is required to complete this portion.
- Opposite Side: Working down opposite side of branch, sl st in each of next 2 branch ch, sl st in base of next stem.
- Next Section: Work the marked sequence once.
The marked sequence is required to complete this portion.
- Remaining Section: Sl st in each of next 6 branch ch, sl st in next stem ch; work the marked sequence once.
The marked sequence is required to complete this portion.
- Finish: Sl st in each ch to end; fasten off.
Carrot Central Support Covers
Make a Short Version and a Long Version with B.
- Step 1: Ch 6; join in a ring.
- Round 1: Ch 1, 1 sc in each ch around; work in a spiral. (6)
- Round 2: 1 sc in each sc around. (6)
- Short Version, Rounds 3 onward: Rep Round 2 until piece measures 5 in. [12.5 cm]; fasten off with a tail.
- Long Version, Rounds 3 onward: Rep Round 2 until piece measures 8 in. [20.5 cm]; fasten off with a tail.
Carrot Topper Assembly
- Step 1: Cut 2 long strips measuring ⅜ in. x 8 in. [1 x 20.5 cm], each 2 x 54 holes; 2 short strips measuring ⅜ in. x 5 in. [1 x 12.5 cm], each 2 x 34 holes; and 1 circular Base Support approx 2 ¼ in. [5.5 cm] across, using a 15-square diameter with 5 x 5 corner cutouts.
- Step 2: Double each pair of strips to make 1 double-layer 8 in. support and 1 double-layer 5 in. support. Join supports upright onto base.
- Step 3: Feed supports through top of bonnet, fit short and long covers over respective supports and stitch down.
- Step 4: Sew 1 leaf along each upright support.
- Step 5: Turn bonnet inside out and sew circular Base Cover across interior base to cover canvas and ends.
Choosing a size
Choose the bonnet size by the listed head circumference. The Buttonhole Strap can be fastened between different dc posts for a more adjustable fit.
Topper sizing
Use the same topper dimensions for every bonnet size.
Crochet Tips
- Check gauge before sizing: The bonnet circumference depends on both dc width and row height. Make a swatch and change hook size if needed, especially when you're making one of the fitted child sizes.
- Mark the transition point: Place the marker exactly where instructed on the last back round. Side depth is measured from this marker, so moving it can make the opening sit unevenly.
- Cut canvas cautiously: Round sharp plastic corners and compare each support with its crocheted cover before attaching it to the base. It's easier to trim a small amount now than after the support is sewn inside.
- Test the strap before fastening off completely: Pin the button in place and try the available spaces between dc posts. This confirms that the strap closes securely while still giving the intended adjustment.
Ways to Adapt Your Crochet Bonnets
- Try another Medium 4 yarn: A smooth yarn with similar yardage and fiber behavior is the safest substitute. Swatch first because even yarns in the same weight category can produce different dc measurements.
- Use a softer yarn for the bonnet: You can choose a softer Medium 4 yarn for the section against the head and a firmer coordinating yarn for the topper. Keep both at the required gauge so the Base Cover and support area still align.
- Change the topper colors: A, B and MC can be replaced with your preferred shades without changing construction. Label the yarns before starting because several assembly directions rely on those color roles.
- Choose a different topper for the same size: The topper measurements don't change with bonnet size, so you can pair Pineapple, Beet or Carrot construction with any of the six bonnet sizes.
- Use comparable craft mesh: A substitute for #7 plastic canvas must be firm, cuttable and compatible with the stated hole dimensions. Very soft mesh may bend under the leaves, while thick rigid material can create a bulky interior.
Fixing Fit and Support Problems
- The back circle is rippling: Your dc stitches may be wider than gauge or the increases may have shifted. Check each completed round count before continuing and try a smaller hook if the fabric keeps forming pronounced waves.
- The side opening is uneven: Measure from the marker along the side edge rather than from the center of the back. Also confirm that Row 1 leaves the correct number of stitches unworked for your size.
- The topper leans: Check that doubled supports are attached firmly at the center of the circular base and that each crocheted cover fits closely. A loose cover or off-center base connection lets the support move even when the leaves are sewn securely.
Care Instructions
Follow the washing directions for your chosen yarn, since the fiber content isn't specified. Because the bonnet contains plastic canvas and a sewn button, gently hand wash in cool water, avoid twisting and reshape while damp. Dry flat away from direct heat, and don't tumble dry unless both the yarn and internal support are confirmed safe for it.
More Whimsical Crochet Costume Headwear
- Knitted Dinosaur Hat
- Halloween Crochet Kitty Hat
- Spooky Crochet Spider Hat
- Crochet Curved Horn Headband
Frequently Asked Questions
When do I stop repeating the bonnet side row?
Stop after the side edge measured from the marker reaches the length listed for your size and you've completed a WS row. Measuring from the marker keeps the bonnet depth consistent with the shaped back. Ending on the specified side also places the Buttonhole Strap at the correct edge when you work the next row.
Does the beginning ch 3 count as a stitch?
Yes, every beginning ch 3 in the bonnet and Base Cover counts as 1 dc. Treating it as an extra chain would add a stitch to each round or row and disrupt both the increase circle and the side counts. Join into the first dc as directed rather than changing the stated counting method.
Can I leave out the plastic canvas?
You can omit it only if you accept a topper that won't have the intended internal support. The leaves attach around covered upright strips, and those strips connect to a circular base inside the bonnet. Yarn alone won't provide the same structure, particularly for the longer Beet and Carrot supports.
Why is the Base Cover made separately?
The Base Cover encloses the circular plastic support after the topper has been installed. Its three dc rounds create a piece sized to cover the internal base, hide yarn ends and keep the cut canvas away from the wearer. Don't sew it in until the upright supports and topper pieces are secure.
Fruit & Veggie Crochet Bonnets are the kind of cheerful, practical costume project I expect you'll return to for more sizes and topper choices. Tell me in the comments which version you're making.



