
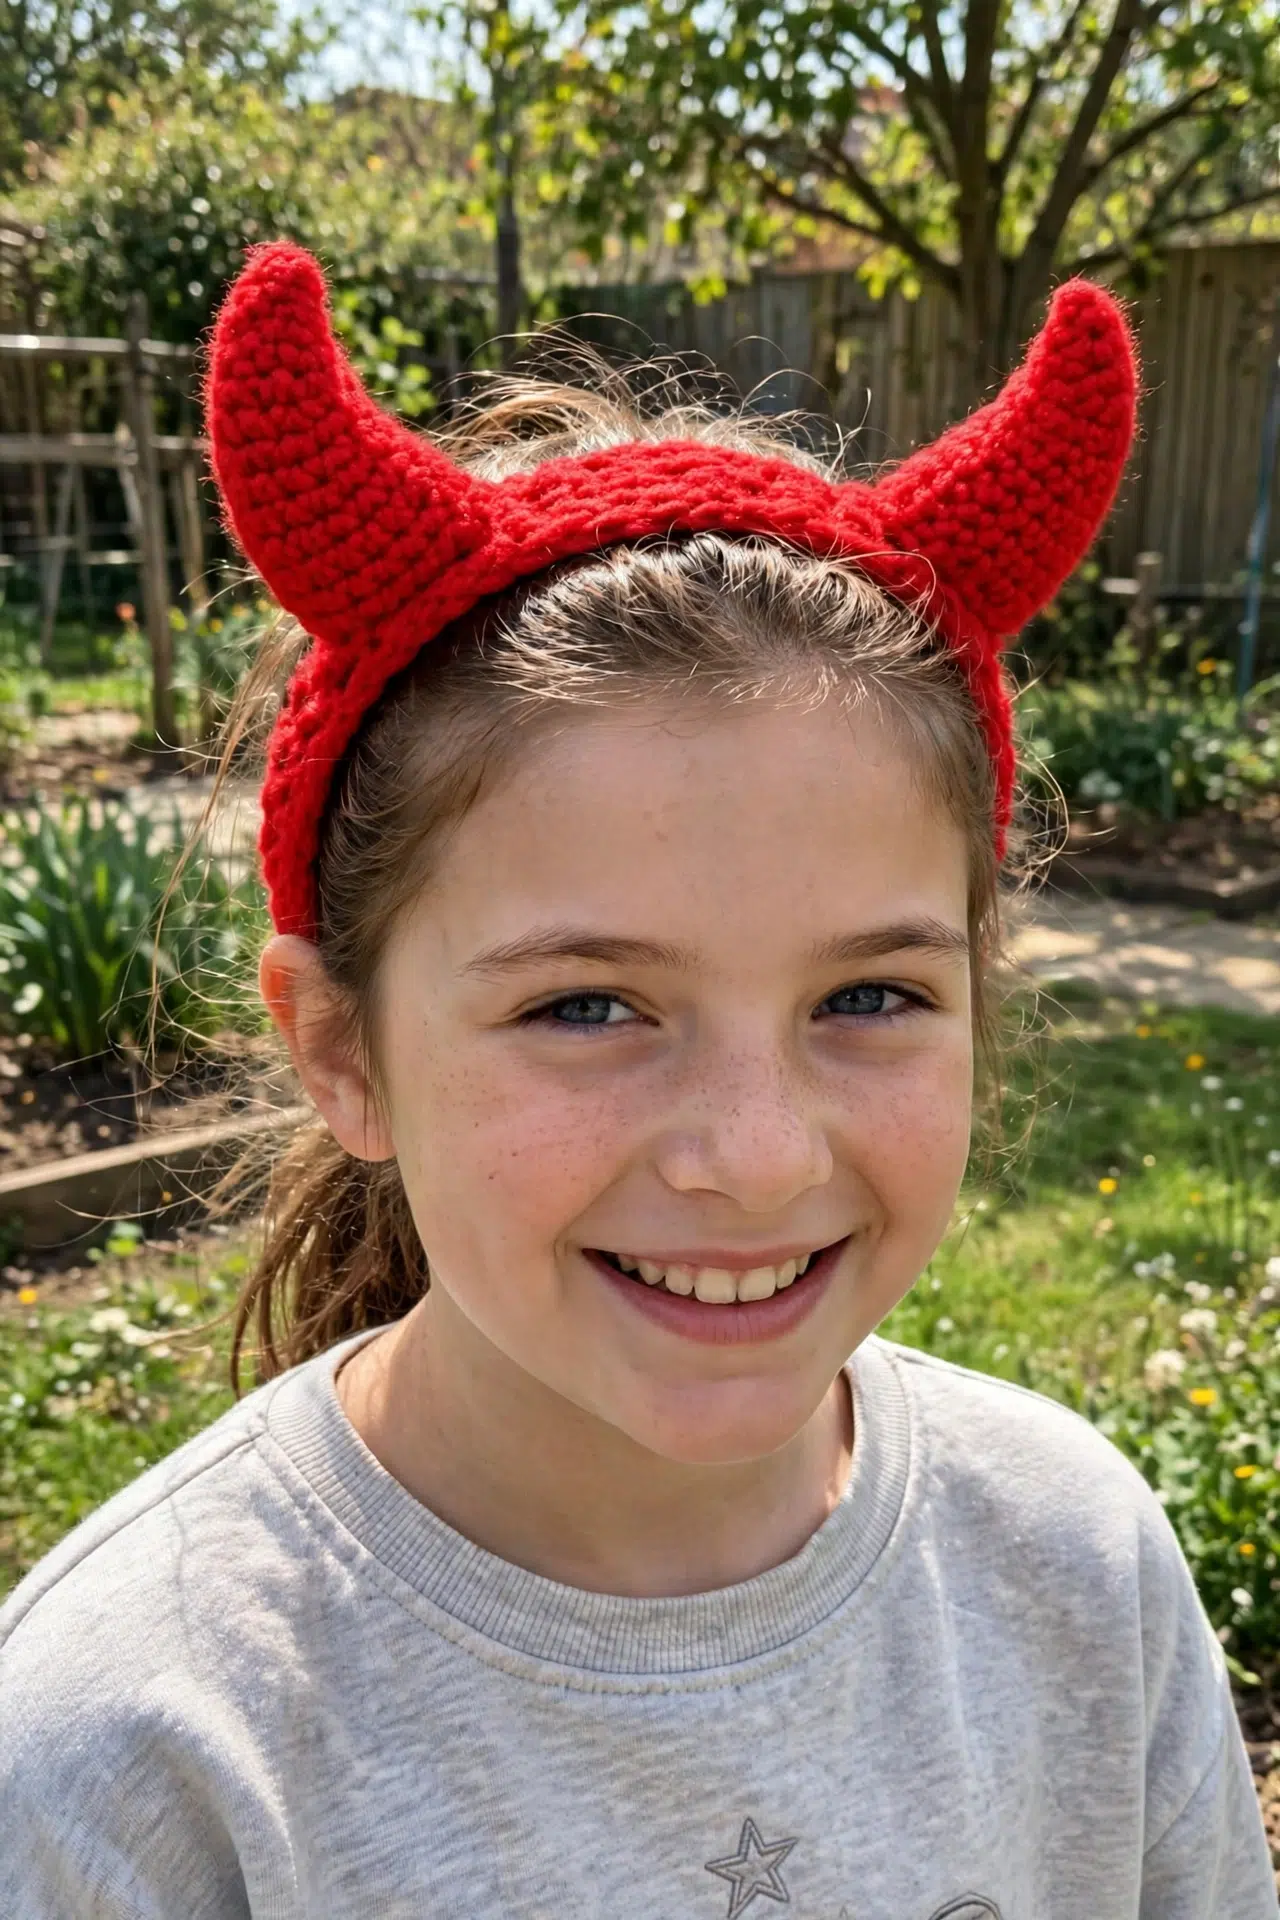
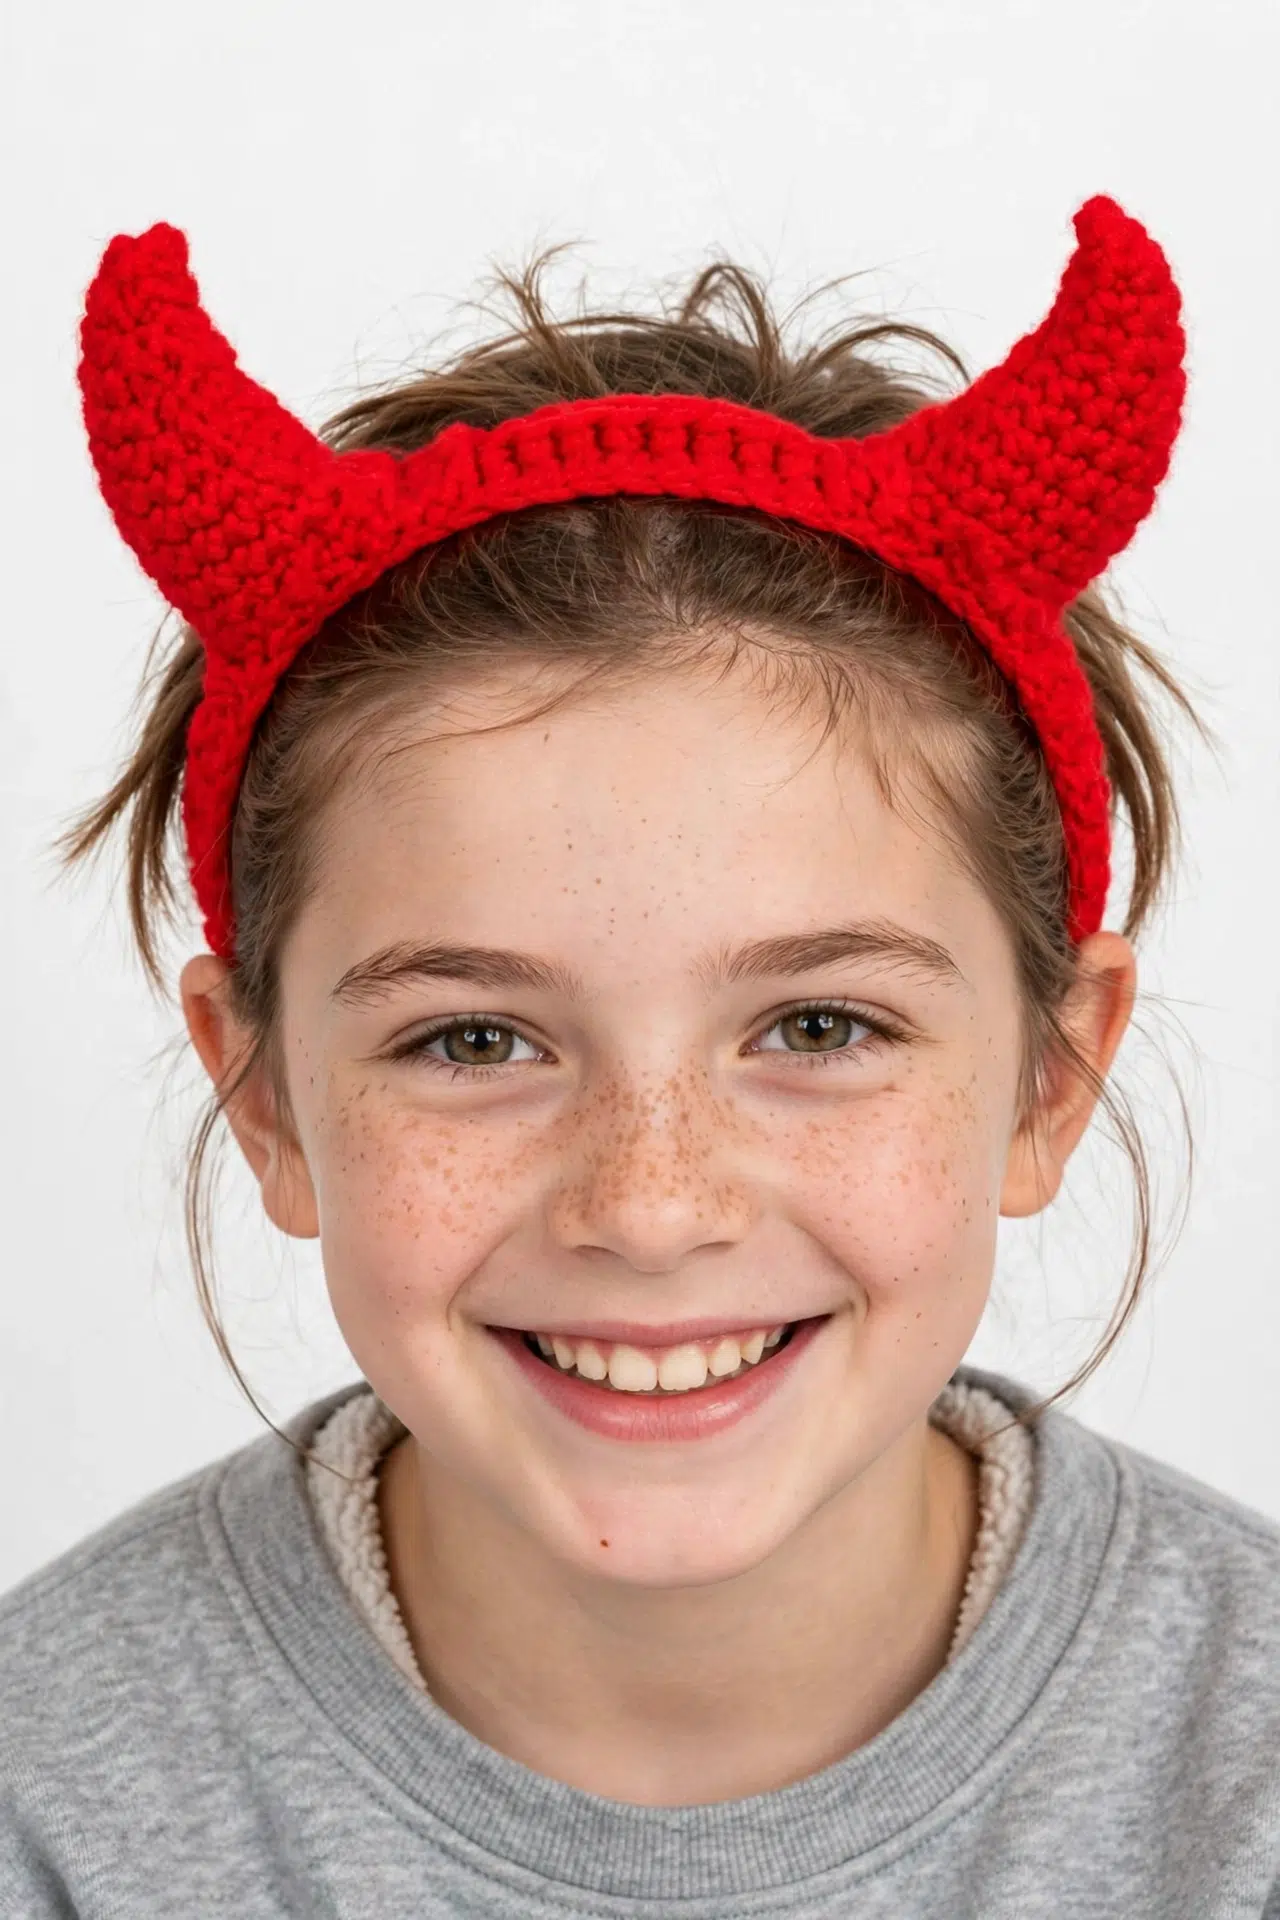
I love a project that's enjoyable in your hands and useful once the last end is woven in, and this Crochet Curved Horn Headband delivers both. Keep it ready for costume days, themed parties, or an afternoon at the dress-up basket when a quick accessory saves you from assembling a whole outfit.

The band gets its texture from alternating front and back post double crochet stitches, while simple decreases and strategically placed slip stitches shape each horn. Those steady rounds are satisfying to work, and the small pieces change quickly enough to keep things interesting!
Jump to:
- Why I Love This Pattern
- Pattern Details
- Supplies
- Stitches & Abbreviations
- How to Crochet the Curved Horn Headband
- Tips for the Best Results
- Make the Post-Stitch Ribbing Feel Simple
- Ways to Adapt Your Horn Headband
- Fixing Fit and Horn Shaping
- Care Instructions
- More Spooky Crochet Patterns
- Frequently Asked Questions
Why I Love This Pattern
- Three useful sizes: You can choose from three age ranges covering babies through children up to 10 years old, so the pattern gives you a clear starting point for fit.
- Purposeful shaping: The horns narrow through regular decreases, while the slip stitches and finishing pull encourage the curve without complicated construction.
- Manageable finishing: Each horn is worked separately, lightly stuffed, and sewn to the band. That lets you pin and adjust both pieces before committing to their final placement.
- An adjustable option: If a fixed ring isn't right for your wearer, you can work the band flat and tie it at the back instead.
Pattern Details
- Finished Size: 6–12 months (12 months – 3 years, 3 – 10 years)
- Gauge: 3 ½ double crochet to 1 in.
- Yarn Weight: Bulky
- Time to Make: about 3–5 hours
Supplies
Gather your bulky yarn, hook, sewing needle, and a small amount of toy stuffing before you begin. Keeping the stuffing nearby is helpful because you'll want to judge each horn's firmness before sewing it down.
- 1 x 100 g ball of King Cole Big Value Chunky in Red: A different bulky yarn can work, but match the stated gauge before starting. A thinner, thicker, or less resilient yarn will change both the band fit and the firmness of the horns.
- G/6 (4.0 mm) crochet hook or any hook needed to obtain gauge
- Yarn needle for sewing
- Toy stuffing for horns: Use small pieces rather than pushing in one large clump. Gradual stuffing makes it easier to fill the narrow tip without distorting the decreasing rounds.
Stitches & Abbreviations
- ch - chain
- sl st - slip stitch
- sc - single crochet
- sc2tog - single crochet two stitches together for decrease
- sk - skip a stitch
- fps - front post stitch
- bps - back post stitch
- dc - double crochet
- dcs - double crochet stitches
- st - stitch
- sts - stitches
- ea - each
- R - King Cole Big Value Chunky in Red or similar
dcfps: Double crochet front post stitch: work a dc around the post of the indicated stitch from the front.
dcbps: Double crochet back post stitch: work a dc around the post of the indicated stitch from the back.
How to Crochet the Curved Horn Headband
Choose the correct age size, make the headband, then crochet and attach 2 matching horns.
Instructions and counts read 6–12 months (12 months – 3 years, 3 – 10 years). Numbers in parentheses give total stitch counts and instructions for different sizes. The ch 2 in Headband Round 1 counts as a stitch. Work only the age-specific Headband section that applies to the chosen size. If preferred, crochet the headband flat and tie it at the back.
Headband
- Round 1: Using R and a G/6 (4.0 mm) crochet hook, ch 64 (72, 80), sl st in first ch to form ring, ch 2 (counts as stitch), 1 dc in next st and in ea st around, sl st to join.
64 (72, 80) sts.
Headband: Ages 6–12 Months and 3–10 Years Only
- Round 2: *1 dcfps around next 8 dcs, 1 dcbps around next 8 dcs; rep from * around. Sl st to join.
- Round 3: Ch 2, *1 dcfps around next 8 dcs, 1 dcbps around next 8 dcs; rep from * around. Sl st to join.
Headband: Ages 12 Months – 3 Years Only
- Round 2: *1 dcfps around next 4 dcs, 1 dcbps around next 4 dcs; rep from * around. Sl st to join.
- Round 3: Ch 2, *1 dcfps around next 4 dcs, 1 dcbps around next 4 dcs; rep from * around. Sl st to join.
Horns
Make 2.
- Round 1: Using R and a G/6 (4.0 mm) crochet hook, ch 16, sl st in first ch to form ring. (16)
- Rounds 2–3: 1 sc in ea st around. (16)
- Round 4: Sc2tog, sl st in next 2 sts, 1 sc in next 12 sts. (15)
- Round 5: Sc2tog, sl st in next 2 sts, 1 sc in next 11 sts. (14)
- Round 6: Sc2tog, sl st in next 2 sts, 1 sc in next 10 sts. (13)
- Round 7: Sc2tog, sl st in next 2 sts, 1 sc in next 9 sts. (12)
- Round 8: Sc2tog, sl st in next 2 sts, 1 sc in next 8 sts. (11)
- Round 9: Sc2tog, sl st in next 2 sts, 1 sc in next 7 sts. (10)
- Round 10: Sc2tog, sk 1 st, 1 sc in next 7 sts. (8)
- Round 11: Sc2tog, sk 1 st, 1 sc in next 5 sts. (6)
Finishing
- Step 1: Sew up the remaining sts with sl sts.
- Step 2: Thread the remaining yarn down through the seam to the base of the horn, then pull to curve the horn.
- Step 3: Stuff the horns neatly and sew them onto the headband equally spaced apart.
Flat Headband Option
If you prefer an adjustable closure, crochet the headband flat and tie it at the back. Check the fit before finishing because the joined-ring instructions do not provide a separate tie length.
Tips for the Best Results
- Check the foundation ring: Lay the chain flat before joining Round 1 so it doesn't twist. Once the double crochet round is complete, a twist is much harder to correct.
- Measure gauge before sizing: The chain counts are designed around the stated gauge, so even a small difference can affect the finished circumference. Change hook size rather than relying on the age label alone.
- Keep the post stitches consistent: Work each dcfps from the front and each dcbps from the back. Consistent post placement keeps the repeat easy to follow through the next round.
- Pin before sewing: Stuff both horns to the same firmness, then pin them equally spaced on the headband. Try the placement against the center of the band before sewing all the way around each base.
Make the Post-Stitch Ribbing Feel Simple
For a dcfps, insert your hook around the post of the next double crochet from the front, complete the double crochet, and let the stitch sit forward. For a dcbps, approach the post from the back so the stitch sits behind the work.
Count the post stitches in groups rather than counting the whole round. The smallest and largest sizes use groups of 8, while the middle size uses groups of 4.
Ways to Adapt Your Horn Headband
- Try another bulky yarn: Choose a yarn that can match 3 ½ double crochet per 1 in. A denser substitute will make firmer horns, while a softer yarn may need more careful stuffing to hold the curve.
- Adjust the hook for gauge: The G/6 (4.0 mm) hook is a starting point. Move up or down only as needed to match gauge, since changing hook size also changes the headband circumference.
- Use the flat construction: Leave the headband open if you want to tie it at the back. Check the wearer's fit at this point because the closure and tie length need to suit the individual wearer.
- Change the stuffing firmness: Use less toy stuffing for softer horns or add small amounts for more structure. Avoid packing the base so firmly that it becomes difficult to sew flat against the band.
- Fine-tune horn placement: The horns should be equally spaced, but their exact position isn't fixed by a stitch count. Pin both in place and compare their distance from the center before sewing.
Fixing Fit and Horn Shaping
- The headband is too loose or tight: Recheck the gauge before changing the foundation count. The post-stitch repeats depend on the given chain numbers, so changing hook size or choosing another pattern size is cleaner than removing an arbitrary number of chains.
- One horn won't curve: Make sure the slip-stitch section stays aligned as the horn narrows, then pull the finishing yarn through that seam toward the base. Add stuffing only after establishing the curve so the filling doesn't fight the shaping.
- The horns lean differently: Compare their stuffing and pin both bases before sewing. Uneven filling or a slightly rotated seam can change the direction of the curve, even when both horns have the same stitch counts.
Care Instructions
Follow the washing directions on the yarn ball and avoid aggressive handling that could shift the toy stuffing. For the best control, gently hand wash the finished headband, press out moisture without twisting, and reshape the horns. Let it air dry completely before storing or wearing.
More Spooky Crochet Patterns
- Spooky Crochet Spider Hat
- Spooky Crochet Pen and Pencil Toppers
- Mini Crochet Halloween Cat
- Crochet Witch Cat Amigurumi
Frequently Asked Questions
Which post-stitch repeat should I use for my size?
Use groups of 8 front post and 8 back post stitches for the 6–12 month and 3–10 year sizes, or groups of 4 and 4 for the 12 month, 3 year size. These repeat lengths divide evenly into the corresponding headband stitch counts, keeping the post-stitch sections aligned around the band.
Why are slip stitches worked along one side of each horn?
The slip stitches create a shorter, tighter section along one side of the horn. As the surrounding single crochet stitches build more height, that difference begins directing the piece into a curve. Pulling the finishing yarn down through the same seam strengthens the shaping before you add the stuffing.
How firmly should I stuff the horns?
Stuff them firmly enough to support the narrowing shape but softly enough that each base can sit flat on the headband. Add small pieces of stuffing gradually, filling the tip first. If the stuffing is packed too tightly, it can straighten the intended curve or make the bases bulky and difficult to sew.
Where should I attach the horns?
There isn't a fixed stitch number for placement, so center the pair and keep them equally spaced. Pin both horns before sewing, then compare their distance from the middle and the direction of each curve. This quick check is more reliable than attaching one horn completely before positioning the second.
Set the finished headband beside the costume basket so it's ready for the next dress-up afternoon. Leave me a comment if you make one.



