
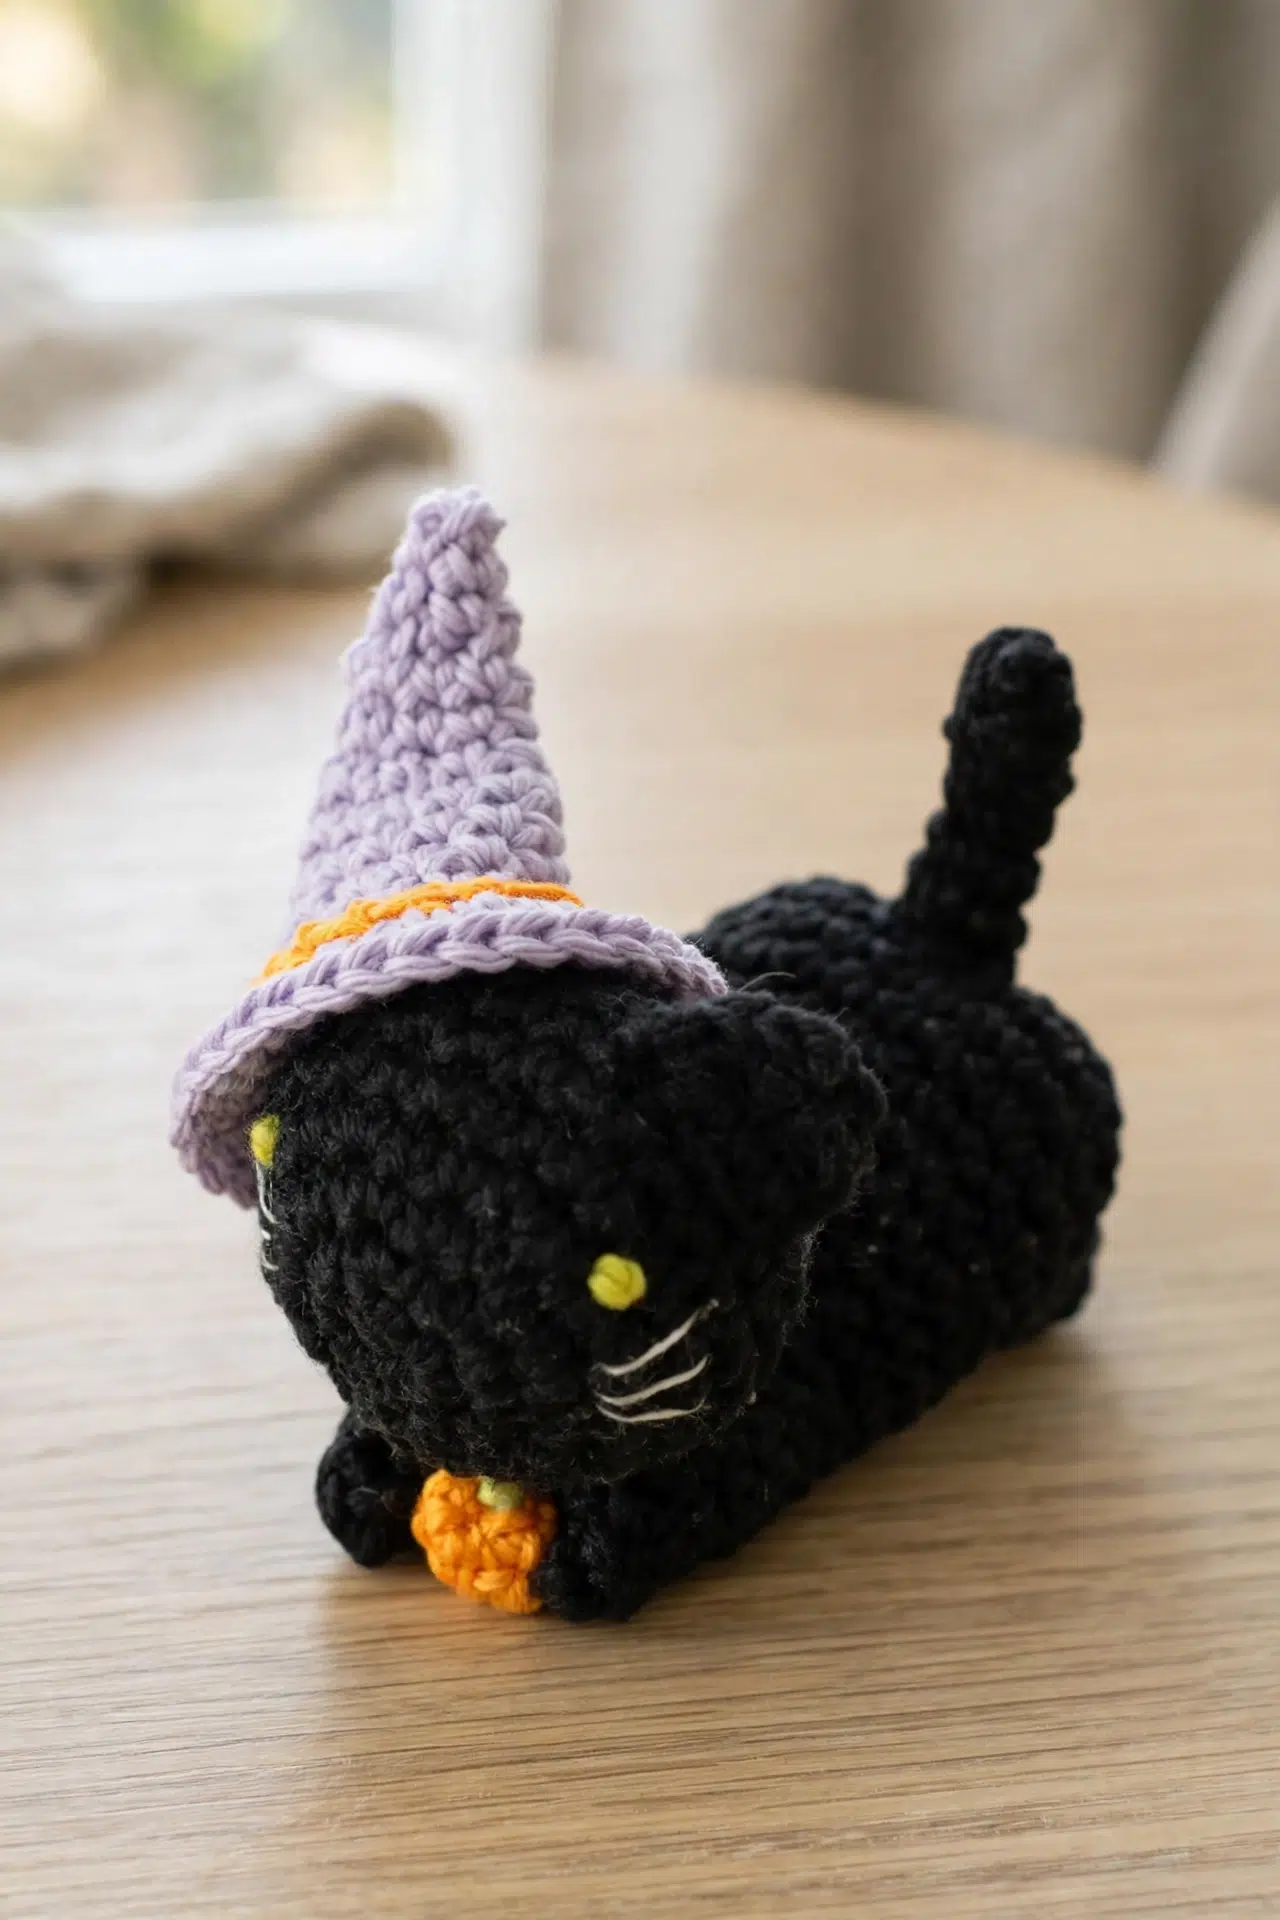
Sewing tiny ears onto an amigurumi head can turn into a frustrating cycle of pinning, shifting, and trying again. I designed this Crochet Witch Cat Amigurumi with ears worked directly into the head, so you can skip that fiddly matching step and keep crocheting.

The ear rows grow from the front loops, while the skipped back loops let you return to the full head round afterward. You get secure construction without separate ear pieces to position.
Jump to:
- Why I Make These on Repeat
- Pattern Details
- Supplies
- Stitches & Abbreviations
- How to Crochet the Witch Cat Amigurumi
- Tips for the Best Results
- How to Keep the Ear Round on Track
- Ways to Adapt Your Witch Cat
- Fixing Tricky Amigurumi Rounds
- Witch Cat Spots for Halloween
- Washing & Care
- More Character Amigurumi to Crochet
- Frequently Asked Questions
Why I Make These on Repeat
- The ears stay in place: Because each ear is crocheted from the head stitches, there's no need to judge its placement during assembly.
- Most rounds are easy to track: The shaping relies on short sc rounds with regular increases and decreases. Once your stitch marker or join is clear, your hands can settle into a steady rhythm.
- The small details offer choices: You can use magic circles or ch 4 loops, choose between two hat foundations, and decide whether the tail needs stuffing.
- Assembly stays manageable: The legs grow from the body, and the feet, head, tail, pumpkin, and hat are the main pieces you'll sew in place.
Pattern Details
- Yarn Weight: 3 or 4 / Sport, Baby/DK, Light Worsted
- Time to Make: about 6-10 hours
Supplies
Gather your yarn, hook, stuffing, and basic sewing tools before you begin, since several small pieces are stuffed or attached as soon as they're completed.
- Yarn weight 3 or 4 in colors for the cat and facial details: Either of the suggested yarn categories can work, but changing yarn thickness will change the finished size. Use the same general thickness throughout so the hat and pumpkin stay in proportion to the cat.
- Orange yarn for the pumpkin and hat foundation
- Green yarn for the pumpkin stem
- Purple yarn for the witch's hat
- 3.00 mm crochet hook or similar
- Toy stuffing or yarn scraps for stuffing: Toy stuffing gives the smoothest fill. Yarn scraps are an included alternative, though cutting them into small pieces helps prevent firm lumps inside the head and body.
- Yarn needle
- Scissors
- Sewing thread, optional for whiskers
Stitches & Abbreviations
- ch - chain
- sc - single crochet
- sl st - slip stitch
- sc2tog - single crochet 2 stitches together
- sc3tog - single crochet 3 stitches together
- st - stitch
- sts - stitches
- rep - repeat
Magic circle: Make an adjustable yarn loop, work the specified stitches into the loop, then pull the yarn tail to close the center.
sc foundation st: Work a foundation single crochet so the foundation chain and first row of single crochet are formed together.
How to Crochet the Witch Cat Amigurumi
Crochet the body and legs first, then make the remaining pieces and sew them together in the order that feels easiest in your hands.
Always start each joined round in the same stitch as the previous sl st. The main body, tail, and pumpkin are worked without joining where instructed. The ears are shaped directly from the head in Round 7, with the first ear row worked through front loops only. Round 8 is worked into the skipped back loops. No separate arm-making steps are included. If you have not added arms of your own, secure the pumpkin directly to the front of the body.
Main Body
- Round 1: Ch 7, 2 sc in 2nd ch from hook, 1 sc in next 4 ch, 2 sc in last ch. Crochet back into the opposite side of the ch, starting in the same ch as the last 2 sc: 2 sc in the same ch, 1 sc in next 4 ch, 2 sc in last ch. Do not join rounds. (16)
- Round 2: *1 sc in next st, 2 sc in next st, 1 sc in next 5 sts, 2 sc in next st; rep from * once more. (20)
- Round 3: *1 sc in next 2 sts, 2 sc in next st, 1 sc in next 6 sts, 2 sc in next st; rep from * once more. (24)
- Rounds 4-9: 1 sc in each st around. (24)
- Round 10: *1 sc in next 2 sts, sc2tog; rep from * around. (18)
- Rounds 11-12: 1 sc in each st around. Do not fasten off; continue to the first leg. (18)
Stuff the body at this point.
First Leg
- Round 1: 1 sc in next 7 sts, ch 3, skip 9 sts.
- Round 2: 1 sc in next 9 sts, 1 sc in next 3 ch. (12)
- Round 3: 1 sc in each st around. (12)
- Round 4: *1 sc in next st, sc2tog; rep from * around. (8)
- Round 5: *1 sc in next 2 sts, sc2tog; rep from * around. Fasten off, stuff, and sew the remaining hole closed. (6)
Second Leg
- Round 1: Rejoin yarn in the first skipped st from Round 1 of the first leg. Work 1 sc in next 9 sts and across the 3 ch in the middle. (12)
- Rounds 2-3: 1 sc in each st around. (12)
- Round 4: *1 sc in next st, sc2tog; rep from * around. (8)
- Round 5: *1 sc in next 2 sts, sc2tog; rep from * around. Fasten off, stuff, and sew the remaining hole closed. (6)
Small Feet, Make 2
- Round 1: 6 sc in a magic circle or ch 4 loop, sl st in 1st sc to join. (6)
- Round 2: Ch 1, 1 sc in each st around, sl st in 1st sc to join. Fasten off and sew onto the back of the body underneath. (6)
The ch 1 does not count as a st.
Head
- Round 1: 7 sc in a magic circle or ch 4 loop, sl st in 1st sc to join. (7)
- Round 2: Ch 1, 2 sc in each st around, sl st in 1st sc to join. (14)
The ch 1 does not count as a st here or throughout the head.
- Round 3: Ch 1, *1 sc in next st, 2 sc in next st; rep from * around. Sl st in 1st sc to join. (21)
- Round 4: Ch 1, *1 sc in next 2 sts, 2 sc in next st; rep from * around. Sl st in 1st sc to join. (28)
- Rounds 5-6: Ch 1, 1 sc in each st around, sl st in 1st sc to join. (28)
- Round 7: Ch 1, 1 sc in first 8 sts, *in front loops only, 1 sc in next 4 sts, turn, 1 sc in next 4 sts working normally into the sts, turn, 1 sc in next st, sc2tog, 1 sc in next st, turn, 1 sc in next 3 sts, turn, sc3tog, sl st down the edge of the ear to the main head; 1 sc in next 5 sts on the main head, rep from * once more. Work 1 sc in last 7 sts, sl st in 1st sc to join.
- Round 8: Ch 1, 1 sc in next 8 sts, 1 sc in next 4 skipped back loops, 1 sc in next 5 sts, 1 sc in next 4 skipped back loops, 1 sc in last 7 sts, sl st in 1st sc to join. (28)
- Round 9: Ch 1, 1 sc in each st around, sl st in 1st sc to join. (28)
- Round 10: Ch 1, *1 sc in next 2 sts, sc2tog; rep from * around. Sl st in 1st sc to join. (21)
- Round 11: Ch 1, *1 sc in next st, sc2tog; rep from * around. Sl st in 1st sc to join. (14)
Stuff the head at this point.
- Round 12: Ch 1, sc2tog until closed, sl st in 1st sc to join. Fasten off and sew the head onto the body. (7)
Tail
- Round 1: 5 sc in a magic circle or ch 4 loop. Do not join rounds. (5)
- Rounds 2-6: 1 sc in each st around. Fasten off and sew onto the body. (5)
Stuffing the tail is optional.
Pumpkin
- Round 1: With orange yarn, work 5 sc in a magic circle or ch 4 loop. Do not join rounds. (5)
- Rounds 2-3: 1 sc in each st around. (5)
Stuff the pumpkin at this point.
- Round 4: Sew the remaining hole closed. Using green yarn, work 5 knots into a short length of yarn on top of each other and sew it onto the top of the pumpkin. Sew the pumpkin into the arms of the cat.
If no separate arms have been added, secure the pumpkin directly to the front of the body.
Witch's Hat
- Round 1: With orange yarn, crochet 16 sc foundation sts, sl st in 1st sc to form a large loop. (16)
Alternatively, ch 16 and sl st in 1st ch to form a large loop. Ch 1, which does not count as a st, crochet 1 sc in each ch around, and sl st in 1st sc to join.
- Round 2: Join purple yarn in ch 1. Work 1 sc in each st around, sl st in 1st sc to join. (16)
The ch 1 does not count as a st here or throughout the hat.
- Round 3: Ch 1, *1 sc in next 2 sts, sc2tog; rep from * around. Sl st in 1st sc to join. (12)
- Rounds 4-5: Ch 1, 1 sc in each st around, sl st in 1st sc to join. (12)
- Round 6: Ch 1, *1 sc in next st, sc2tog; rep from * around. Sl st in 1st sc to join. (8)
- Rounds 7-8: Ch 1, 1 sc in each st around, sl st in 1st sc to join. (8)
- Round 9: Ch 1, sc2tog around, sl st in 1st sc to join. (4)
- Round 10: Ch 1, 1 sc in each st around, sl st in 1st sc to join. Fasten off and sew any remaining hole closed. (4)
- Round 11: Rejoin purple yarn in any foundation ch from Round 1. Crochet 2 sc in each st around, sl st in 1st sc to join. (32)
- Round 12: Ch 1, 1 sc in each st around, sl st in 1st sc to join. Fasten off and sew the hat onto the cat. (32)
Finishing
- Step 1: Using an alternative color, work 2-3 knots into each of 2 short lengths of yarn, stacking the knots on top of each other. Sew them onto the cat's face to make the eyes.
- Step 2: Split some yarn or use sewing thread to sew whiskers onto the face.
Tips for the Best Results
- Mark the body round: The body is worked without joining, so place a marker in the first stitch and move it after every round. This keeps the leg opening and decreases aligned with the correct stitch count.
- Pause before closing: Stuff the body after Round 12 and the head after Round 11. Add small amounts at a time, paying attention to the edges because they're harder to adjust after the decrease rounds close.
- Save the back loops: In Head Round 7, work the first ear row through front loops only. Keep the 4 back loops behind each ear easy to identify because Round 8 needs all 8 skipped loops to restore the 28-stitch round.
- Check each leg count: Both legs reach 12 stitches before their decrease rounds. Count that first complete round carefully so each leg closes at the same rate.
How to Keep the Ear Round on Track
Round 7 temporarily leaves the main head round to build each ear in turned rows. After shaping an ear and slip stitching down its edge, continue across the unworked head stitches rather than crocheting around the ear itself.
Round 8 passes behind both ears through their skipped back loops. You should work 8 regular head stitches, 4 back loops, 5 head stitches, 4 back loops, and the final 7 head stitches for 28 stitches total.
Ways to Adapt Your Witch Cat
- Use a ch 4 loop: Choose the ch 4 loop anywhere a magic circle is offered if adjustable rings aren't comfortable for you. The center may remain slightly more open, so leave a long tail and use it to close any gap.
- Change the yarn thickness: A different suggested yarn weight will produce a different overall size because no gauge or finished measurement is specified. Pair it with a hook that makes a dense fabric so stuffing doesn't work through the stitches.
- Leave the tail unstuffed: An unstuffed tail stays softer and flatter against the body. Add a small amount of stuffing if you want it firmer, but avoid overfilling such a narrow five-stitch tube.
- Choose the hat foundation: Foundation sc creates the first chain and sc row together. The alternative ch start is useful if you prefer a familiar foundation, but keep it loose enough for the loop to sit around the head.
- Swap the whisker material: Split yarn gives thicker whiskers that match the crochet materials. Sewing thread makes finer whiskers, though it needs secure knots so the ends don't pull free.
Fixing Tricky Amigurumi Rounds
- The body foundation twists: Work into one side of the starting chain first, then rotate and crochet into the unused loops on the opposite side. Don't turn the work as if beginning a flat row, since the goal is to build an oval around the chain.
- The first leg seems short a stitch: Round 1 stops after 7 sc and the ch bridge, but Round 2 encounters the remaining body stitches as you continue around the opening. Follow the stated 9 sc and 3 chain stitches to establish the 12-stitch leg round.
- The head count drops after the ears: Look behind each ear for 4 skipped back loops. Missing even one of those loops in Round 8 will reduce the 28-stitch head round and throw off the later decreases.
Witch Cat Spots for Halloween
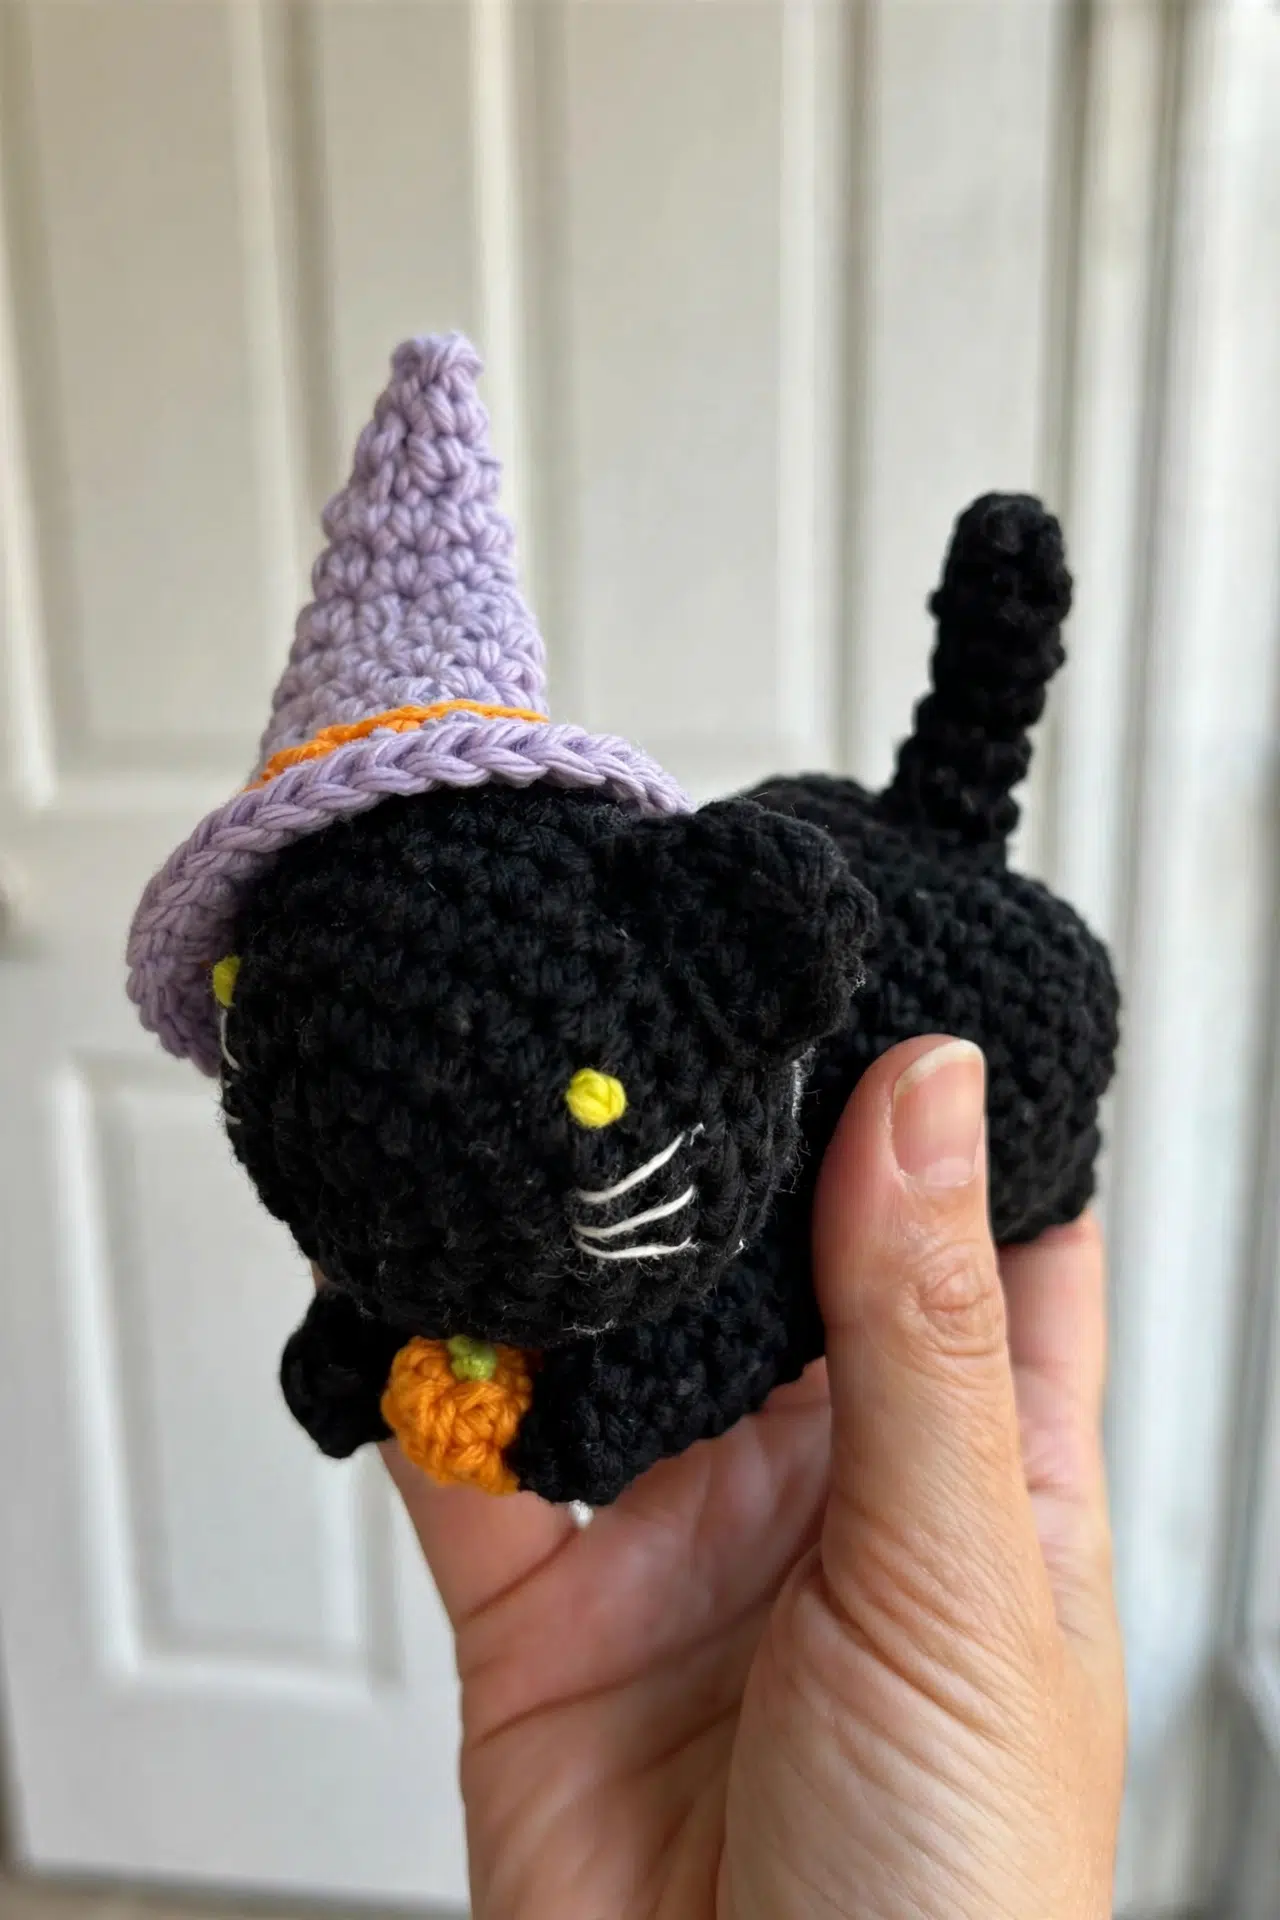
Set the finished witch cat on a stable shelf or include it in a Halloween arrangement where the small pumpkin and sewn hat won't be handled constantly. Keep it away from pets and very young children because the knotted facial details and sewn-on pieces aren't intended as safety-tested toy features.
Washing & Care
Fiber content isn't specified, so follow the washing directions on your yarn label. Spot cleaning is the safest choice for the stuffing, knotted eyes, whiskers, and sewn-on pieces. Reshape gently and let the amigurumi dry completely on a flat surface.
More Character Amigurumi to Crochet
Frequently Asked Questions
Are the ears made separately?
No, both ears are worked directly into Head Round 7. Each one begins in the front loops of 4 head stitches and is shaped with turned rows before you slip stitch back down to the main round. The unused back loops remain available for Round 8, which lets the head continue with its full 28-stitch count.
When should I stuff the body and head?
Stuff the body after Main Body Round 12 and the head after Head Round 11. These points leave enough room for you to distribute the filling before the openings narrow. Waiting until the final closures makes it harder to reach the edges, while stuffing earlier can make the last working rounds less comfortable.
Why does the first leg begin with only 7 sc?
The first leg uses part of the body round, a ch-3 bridge, and the remaining stitches encountered as you continue. Although Round 1 lists 7 sc before the bridge, Round 2 establishes the complete leg by working 9 sc and then 3 sc across the chains. That creates the required 12 stitches for shaping.
Do I need to know foundation sc for the hat?
No, the hat includes a standard chain alternative. You can ch 16, join the chain into a loop, ch 1, and work 1 sc into each chain for the same 16-stitch foundation. Keep the chain relaxed because a tight starting loop can make the hat opening smaller than intended.
Does the tail need stuffing?
No, tail stuffing is optional. The tail contains only 5 stitches per round, so even a small amount of filling makes it noticeably firmer. If you stuff it, add tiny pieces as you crochet because the narrow tube will be difficult to fill evenly after all six rounds are complete.
Halloween Witch Cat will be one of those compact seasonal projects you return to whenever you're ready for a little detailed crochet. Tell me in the comments which part you enjoyed making most.



