
When you're ready for a quiet evening with a character taking shape in your hands, the Crochet Lumiling Character gives you plenty of soothing rounds and small details to enjoy. You'll make the body, hood, limbs and finishing pieces separately, then bring everything together at the end.

There's no complicated stitch work or intricate shaping to manage. Single crochet carries most of the pattern, while steady increases and decreases create a comfortable rhythm that lets you settle into the making.
Jump to:
- Why I Make These on Repeat
- Pattern Details
- Materials for This Character
- Abbreviations
- How to Crochet the Lumiling Character
- Crochet Tips
- Ways to Adapt Your Crochet Lumiling
- Keeping Lumiling's Shapes on Track
- A Home for Your Finished Lumiling
- Caring for Your Character
- More Amigurumi Patterns to Make Next
- Frequently Asked Questions
Why I Make These on Repeat
- A beginner-friendly stitch mix: Most of Lumiling uses chains, single crochet, slip stitches and simple decreases. The sunflower adds half double crochet, but there aren't any complex specialty stitches to learn.
- A satisfying one-piece body: The head and body flow from one continuous piece, so you can enjoy long stretches of crochet without stopping for lots of seams.
- Small pieces with clear jobs: The arms, legs, spikes, pocket, tail and sunflower are worked separately. That makes each part manageable and gives you natural stopping points between sessions.
- Details added at the end: The hood, facial embroidery and blush let you slow down and place the final features carefully once the main crocheting is complete.
Pattern Details
- Skill Level: Beginner
- Yarn Weight: DK / Light Worsted
- Time to Make: about 10-14 hours
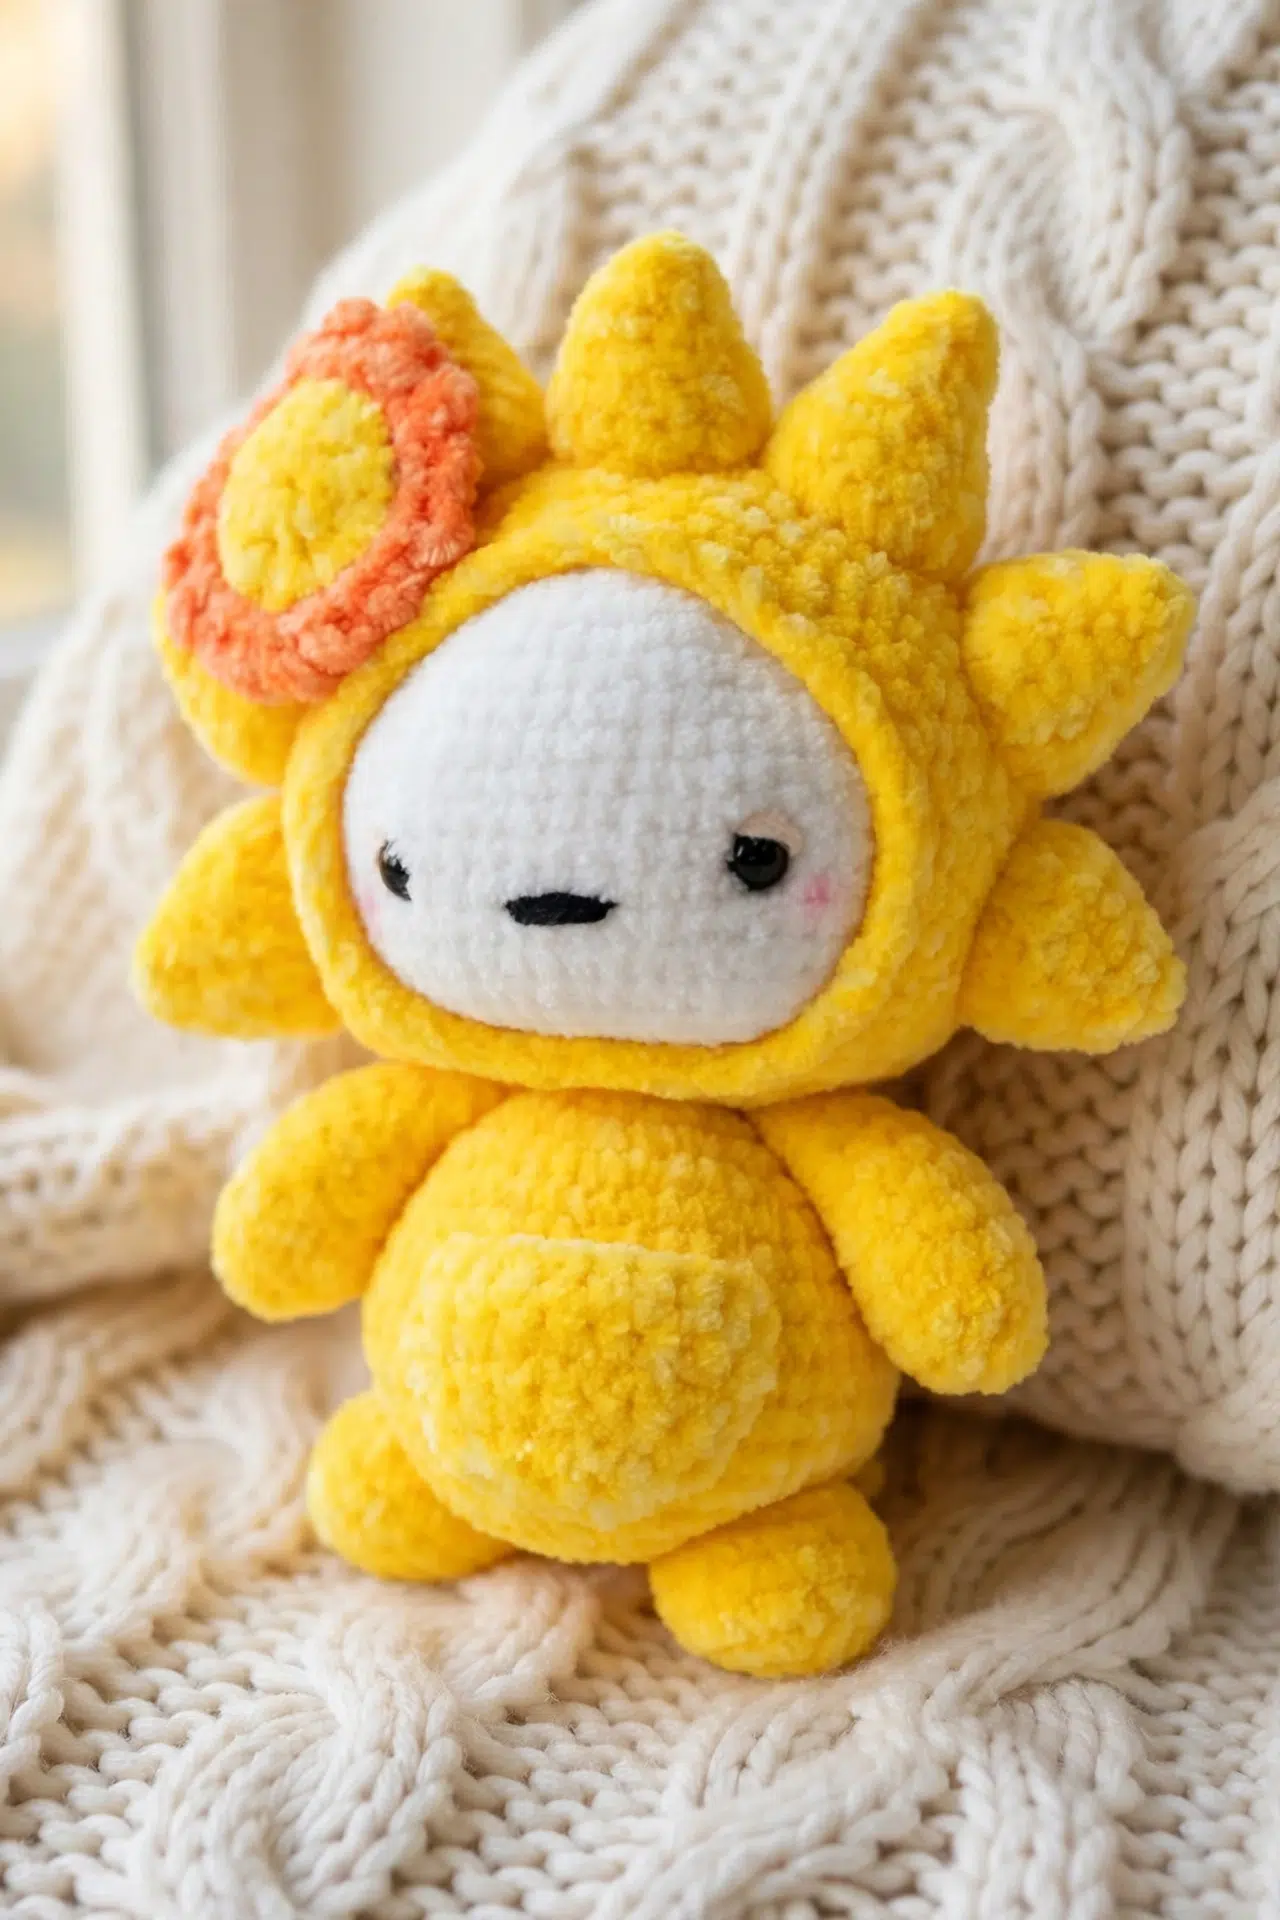
Materials for This Character
Gather your chenille yarn, hook and stuffing before you begin, and keep the smaller finishing supplies together so they're ready when you reach assembly.
- DK/Light Worsted Weight Chenille Yarn (3) in Yellow, Orange, Peach and Black: Chenille can hide stitch tops, so use a marker and count regularly rather than relying only on sight. A smooth DK yarn can be easier to read, though it will change the finished texture and may alter the size.
- 3.5 mm crochet hook
- Yarn needle
- Scissors
- Toy stuffing
- 2 x 8 mm toy safety eyes: Install the eyes before the neck closes and before the head is fully inaccessible. For a character intended for a very young child, embroider the eyes instead of using safety eyes.
- Stitch marker, optional
- Pink make-up eye shadow or pink pastel dust
Abbreviations
- st(s) - stitch(es)
- ch - chain
- sl st - slip stitch
- sc - single crochet
- sc2tog - single crochet 2 stitches together
- hdc - half double crochet
How to Crochet the Lumiling Character
Work through each piece in order, then use the finishing section to complete Lumiling's face.
Yellow is abbreviated as Y, Orange as O, Peach as P and Black as B. Most pieces are worked in continuous rounds without joining. Use a stitch marker to identify the beginning of each round if needed. A magic ring or magic loop may replace the chain-loop start where noted.
Main Body
- Round 1: In Yellow, ch 4, sl st in first ch to form a loop, then work 7 sc in centre of loop. Do not join rounds. (7)
Alternatively, use a magic ring.
- Round 2: 2 sc in each st around. (14)
- Round 3: *1 sc in next st, 2 sc in next st; rep from * around. (21)
- Round 4: *1 sc in next 2 sts, 2 sc in next st; rep from * around. (28)
- Round 5: *1 sc in next 3 sts, 2 sc in next st; rep from * around. (35)
- Round 6: *1 sc in next 4 sts, 2 sc in next st; rep from * around. (42)
- Round 7: *1 sc in next 5 sts, 2 sc in next st; rep from * around. (49)
- Round 8: *1 sc in next 6 sts, 2 sc in next st; rep from * around. (56)
- Rounds 9-20: 1 sc in each st around. (56)
- Round 21: *1 sc in next 6 sts, sc2tog; rep from * around. (49)
- Round 22: *1 sc in next 5 sts, sc2tog; rep from * around. (42)
- Round 23: *1 sc in next 4 sts, sc2tog; rep from * around. (35)
- Round 24: *1 sc in next 3 sts, sc2tog; rep from * around. (28)
- Round 25: *1 sc in next 2 sts, sc2tog; rep from * around. (21)
- Round 26: *1 sc in next st, sc2tog; rep from * around. (14)
- Round 27: 1 sc in each st around. (14)
Stuff the head and add the safety eyes between Rounds 15 and 16, placing them 8 to 10 sts apart.
- Round 28: *1 sc in next st, 2 sc in next st; rep from * around. (21)
- Round 29: *1 sc in next 2 sts, 2 sc in next st; rep from * around. (28)
- Round 30: *1 sc in next 3 sts, 2 sc in next st; rep from * around. (35)
- Round 31: *1 sc in next 4 sts, 2 sc in next st; rep from * around. (42)
- Rounds 32-41: 1 sc in each st around. (42)
- Round 42: *Sc2tog; rep from * around. (21)
- Round 43: *Sc2tog; rep from * around until 1 st remains, then 1 sc in last st. (11)
Stuff the body at this point.
- Round 44: *Sc2tog; rep from * around until 1 st remains, then 1 sc in last st. Fasten off, sew the remaining hole closed and weave in all ends. (6)
Arms x 2
- Round 1: In Yellow, ch 4, sl st in first ch to form a loop, then work 6 sc in centre of loop. Do not join rounds. (6)
Alternatively, use a magic loop.
- Round 2: 2 sc in each st around. (12)
- Rounds 3-6: 1 sc in each st around. (12)
- Round 7: *1 sc in next st, sc2tog; rep from * around. (8)
- Rounds 8-10: 1 sc in each st around. Fasten off, stuff slightly, fold the top flat and sew onto the body. (8)
Legs x 2
- Round 1: In Yellow, ch 4, sl st in first ch to form a loop, then work 7 sc in centre of loop. Do not join rounds. (7)
Alternatively, use a magic loop.
- Round 2: 2 sc in each st around. (14)
- Rounds 3-6: 1 sc in each st around. Fasten off, stuff slightly and sew onto the body. (14)
Hood
The hood begins in continuous rounds, changes to turned rows for the opening, then returns to rounds when the chain closes the gap.
- Round 1: In Yellow, ch 4, sl st in first ch to form a loop, then work 7 sc in centre of loop. Do not join rounds. (7)
Alternatively, use a magic loop.
- Round 2: 2 sc in each st around. (14)
- Round 3: *1 sc in next st, 2 sc in next st; rep from * around. (21)
- Round 4: *1 sc in next 2 sts, 2 sc in next st; rep from * around. (28)
- Round 5: *1 sc in next 3 sts, 2 sc in next st; rep from * around. (35)
- Round 6: *1 sc in next 4 sts, 2 sc in next st; rep from * around. (42)
- Round 7: *1 sc in next 5 sts, 2 sc in next st; rep from * around. (49)
- Round 8: *1 sc in next 6 sts, 2 sc in next st; rep from * around. (56)
- Rounds 9-11: 1 sc in each st around. (56)
- Rows 12-17: Ch 1, turn, 1 sc in next 48 sts. (48)
- Round 18: Ch 8, join with the opposite side, then work 1 sc in next 48 sts. (56)
- Round 19: 1 sc in next 8 chs, then 1 sc in next 48 sts. (56)
- Round 20: *1 sc in next 6 sts, sc2tog; rep from * around. (49)
- Round 21: *1 sc in next 5 sts, sc2tog; rep from * around. (42)
- Round 22: *1 sc in next 4 sts, sc2tog; rep from * around. (35)
- Round 23: 1 sl st in each st around. Fasten off and weave in all ends. Place the hood over the head. (35)
Spikes x 7
- Round 1: In Yellow, ch 16, sl st in first ch to form a large loop, then ch 1. (16)
- Round 2: Starting in the same ch as the previous sl st, work 1 sc in each ch around. Do not join rounds. (16)
- Round 3: *1 sc in next 2 sts, sc2tog; rep from * around. (12)
- Round 4: 1 sc in each st around. (12)
- Round 5: *1 sc in next st, sc2tog; rep from * around. (8)
- Round 6: 1 sc in each st around. (8)
- Round 7: *Sc2tog; rep from * around. Fasten off, sew the remaining hole closed, stuff slightly and sew onto the hood. (4)
- Row 1: In Yellow, ch 9, 1 sc in second ch from hook and in each ch across. Turn. (8)
- Rows 2-5: 1 sc in each st across. Turn. (8)
- Row 6: (Sc2tog) 4 times. Turn. (4)
- Row 7: (Sc2tog) 2 times. Fasten off and sew onto the body. (2)
Tail
- Round 1: In Yellow, ch 15, sl st in first ch to form a loop, then ch 1. (15)
Begin Round 2 in the same ch as the previous sl st.
- Rounds 2-4: 1 sc in each st around. Do not join rounds. (15)
- Round 5: *1 sc in next 3 sts, sc2tog; rep from * around. (12)
- Rounds 6-7: 1 sc in each st around. (12)
- Round 8: *1 sc in next 2 sts, sc2tog; rep from * around. (9)
- Rounds 9-10: 1 sc in each st around. (9)
- Round 11: *1 sc in next st, sc2tog; rep from * around. (6)
- Rounds 12-13: 1 sc in each st around. (6)
- Round 14: *Sc2tog; rep from * around. Fasten off, sew the remaining hole closed, stuff slightly and sew onto the body. (3)
Sunflower
- Round 1: In Yellow, ch 4, sl st in first ch to form a loop, work 8 hdc in centre of loop, then sl st in first hdc to join. (8)
Alternatively, use a magic loop.
- Round 2: Ch 1, starting in the same st as the previous sl st, work 2 sc in each st around, then sl st in first sc to join. (16)
- Round 3: In Orange, *ch 5, sl st in next st; rep from * around. Fasten off and sew onto the hood. (16)
This creates 16 petals.
Finishing
- Step 1: In Black, sew a small mouth over 3 to 4 sts.
- Step 2: In Peach, sew eyelids above the eyes.
- Step 3: Use a little pink make-up eye shadow or pink pastel dust to add blush.
Crochet Tips
- Mark every round: Chenille stitches can be difficult to distinguish, especially at the beginning of a round. Move your marker into the first stitch each time and verify the count before starting the next increase or decrease round.
- Place the eyes on time: Pause after Main Body Round 27 to stuff the head and secure the eyes between Rounds 15 and 16. Once the body continues and the neck area closes, reaching the backs of the eyes becomes much harder.
- Stuff in small amounts: Add little pieces of stuffing at a time so the fabric stays smooth and the decreases remain easy to work. The arms, legs, spikes and tail are only stuffed slightly, which keeps their attachment edges manageable.
- Pin before sewing: Arrange the paired limbs, seven spikes, pocket, tail and sunflower with pins or spare yarn before committing to stitches. This gives you a chance to check spacing and balance from several angles.
Ways to Adapt Your Crochet Lumiling
- Try smooth DK yarn: A smooth acrylic, cotton or blended DK yarn will make the stitches easier to see than chenille. Expect a different texture, and don't assume the finished character will match the same size because no gauge is specified.
- Adjust the hook with care: Move down a hook size if stuffing shows through your fabric, or move up slightly if your hands are fighting very tight stitches. Keep the fabric dense enough to contain the stuffing.
- Choose another color plan: You can replace any of the four yarn colors while keeping their roles consistent throughout the instructions. Separate contrast colors for the sunflower, eyelids and mouth will help you keep track during finishing.
- Embroider the eyes: Black yarn can replace the safety eyes when you want a fully stitched face. Add the embroidery at the same point in construction so you can secure the yarn ends inside the head.
- Replace cosmetic blush: Skip the make-up or pastel dust if you prefer, or add small Peach yarn stitches instead. Yarn blush is more permanent, while surface color can soften or transfer depending on the product and handling.
Keeping Lumiling's Shapes on Track
- The hood opening loses stitches: Rows 12-17 use only 48 of the 56 stitches and are turned rather than continued around. Count all 48 stitches on every row, then use the chain in Round 18 to bridge the open section and restore the 56-stitch round.
- The closing rounds feel crowded: Add stuffing before the opening becomes too small, but keep it away from the active stitches. This gives your hook room to complete the final sc2tog stitches without catching fibers.
- The chenille stitches are hard to count: Feel for each stitch top with your fingers and count in small groups. Checking at the end of every round is faster than undoing several rounds after a missed increase or decrease.
A Home for Your Finished Lumiling
Set your finished Lumiling on a shelf, desk or reading nook where the small sewn pieces won't be crushed. It also makes a thoughtful character gift, especially when you include the hood and sunflower details that complete the pattern.
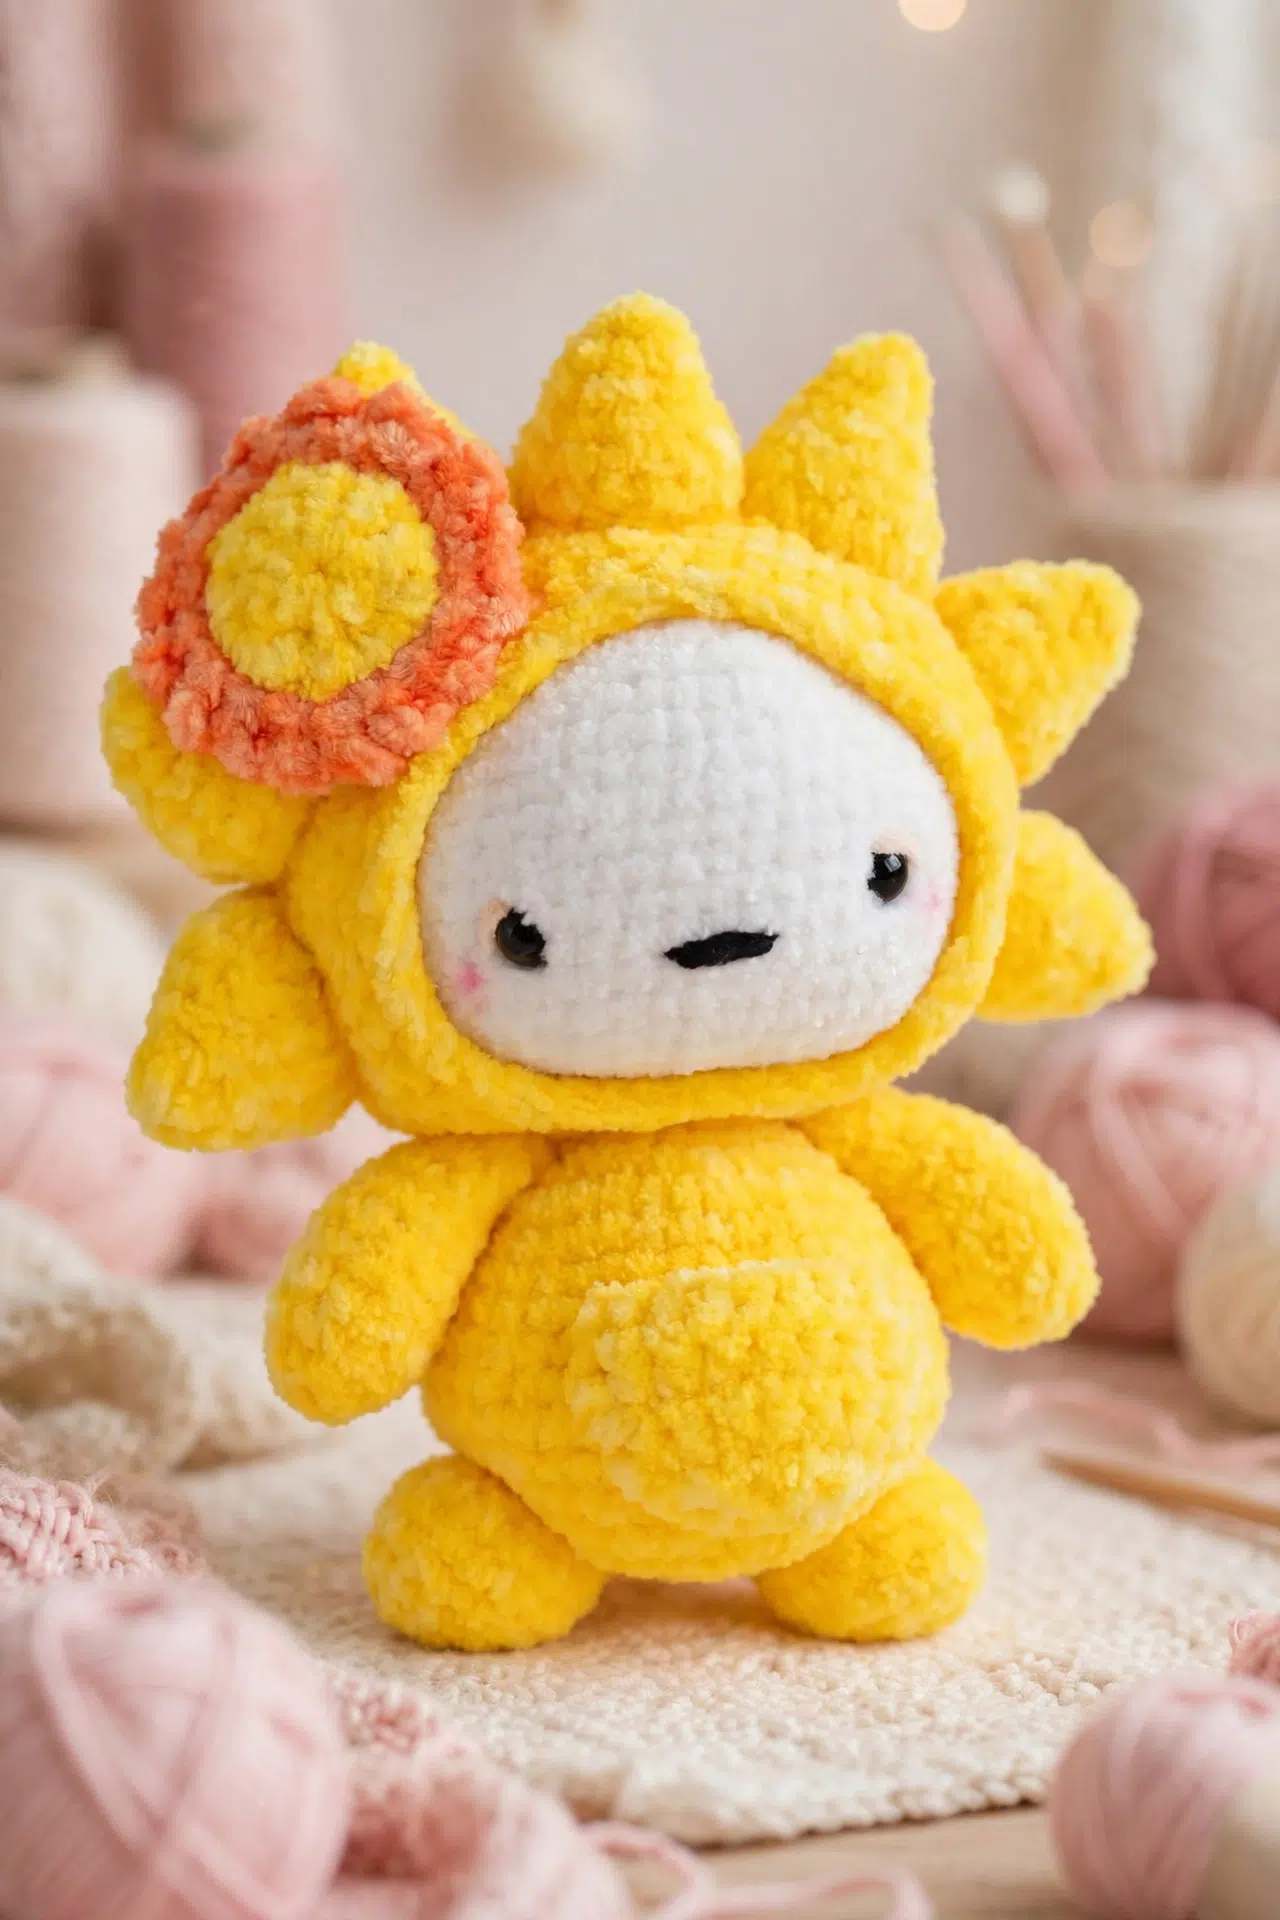
Caring for Your Character
Check the yarn label first because chenille fiber content and washing instructions vary. Spot clean gently when possible, avoid scrubbing the surface and let Lumiling air dry fully. Keep cosmetic blush away from moisture because it may fade or transfer.
More Amigurumi Patterns to Make Next
- Monster Plushie Crochet Pattern
- Molly Amigurumi Doll Crochet Pattern
- Black Cat Amigurumi Crochet Pattern
- Pocket Alien & UFO Amigurumi: A Two-Piece Crochet Pattern With Puff Stitch Details
- Pocket Parrot Amigurumi: A Low-Sew Crochet Pattern With Just Two Seams
Frequently Asked Questions
When should I attach the safety eyes?
Attach the eyes after Main Body Round 27, between Rounds 15 and 16 and 8 to 10 sts apart. This is the last convenient point for reaching inside the head and securing the washers. Test the placement before fastening them permanently, since safety-eye backs generally can't be removed without damage.
Why does the hood change from rounds to rows?
Rows 12-17 create the hood opening by working back and forth across 48 stitches instead of all 56. Round 18 bridges the remaining space with 8 chains, and Round 19 works into those chains to restore a complete 56-stitch round. Marking both edges of the opening can make the join easier to identify.
How firmly should I stuff each piece?
Stuff the head and body evenly, but stuff the arms, legs, spikes and tail only slightly. Overfilling the smaller pieces makes their edges bulky and harder to sew securely. Add stuffing in small tufts, shaping it with your fingers while leaving the attachment area flatter than the rest of the piece.
How do I arrange all seven spikes?
Pin all seven spikes to the hood before sewing any of them permanently. The pattern doesn't assign exact attachment stitches, so use the completed hood to judge spacing and keep the arrangement balanced. Slight stuffing gives each spike shape without making its base too thick to stitch through.
Tell me how your Lumiling turned out in the comments when you've sewn on that final detail! 🧶



