
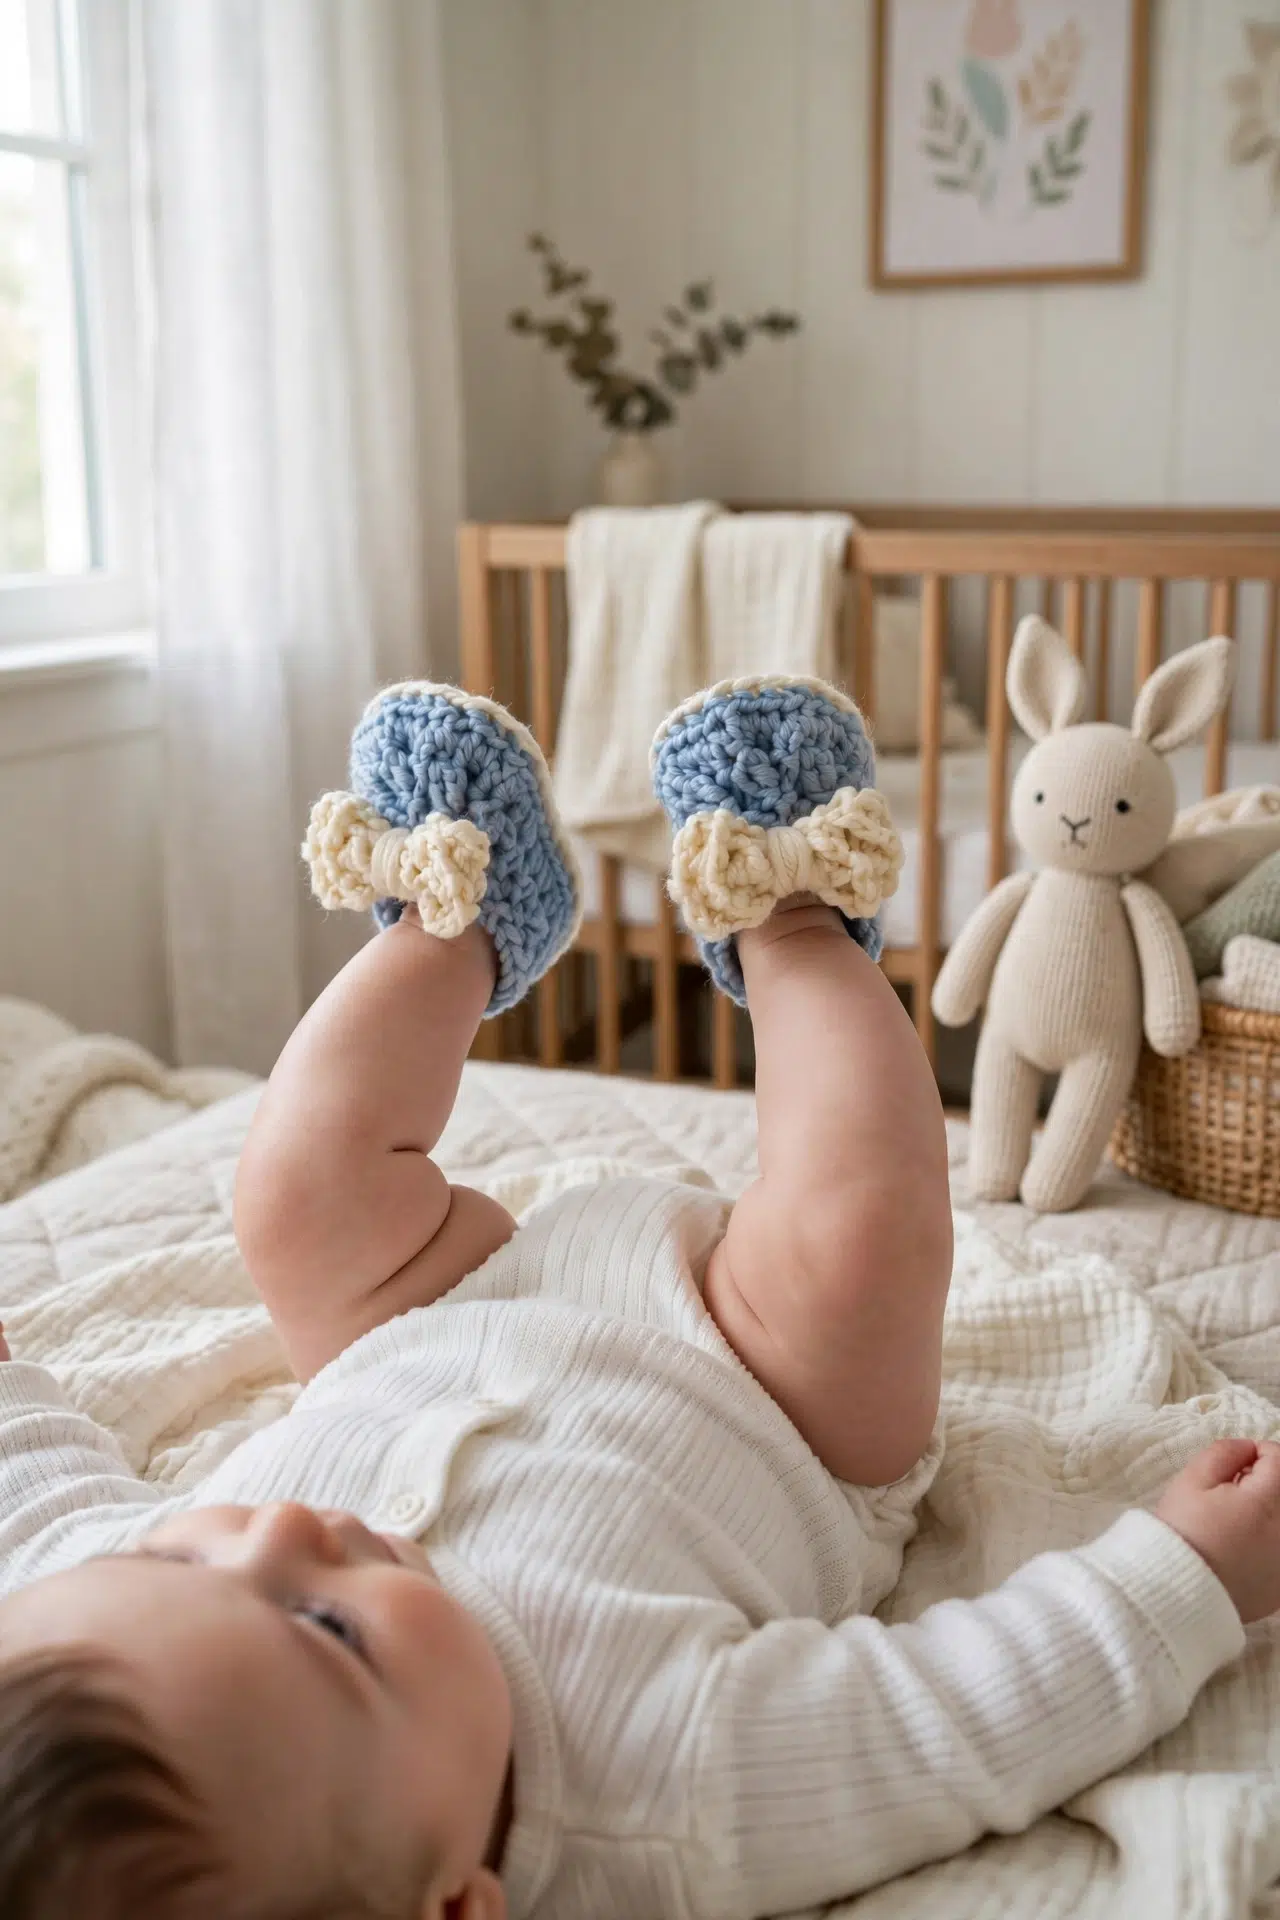
Small projects can still give your hands plenty of interesting work, and these Crochet Bow Baby Shoes move through sole shaping, post stitches, crossed stitches, and a separate bow. They're intended for intermediate to advanced crocheters, though I've included simpler routes through the fiddliest rounds.

I especially love how the bow begins as a crocheted loop, then takes shape when you wrap and secure its center. You can use the color change in Round 4, stay with one yarn throughout, or choose the easier stitch options to suit your mood. Pick your yarn and settle in!
Jump to:
- Why I Make These on Repeat
- Pattern Details
- Yarn and Supplies
- Stitches & Abbreviations
- How to Crochet the Bow Baby Shoes
- Tips for the Best Results
- Making the Crossed Rounds Easier to Follow
- Ways to Adapt Your Baby Shoes
- Fixing Counts and Crossed Stitches
- Care Instructions
- More Crochet Baby Shoes & Booties
- Frequently Asked Questions
Why I Make These on Repeat
- Interesting construction: The sole grows through carefully placed increases, then the upper is shaped with decreases rather than separate pieces.
- A choice of techniques: You can practice front post and crossed stitches or follow the easier alternatives without changing the stated stitch counts.
- Minimal assembly: Only the bow is made separately, and its long tail handles both the wrapped center and attachment.
- A repeatable second shoe: Once you've completed the first shoe, the same sequence gives your hands a familiar path through the matching one.
Pattern Details
- Skill Level: Intermediate, Advanced
- Finished Size: 0-6 months
- Yarn Weight: DK / Light Worsted (3)
- Time to Make: about 4-6 hours for the pair
Yarn and Supplies
You'll need DK or light worsted yarn, a 4.00 mm hook, and basic finishing tools. No yarn amount is specified, so have enough of your chosen yarn available to complete both shoes and bows.
- DK/light worsted weight yarn (yarn weight 3): Yarns labeled weight 3 can still vary in thickness. Since no gauge is specified, compare the first sole with the intended 0-6 month size before continuing.
- 4.00 mm crochet hook
- Yarn needle
- Scissors
Stitches & Abbreviations
- ch - chain
- chs - chains
- st - stitch
- sts - stitches
- ea - each
- sk - skip
- rep - repeat
- hdc - half double crochet
- dc - double crochet
- sl st - slip stitch
- fps - front post stitch
- dc2tog - double crochet 2 together
hdc fps: Work the indicated hdc as a front post stitch around the post of the stitch.
Crossed dc pair: Sk 1 st, work 1 dc in the next st, then work 1 dc in the previously skipped st.
Crossed dc2tog pair: Sk 2 sts, work dc2tog over the next 2 sts, then work dc2tog over the 2 previously skipped sts.
How to Crochet the Bow Baby Shoes
Work the sole and upper in joined rounds, crochet the bow separately, and repeat the full process for the second shoe.
Ch 1 does not count as a stitch here or throughout. This pattern is fiddly and is not suitable for beginners, but easier alternatives are provided for the more involved rounds. Make all sections again for the second shoe.
Shoe
- Round 1: Ch 11. Work 3 dc in 2nd ch from hook, 1 dc in next 4 chs, 1 hdc in next 4 chs, and 6 hdc in last ch. Work back along the opposite side of the foundation ch, skipping the first ch containing 6 hdc: 1 hdc in next 4 chs, 1 dc in next 4 chs, and 3 dc in last ch. Sl st in first dc to join. (28)
- Round 2: Ch 1, 1 dc in first st, 2 dc in next 2 sts, 1 dc in next 4 sts, 1 hdc in next 5 sts, 2 hdc in next 2 sts, 1 hdc in next st, 2 hdc in next 2 sts, 1 hdc in next 5 sts, 1 dc in next 4 sts, and 2 dc in last 2 sts. Sl st in first dc to join. (36)
- Round 3: Ch 1, 1 hdc in first 2 sts, 2 hdc in next 3 sts, 1 hdc in next 10 sts, 2 hdc in next 3 sts, 1 hdc in next 2 sts, 2 hdc in next 3 sts, 1 hdc in next 10 sts, and 2 hdc in last 3 sts. Sl st in first hdc to join. (48)
- Round 4: Join new color, ch 1. Work 1 hdc fps in first 3 sts, 2 hdc fps in next st, 1 hdc fps in next 2 sts, 2 hdc fps in next st, 1 hdc fps in next 37 sts, 2 hdc fps in next st, 1 hdc fps in next 2 sts, and 2 hdc fps in last st. Sl st in first hdc to join. (52)
Easier option: Work normal hdc stitches in place of the hdc fps stitches.
- Round 5: Ch 1, turn, work 1 hdc in ea st around, and sl st in first hdc to join. (52)
- Round 6: Ch 1. *Sk 2 sts, dc2tog over the next 2 sts, and dc2tog over the 2 previously skipped sts; rep from * 2 more times. *Sk 1 st, work 1 dc in next st, and work 1 dc in the previously skipped st; rep from * to last 12 sts. *Sk 2 sts, dc2tog over the next 2 sts, and dc2tog over the 2 previously skipped sts; rep from * 2 more times. Sl st in first st to join. (40)
Easier option: Ch 1, work dc2tog 6 times, work 1 dc in ea st around to last 12 sts, work dc2tog 6 times, and sl st in first st to join. 40 sts.
- Round 7: Ch 1. *Sk 2 sts, dc2tog over the next 2 sts, and dc2tog over the 2 previously skipped sts; rep from * once more. *Sk 1 st, work 1 dc in next st, and work 1 dc in the previously skipped st; rep from * to last 8 sts. *Sk 2 sts, dc2tog over the next 2 sts, and dc2tog over the 2 previously skipped sts; rep from * once more. Sl st in first st to join. Fasten off and tie in all tails. (32)
Easier option: Ch 1, work dc2tog 4 times, work 1 dc in ea st around to last 8 sts, work dc2tog 4 times, and sl st in first st to join. 32 sts.
Bow
- Round 1: Ch 20 and sl st in first ch to form a large loop. (20)
- Round 2: Ch 1. *Sk 1 st, work 1 dc in next st, and work 1 dc in the previously skipped st; rep from * around. Sl st in first dc to join. (20)
Easier option: Ch 1, work 1 dc in ea st around, and sl st in first dc to join. 20 sts.
- Round 3: Rep Round 2. Fasten off, leaving a long tail. (20)
Finishing
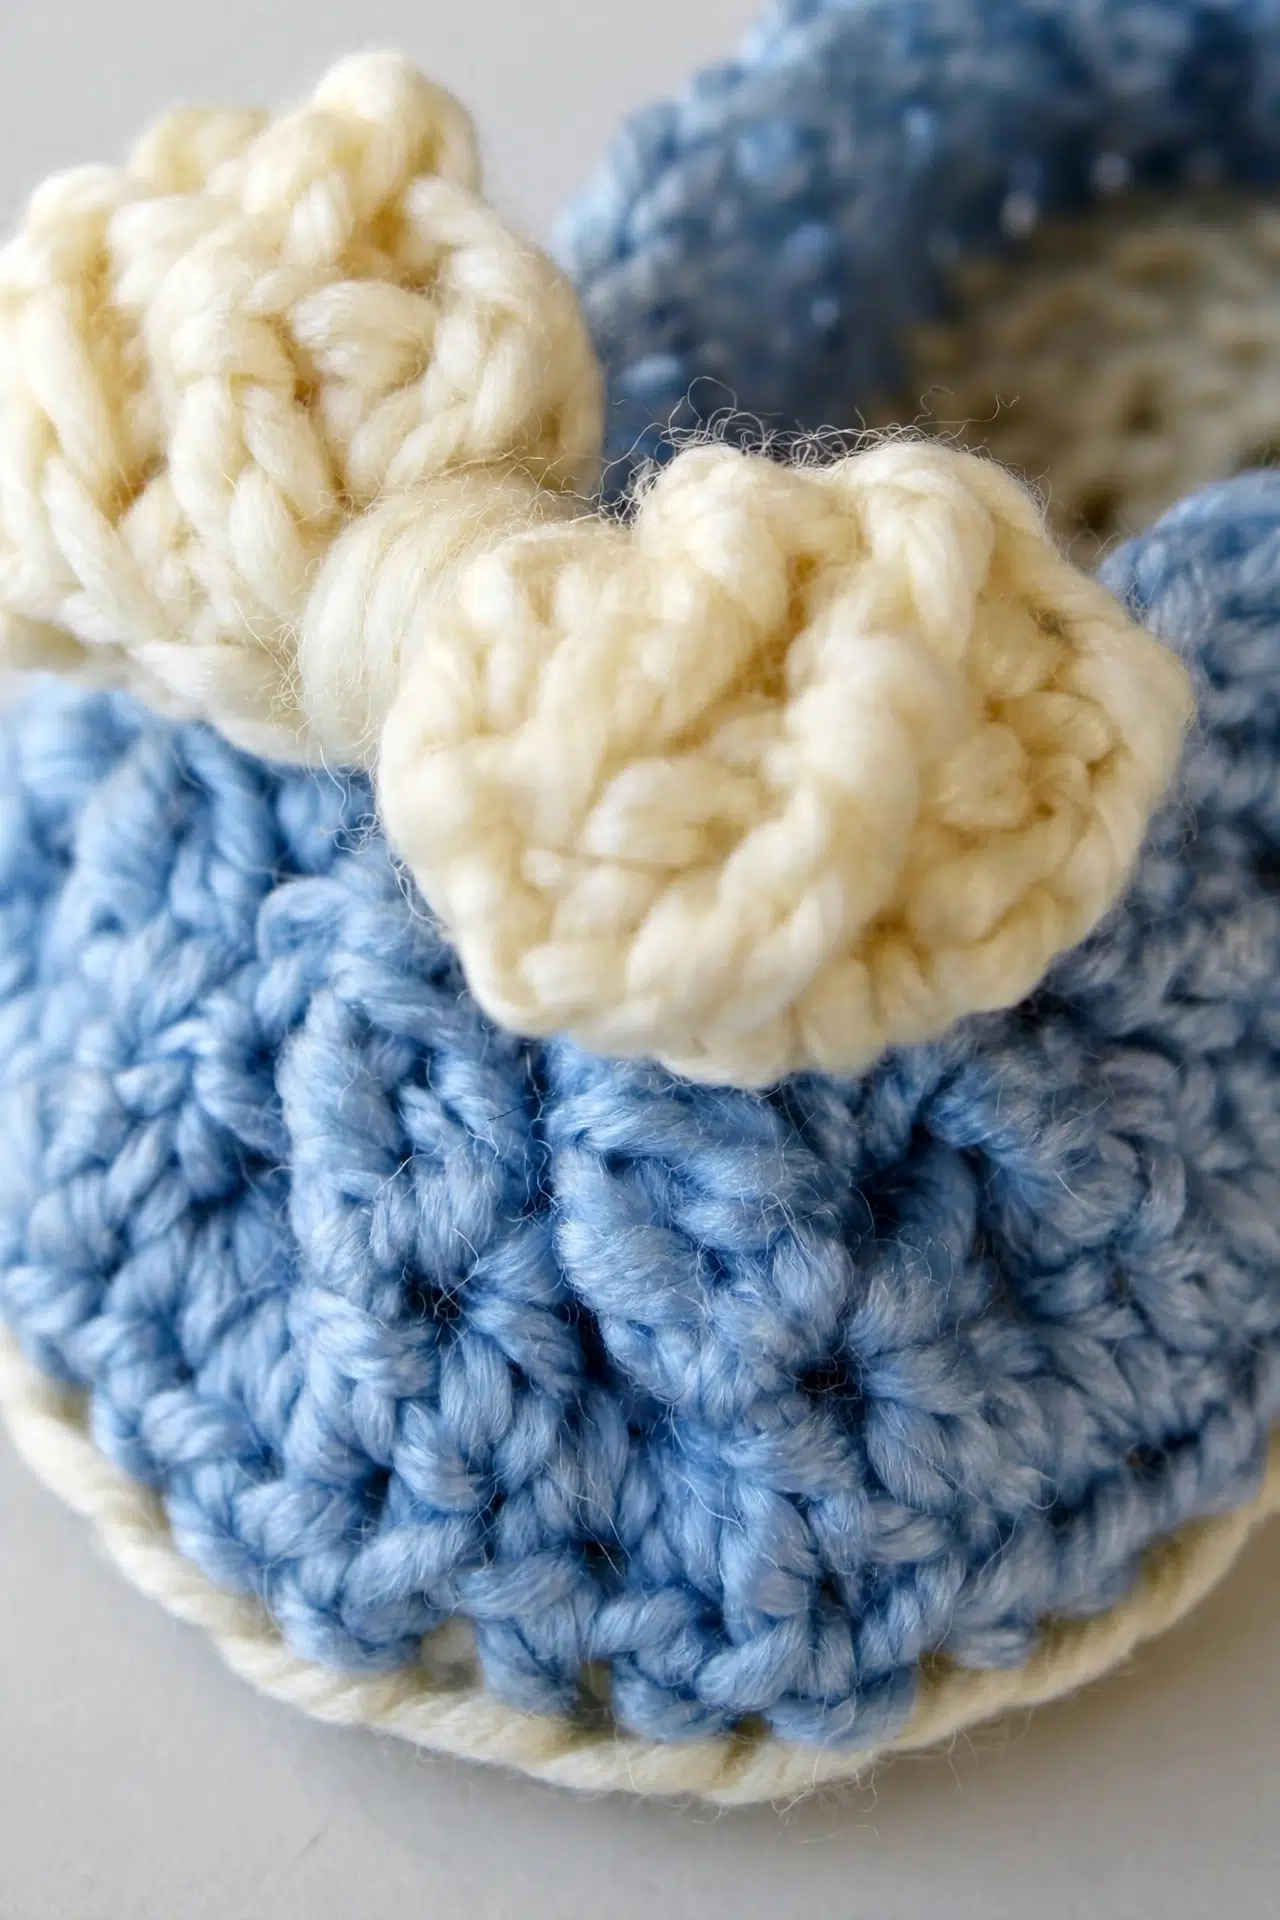
- Step 1: Wrap the long bow tail around the center of the bow, making sure the join sits in the middle. Pull tightly and secure the tail ends with a knot.
- Step 2: Use the remaining tail to sew the bow onto the shoe.
- Step 3: Repeat all steps for the second shoe.
Tips for the Best Results
- Count the sole rounds: Check for 28, 36, 48, and 52 stitches at the ends of the first four rounds. Those counts establish the shape needed before the upper begins.
- Keep the chain loose: A relaxed foundation chain gives you room to work along both sides without pulling the center of the sole too tightly.
- Mark skipped stitches: When working the crossed dc and crossed dc2tog pairs, use a removable marker if you have trouble finding the stitches you skipped. The second part of each pair goes back into them.
- Secure the bow firmly: Pull the wrapped center snugly, knot the tails securely, and sew through the shoe and bow several times so the attachment can handle regular movement.
Making the Crossed Rounds Easier to Follow
Each crossed dc pair uses two stitches. Skip the first stitch, crochet into the second, then return to the skipped stitch. Work slowly enough that you don't accidentally move on to a fresh stitch for the second dc.
The crossed dc2tog pair follows the same idea over four stitches. Skip two, work dc2tog across the next two, then return and work dc2tog across the skipped pair. If that feels too fiddly, use the provided standard decrease option and keep the same ending count.
Ways to Adapt Your Baby Shoes
- Use ordinary hdc stitches: Replace the hdc fps stitches in Round 4 with regular hdc stitches. The count stays the same, and you won't need to work around the stitch posts.
- Choose standard decreases: Follow the alternate instructions in Rounds 6 and 7 if crossed dc2tog pairs feel awkward. You'll still finish with 40 stitches and then 32 stitches.
- Simplify the bow: Work 1 dc in each stitch for Bow Rounds 2 and 3 instead of crossing the dc stitches. Keep the full 20-stitch count in each round.
- Stay with one color: Continue with the same yarn in Round 4 instead of joining a new color. This reduces the number of ends you'll need to secure.
- Try another weight 3 yarn: A different DK or light worsted yarn can work, but fiber and yarn construction may change the finished size. Check the sole against the intended wearer before making the upper.
Fixing Counts and Crossed Stitches
- The sole count is off: Recount each increase group before starting the next round. Missing just one increase in the curved ends affects every later count and can shift the upper shaping.
- The skipped stitches disappear: Place a marker in the skipped stitch or first skipped pair before working ahead. Return to those marked stitches to complete the crossed pair, then remove the marker.
- The upper has too many stitches: Check that each dc2tog uses two stitches and produces one stitch. In the crossed version, each full pair begins across four stitches and produces two stitches.
Care Instructions
Because the yarn fiber isn't specified, follow the washing and drying directions on your yarn label. Secure every end before laundering, and check that each bow remains firmly attached. Reshape the shoes gently after washing if needed.
More Crochet Baby Shoes & Booties
- Bumblebee Crochet Baby Booties
- Bumblebee Baby Booties Crochet Pattern
- Baby Flipflop Sandals Crochet Pattern
- Baby Flipflop Sandals Crochet Pattern
Frequently Asked Questions
Can I make the shoes without front post stitches?
Yes, work ordinary hdc stitches in Round 4 while keeping every placement and increase the same. This gives you the required 52 stitches without working around the posts. Don't remove the increases, since they're needed to reach the correct count before the upper is turned and shaped.
Why do I turn in Round 5?
Turn only after the chain 1 at the start of Round 5. This changes your working direction for that round before you continue into the crossed stitches and decreases. If you forget, the stitch count may still be correct, but the construction won't follow the intended sequence.
Do I repeat just the shoe or the bow too?
Repeat the entire pattern, including the shoe, bow, and finishing steps. Each shoe receives its own separately crocheted bow. Leaving a long tail after Bow Round 3 gives you the yarn needed to wrap the center and sew that bow securely to its shoe.
Can I replace all the crossed stitches with regular stitches?
Yes, use the alternate instructions in Shoe Rounds 6 and 7 and Bow Round 2, then repeat that bow instruction for Round 3. The alternatives preserve the stated ending counts while removing the need to return to skipped stitches. Round 4 also includes a regular hdc option.
Which colors and stitch options did you choose for your pair? Tell me what you changed in the comments.



