
When you're in the mood for a small summer project or need a baby gift soon, the Bumblebee Crochet Baby Booties give your hands something cheerful and focused to make. The pair comes together in manageable sections, so it's easy to pause between the booties and their small sewn details.

You won't need to juggle different hook sizes or learn an elaborate stitch pattern. Instead, you'll move through steady sc rounds, simple turned rows, and a short series of decreases that finishes the shaping.
Jump to:
What Makes This Pattern Work
- Clear count checkpoints: Nearly every row and round includes an ending count, giving you plenty of chances to catch a missed stitch before it affects the shaping.
- A smoothly built foundation: The sole begins along one side of the foundation chain and continues back along the other. That creates the full 20-stitch base without making a separate sole to sew on.
- One hook throughout: The booties, eyes, and wings all use the same 4.0 mm hook, so you can move from one part to the next without changing tools.
- Two center options: Both the eyes and wings can begin with a magic circle or a joined ch-4 loop. Use whichever method feels steadier in your hands.
Pattern Details
- Skill Level: Beginner
- Finished Size: Baby size 0-6 months; fits a foot up to 10 cm.
- Yarn Weight: Aran / Worsted
- Time to Make: about 3-5 hours for the pair
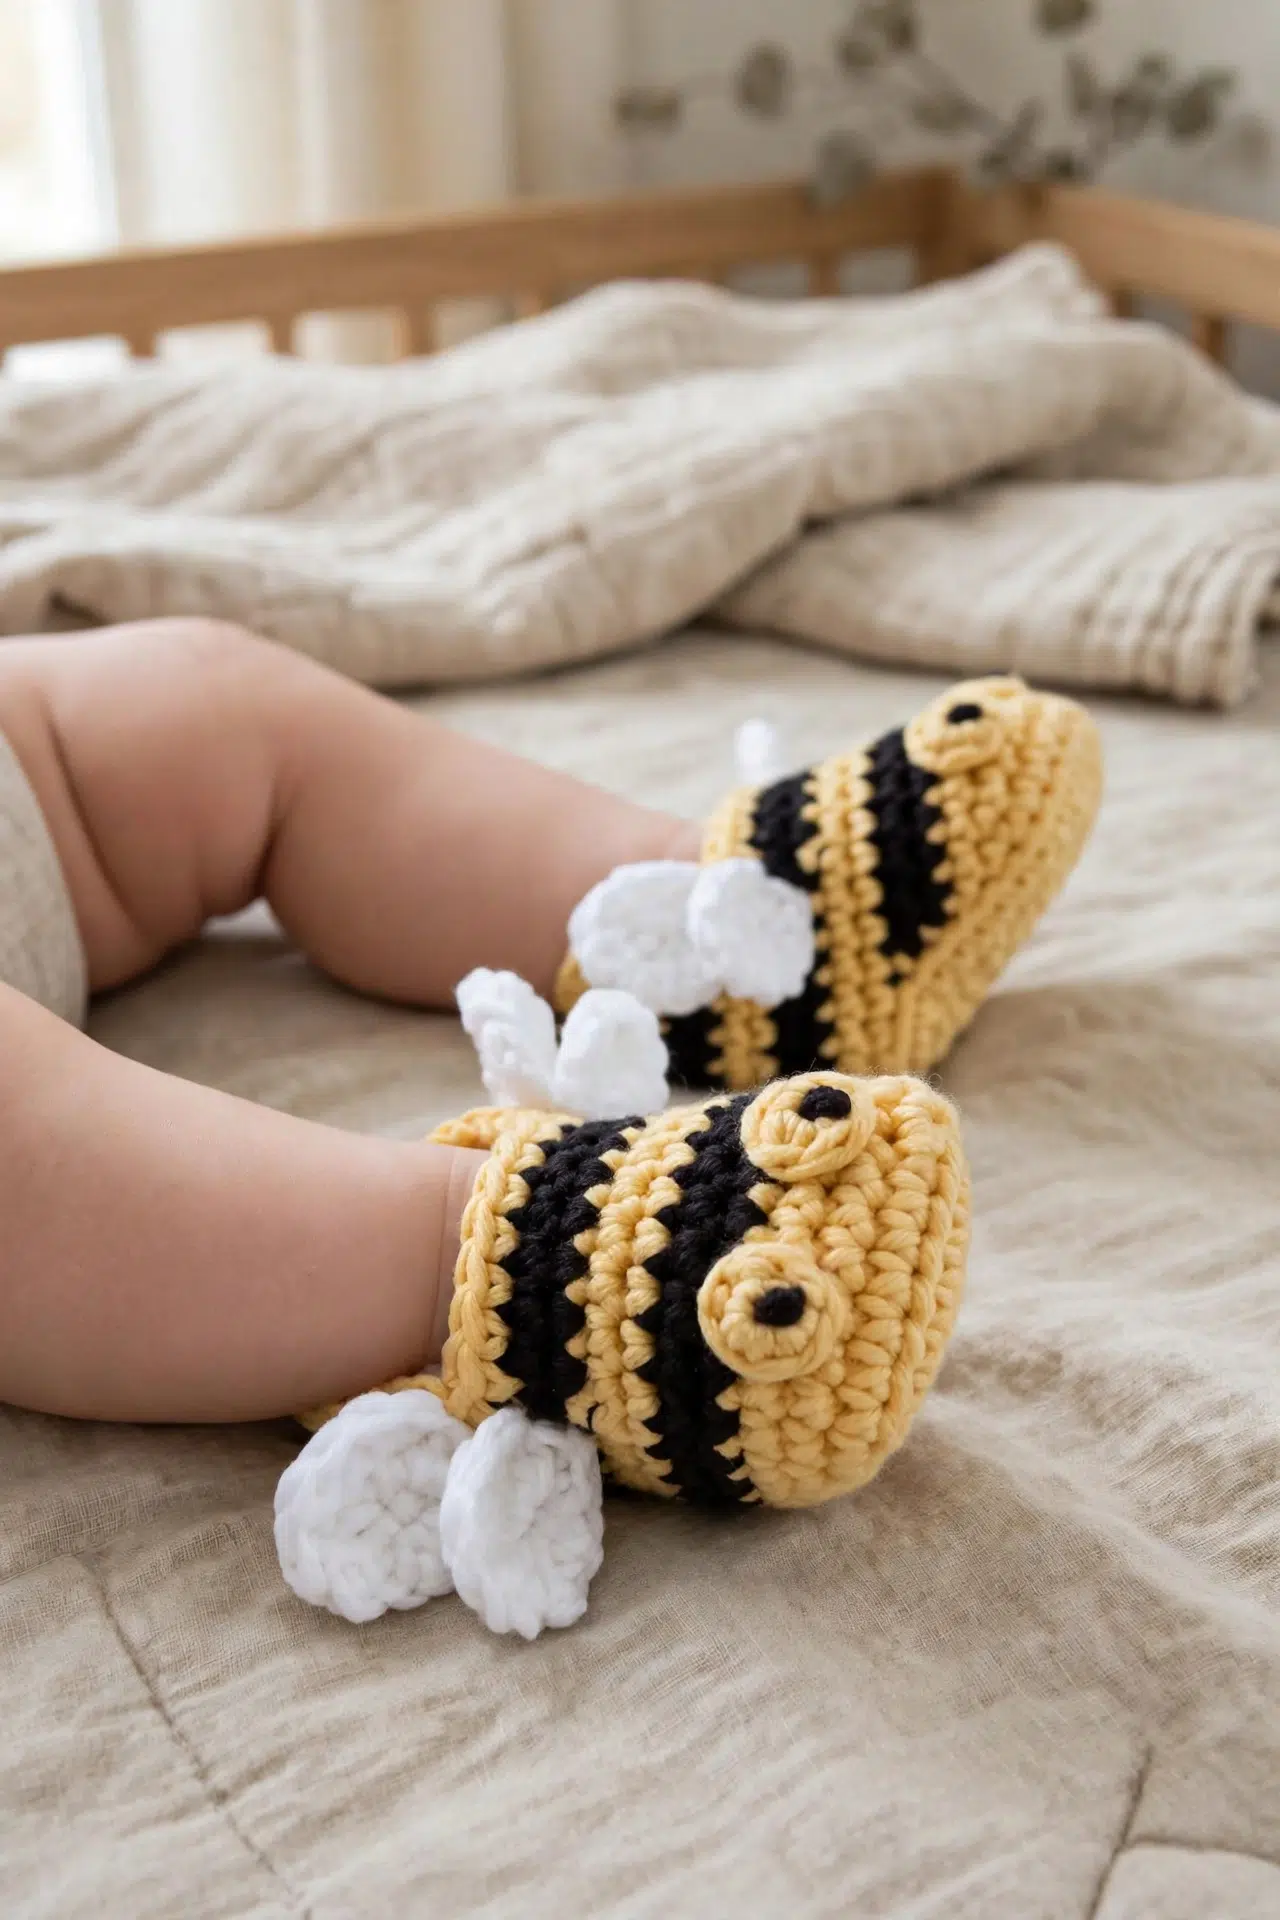
Materials for These Booties
Gather all 3 yarn colors before you begin, along with one hook and basic finishing tools. Exact yarn amounts aren't specified, but every part is worked in aran/worsted weight yarn.
- Aran/worsted weight yarn in yellow, black, and white: Choose yarns with a similar thickness so the stitch counts produce consistent sizing across the booties and sewn pieces. A noticeably thicker or thinner substitute will change the finished fit.
- 4.0 mm crochet hook
- Yarn needle
- Scissors
Stitches & Abbreviations
- Y - yellow
- B - black
- W - white
- ch - chain
- sc - single crochet
- hdc - half double crochet
- dc - double crochet
- sl st - slip stitch
- sc2tog - single crochet 2 stitches together
- sc3tog - single crochet 3 stitches together
- st - stitch
- sts - stitches
magic circle: An adjustable yarn loop into which the first stitches are worked before the loop is pulled closed.
How to Crochet the Bumblebee Baby Booties
Read through the ch-1 counting note before you begin, since that small change is important when the pattern moves from joined rounds to turned shaping.
The bootie begins by working along one side of the foundation chain and then back along the other side. From Round 3 through Round 12, the beginning ch 1 counts as a stitch. From Round 13 onward, the beginning ch 1 does not count as a stitch. Make 2 main booties, 2 eyes, and 4 wings.
Main Bootie
Make 2.
- Row 1: Using Y and a 4.0 mm crochet hook, ch 9. Work 2 sc in 2nd st from hook, 1 sc in each of next 6 sts, and 2 sc in last st. (10)
- Row 2: Crocheting back into the foundation chains, work 2 sc in 1st ch, which is the same st as the last st worked, 1 sc in each of next 6 sts, and 2 sc in last st. (20)
The count includes the stitches from Rows 1 and 2.
- Round 3: You are now working in the round. Sl st in next st, ch 1, 1 sc in next st and in each st around, then sl st in ch 1 to join. (20)
The ch 1 counts as a stitch here and through Round 12.
- Round 4: Ch 1, 1 sc in next st and in each st around, then join B with sl st in ch 1. (20)
- Rounds 5-6: Rep Round 4, joining Y with sl st in ch 1 at the end of the last round. (20)
- Rounds 7-8: Rep Round 4, joining B with sl st in ch 1 at the end of the last round. (20)
- Rounds 9-10: Rep Round 4, joining Y with sl st in ch 1 at the end of the last round. (20)
- Round 11: Ch 1, 1 sc in next st and in each st around, then sl st in ch 1 to join. (20)
- Round 12: Ch 1, 1 sc in next st and in each of next 12 sts. (14)
- Round 13: Join B with ch 1, turn, 1 sc in 1st st and in each of next 12 sts, then 1 sc in the previous ch 1. (14)
The beginning ch 1 does not count as a stitch here or in the following rounds.
- Round 14: Ch 1, turn, 1 sc in next st and in each st along. (14)
- Round 15: Join Y with ch 1, turn, 1 sc in 1st st and in each st along. (14)
- Round 16: Ch 1, turn, 1 sc in 1st st and in each st along. (14)
- Round 17: Join B with ch 1, turn, 1 sc in 1st st and in each st along. (14)
- Round 18: Ch 1, turn, 1 sc in 1st st and in each st along. (14)
- Round 19: Join Y with ch 1, turn, 1 sc in 1st st and in each st along. (14)
- Round 20: Ch 1, turn, 1 sc in 1st st and in each st along. (14)
- Round 21: Ch 1, turn, (sc2tog) 7 times. (7)
- Round 22: Ch 1, turn, sc2tog, sc3tog, sc2tog. (3)
- Round 23: Sc3tog. (1)
- Round 24: Without fastening off, ch 1 and crochet 1 sc neatly around the top edge. Sl st in ch 1 to join. Fasten off and weave in all tails. Rep all steps for the second bootie.
Eye
Make 2.
- Step 1: Take a short length of B and tie 2 knots in the center of the yarn length, one directly on top of the other.
- Step 2: Using Y and a 4.0 mm crochet hook, crochet 6 sc into a magic circle, then sl st in first sc to join. Fasten off, leaving enough yarn for sewing. (6)
Alternatively, ch 4, sl st in first ch to form a loop, and crochet 6 sc into the loop.
Wings
Make 4.
- Round 1: Using W and a 4.0 mm crochet hook, crochet 5 sc into a magic circle, then sl st in first sc to join. (5)
Alternatively, ch 4, sl st in first ch to form a loop, and crochet 5 sc into the loop.
- Round 2: Without chaining, crochet 2 sc in next st, 2 hdc in next st, 3 dc in next st, 2 hdc in next st, and 2 sc in last st. Fasten off and sew the wing onto the side of the bootie. Rep all steps 3 more times for the remaining wings. (11)
Finishing
- Step 1: Sew each end of the black knotted yarn length into a yellow circle and tie securely on the back. Use the remaining Y yarn to sew the eye onto the front of the bootie. Rep for the second eye.
Tips for Success
- Work both sides of the chain: After Row 1, don't turn as you normally would for a flat row. Rotate the work so you can crochet into the unused loops along the other side of the foundation chain, bringing the total to 20 stitches.
- Track the beginning chain: Treat the ch 1 as a stitch from Round 3 through Round 12. Starting with Round 13, it no longer counts, so place the first sc exactly where directed to keep 14 stitches.
- Change color at the stated join: Complete each color section before joining the next color with the final sl st. This puts the new yarn in place for the following round without adding an extra stitch.
- Secure every sewn piece: Knot the eye center firmly and sew the eyes and wings through several stitches of the bootie fabric. Weave the tails securely on the inside and check the attachments before wear.
Ways to Adapt Your Baby Booties
- Try another aran or worsted yarn: You can substitute another yarn of the same weight, but fiber behavior matters. Cotton generally has less stretch, while wool and acrylic blends can vary in bounce, so check the finished sole against the intended foot length.
- Adjust the hook with care: A different hook size can help you match the intended 10 cm maximum fit when your tension runs tight or loose. Changing the hook also changes the density of the fabric, so make both booties with the same hook and tension.
- Use the chain-loop start: Skip the magic circle by chaining 4 and joining with a sl st. Work the eye or wing stitches into the center of that loop, taking care to keep the opening as small as possible.
- Choose a different color arrangement: The construction still works with other color choices. Keep the same joining points and round sequence so both booties follow an identical stitch count and color schedule.
- Make a plain version: You can leave off the eyes and wings for a simpler pair. This doesn't change the bootie construction, but it removes the sewn embellishments and the intended bumblebee details.
Fixing Bootie Counts and Shaping
- The sole doesn't reach 20 stitches: Check that Row 2 was worked into the unused side of the same 8 foundation chains. Rows 1 and 2 each contribute 10 stitches, including 2 sc at both ends.
- The turned section keeps growing: The beginning ch 1 stops counting as a stitch in Round 13. If you count it and also work all 14 sc, you'll add an unwanted stitch at the edge.
- The booties don't match: Compare counts after every color section and use the same tension for both pieces. Small changes in foundation-chain tightness can also affect the sole length, so keep those first 9 chains relaxed and even.
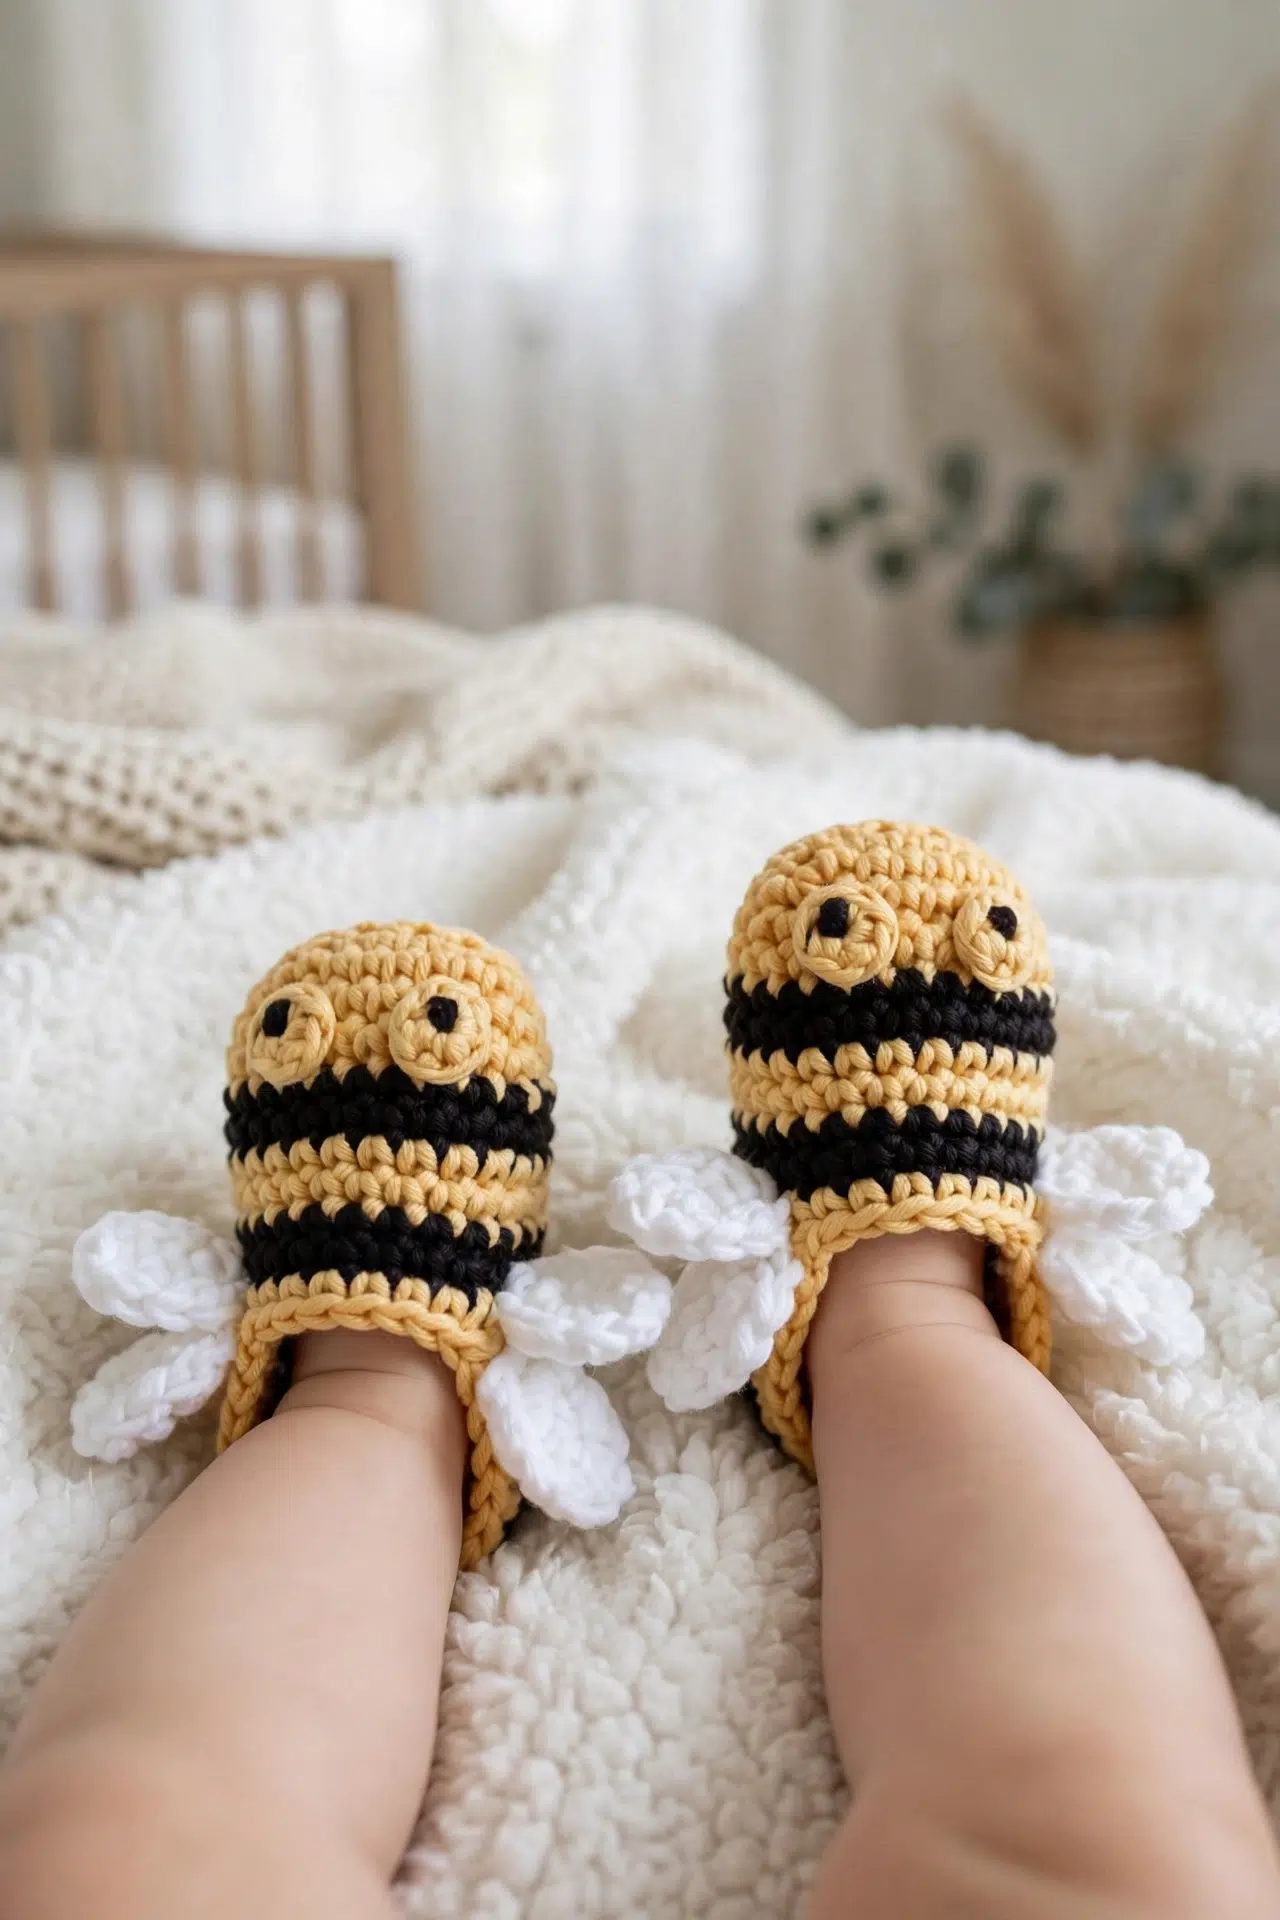
Care Instructions
Follow the yarn label for washing and drying because the fiber content isn't specified. Before each wear, check that the sewn-on eyes and wings are secure, then reshape the booties after cleaning and let them dry as the label directs.
More Crochet Baby Wearables
- Baby Flipflop Sandals Crochet Pattern
- Baby Aviator Hat Crochet Pattern
- Simple Crochet Baby Cardigan
- Summer Crochet Baby Cardigan
Frequently Asked Questions
What size do these booties fit?
They're sized for babies from 0-6 months and fit a foot up to 10 cm. Age ranges are only a guide because baby feet vary, so measure the intended foot when possible and compare that measurement with the completed sole before finishing the second bootie.
Does the beginning ch 1 count as a stitch?
Yes, the ch 1 counts as a stitch from Round 3 through Round 12, but it doesn't count from Round 13 onward. That change supports the move into turned shaping. Counting it after Round 13 adds an extra stitch and disrupts the decreases in Rounds 21-23.
How many pieces do I need for one pair?
You'll make 2 main booties, 2 eyes, and 4 wings. Each bootie receives 1 eye and 2 wings. Making all matching pieces in batches can help your tension stay consistent, especially when working the small circles and shaped wing rounds.
Can I avoid using a magic circle?
Yes, ch 4 and join with a sl st to form a loop, then work 6 sc into it for an eye or 5 sc into it for a wing. The opening may be less adjustable than a magic circle, so keep the initial chains snug without making them difficult to work into.
Why does Round 12 stop after 14 stitches?
Round 12 intentionally works only 14 stitches because the bootie now changes from complete joined rounds to a turned section. Rounds 13-20 maintain those 14 stitches, and Rounds 21-23 reduce them to 1 stitch before the top edge is finished.
Tell me in the comments how your little pair turned out! 🧶



