
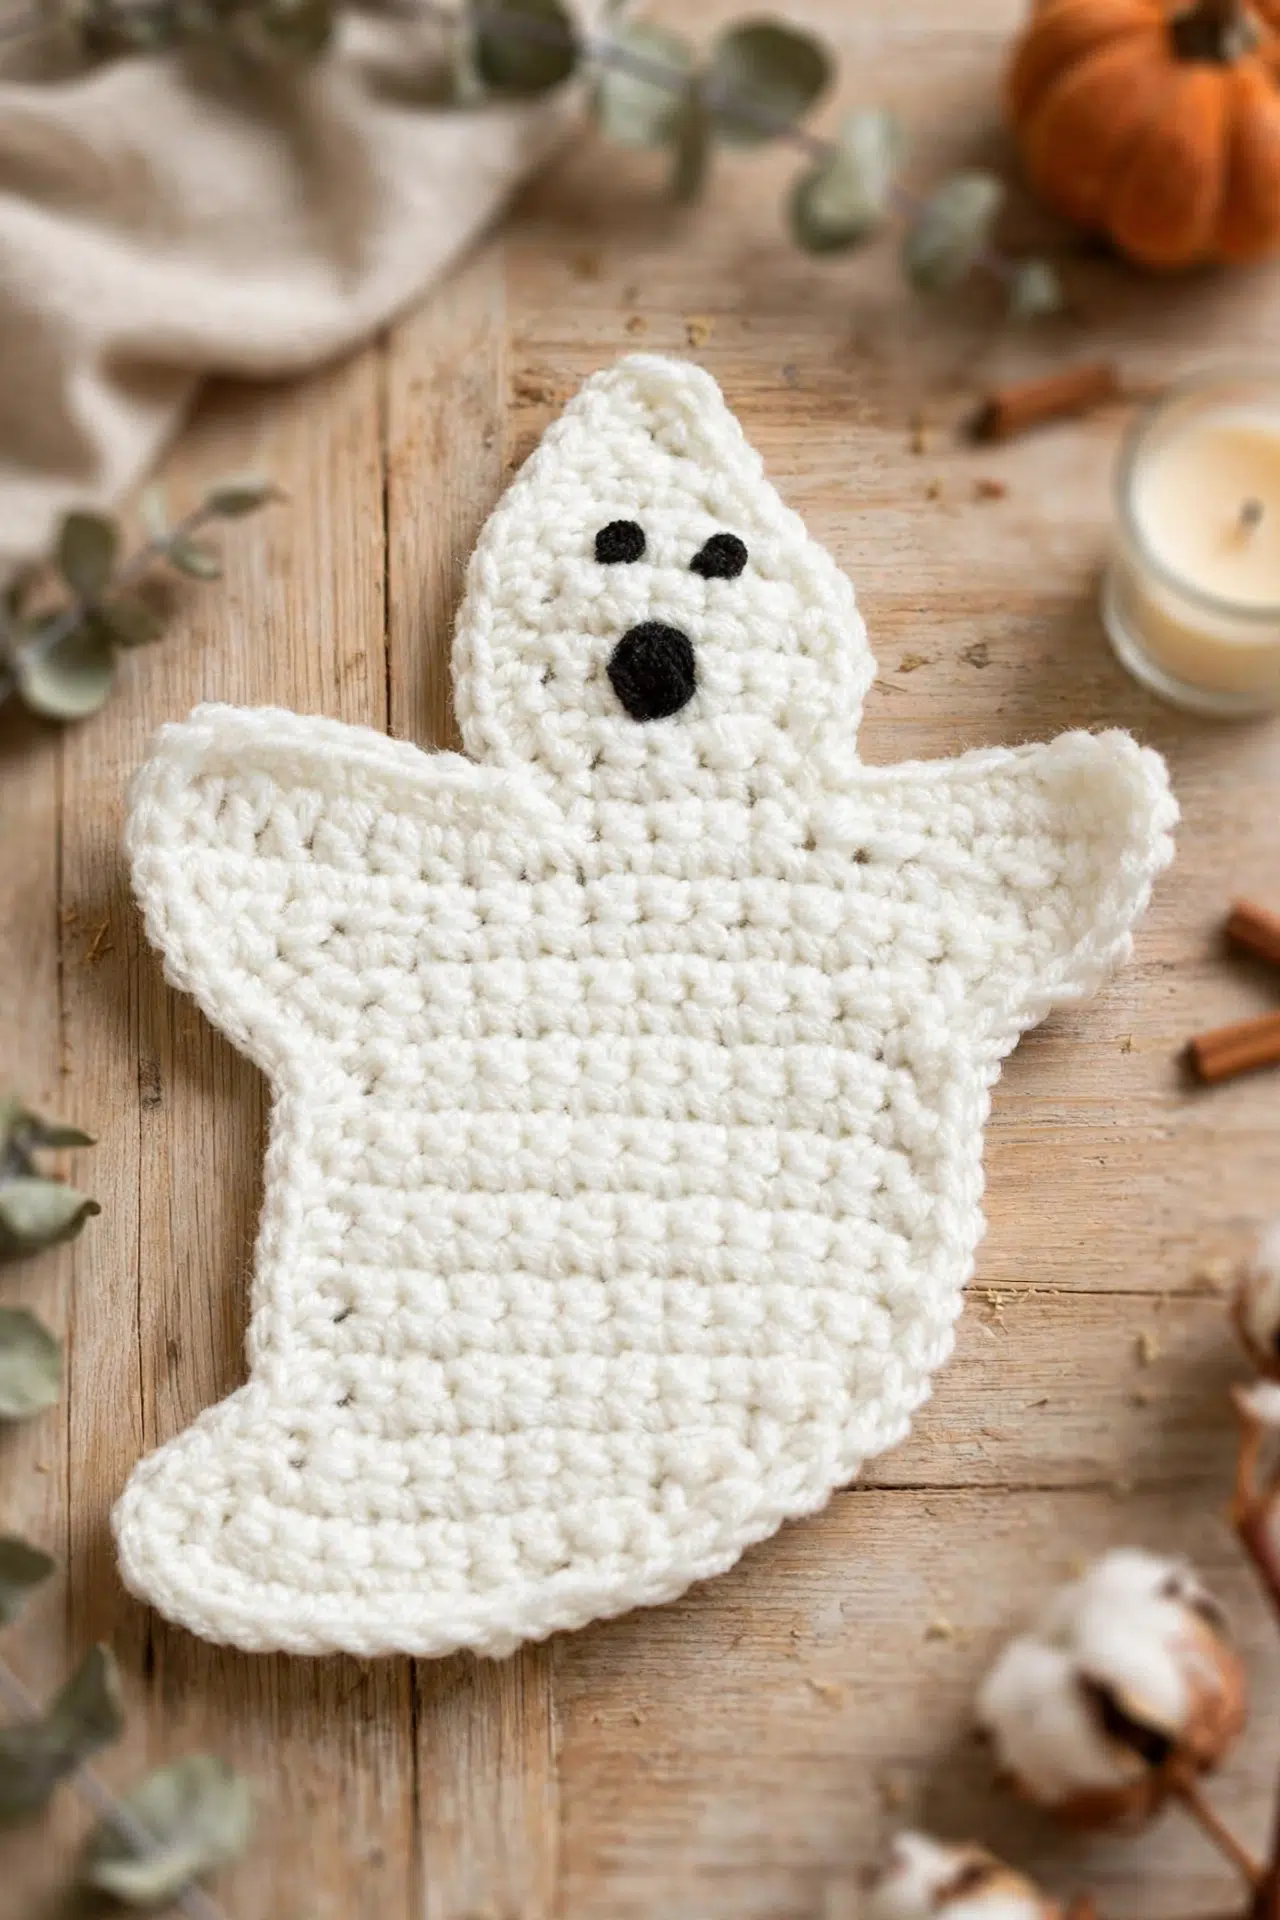
If you've been wanting a quick, useful crochet project with a playful spooky theme, my Spooky Crochet Ghost Coasters are ready for your hook. You get a complete set to use together, and each piece is small enough to feel manageable.

The making stays pleasantly rhythmic, with simple single crochet rows, steady shaping, and one edging round. A pair of chain extensions creates the wider section, then a few embroidered stitches finish each coaster.
Jump to:
- Why This Pattern Is a Keeper
- Pattern Details
- Materials You'll Need
- Stitches & Abbreviations
- How to Crochet the Spooky Ghost Coasters
- Crochet Tips
- Ways to Adapt Your Ghost Coasters
- Fixing Counts and Edges on Your Ghost Coasters
- Coasters for a Spooky Table
- Washing & Care
- More Seasonal Crochet Home Decor
- Frequently Asked Questions
Why This Pattern Is a Keeper
- A satisfying set: You repeat the same coaster 4 times, so the shaping becomes familiar and comfortable after the first one.
- No separate crochet pieces: The main shape is worked in rows as one piece. Once the body is complete, you only need an edging round and embroidered features.
- Straightforward shaping: The increases and decreases happen at clearly stated points, mostly along the row ends, so you aren't juggling complicated construction.
- A useful finish: The final round works directly into the row ends and places extra stitches at the points, finishing the entire outer edge in one pass.
Pattern Details
- Skill Level: Easy
- Finished Size: Each coaster measures approx 9 in. [23 cm] × 4 in. [10 cm].
- Gauge: 14 sts and 15 rows of sc = 4 in. [10 cm].
- Yarn Weight: Medium (4)
- Time to Make: about 6-8 hours for the set of 4
Materials You'll Need
Gather both yarn colors, your hook, and a yarn needle before you begin. The same needle handles the facial details and the final yarn ends.
- Red Heart Super Saver, solid colors, 7 oz / 198 g; 364 yd / 333 m per skein: Color A, 316 Soft White, 1 skein
- Red Heart Super Saver, solid colors, 7 oz / 198 g; 364 yd / 333 m per skein: Color B, 312 Black, 1 skein
- Size U.S. H-8 (5 mm) Susan Bates crochet hook, or size needed to obtain gauge: Treat the hook size as a starting point. Change sizes if needed so your single crochet fabric matches gauge.
- Susan Bates yarn needle
Stitches & Abbreviations
- A - Color A
- B - Color B
- ch - chain
- ch-10 - chain-10
- dc - double crochet
- hdc - half double crochet
- RS - right side
- sc - single crochet
- sl st - slip stitch
- st(s) - stitch(es)
sc2tog: Insert hook in next st, yarn over, draw up a loop, yarn over, draw through 2 loops on hook; repeat this sequence once more, yarn over, draw through 3 loops on hook.
dc2tog: Yarn over, insert hook in next dc, yarn over, draw up a loop, yarn over, draw through 2 loops on hook; repeat this sequence once more, yarn over, draw through 3 loops on hook.
How to Crochet the Spooky Ghost Coasters
Make each ghost from the top down, add the outer edging without fastening off, and embroider the features after the crochet is complete.
Rows 12 and 13 use the first 3 chains as a turning chain included in the stated stitch total. Leave that turning chain unworked on the following row as directed. Eye placement depends on the pattern photograph.
Ghost
Make 4. Begin at the top of the head.
- Foundation: With A, ch 2.
- Row 1: Sc in 2nd ch from hook; turn. (1)
RS
- Row 2: Ch 1, 2 sc in st; turn. (2)
- Row 3: Ch 1, sc in first st, 2 sc in next st; turn. (3)
- Row 4: Ch 1, 2 sc in first st, sc in each of last 2 sts; turn. (4)
- Row 5: Ch 1, sc in each of first 3 sts, 2 sc in last st; turn. (5)
- Row 6: Ch 1, 2 sc in first st, sc in each of last 4 sts; turn. (6)
- Rows 7-9: Ch 1, sc in each st across; turn.
- Row 10: Ch 1, sc2tog over first 2 sts, sc in each of next 2 sts, sc2tog over next 2 sts; turn. (4)
- Row 11: Ch 1, sc in each st across, ch 10; turn. (4)
Ends with 4 sc and ch-10.
- Row 12: Dc in 4th ch from hook, dc in each of next 2 ch, hdc in each of next 3 ch, sc in last ch, sc in next 4 sts, ch 10; turn. (12)
Ends with 12 sts and ch-10.
- Row 13: Dc in 4th ch from hook, dc in each of next 2 ch, hdc in each of next 3 ch, sc in last ch, sc in next 7 sts, hdc in next st, dc in next st, dc2tog over next 2 sts; turn, leaving turning ch unworked. (18)
- Row 14: Ch 1, sc2tog over first 2 sts, sc in each of next 11 sts, hdc in next st, dc in next st, dc2tog over next 2 sts; turn, leaving turning ch unworked. (15)
- Row 15: Ch 1, sc2tog over first 2 sts, sc in each of next 11 sts, sc2tog over last 2 sts; turn. (13)
- Row 16: Ch 1, sc2tog over first 2 sts, sc in each of next 9 sts, sc2tog over last 2 sts; turn. (11)
- Rows 17-25: Ch 1, sc in each st across; turn.
- Row 26: Ch 1, sc2tog over first 2 sts, sc in each st across; turn. (10)
- Row 27: Ch 1, sc in each of next 8 sts, sc2tog over last 2 sts; turn. (9)
- Row 28: Ch 1, sc2tog over first 2 sts, sc in each of next 6 sts, 2 sc in last st; turn. (9)
- Row 29: Ch 1, 2 sc in first st, sc in each of next 6 sts, sc2tog over last 2 sts; turn. (9)
- Row 30: Ch 1, sc2tog, 1 sc in next 6 sts, 2 sc in last st; turn. (9)
- Row 31: Ch 1, 2 sc in first st, sc in each of next 4 sts, (sc2tog over next 2 sts) 2 times; do not fasten off or turn. (8)
Outer Edging
- Round 1: Ch 1, rotate the piece to work across the side edge, and sc evenly around the entire piece, working 3 sc at the very top point and each bottom point; join with a sl st in the first sc. Fasten off.
Finishing
- Step 1: Using B and a yarn needle, embroider 2 French knots for the eyes using the pattern photograph as a placement guide.
- Step 2: Embroider satin stitches over 2 rows to create an oval-shaped mouth.
- Step 3: Fasten off and weave in all yarn ends securely on the wrong side.
Crochet Tips
- Mark the long repeat: Use a row counter for Rows 17-25. Those plain rows are relaxing, but losing one changes where the lower shaping begins.
- Count the chain extensions carefully: Rows 11 and 12 each end with ch 10. On the next row, the first 3 chains act as the turning chain, so place the first dc in the 4th ch from your hook.
- Keep the edging relaxed: Space the sc evenly along the row ends rather than forcing one stitch into every small gap. If the edge cups, add stitches more often; if it ripples, use fewer.
- Secure the embroidery: Keep the French knots and satin stitches firm enough to stay neat, but don't pull so tightly that the coaster puckers. Fasten every embroidery end on the wrong side.
Ways to Adapt Your Ghost Coasters
- Try another medium-weight yarn: You can substitute another Medium (4) yarn if you match the listed gauge. A thicker or thinner strand will change the finished measurements and may make the coaster feel more or less firm.
- Use cotton for more absorbency: Medium-weight cotton is a practical alternative for a coaster, but it usually has less stretch than acrylic. Work a gauge swatch and adjust your hook if the fabric becomes too dense.
- Replace Color B with embroidery scraps: The second color is used for the French-knot eyes and satin-stitch mouth. A small amount of compatible yarn can replace a full skein, provided it passes comfortably through the crocheted fabric.
- Change the feature placement: The photograph guides the eye placement, but you can pin or lay short yarn strands on the finished coaster before committing. Keep both eyes and the mouth away from the outer edging so the embroidery doesn't distort it.
- Adjust the hook, not the stitch counts: If your coaster is coming out too large or small, change hook size to correct gauge instead of removing shaping stitches. The row counts and increases work together to form the complete outline.
Fixing Counts and Edges on Your Ghost Coasters
- Rows 12 or 13 seem one stitch short: Count the skipped first 3 chains as the turning chain. That turning chain is included in the stated total even though you don't work another stitch into it on the following row.
- The outer edge ripples: Too many sc are packed into the row ends. Remove a few evenly spaced edging stitches while keeping 3 sc at the top point and at each bottom point.
- The final rows drift out of count: Check whether each sc2tog uses exactly 2 stitches and produces 1 stitch. Rows 28-30 balance a decrease with an increase, so each of those rows should still end with 9 stitches.
Coasters for a Spooky Table
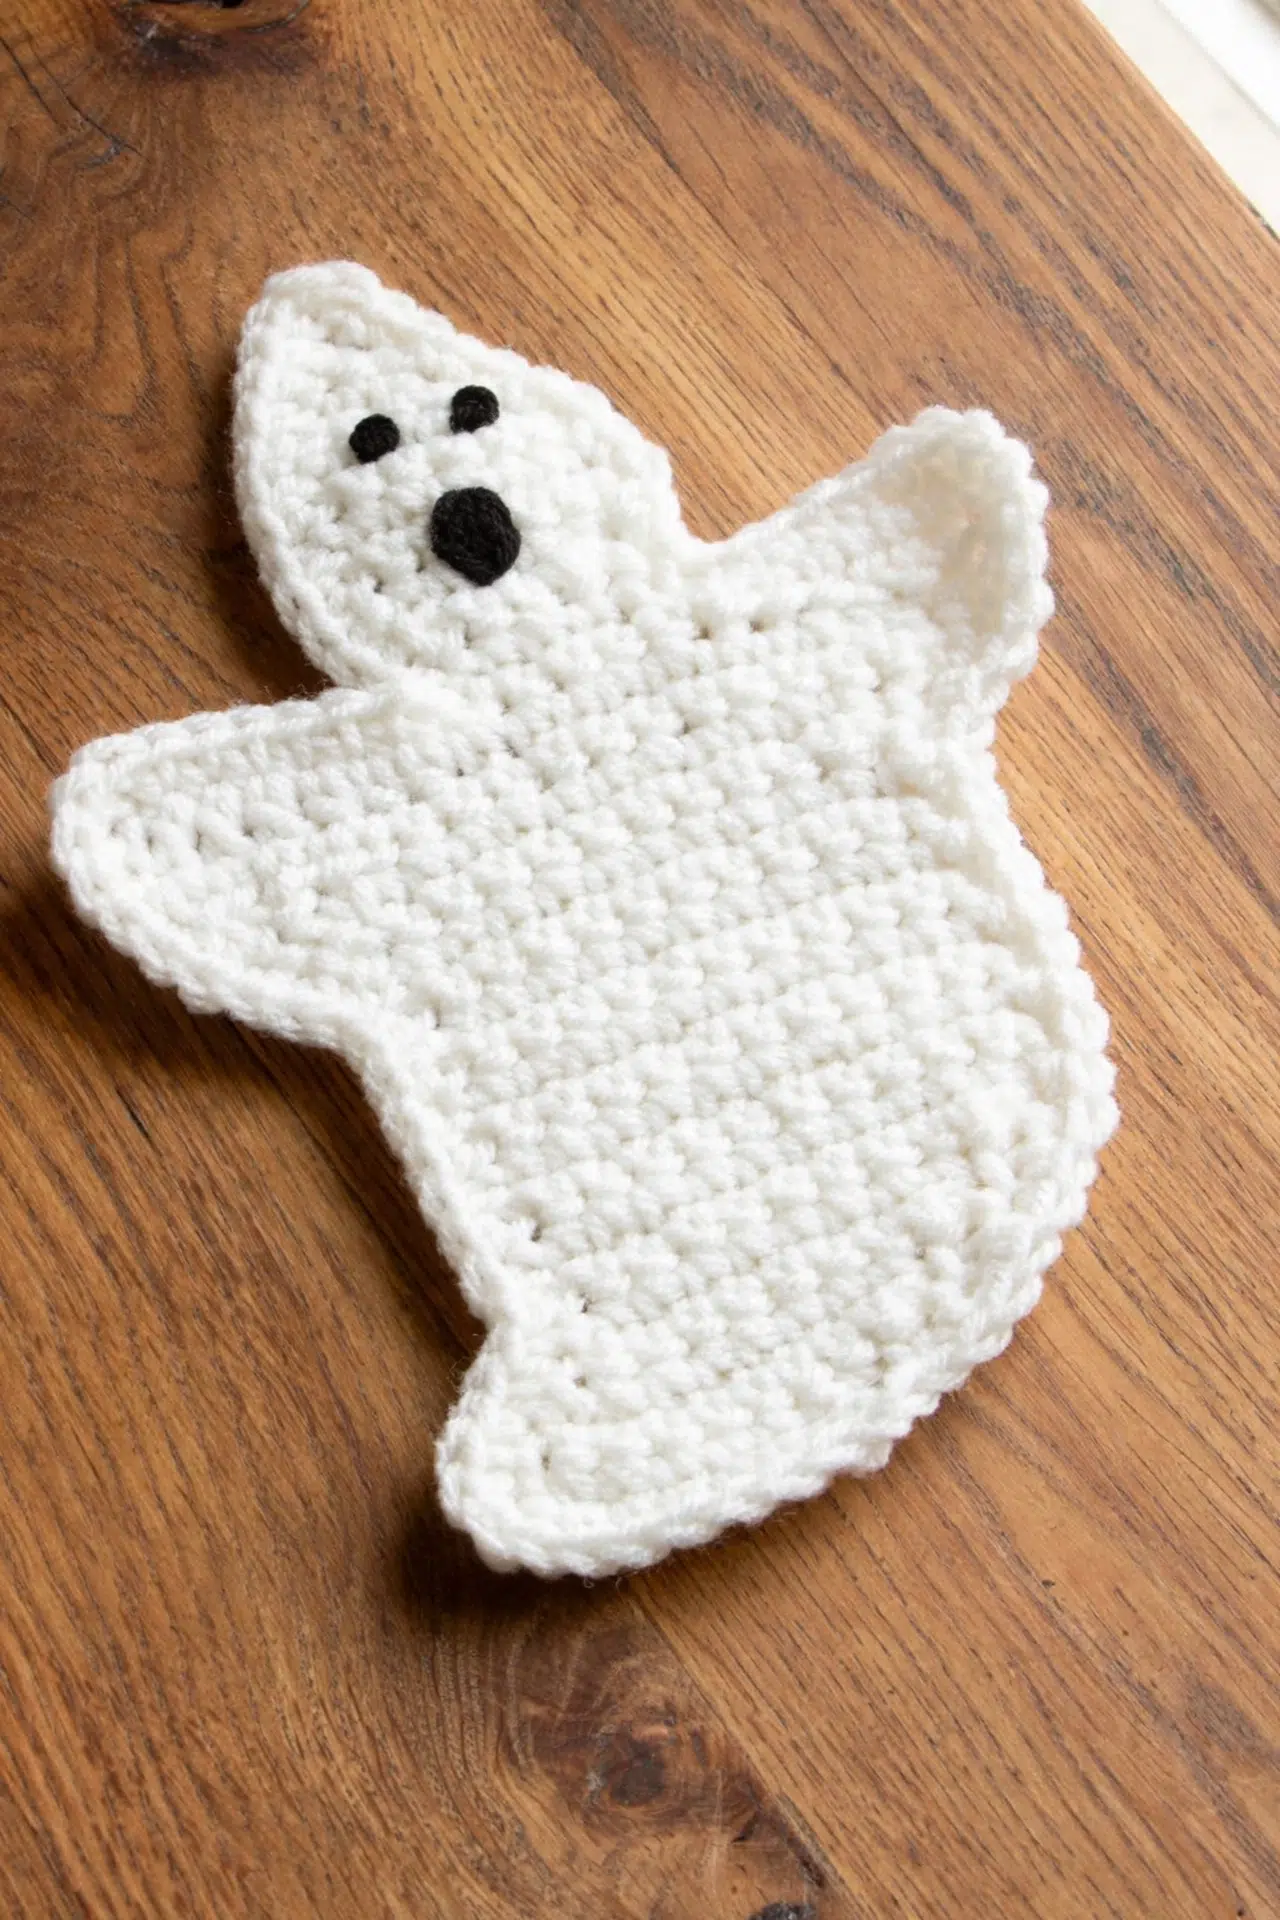
Place the set of 4 with mugs or cold drinks when you want a small seasonal detail that also protects the table. Between uses, stack the coasters together so the embroidered surfaces stay flat.
Washing & Care
Red Heart Super Saver is an acrylic yarn, so follow the washing directions on the yarn label and avoid excessive heat. Reshape the coasters after washing and let them lie flat so the points and embroidered areas settle neatly. Don't use acrylic coasters beneath cookware or other items hot enough to damage synthetic fibers.
More Seasonal Crochet Home Decor
Frequently Asked Questions
How many coasters does the pattern make?
Make 4 coasters. Each one follows the complete Ghost section, edging round, and finishing steps, so you'll repeat the same construction from foundation chain through embroidery. Working all 4 bodies before moving to edging and finishing can help you keep your tension and feature placement consistent across the set.
Do the skipped chains count as stitches in Rows 12 and 13?
Yes, the first 3 skipped chains form a turning chain and are included in the stated stitch totals. That's why you work the first dc in the 4th chain from the hook. On the following row, leave that turning chain unworked as instructed or the row will gain an extra stitch and disrupt the shaping.
How important is gauge for these coasters?
Gauge determines the finished measurements and firmness, though there isn't a wearable fit to manage. If you have more than 14 stitches across 4 in. [10 cm], your coaster will be smaller and denser. Fewer stitches in that distance will make it larger and potentially looser, so adjust the hook before making all 4.
Where should I place the embroidered face?
Use the pattern photograph as the placement guide for the 2 French-knot eyes, then work the oval mouth over 2 rows. If you're choosing your own placement, lay the finished coaster flat and test the positions with loose yarn first. That lets you adjust the spacing before pulling embroidery through the crochet fabric.
Did you change the feature color, shift the face, or make more than 4 coasters? Tell me in the comments what you added or adjusted.



