
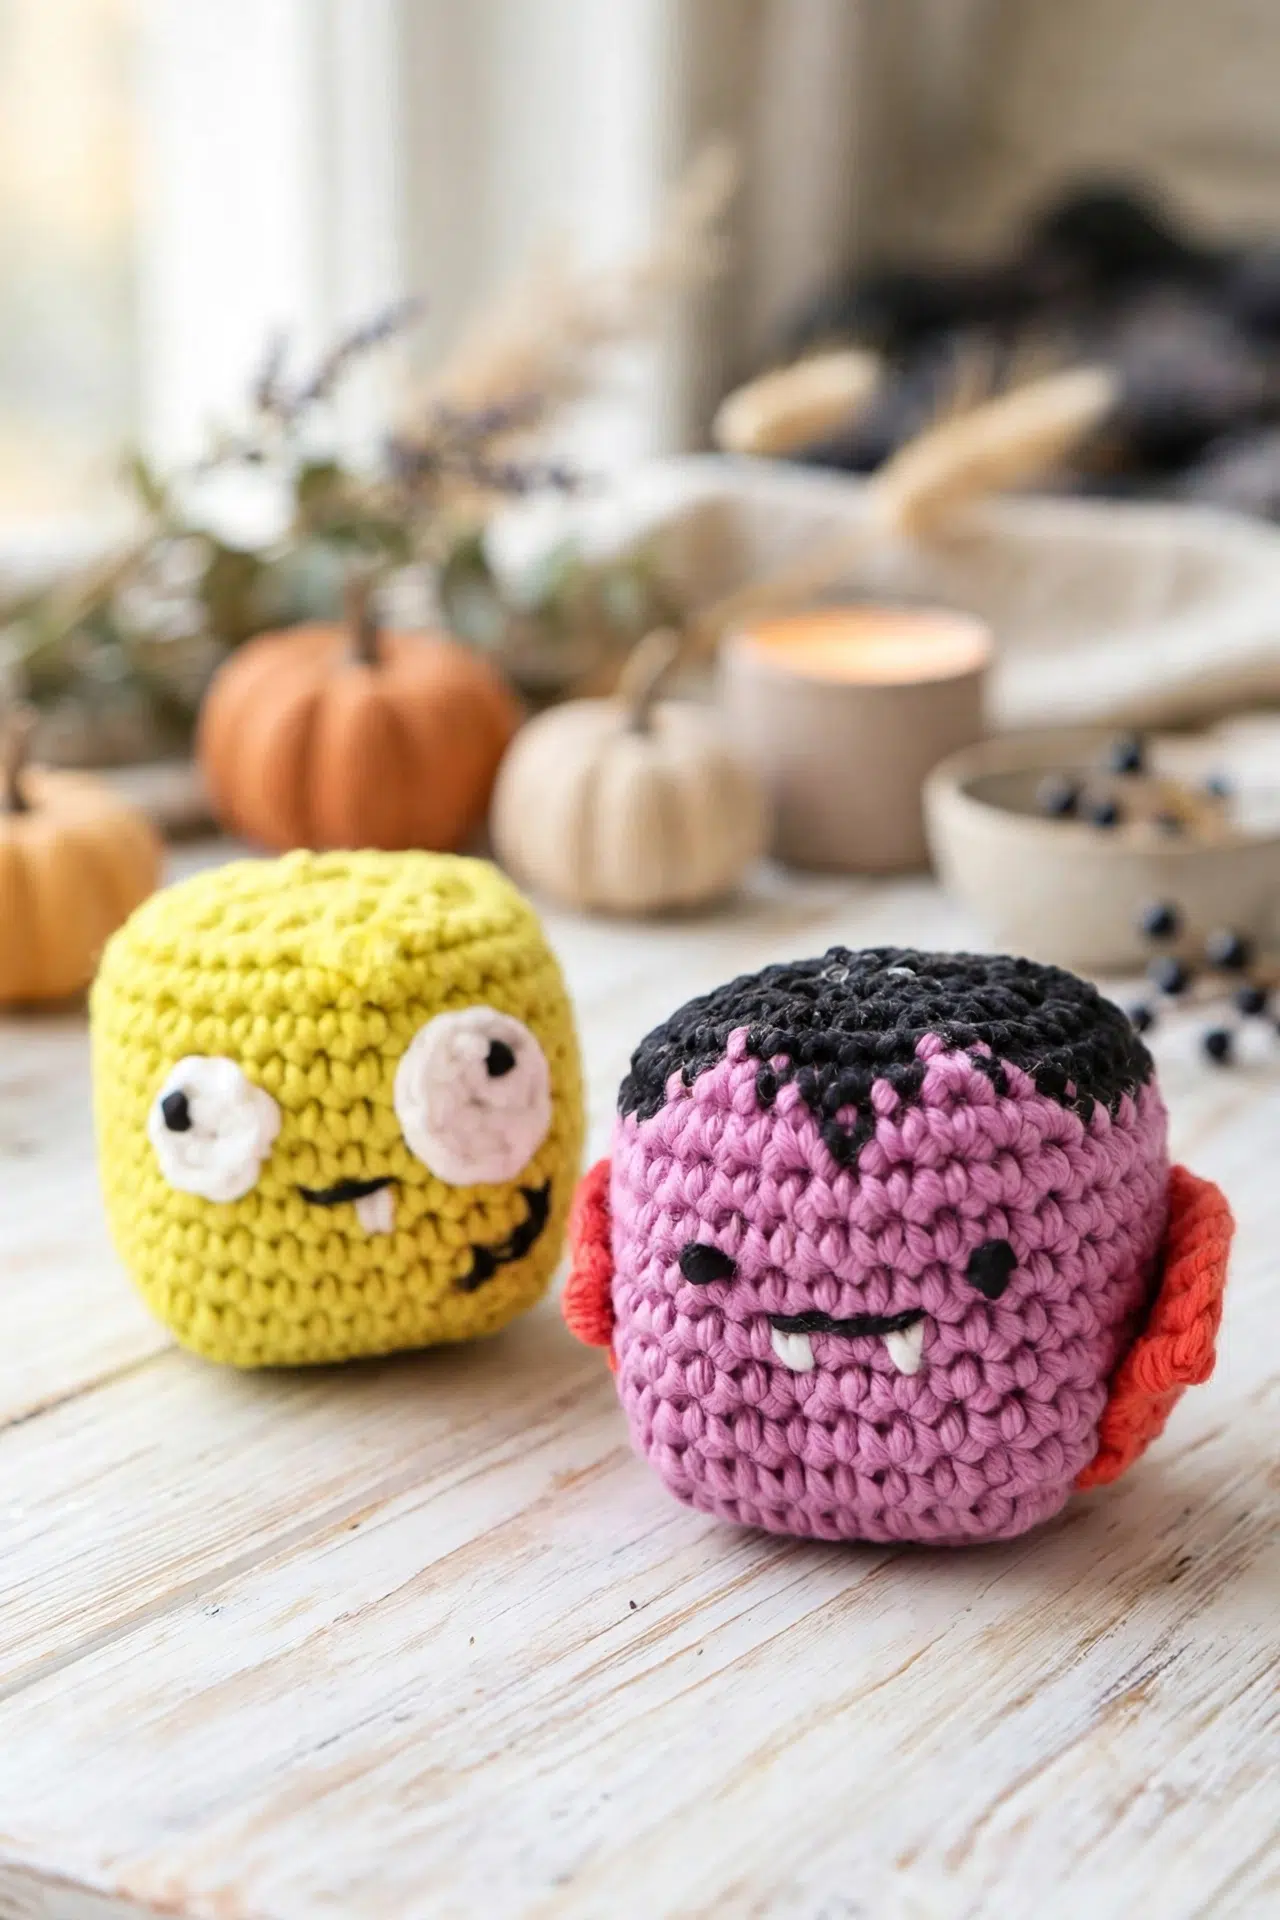
That DK yarn waiting in your stash is a happy excuse to make these Spooky Crochet Undead Critters between larger projects. The shared body pattern keeps the pair manageable, while the separate cloak, eyes, and stitched details give your hands a satisfying mix of simple crochet and finishing.

Once you've woven in the last tail, you'll have two stuffed Halloween characters ready for a treat bowl, desk, shelf, or handmade surprise. They also offer a sugar-free way to share a little seasonal fun!
Jump to:
- Why I Love This Pattern
- Pattern Details
- Materials for These Critters
- Stitches & Abbreviations
- How to Crochet the Spooky Undead Critters
- Crochet Tips
- Ways to Change Your Crochet Critters
- Fixing Critter Count and Finishing Problems
- Give Your Finished Critters a Halloween Spot
- Washing & Care
- More Spooky Crochet Amigurumi
- Frequently Asked Questions
Why I Love This Pattern
- One body, two characters: Both critters begin with the same four-corner increase sequence and settle into 32-stitch rounds, so the second body feels familiar in your hands.
- Small amounts are useful: Five colors handle the bodies, cloak, eyes, and facial details, making this a practical project for DK yarn left from other makes.
- The shaping stays simple: After the opening increases, most of each body is plain single crochet. One repeated decrease closes the top, so there's no complicated shaping to track.
- Finishing adds the character: The cloak, two eye sizes, knotted details, scars, mouth, and hair let you enjoy embroidery and assembly without adding long crochet sections.
Pattern Details
- Yarn Weight: DK/Light worsted weight
- Time to Make: about 4-6 hours for the pair
Materials for These Critters
Gather DK or light worsted yarn in purple, red, white, black, and green, plus a 3.5 mm hook, filling, a yarn needle, and scissors.
- DK/Light worsted weight yarn in purple, red, white, black, and green
- 3.5 mm crochet hook or similar: Choose a hook that makes a firm fabric with your yarn. If gaps open when you stretch the stitches lightly, move down a hook size so the filling stays contained.
- Toy stuffing or yarn scraps for stuffing: Toy stuffing gives an even fill. Yarn scraps work too, although they can make the critters feel denser, so add them in small pieces and distribute them carefully.
- Yarn needle
- Scissors
Stitches & Abbreviations
- ch - chain
- sc - single crochet
- hdc - half double crochet
- sl st - slip stitch
- sc2tog - single crochet 2 stitches together
- st - stitch
- sts - stitches
- sp - space
- ch-2 sp - chain-2 space
- rep - repeat
Magic circle: Make an adjustable yarn loop and work the specified stitches into the loop, then pull the yarn tail to close the center.
Knotted eye detail: Take 2 short strands and tie 3 knots on top of each other at the center. Thread each end into the project, leaving the knots on the outside.
How to Crochet the Spooky Undead Critters
Crochet each body first, then add the vampire's separate cloak or the zombie's separate eyes before completing the embroidered details.
Beginning ch 1 does not count as a stitch throughout the body rounds. The vampire and zombie bodies are worked in joined rounds. Stuff each body before the decreasing opening becomes too small.
Vampire
- Round 1: In purple, crochet 8 sc into a magic circle or ch-4 loop, sl st in first sc to join. (8)
- Round 2: Ch 1, *1 sc in next st, (1 sc, ch 2, 1 sc) in next st; rep from * around. Sl st in first sc to join. (20)
The beginning ch 1 does not count as a stitch.
- Round 3: Ch 1, *1 sc in next 2 sts, (1 sc, ch 2, 1 sc) in ch-2 sp, 1 sc in next st; rep from * around. Sl st in first sc to join. (28)
- Round 4: Ch 1, *1 sc in next 3 sts, (1 sc, ch 2, 1 sc) in ch-2 sp, 1 sc in next 2 sts; rep from * around. Sl st in first sc to join. (36)
- Round 5: Ch 1, 1 sc in next 4 sts, *1 sc in ch-2 sp, 1 sc in next 7 sts; rep from * 2 more times. 1 sc in last ch-2 sp, 1 sc in last 3 sts, sl st in first sc to join. (32)
- Rounds 6-11: Ch 1, 1 sc in each st around, sl st in first sc to join. (32)
- Round 12: Join black in ch 1, 1 sc in first 13 sts, joining purple in end of last st; 1 sc in next 4 sts, joining black in end of last st; 1 sc in next st, joining purple in end of st; 1 sc in next 4 sts, joining black in end of last st; 1 sc in last 10 sts to end, sl st in first sc to join. (32)
- Round 13: 1 sc in first 15 sts, joining purple in end of last st; 1 sc in next st, joining black in end of st; 1 sc in next 4 sts, joining purple in end of last st; 1 sc in next st, joining black in end of st; 1 sc in last 11 sts to end, sl st in first sc to join. (32)
- Round 14: Ch 1, 1 sc in each st around, sl st in first sc to join. (32)
- Rounds 15 onward: Sc2tog until the end. Stuff before finishing, then sew any remaining hole closed.
Cloak
- Row 1: Using red, ch 21. 1 sc in second ch from hook and in each ch along, turn. (20)
- Rows 2-3: 1 sc in each st across, turn. (20)
- Row 4: (2 sc in next st) 2 times, 1 sc in next 16 sts, (2 sc in next st) 2 times, turn. (24)
- Row 5: 1 sc in first st, 2 sc in next st, 1 sc in next st, 2 sc in next st, 1 sc in next 16 sts, 2 sc in next st, 1 sc in next st, 2 sc in next st, 1 sc in last st. Fasten off and sew onto the vampire. (28)
Vampire Finishing
- Step 1: Using black and white, sew on a small face.
- Step 2: For each eye, take 2 short strands and tie 3 knots on top of each other in the center. Thread each end into the project, leaving the knots on the outside.
Zombie
- Round 1: In green, crochet 8 sc into a magic circle or ch-4 loop, sl st in first sc to join. (8)
- Round 2: Ch 1, *1 sc in next st, (1 sc, ch 2, 1 sc) in next st; rep from * around. Sl st in first sc to join. (20)
The beginning ch 1 does not count as a stitch.
- Round 3: Ch 1, *1 sc in next 2 sts, (1 sc, ch 2, 1 sc) in ch-2 sp, 1 sc in next st; rep from * around. Sl st in first sc to join. (28)
- Round 4: Ch 1, *1 sc in next 3 sts, (1 sc, ch 2, 1 sc) in ch-2 sp, 1 sc in next 2 sts; rep from * around. Sl st in first sc to join. (36)
- Round 5: Ch 1, 1 sc in next 4 sts, *1 sc in ch-2 sp, 1 sc in next 7 sts; rep from * 2 more times. 1 sc in last ch-2 sp, 1 sc in last 3 sts, sl st in first sc to join. (32)
- Rounds 6-14: Ch 1, 1 sc in each st around, sl st in first sc to join. (32)
- Rounds 15 onward: Sc2tog until the end. Stuff before finishing, then sew any remaining hole closed. Use the tail end to make a little hair on top.
Zombie Eye - Small
- Step 1: Using white, crochet 8 sc into a magic circle or ch-4 loop, sl st in first sc to join. Fasten off, leaving a long tail for sewing. (8)
- Step 2: Using black, create a pupil with knots and secure it on the back of the eye, then sew the completed eye onto the face.
Zombie Eye - Large
- Step 1: Using white, crochet 8 hdc into a magic circle or ch-4 loop, sl st in first hdc to join. Fasten off, leaving a long tail for sewing. (8)
- Step 2: Using black, create a pupil with knots and secure it on the back of the eye, then sew the completed eye onto the face.
Zombie Finishing
- Step 1: Use black to sew on some scars and a small mouth.
- Step 2: Fasten off and tie in all tails.
Crochet Tips
- Mark the first stitch: These are joined rounds, and the beginning ch 1 doesn't count as a stitch. Place a marker in the first sc so you don't accidentally work into the chain at the end of the round.
- Count after each increase round: Pause at 20, 28, 36, and then 32 stitches. Finding a missed ch-2 space early is much easier than adjusting the straight body rounds later.
- Change color before the stitch is complete: On the vampire's colorwork rounds, work the final sc until 2 loops remain on the hook, then finish it with the next color. This puts the new color in position for the following stitch.
- Stuff before the opening narrows: Begin filling during the closing rounds and add smaller amounts as the gap shrinks. Shape the filling with your fingers before sewing the final hole closed.
Ways to Change Your Crochet Critters
- Change the yarn weight: You can use another yarn weight with a suitable hook, but every piece will change size. Keep the same yarn weight for the body, cloak, and eyes so the sewn pieces remain proportional.
- Use a chain loop: If an adjustable ring isn't comfortable for you, use the included ch-4 loop option. It may leave a slightly more open center, so close and secure the starting tail firmly.
- Fill with leftovers: Yarn scraps can replace toy stuffing and put short offcuts to work. Cut or fold long strands into smaller bundles to prevent firm knots and uneven areas inside the body.
- Adjust the zombie eyes: Make 2 small eyes or 2 large eyes if you prefer matching construction. This changes the amount of space the eyes occupy on the face, so pin them in place before sewing.
- Try another DK palette: The body and detail colors can be changed without altering the stitch counts. Keep enough contrast between adjoining face details and body yarn so your embroidery remains easy to place.
Fixing Critter Count and Finishing Problems
- The body count is off after Round 4: Check that you worked into all 4 ch-2 spaces and placed a fresh ch 2 in each one. Those spaces establish the repeated increase points, and skipping one prevents the round from reaching 36 stitches.
- Round 5 doesn't end evenly: There should be 3 full repeats between the opening 4 sc and the final ch-2 space. After that last space, work the final 3 sc before joining for a total of 32 stitches.
- The filling shows through: Your fabric needs a firmer tension. Try a smaller hook, avoid overstuffing, and use small portions of filling so pressure isn't concentrated against a few stitches.
Give Your Finished Critters a Halloween Spot
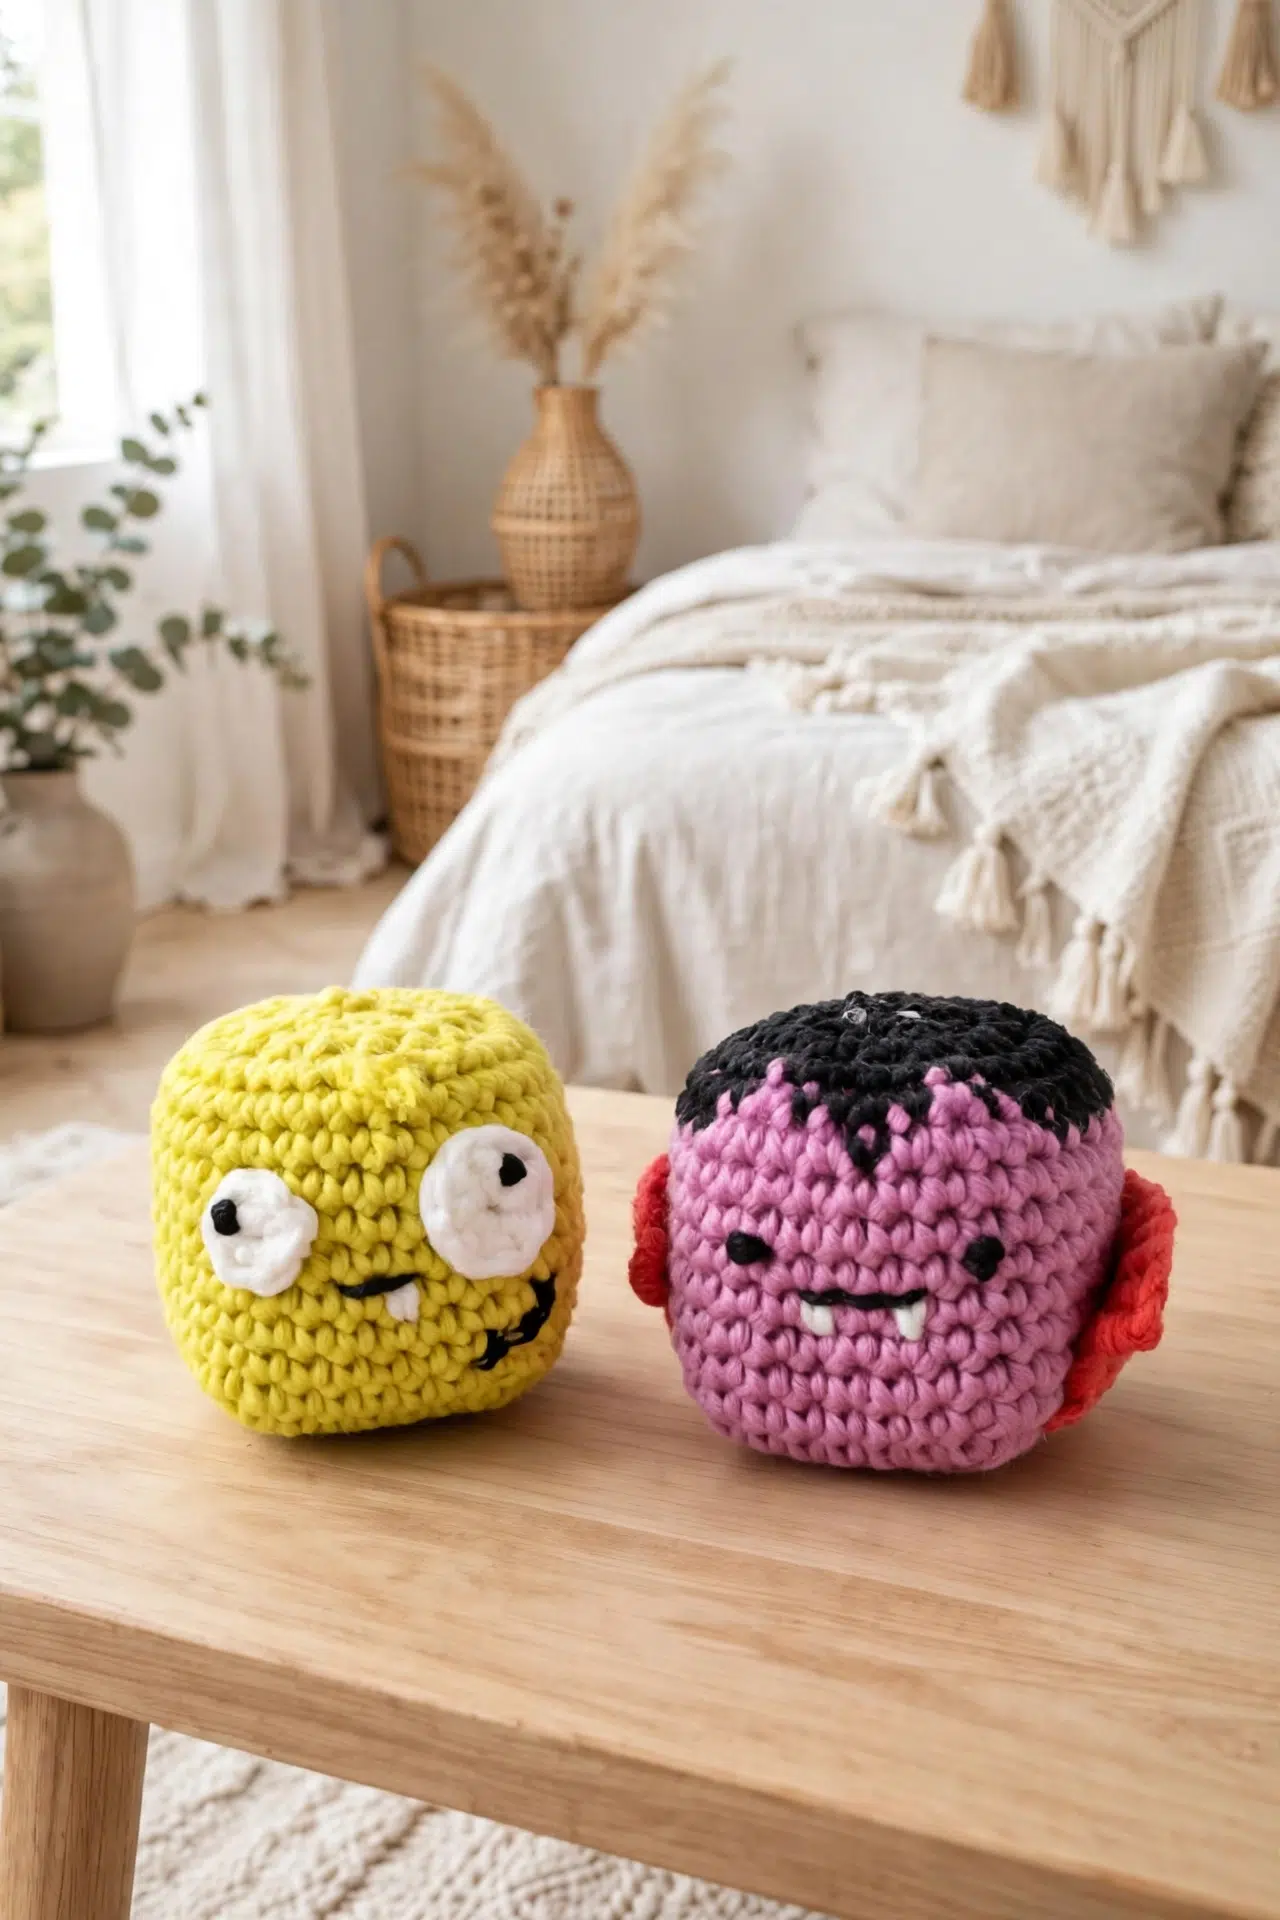
Set the pair beside a Halloween treat bowl, on a desk, or among other small seasonal decorations. Their stuffed construction lets you move them easily when you're arranging your space.
For a handmade gift, tuck the finished critters into a Halloween package for someone who enjoys small crochet decor. Because the facial details are made with yarn, treat them as decorations rather than toys for very young children.
Washing & Care
Check the yarn label before washing because the fiber content isn't specified. Spot cleaning is the safest choice for the stuffed bodies, sewn cloak, and knotted facial details. If both the yarn and filling are washable, use cool water, handle gently, reshape, and air dry completely.
More Spooky Crochet Amigurumi
- Black Cat Amigurumi Crochet Pattern
- Monster Plushie Crochet Pattern
- Crochet Witch Cat Amigurumi
- Mini Crochet Halloween Cat
Frequently Asked Questions
Does the beginning ch 1 count as a stitch?
No, the beginning ch 1 doesn't count as a stitch in the body rounds. Work the first sc into the first actual stitch, then join with a sl st to that sc. Counting the chain would add an unwanted stitch and shift the joins as the body grows.
When should I stuff each body?
Stuff during Rounds 15 onward, before the decreasing opening becomes too narrow for your fingers. Add most of the filling while the opening is accessible, then use smaller pieces near the top. Finish shaping the body before you sew the remaining hole closed.
Can I carry the vampire colors across Rounds 12 and 13?
Yes, you can carry yarn across the short color sections if the floats stay loose. Tight floats pull the fabric inward, while very loose floats may catch on stuffing. For longer spans, securing or cutting the inactive yarn can keep the inside easier to manage.
Is the vampire cloak worked separately?
Yes, the cloak is crocheted flat in 5 rows and sewn onto the finished vampire. Leave a useful sewing tail when you fasten off, then pin or hold the cloak in position before stitching so its 28-stitch final edge isn't pulled out of shape.
Why does Vampire Round 2 have a count of 20?
The count is 20 because the ch-2 spaces are included in the round count. Each repeat creates 3 sc and 2 chains, giving 5 counted positions. The sequence is worked around the 8 starting stitches in 4 repeats, producing 20 positions in total.
Place your finished vampire and zombie where they'll greet someone reaching for a Halloween treat. Leave a comment if you make the pair.



