
If your yarn basket is asking for a satisfying project between smaller makes, this Crochet Raccoon Amigurumi gives you plenty of steady stitching and a finish that feels substantial. Set aside a few relaxed sessions, keep your stitch marker close, and enjoy watching the separate pieces come together.

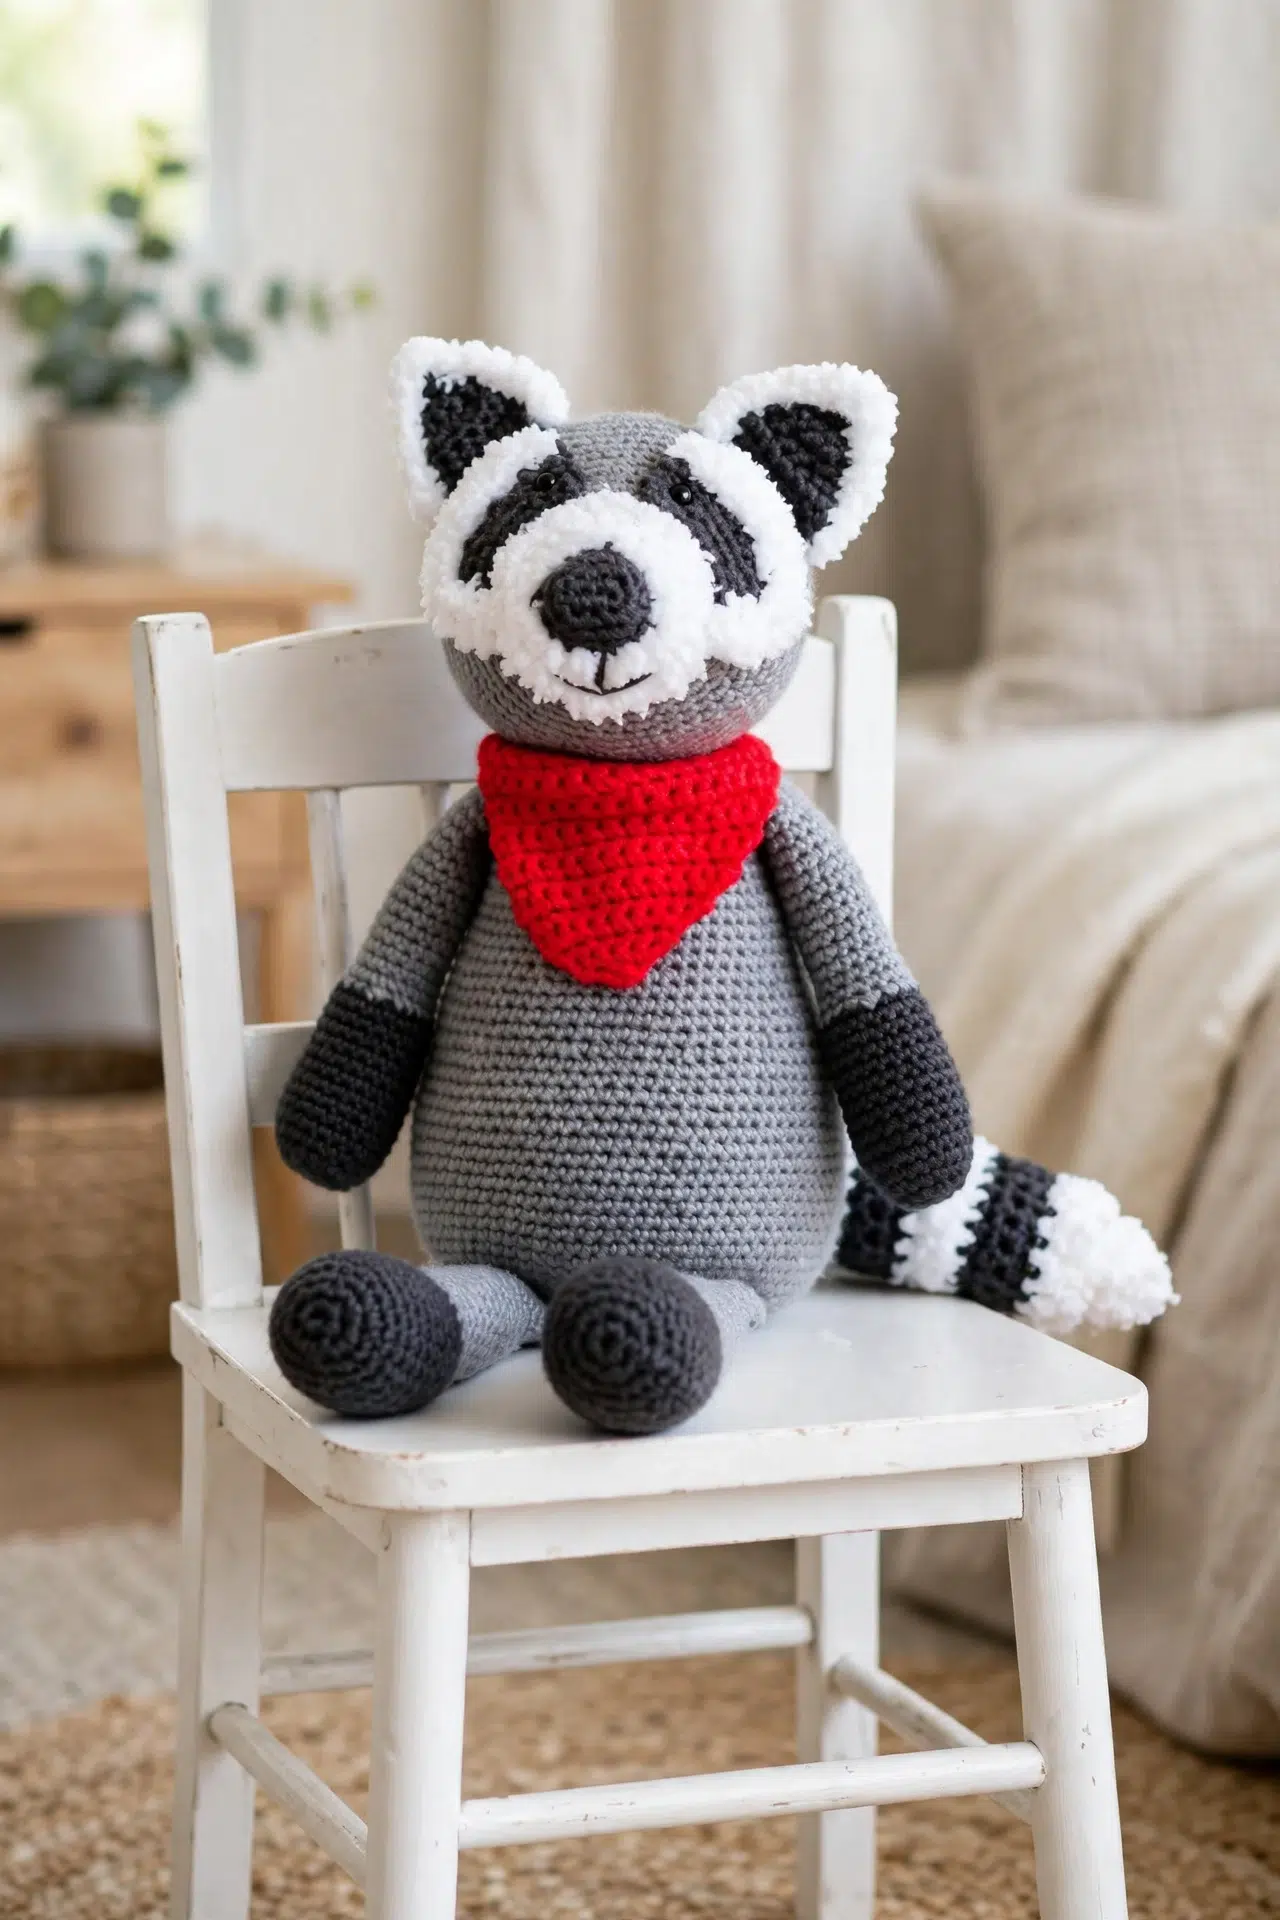
Once the ends are woven in, you'll have a generously sized handmade character with movable stuffed limbs, a shaped tail and a removable buttoned bandana. It's the kind of project that rewards patient hands without asking you to master complicated stitch combinations.
Jump to:
- What Makes This Pattern Work
- Pattern Details
- What You'll Need
- Stitches & Abbreviations
- How to Crochet the Raccoon Amigurumi
- Crochet Tips
- Ways to Adapt Your Crochet Raccoon
- Fixing Shape and Assembly Problems
- Give Your Finished Raccoon a Place to Belong
- Washing & Care
- More Crochet Animal Amigurumi Patterns
- Frequently Asked Questions
What Makes This Pattern Work
- Mostly familiar stitches: The shaping relies on sc, hdc, increases and simple decreases. You can settle into the rhythm while the stitch counts do the shaping for you.
- Clear construction stages: Each major piece is made separately, so you can pause after the body, head or limbs without losing your place. That also makes stuffing and assembly easier to control.
- Two useful textures: The medium-weight yarn provides structure for the main pieces, while the fluffy bulky yarn adds a different texture around the nose, eye patches, ears and tail.
- A secure finishing plan: The head and tail close with their yarn ends drawn through the remaining loops, and the bandana fastens with a real buttonhole. Those details give you practical, tidy finishing points.
Pattern Details
- Skill Level: Intermediate
- Finished Size: Approx. 22 in. [56 cm] total height.
- Gauge: Medium Weight Yarn: 17 sc and 18 rows = 4 in. [10 cm] with smaller hook. Fluffy Bulky Yarn: 9 sc and 12 rows = 4 in. [10 cm] with larger hook.
- Yarn Weight: Medium weight and fluffy bulky
- Time to Make: about 18-25 hours
What You'll Need
Gather both hooks before you begin because the smaller hook handles the main amigurumi pieces while the larger hook is reserved for the tail and bandana.
- Medium Weight Yarn, Solids: 6 oz/170.1 g, 315 yds/288 m; Heathers: 5 oz/141.7 g, 250 yds/228 m: Contrast A, Grey Heather, 2 balls
- Medium Weight Yarn, Solids: 6 oz/170.1 g, 315 yds/288 m; Heathers: 5 oz/141.7 g, 250 yds/228 m: Contrast B, Charcoal Heather, 1 ball
- Medium Weight Yarn, Solids: 6 oz/170.1 g, 315 yds/288 m; Heathers: 5 oz/141.7 g, 250 yds/228 m: Contrast C, Red, 1 ball
- Fluffy Bulky Yarn, 3.5 oz/100 g, 101 yds/92 m: Contrast D, White, 1 ball: Check this yarn against the separate bulky-yarn gauge. Fluffy fibers can hide stitches, so feel for each stitch top instead of relying only on sight.
- U.S. E/4 [3.5 mm] crochet hook or size needed to obtain gauge
- U.S. H/8 [5 mm] crochet hook or size needed to obtain gauge
- Polyester fiberfill
- Pair of 8 mm safety eyes or 2 buttons for eyes: Neither option is suitable for every young child. Use securely embroidered eyes when small removable parts would be a concern.
- Stitch marker
- 1 small button for bandana
Stitches & Abbreviations
- approx - approximately
- beg - beginning
- ch - chain or chains
- cont - continue
- dec - decrease
- hdc - half double crochet
- inc - increase
- rem - remaining
- rep - repeat
- rnd - round
- sc - single crochet
- sl st - slip stitch
- st - stitch or stitches
- tog - together
- WS - wrong side
- yo - yarn over
hdc2tog: Yo and draw up a loop in each of the next 2 sts. Yo and draw through all loops on hook.
sc2tog: Draw up a loop in each of the next 2 sts. Yo and draw through all loops on hook.
How to Crochet the Raccoon Amigurumi
Work through the pieces in order, checking each stated stitch count before you move into the next shaping section.
Ch 1 at the beginning of joined sc rounds does not count as a stitch. The body, head, arms and legs are worked with the smaller hook. The tail and bandana are worked with the larger hook. The tail is worked with 2 strands of B held together wherever B is used. Eye and eye-patch placement is guided by the reference picture. Position both patches symmetrically on the front of the head before securing them. Stuff the body before attaching the head. Stuff the head before completing its final decrease rounds, and stuff the arms and legs lightly before attachment.
Body
- Step 1: With A and smaller hook, ch 2.
- Round 1: 8 sc in 2nd ch from hook. Join with sl st to first sc. (8)
- Round 2: Ch 1. 2 sc in each sc around. Join with sl st to first sc. (16)
- Round 3: Ch 1. 2 sc in first sc. 1 sc in next sc. *2 sc in next sc. 1 sc in next sc; rep from * around. Join with sl st to first sc. (24)
- Round 4: Ch 1. 2 sc in first sc. 1 sc in each of next 2 sc. *2 sc in next sc. 1 sc in each of next 2 sc; rep from * around. Join with sl st to first sc. (32)
- Round 5: Ch 1. 2 sc in first sc. 1 sc in each of next 3 sc. *2 sc in next sc. 1 sc in each of next 3 sc; rep from * around. Join with sl st to first sc. (40)
- Round 6: Ch 1. 2 sc in first sc. 1 sc in each of next 4 sc. *2 sc in next sc. 1 sc in each of next 4 sc; rep from * around. Join with sl st to first sc. (48)
- Round 7: Ch 1. 2 sc in first sc. 1 sc in each of next 5 sc. *2 sc in next sc. 1 sc in each of next 5 sc; rep from * around. Join with sl st to first sc. (56)
- Round 8: Ch 1. 2 sc in first sc. 1 sc in each of next 6 sc. *2 sc in next sc. 1 sc in each of next 6 sc; rep from * around. Join with sl st to first sc. (64)
- Round 9: Ch 1. 2 sc in first sc. 1 sc in each of next 7 sc. *2 sc in next sc. 1 sc in each of next 7 sc; rep from * around. Join with sl st to first sc. (72)
Place marker on last rnd.
- Round 10: Ch 1. 1 sc in each sc around. Join with sl st to first sc. (72)
- Rounds 11 onward: Rep Round 10 until work from marked rnd measures 5 in. [12.5 cm]. (72)
Body Decrease Rounds
- Round 1: Ch 1. 1 sc in each of first 7 sc. *Sc2tog. 1 sc in each of next 7 sc; rep from * to last 2 sc. Sc2tog. Join with sl st to first sc. (64)
- Rounds 2-5: Ch 1. 1 sc in each st around. Join with sl st to first sc. (64)
- Round 6: Ch 1. 1 sc in each of first 6 sc. *Sc2tog. 1 sc in each of next 6 sc; rep from * to last 2 sc. Sc2tog. Join with sl st to first sc. (56)
- Rounds 7-10: Rep Rounds 2-5. (56)
- Round 11: Ch 1. 1 sc in each of first 5 sc. *Sc2tog. 1 sc in each of next 5 sc; rep from * to last 2 sc. Sc2tog. Join with sl st to first sc. (48)
- Rounds 12-15: Rep Rounds 2-5. (48)
- Round 16: Ch 1. 1 sc in each of first 4 sc. *Sc2tog. 1 sc in each of next 4 sc; rep from * to last 2 sc. Sc2tog. Join with sl st to first sc. (40)
- Rounds 17-20: Rep Rounds 2-5. (40)
- Round 21: Ch 1. 1 sc in each of first 3 sc. *Sc2tog. 1 sc in each of next 3 sc; rep from * to last 2 sc. Sc2tog. Join with sl st to first sc. (32)
- Round 22: Ch 1. 1 sc in each st around. Join with sl st to first sc. Fasten off. (32)
- Step 1: Stuff Body.
Head
- Step 1: For Nose, with B and smaller hook, ch 4.
- Round 1: 1 sc in 2nd ch from hook. 1 sc in next ch. 3 sc in last ch. Working in rem loops of foundation ch, 1 sc in next ch. 2 sc in last ch. Join with sl st to first sc. (8)
- Round 2: Ch 1. 2 sc in first sc. 1 sc in next sc. 2 sc in each of next 3 sc. 1 sc in next sc. 2 sc in each of last 2 sc. Join with sl st to first sc. (14)
- Rounds 3-4: Ch 1. 1 sc in each sc around. Join with sl st to first sc. Join D at end of Round 4. (14)
- Round 5: With D, ch 1. 2 sc in first sc. *1 sc in next sc. 2 sc in next sc; rep from * to last sc. 1 sc in last sc. Join with sl st to first sc. (21)
- Round 6: Ch 1. 1 sc in each of first 2 sc. *2 sc in next sc. 1 sc in each of next 2 sc; rep from * to last sc. 2 sc in last sc. Join with sl st to first sc. (28)
- Round 7: Ch 1. 1 sc in each sc around. Break D and join A with sl st to first sc. (28)
- Round 8: With A, ch 1. 1 sc in each of first 3 sc. *2 sc in next sc. 1 sc in each of next 3 sc; rep from * to last sc. 2 sc in last sc. Join with sl st to first sc. (35)
- Round 9: Ch 1. 1 sc in each sc around. Join with sl st to first sc. (35)
- Round 10: Ch 1. 1 sc in each of first 4 sc. *2 sc in next sc. 1 sc in each of next 4 sc; rep from * to last sc. 2 sc in last sc. Join with sl st to first sc. (42)
- Round 11: Rep Round 9. (42)
- Rounds 12-16: Cont as established, inc 7 sc evenly spaced across every other rnd until there are 63 sc. (63)
- Rounds 17-22: Ch 1. 1 sc in each sc around. Join with sl st to first sc. Rep this rnd 5 more times. (63)
Head Decrease Rounds
- Round 1: Ch 1. 1 sc in each of first 7 sc. *Sc2tog. 1 sc in each of next 7 sc; rep from * to last 2 sc. Sc2tog. Join with sl st to first sc. (56)
- Round 2: Ch 1. 1 sc in each st around. Join with sl st to first sc. (56)
- Round 3: Ch 1. 1 sc in each of first 6 sc. *Sc2tog. 1 sc in each of next 6 sc; rep from * to last 2 sc. Sc2tog. Join with sl st to first sc. (49)
- Round 4: Rep Round 2. (49)
- Round 5: Ch 1. 1 sc in each of first 5 sc. *Sc2tog. 1 sc in each of next 5 sc; rep from * to last 2 sc. Sc2tog. Join with sl st to first sc. (42)
- Round 6: Rep Round 2. (42)
- Round 7: Ch 1. 1 sc in each of first 4 sc. *Sc2tog. 1 sc in each of next 4 sc; rep from * to last 2 sc. Sc2tog. Join with sl st to first sc. (35)
- Round 8: Rep Round 2. (35)
Stuff Head.
- Round 9: Ch 1. 1 sc in each of first 3 sc. *Sc2tog. 1 sc in each of next 3 sc; rep from * to last 2 sc. Sc2tog. Join with sl st to first sc. (28)
- Round 10: Rep Round 2. (28)
- Round 11: Ch 1. 1 sc in each of first 2 sc. *Sc2tog. 1 sc in each of next 2 sc; rep from * to last 2 sc. Sc2tog. Join with sl st to first sc. (21)
- Round 12: Rep Round 2. (21)
- Round 13: Ch 1. 1 sc in first sc. *Sc2tog. 1 sc in next sc; rep from * to last 2 sc. Sc2tog. Join with sl st to first sc. (14)
- Round 14: Ch 1. *Sc2tog; rep from * around. Join with sl st to first st. (7)
- Step 1: Fasten off, leaving a long end. Draw end through rem loops and pull tightly. Fasten securely.
- Step 2: Sew Head to top of Body.
Eye Patches
Make 2.
- Step 1: With B and smaller hook, ch 9.
- Row 1: 1 sc in 2nd ch from hook. 1 sc in each ch to end of ch. Turn. (8)
- Row 2: Ch 2, which counts as hdc. 1 hdc in each sc to last sc. 2 hdc in last sc. Turn. (9)
- Row 3: Ch 2, which counts as hdc. 1 hdc in first hdc. 1 hdc in each hdc to end of row. Break B. Join D. Turn. (10)
- Row 4: With D, ch 2, which counts as hdc. 1 hdc in each hdc to end of row. Do not turn. Work 4 hdc evenly along side edge. Fasten off. (14)
- Step 2: Attach safety eyes or buttons to Eye Patches.
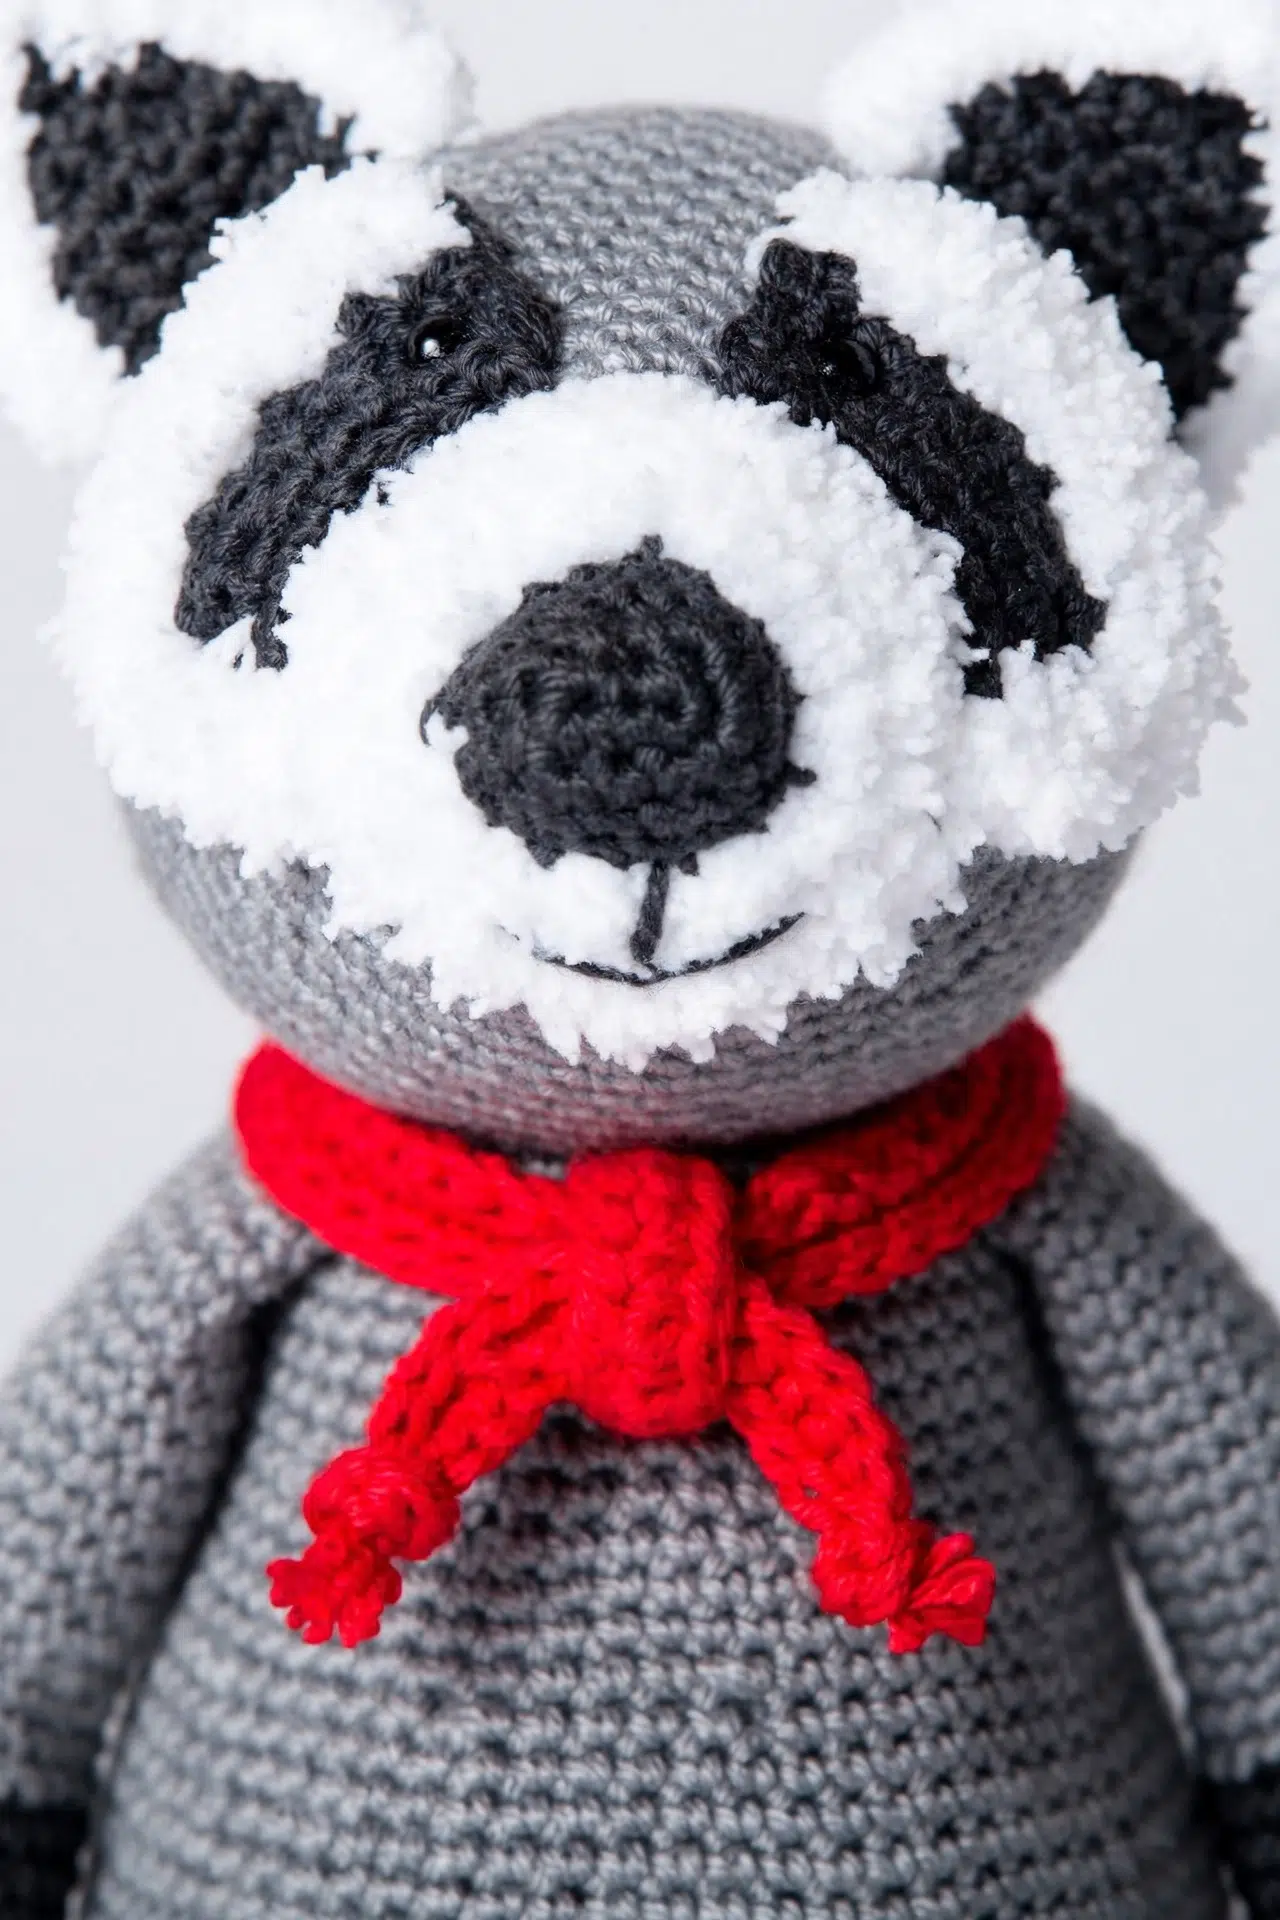
Use the reference picture for placement.
- Step 3: Sew Eye Patches to front of Head.
Use the reference picture for placement.
Ears
Make 2 with A for Outer Ears and 2 with B for Inner Ears. Ch 2 at beg of row does not count as hdc.
- Step 1: With smaller hook, ch 10.
- Row 1: 1 hdc in 3rd ch from hook. 1 hdc in each ch to end of ch. Turn. (8)
- Row 2: Ch 2. 1 hdc in each hdc to end of row. Turn. (8)
- Row 3: Ch 2. Hdc2tog. 1 hdc in each of next 4 hdc. Hdc2tog. Turn. (6)
- Row 4: Ch 2. Hdc2tog. 1 hdc in each of next 2 hdc. Hdc2tog. Turn. (4)
- Row 5: Ch 2. (Hdc2tog) 2 times. (2)
- Row 6: Ch 2. Hdc2tog. Fasten off. (1)
- Step 2: Holding WS of Outer and Inner Ears tog, with smaller hook, join D with sl st to bottom right corner. Working through both thicknesses, ch 1. Work 1 row of sc evenly to top of Ear. Work 3 sc in tip of Ear. Work 1 row of sc evenly along left side edge. Fasten off.
- Step 3: Sew Ears to top of Head.
- Step 4: With B, embroider mouth.
Arms
Make 2.
- Step 1: With B and smaller hook, ch 2.
- Round 1: 8 sc in 2nd ch from hook. Join with sl st to first sc. (8)
- Round 2: Ch 1. 2 sc in each sc around. Join with sl st to first sc. (16)
- Round 3: Ch 1. 1 sc in each sc around. Join with sl st to first sc. (16)
- Round 4: Ch 1. 1 sc in each of first 3 sc. *2 sc in next sc. 1 sc in each of next 3 sc; rep from * to last sc. 2 sc in last sc. Join with sl st to first sc. (20)
- Rounds 5-14: Ch 1. 1 sc in each sc around. Join with sl st to first sc. Rep this rnd 9 more times. Break B and join A. (20)
- Round 15: With A, ch 1. 1 sc in each of first 3 sc. *Sc2tog. 1 sc in each of next 3 sc; rep from * to last 2 sc. Sc2tog. Join with sl st to first sc. (16)
- Round 16: Ch 1. 1 sc in each st around. Join with sl st to first sc. (16)
- Rounds 17 onward: Rep Round 16 until Arm measures approx. 6 in. [15 cm] from beg. Fasten off. (16)
- Step 2: Stuff Arms lightly. Attach Arms to either side of Body.
Legs
Make 2.
- Step 1: With B and smaller hook, ch 2.
- Round 1: 8 sc in 2nd ch from hook. Join with sl st to first sc. (8)
- Round 2: Ch 1. 2 sc in each sc around. Join with sl st to first sc. (16)
- Round 3: Ch 1. 1 sc in each sc around. Join with sl st to first sc. (16)
- Round 4: Ch 1. 1 sc in first sc. *2 sc in next sc. 1 sc in next sc; rep from * to last sc. 2 sc in last sc. Join with sl st to first sc. (24)
- Rounds 5-14: Ch 1. 1 sc in each sc around. Join with sl st to first sc. Rep this rnd 9 more times. Break B and join A. (24)
- Round 15: With A, ch 1. 1 sc in each of first 4 sc. *Sc2tog. 1 sc in each of next 4 sc; rep from * to last 2 sc. Sc2tog. Join with sl st to first sc. (20)
- Rounds 16-25: Ch 1. 1 sc in each st around. Join with sl st to first sc. (20)
- Round 26: Ch 1. 1 sc in each of first 3 sc. *Sc2tog. 1 sc in each of next 3 sc; rep from * to last 2 sc. Sc2tog. Join with sl st to first sc. (16)
- Rounds 27-36: Ch 1. 1 sc in each st around. Join with sl st to first sc. Fasten off at end of Round 36. (16)
- Step 2: Stuff Legs lightly. Attach Legs to bottom of Body.
Tail
Use 2 strands of B held tog whenever working with B.
- Step 1: With 2 strands of B held tog and larger hook, ch 20. Join with sl st to first ch to form a ring. (20)
Take care not to twist the chain before joining.
- Round 1: Ch 2, which counts as hdc. 1 hdc in each ch around. Join with sl st to top of ch-2. (20)
- Round 2: Ch 2, which counts as hdc. 1 hdc in each hdc around. Join with sl st to top of ch-2. (20)
- Round 3: Rep Round 2. Join D with sl st to top of ch-2. (20)
- Rounds 4-5: With D, rep Round 2. Join 2 strands of B at end of Round 5. (20)
- Rounds 6-8: With B, rep Round 2. Join D with sl st to top of ch-2 at end of Round 8. (20)
- Rounds 9-13: Rep Rounds 4-8 once more. Break B and join D. (20)
- Round 14: With D, ch 2, which counts as hdc. 1 hdc in each hdc around. Join with sl st to top of ch-2. (20)
- Round 15: Ch 2, which counts as hdc. 1 hdc in each of next 2 hdc. Hdc2tog. *1 hdc in each of next 3 hdc. Hdc2tog; rep from * around. Join with sl st to top of ch-2. (16)
- Round 16: Ch 2, which counts as hdc. 1 hdc in next hdc. Hdc2tog. *1 hdc in each of next 2 hdc. Hdc2tog; rep from * around. Join with sl st to top of ch-2. (12)
- Round 17: Ch 2, which counts as hdc. Hdc2tog. *1 hdc in next hdc. Hdc2tog; rep from * 2 more times. Join with sl st to top of ch-2. (8)
- Round 18: (Hdc2tog) 4 times. Fasten off, leaving a long end. (4)
- Step 2: Draw end through rem loops and draw up tightly. Fasten securely.
- Step 3: Attach Tail to back of Body at center back.
Bandana
- Step 1: With C and larger hook, ch 2.
- Row 1: 3 sc in 2nd ch from hook. Turn. (3)
- Row 2: Ch 1. 2 sc in first sc. 1 sc in next sc. 2 sc in last sc. Turn. (5)
- Row 3: Ch 1. 2 sc in first sc. 1 sc in each sc to last sc. 2 sc in last sc. Turn. (7)
- Rows 4-6: Rep Row 3. (13)
- Row 7: Ch 1. 1 sc in each sc to end of row. Turn. (13)
- Row 8: Ch 1. 2 sc in first sc. 1 sc in each sc to last sc. 2 sc in last sc. Turn. (15)
- Rows 9-14: Rep Rows 7-8 until there are 21 sc. (21)
- Row 15: Ch 1. 1 sc in each sc to end of row. Ch 7. Turn. (28)
- Row 16: 1 sc in 2nd ch from hook. 1 sc in each of next 5 ch. 1 sc in each sc to end of row. Ch 7. Turn. (34)
- Row 17: 1 sc in 2nd ch from hook. 1 sc in next ch. Ch 1. Skip next ch for buttonhole. 1 sc in each of next 3 ch. Sl st in next sc. Fasten off. (5)
- Step 2: Sew on button to correspond with buttonhole.
Crochet Tips
- Mark the body measurement round: Move the marker exactly where directed after Body Round 9. The straight section is measured from that round, so a clear marker keeps the body length accurate.
- Count every decrease round: The body and head lose stitches in evenly spaced groups. Count immediately after each decrease round rather than waiting until the next one, when an error is harder to find.
- Stuff in small handfuls: Add fiberfill gradually and press it into the outer edges before filling the center. Keep the head and body firm enough to hold their shape, but follow the lighter stuffing instruction for the arms and legs.
- Pin before sewing: Pin or tack the ears, limbs, eye patches and tail in place first. Check the piece from the front, side and back, then sew only when the placement feels balanced.
Ways to Adapt Your Crochet Raccoon
- Embroidered eyes: Replace the safety eyes or buttons with firmly embroidered eyes when you want to avoid separate hard parts. Add the embroidery before sewing the eye patches to the head so the yarn ends can be secured on the back.
- Smooth yarn for Contrast D: A smooth bulky yarn can stand in for the fluffy option, but it won't behave identically. Match the bulky-yarn gauge and expect the stitches to be easier to see and the finished areas to have a different texture.
- One strand for the tail: Don't replace the doubled Contrast B with one strand unless the substitute yarn matches the thickness created by those 2 strands. A thinner tail will change both its circumference and its relationship to the Contrast D rounds.
- Bandana-free version: You can leave off the bandana without adjusting any other piece. If you include it, choose a button that passes through the crocheted buttonhole without stretching it too far.
- Softer or firmer stuffing: You can adjust the feel with the amount of fiberfill, but avoid overstuffing the lightly filled limbs. Too much stuffing can make their open attachment edges harder to sew neatly against the body.
Fixing Shape and Assembly Problems
- The body leans: Check that each joined round begins in the correct first stitch and that the joining sl st isn't being counted as a stitch. Accidental stitches at the joins shift the increase and decrease points, which can pull the body off center.
- The head opening won't close: Confirm that Round 14 ends with 7 sts. If more remain, one or more sc2tog decreases were missed; correct the count before drawing the yarn through the loops so the top closes firmly.
- The tail twists at its base: Make sure the foundation chain isn't twisted before joining it into a ring. Once several hdc rounds are complete, a twist can't be blocked out and the tail will need to be restarted.
- The patches don't match: Place both eye patches with the same row edges facing in corresponding directions before attaching the eyes. Pin them to the head and compare their height and spacing before sewing.
Give Your Finished Raccoon a Place to Belong
Place your finished raccoon where its larger size has room to sit without the tail being crushed behind it. A shelf, reading corner or handmade-toy display gives the attached pieces space to rest naturally.
For a gift, pair it with the bandana already buttoned in place and include a note about the eye style used. If it's intended for a child, choose embroidered eyes and inspect every seam carefully.
Washing & Care
Follow the washing directions on both yarn labels because the fiber content isn't specified and the two yarn types may have different needs. For the assembled amigurumi, gentle spot cleaning is the safest default; reshape it and let it air-dry completely. Check sewn pieces, the bandana button and any safety eyes or eye buttons regularly for looseness.
More Crochet Animal Amigurumi Patterns
- Crochet Dragon Amigurumi
- Black Cat Amigurumi Crochet Pattern
- How to Crochet an Amigurumi Bunny (A Beginner-Friendly Plushie Tutorial)
- How to Crochet a Super Soft Amigurumi Turtle
Frequently Asked Questions
When should I stuff the head?
Stuff the head after Head Decrease Round 8, when 35 sts remain. The opening is still wide enough to distribute fiberfill smoothly, but the main head shape is already established. Add a little more stuffing through the opening as you complete the final decreases if the top begins to feel softer than the rest.
Why does the body need a marker after Round 9?
The marker creates the starting point for the 5 in. [12.5 cm] straight body measurement. Without it, it's easy to measure from the foundation or from a later round and change the body's proportions. Leave the marker in place until the straight section has reached the stated length.
Can I use one hook for the whole pattern?
Only if that hook produces both stated gauges with the corresponding yarns. The smaller hook creates dense fabric in the medium-weight pieces, while the larger hook suits the bulky tail and bandana construction. Using one size without checking gauge can leave stuffing visible or change the finished dimensions.
How firmly should I stuff the limbs?
Stuff the arms and legs lightly. A small amount of filling gives them shape while leaving their upper edges flexible enough to sew against the body. Packing them firmly can make the seams bulky and cause the limbs to project stiffly instead of resting at their attachment points.
Why are 2 strands of Contrast B used for the tail?
The doubled strands bring Contrast B closer to the thickness used with the larger hook and the bulky Contrast D rounds. Using only one medium-weight strand would create a thinner fabric section, changing the gauge and making the tail's alternating yarn sections inconsistent.
Share this pattern with the amigurumi maker who enjoys a roomy project and careful finishing. Tell me in the comments which eye option and bandana variation you chose!



