
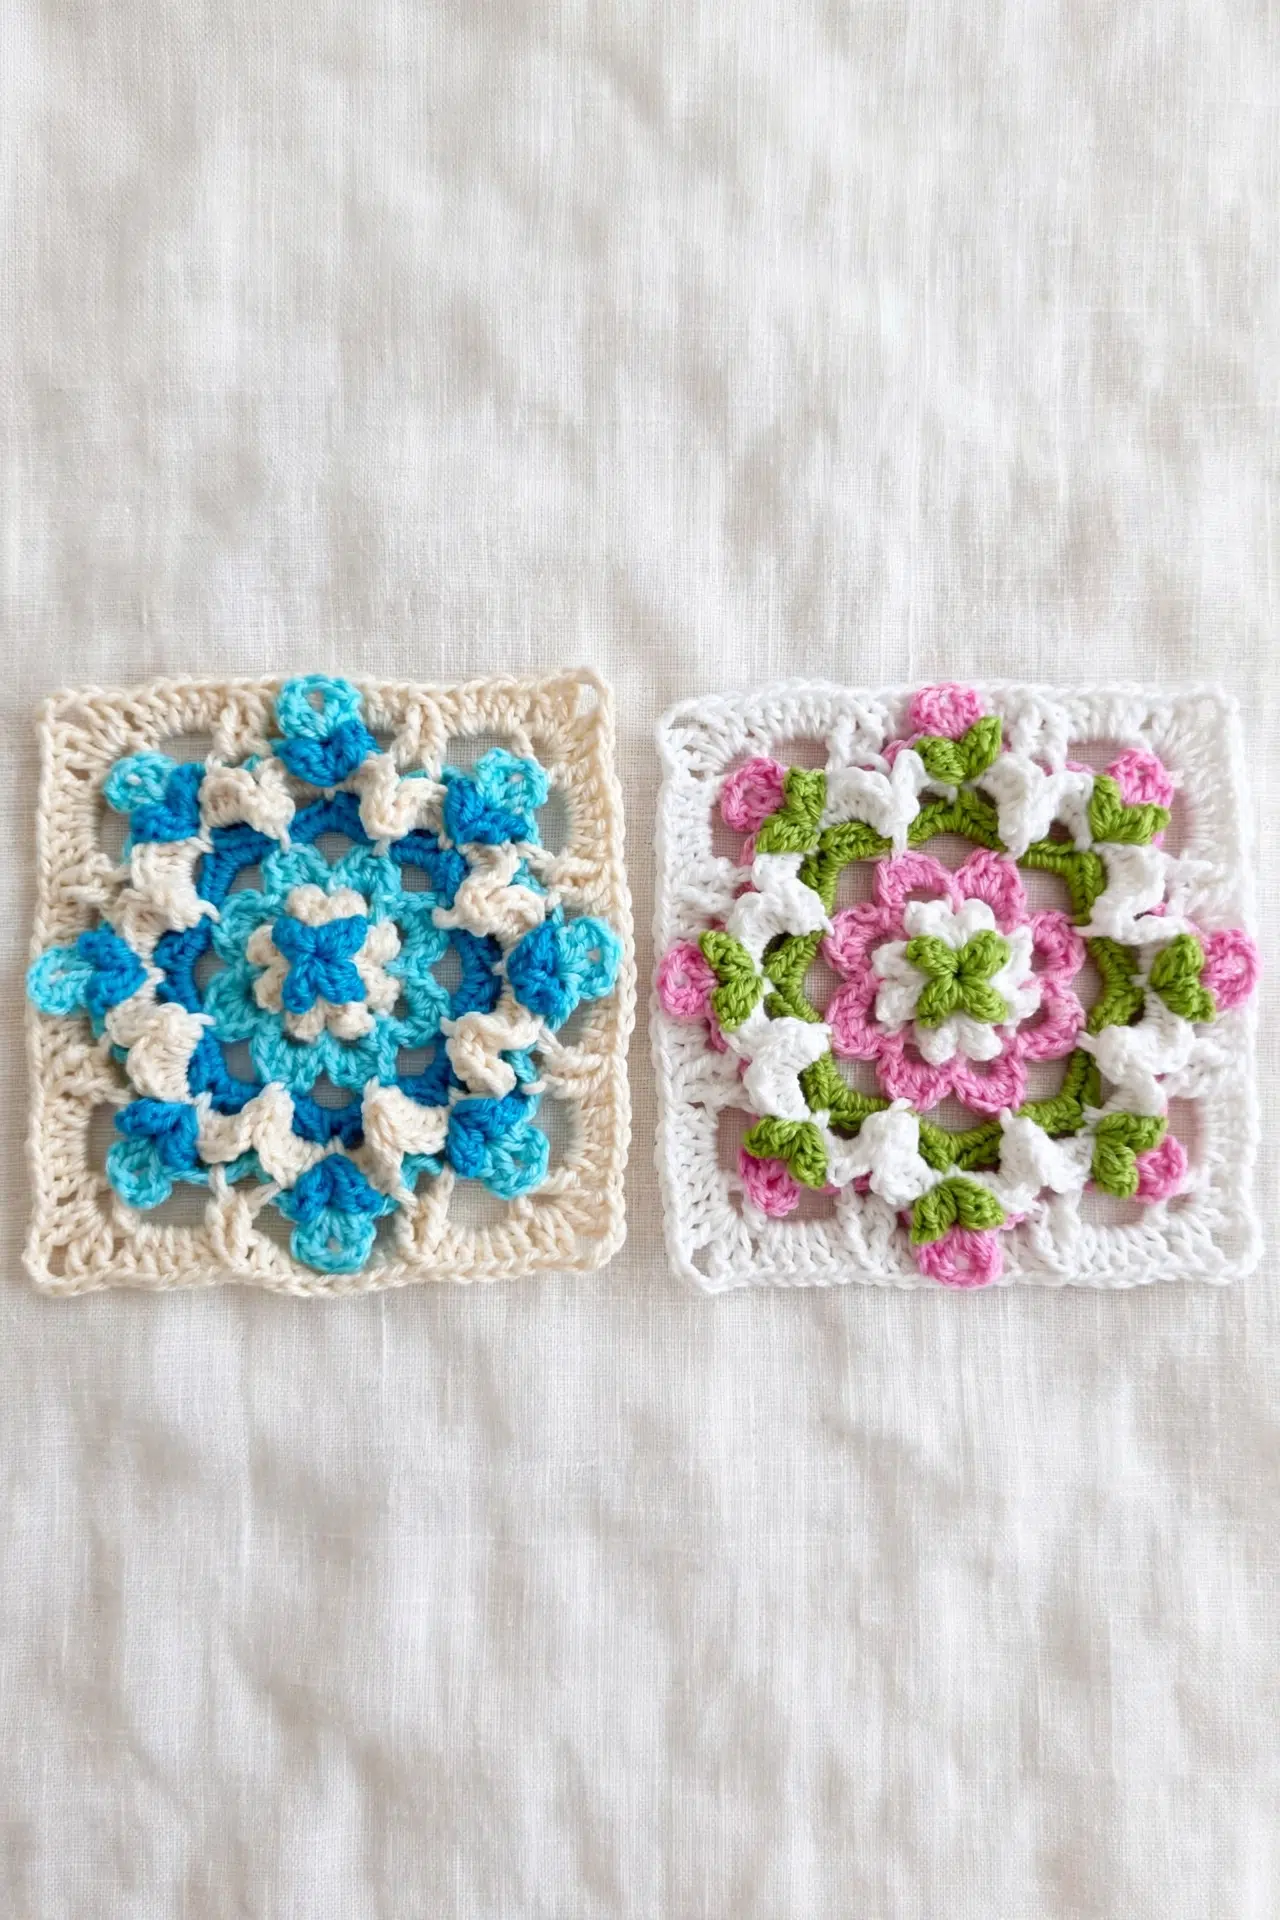
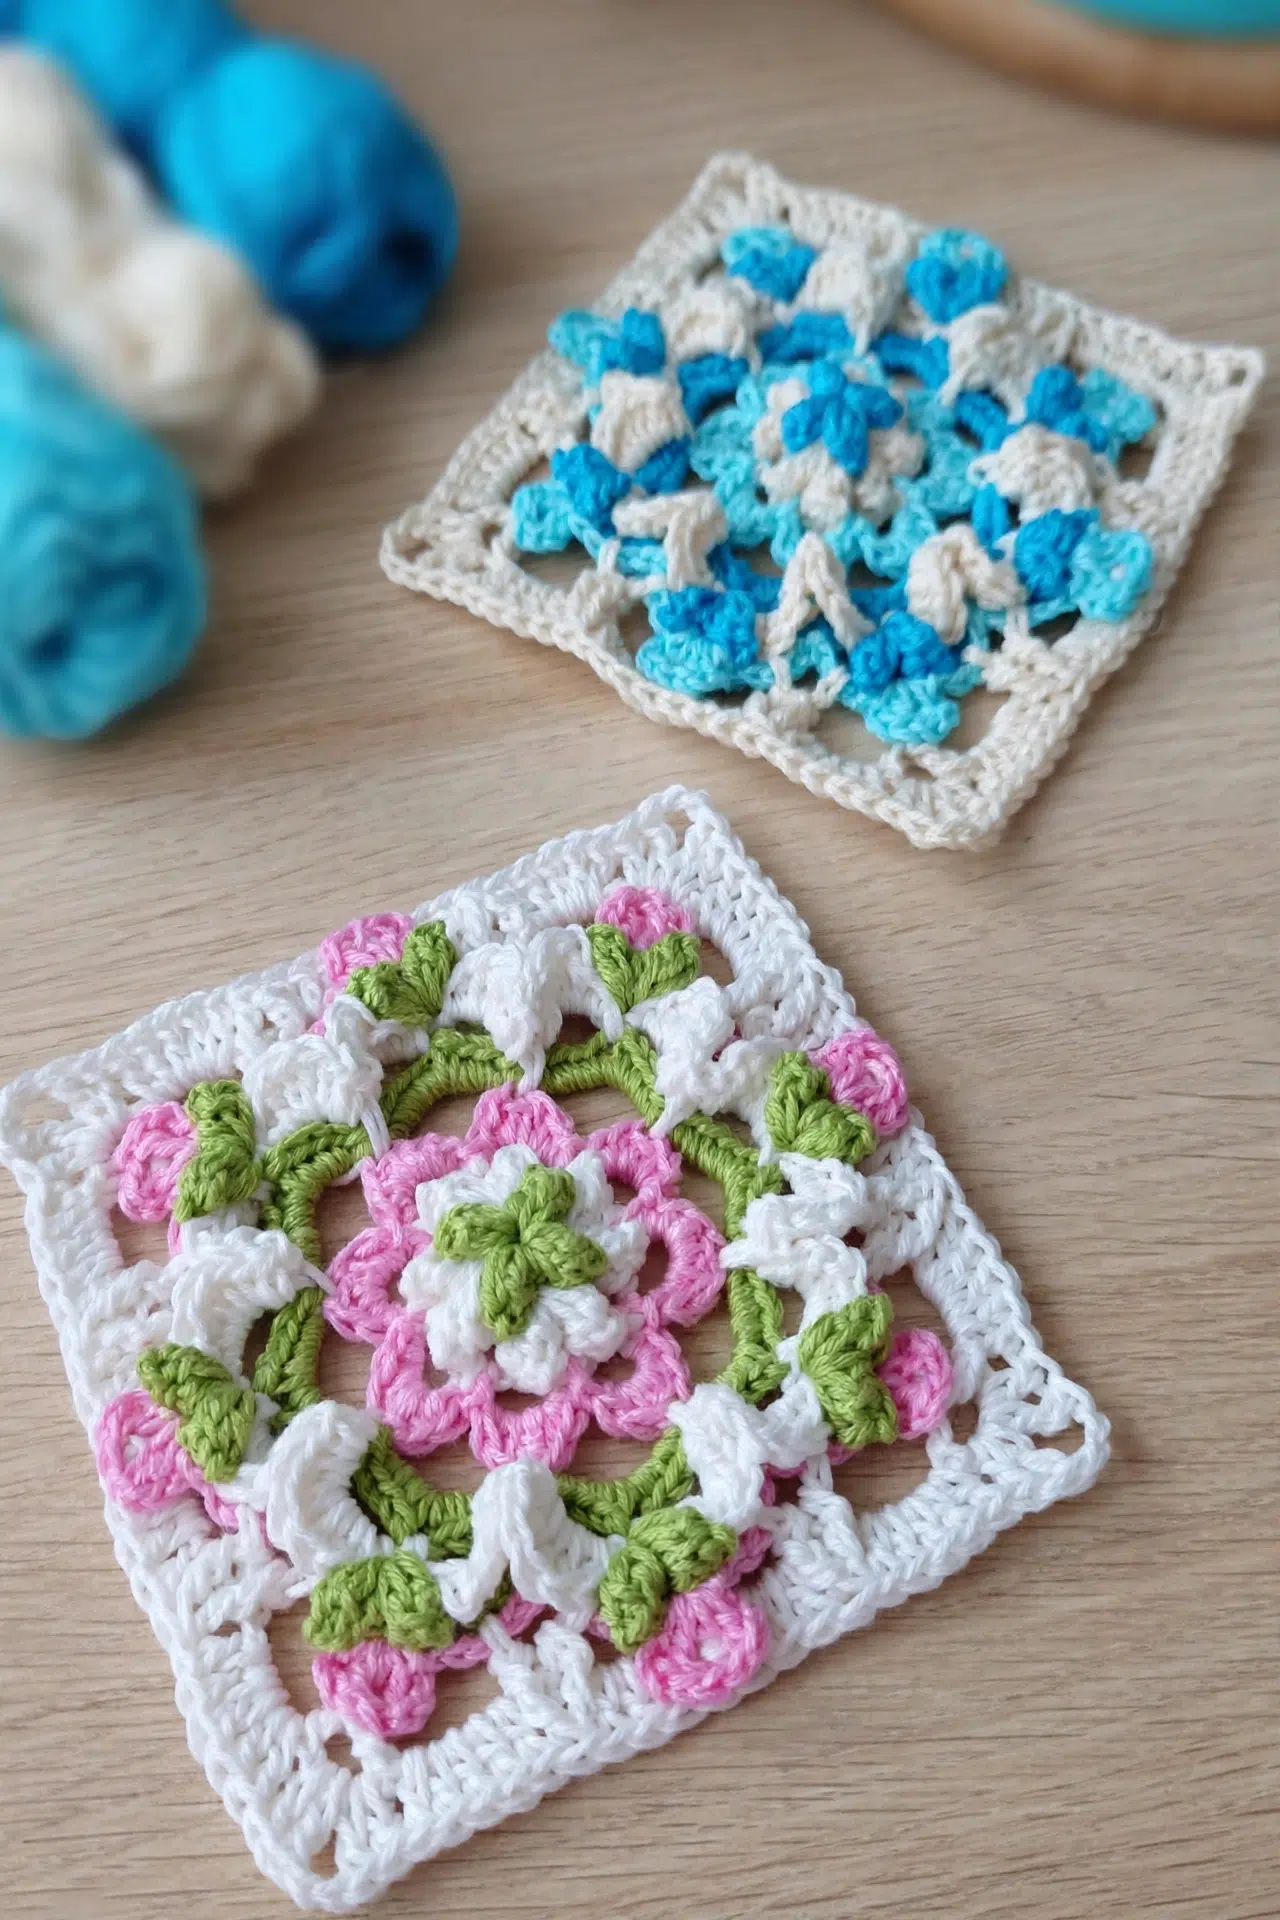
I've been on a serious granny square kick lately, and this one really does take the cake. The Tulip Butterfly Granny Square Crochet Pattern is one of those projects that feels special the moment it comes together. It's an intermediate-level make, so there's enough going on to keep things interesting without turning into a whole thing.

Jump to:
Behind the Pattern
What I love about this one is how much is happening in a single square. The tulip and butterfly motifs aren't just decorative, they're built into the construction itself, so the design actually comes from how the stitches are worked. That's the part I find genuinely satisfying. It's not surface decoration. It's the structure.
I'd make this for anyone who appreciates something a little more considered. It's a great one for a gift, honestly. The kind of thing where the person receiving it can tell it wasn't just thrown together.
Why You Need This on Your Hook
This square packs real design payoff into a compact, satisfying project you'll want to make in multiples.
- Skill level fit: Intermediate crocheters will find this engaging without it becoming frustrating.
- Quick turnaround: It's a small project, so you actually finish it, which is always a win.
- Mix and match potential: Make a bunch and join them into something bigger, or keep a single square as a standalone piece.
- Gifting potential: Small, thoughtful, and handmade. Pretty much the ideal gift ingredient.
- Technique value: Working motifs into the structure of a granny square is a solid skill to add to your repertoire.
Materials You'll Need
Three colors, one hook, and a small stash of sport weight yarn — that covers it.
- Sport Weight Yarn in Green, Pink, and White: Sport weight (also called baby weight) is the right call here because the finer yarn picks up the stitch detail cleanly, especially for the front post and back post work this pattern relies on. A heavier yarn would bulk up the texture and make those stitches harder to read. The yardage listed is sport/baby weight in all three colors, but specific amounts aren't broken down by color in the pattern, so I'd pull roughly equal amounts of each and have a little extra green on hand since it opens and closes the work more than once.
- 3.00 mm Crochet Hook: This size pairs well with sport weight to give you a firm, tight fabric. Going up a size tends to leave gaps that don't suit the structure here.
- Also needed: yarn needle, scissors
Color Sequence & Yarn Changes
The color changes in this pattern are frequent and follow a specific round-by-round order, so it's worth reading through the full sequence before you start. Green opens in Round 1, white joins in that same round, pink comes in at Round 3, and all three colors re-join at various points through Round 10. Cutting and rejoining rather than carrying the yarn is the cleaner approach here, since the gaps between uses are long enough that carrying would create tension problems across the back of the work.
At a Glance
This granny square packs popcorns, post stitches, and a three-color palette into a compact 5-inch piece.
| Skill Level | Intermediate |
| Pattern Gauge | Gauge is not critical for this project. Use a hook size that creates a fabric you like for a granny square and matches your desired finished size. |
| Finished Size | Finished size: 5 inches (12.7 cm) approx. |
| Yarn Weight | 2 Fine / Sport |
| Fiber | Not specified — check the yarn label |
| Terminology | US |
Abbreviations & Stitches Used
There's a solid range of stitches here, including some textured ones worth reviewing before you start.
- G = Green
- P = Pink
- W = White
- ch = chain
- ch-sp = chain space
- st(s) = stitch(es)
- sl st = slip stitch
- sc = single crochet
- hdc = half double crochet
- dc = double crochet
- tr = treble crochet
- pc = popcorn stitch
- fps = front post stitch
- bps = back post stitch
- dc2tog = double crochet 2 together
- * * = repeat instructions between asterisks as directed
Special Stitches
- pc (popcorn stitch): Work the number of dc indicated in the same stitch/space, drop loop from hook, insert hook into first dc of the group, pick up dropped loop and pull through to close popcorn.
- dc bps (back post double crochet): Yarn over, insert hook from back to front to back around the post of the indicated dc, yarn over and pull up a loop, yarn over and pull through 2 loops twice.
- tr fps decrease (front post treble crochet decrease): Yarn over twice, insert hook from front to back to front around the post of the first indicated stitch, yarn over and pull up a loop, (yarn over, pull through 2 loops) twice (leave last 2 loops on hook). Yarn over twice, insert hook from front to back to front around the post of the next indicated stitch, yarn over and pull up a loop, (yarn over, pull through 2 loops) twice (leave last 3 loops on hook). Yarn over, pull through all loops on hook.
Helpful Tips
This pattern uses US terminology throughout. It's not suitable for beginners. You'll want to be comfortable with front post stitch decreases, popcorn stitches, and back post stitches before casting on — those techniques show up in the construction and aren't explained in detail within the row-by-row instructions themselves.
Gauge isn't critical here. Pick a hook that gives you a fabric you're happy with for a granny square, and your finished size will land close to the approximate measurement listed above. If you want a larger or smaller square, adjusting your hook size is the most straightforward way to get there.
How to Make the Tulip Butterfly Granny Square Crochet Pattern
Follow the rounds below to build this layered granny square from the center out, working through three colors as the design shifts from popcorn clusters to petal loops to a classic squared border.
Building the Granny Square
This square is worked in rounds from a starting loop, and the color changes are built right into the construction — G (green), W (white), and P (pink/purple) each play a specific role as the design develops. The layers build on each other, so earlier rounds become anchor points for later ones. Keep your tension consistent and have a stitch marker handy for tracking your ch 1 spaces in the early rounds.
Round 1: In G ch 4, sl st in first ch to form a loop, [ch 3, 3 dc] pc in loop, ch 1, *4 dc pc in loop, ch 1* repeat from * to * twice more, sl st in first ch 1 sp and join W. This round sets up four popcorn clusters with ch 1 spaces between them — those ch 1 spaces are your joining points for Round 2, so finding them matters.
The ch 1 sps are going to be hidden on the back between those petals so make sure to hunt them down!
Round 2: [ch 3, 3 dc pc, ch 1, 4 dc pc] in same ch 1 sp, ch 2, *[4 dc pc, ch 1, 4 dc pc] in next ch 1 sp, ch 2* repeat from * to * until end, sl st in first ch 1 sp. You're doubling up the popcorn clusters now, with a ch 1 between each pair and ch 2 between the groups — those ch 2 spaces become important anchors in Round 3.
Round 3: *ch 5, sl st in next ch 2 sp, ch 5, sl st in next ch 1 sp* repeat from * to * until end, ending with a sl st in same ch 1 sp as last sl st from Round 2, join P (8 loops). This round creates the loop framework the petals will sit in. Count your 8 loops before moving on.
Round 4: *[1 sc, 1 hdc, 2 dc, 1 hdc, 1 sc] in next ch 5 sp, sl st in ch 2 sp from Round 2, [1 sc, 1 hdc, 2 dc, 1 hdc, 1 sc] in next ch 5 sp, sl st in ch 1 sp from Round 2* repeat from * to * until end, ending with a sl st in same ch 1 sp as last sl st from Round 3, sl st up to second dc, re-join W. The petal shaping happens here — each ch 5 loop gets filled with a small fan. Note that you're slipping into Round 2 spaces, anchoring the petals back into the earlier structure. After the round ends, you sl st up to the second dc of the last petal before re-joining W, so position matters.
Round 5: *ch 5, sl st in next second dc of next petal* repeat from * to * until end, ending in the same second dc as last sl st from Round 4, re-join G. You're creating another loop layer, this time connecting the peak of each petal. The second dc is your consistent anchor point through this round and the next.
Round 6: *[4 sc, ch 2, 4 sc] in next ch 5 sp, sl st in same second dc from Round 4* repeat from * to * until end, sl st up to next ch 2 sp, re-join W. The ch 2 at the center of each group will be used again in Round 7, so work them clearly and don't pull them too tight.
Round 7: *ch 5, sl st in next previous sl st, ch 5, sl st in next ch 2 sp* repeat from * to * until end. Another loop round, alternating between the sl st points from Round 6 and the ch 2 spaces — this sets up the larger petal fans in Round 8.
Round 8: *[1 sc, 1 hdc, 3 dc, 1 hdc, 1 sc] in next ch 5 sp, 1 dc in same second dc from Round 4, [1 sc, 1 hdc, 3 dc, 1 hdc, 1 sc] in next ch 5 sp, sl st in same ch 2 sp from Round 6* repeat from * to * until end, re-join G. These fans are slightly larger than the Round 4 petals, with 3 dc at the center instead of 2. The single dc worked into the Round 4 second dc post sits between the two fans and becomes an anchor for Round 9.
Round 9: [ch 3, 3 dc pc, ch 1, 4 dc pc] around dc post below, *ch 5, sl st around next dc post between next set of petals but at the back, ch 5, sl st in next sl st between petals, [ch 3, 3 dc pc, ch 1, 4 dc pc] in same sl st below* repeat from * to * until end, ending ch 5, sl st in sl st in previous dc between next set of petals but at the back, ch 5, sl st in ch 1 sp between next set of green leaves, re-join P. The popcorn clusters return here, and you're working around dc posts and at the back of the work in places — take it slowly and make sure you're catching the right posts. The "at the back" note is intentional and affects how the design sits.
Round 10: *[ch 3, 3 dc, ch 3, sl st] in same ch 1 sp, sl st in next ch 5 sp, ch 4, sl st in next previous sl st, ch 4, sl st in next ch 1 sp between green leaves* repeat from * to * until end, ending with a sl st in same first ch 1 sp used, sl st up to middle dc of 3, re-join W. The small fan worked into the ch 1 sp here is a decorative element between the larger structural sections. After completing the round, sl st up to the middle dc of the 3-dc group before re-joining W.
Round 11: 1 dc bps around middle dc post below, *ch 4, dc2tog over both ch 4 sps, ch 4, 1 dc bps around next middle dc post, ch 4, dc2tog over both ch 4 sps, ch 4, 1 dc bps around next middle dc post, ch 3, 1 dc bps around same dc post* repeat from * to * until end, ending 1 more dc bps around same beginning dc post, ch 3, sl st in first dc, sl st in next ch 4 sp. This round uses back post stitches and decrease stitches worked over ch 4 spaces — the dc2tog over both ch 4 sps pulls two spans together into one stitch. The ch 3 at the corners is what becomes the corner space in Round 12, so keep those chains loose enough to work into.
Round 12: Ch 3, 4 dc in same ch 4 sp, *1 tr fps decrease over next 2 previous dc decrease posts, 3 dc in next ch 4 sp, dc2tog over same ch 4 sp and next ch 4 sp, 3 dc in same next ch 4 sp, 1 tr fps decrease over next 2 previous dc decrease posts, 5 dc in next ch 4 sp, [1 dc, 1 tr, ch 2, 1 tr, 1 dc] in next ch 3 sp, 5 dc in next ch 4 sp* repeat from * to * until end, ending on last corner, sl st in top of ch 3, fasten off and tie in all ends.
Fasten off and tie in all ends.
Blocking
Granny squares really do benefit from a light block, and this one is no exception. Because the fiber isn't specified, check your yarn label before you do anything else. For most sport weight cotton or cotton blends, I wet block by soaking the square briefly, pressing out the water gently in a towel, then pinning it to a foam mat at the corners and the four ch-2 corner spaces until dry. That's usually enough to get those petals lying flat and the outer edge sitting square. If your yarn is acrylic, a light steam from a few inches away works better than pinning wet.
Care Instructions
Check your yarn label for washing specifics, since the fiber isn't fixed for this pattern. Because the square has a lot of layered texture from the popcorns and post stitches, I'd avoid throwing it in the machine even if the label says you can. Hand washing in cool water and laying it flat to dry keeps all those raised details from getting crushed or distorted. If you're joining multiples into a larger project, store the finished squares flat rather than folded so the petals don't crease along the same line repeatedly.
Frequently Asked Questions
Those ch 1 spaces get buried between the popcorns and are easy to miss. Before you move on to Round 2, take a second to physically locate each one with your hook or fingernail. You need to work into all four of them in Round 2, so if you skip one the whole petal structure falls apart. It's fiddly but worth the extra thirty seconds.
You need to be comfortable with popcorn stitches, front post and back post stitches, and front post treble decreases before you start. The square is worked in rounds with multiple color joins and re-joins, and several rounds require you to work into specific stitches from two or three rounds back. If any of those techniques are new to you, practice them separately first.
There are quite a few re-joins across the 12 rounds. Green, pink, and white each come and go at different points, and the pattern specifies re-joining rather than carrying the yarn, so yes, you will be cutting and weaving in a number of ends. It's part of what gives the design its clean color separation, but factor that into your time estimate.
You're working a double crochet decrease that spans two separate chain-4 spaces: insert your hook into the first ch 4 space, pull up a loop, then insert into the second ch 4 space and pull up another loop, then yarn over and draw through all three loops. It pulls those two spaces together and shapes the outer edge of the square. The front post treble decreases in Round 12 work similarly over the dc2tog posts from Round 11.
The 3.00 mm hook is what I use for this with sport weight yarn, and at roughly 5 inches finished it's a good size for joining into larger projects. If you go up a hook size your square will come out a bit larger and the stitches looser, which affects how the popcorns sit. For this kind of textured motif I'd stay close to the recommended size rather than straying too far.
Before You Go
This square takes a little patience to work through, especially those middle rounds where you're hunting back through previous stitches, but when it comes together it really is something. If you make one, I'd love to see it. Tag me on Instagram or drop a photo in the comments below. And if you're saving this for later, pin it so you can find it when you're ready to sit down with your hook and a good playlist.



