
I made this one for a little afternoon tea setup I was putting together, and honestly it turned into one of my favorite small projects in a while. The Teddy Bear Tea Coaster Crochet Pattern is one of those easy home decor makes that feels way more special than the time it actually takes, and I've already made a few extras to keep on hand for gifting.

Jump to:
About This Project
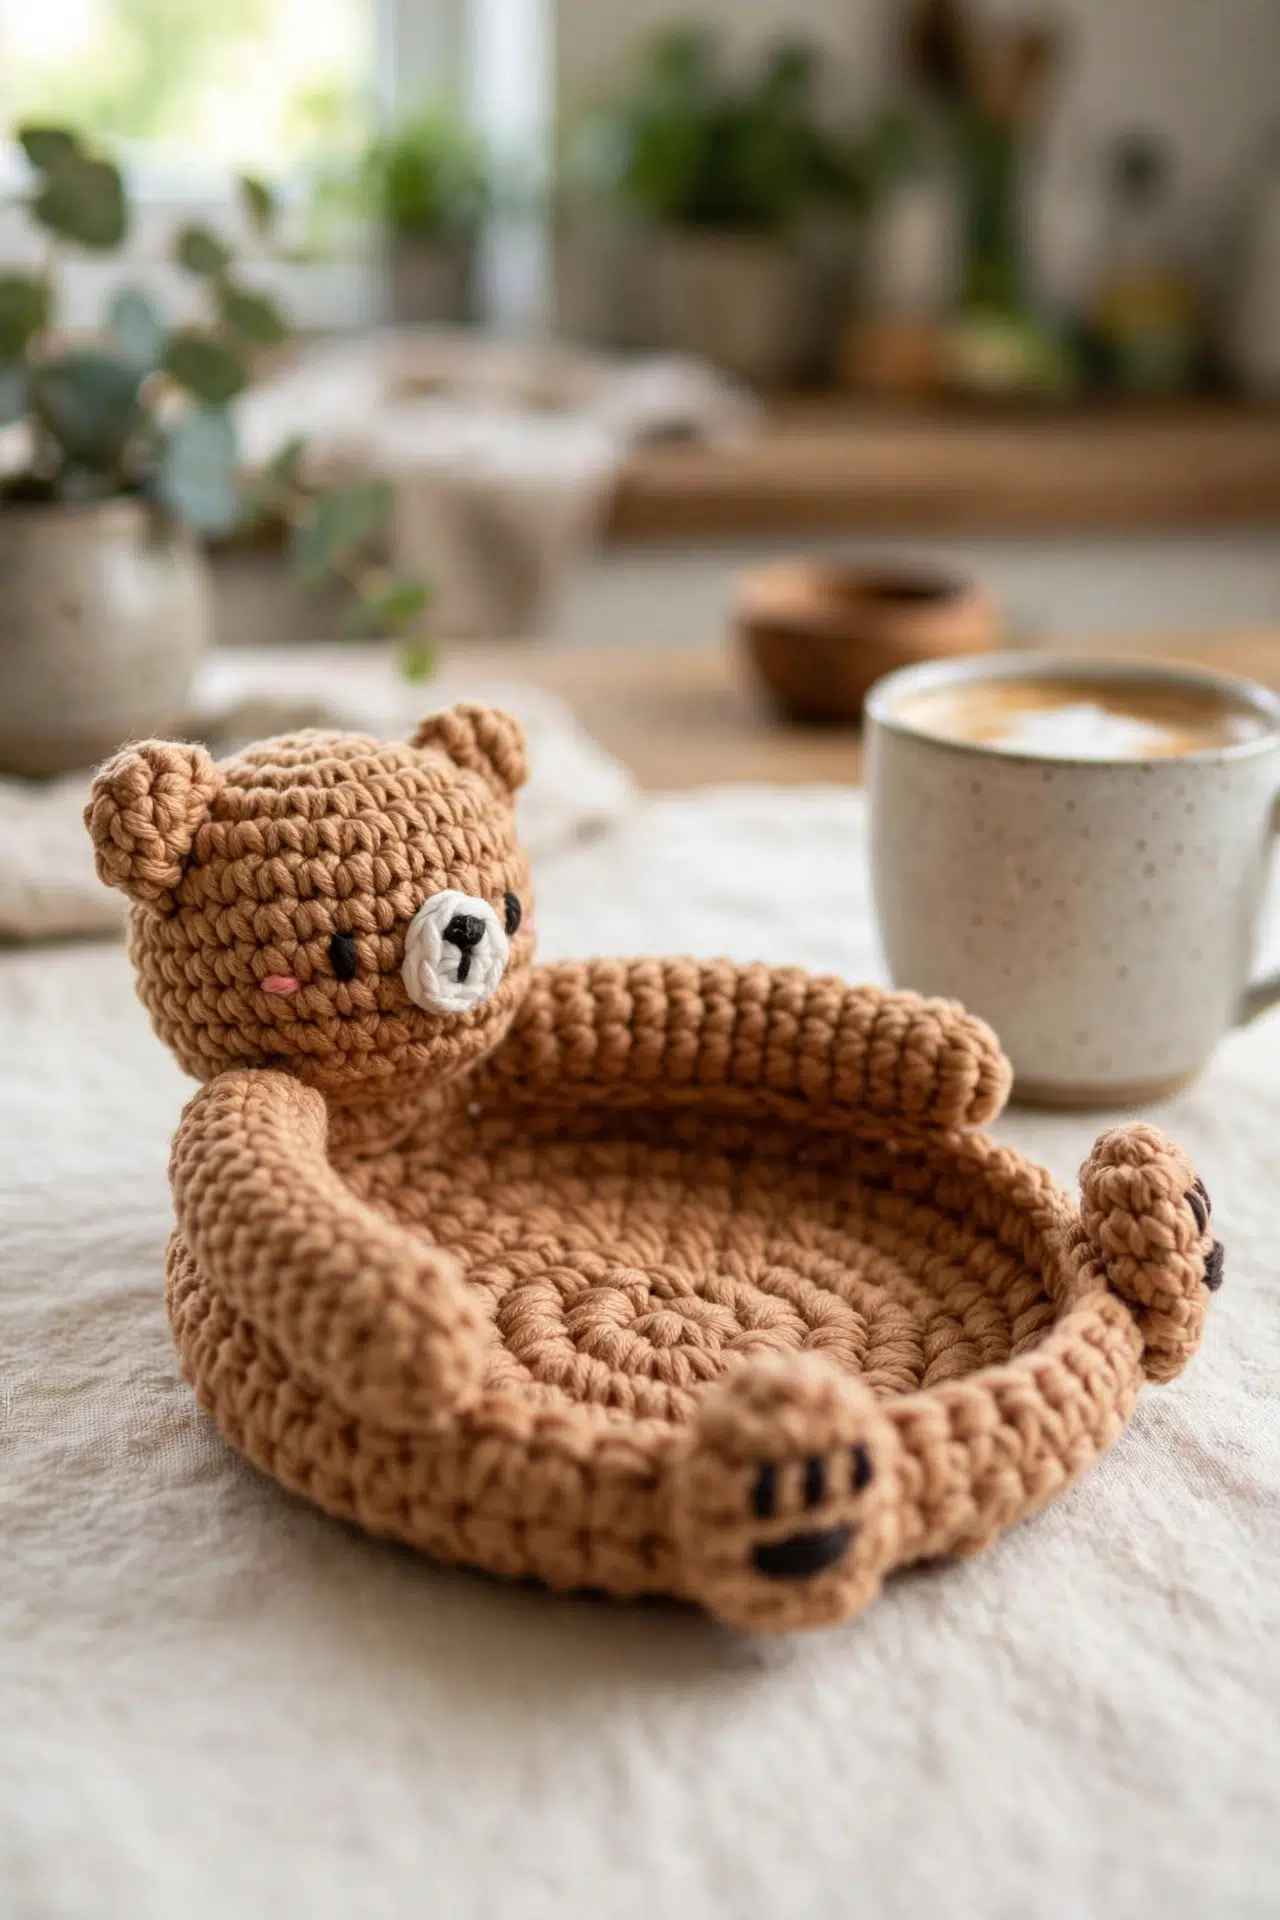
What I really love about this one is that it's two things in one. You've got a functional coaster base, and then a little bear head that sits right on top of it as an assembled piece. The construction is pretty simple, but the way the two parts come together gives it this finished, intentional look that feels like way more effort than it was.
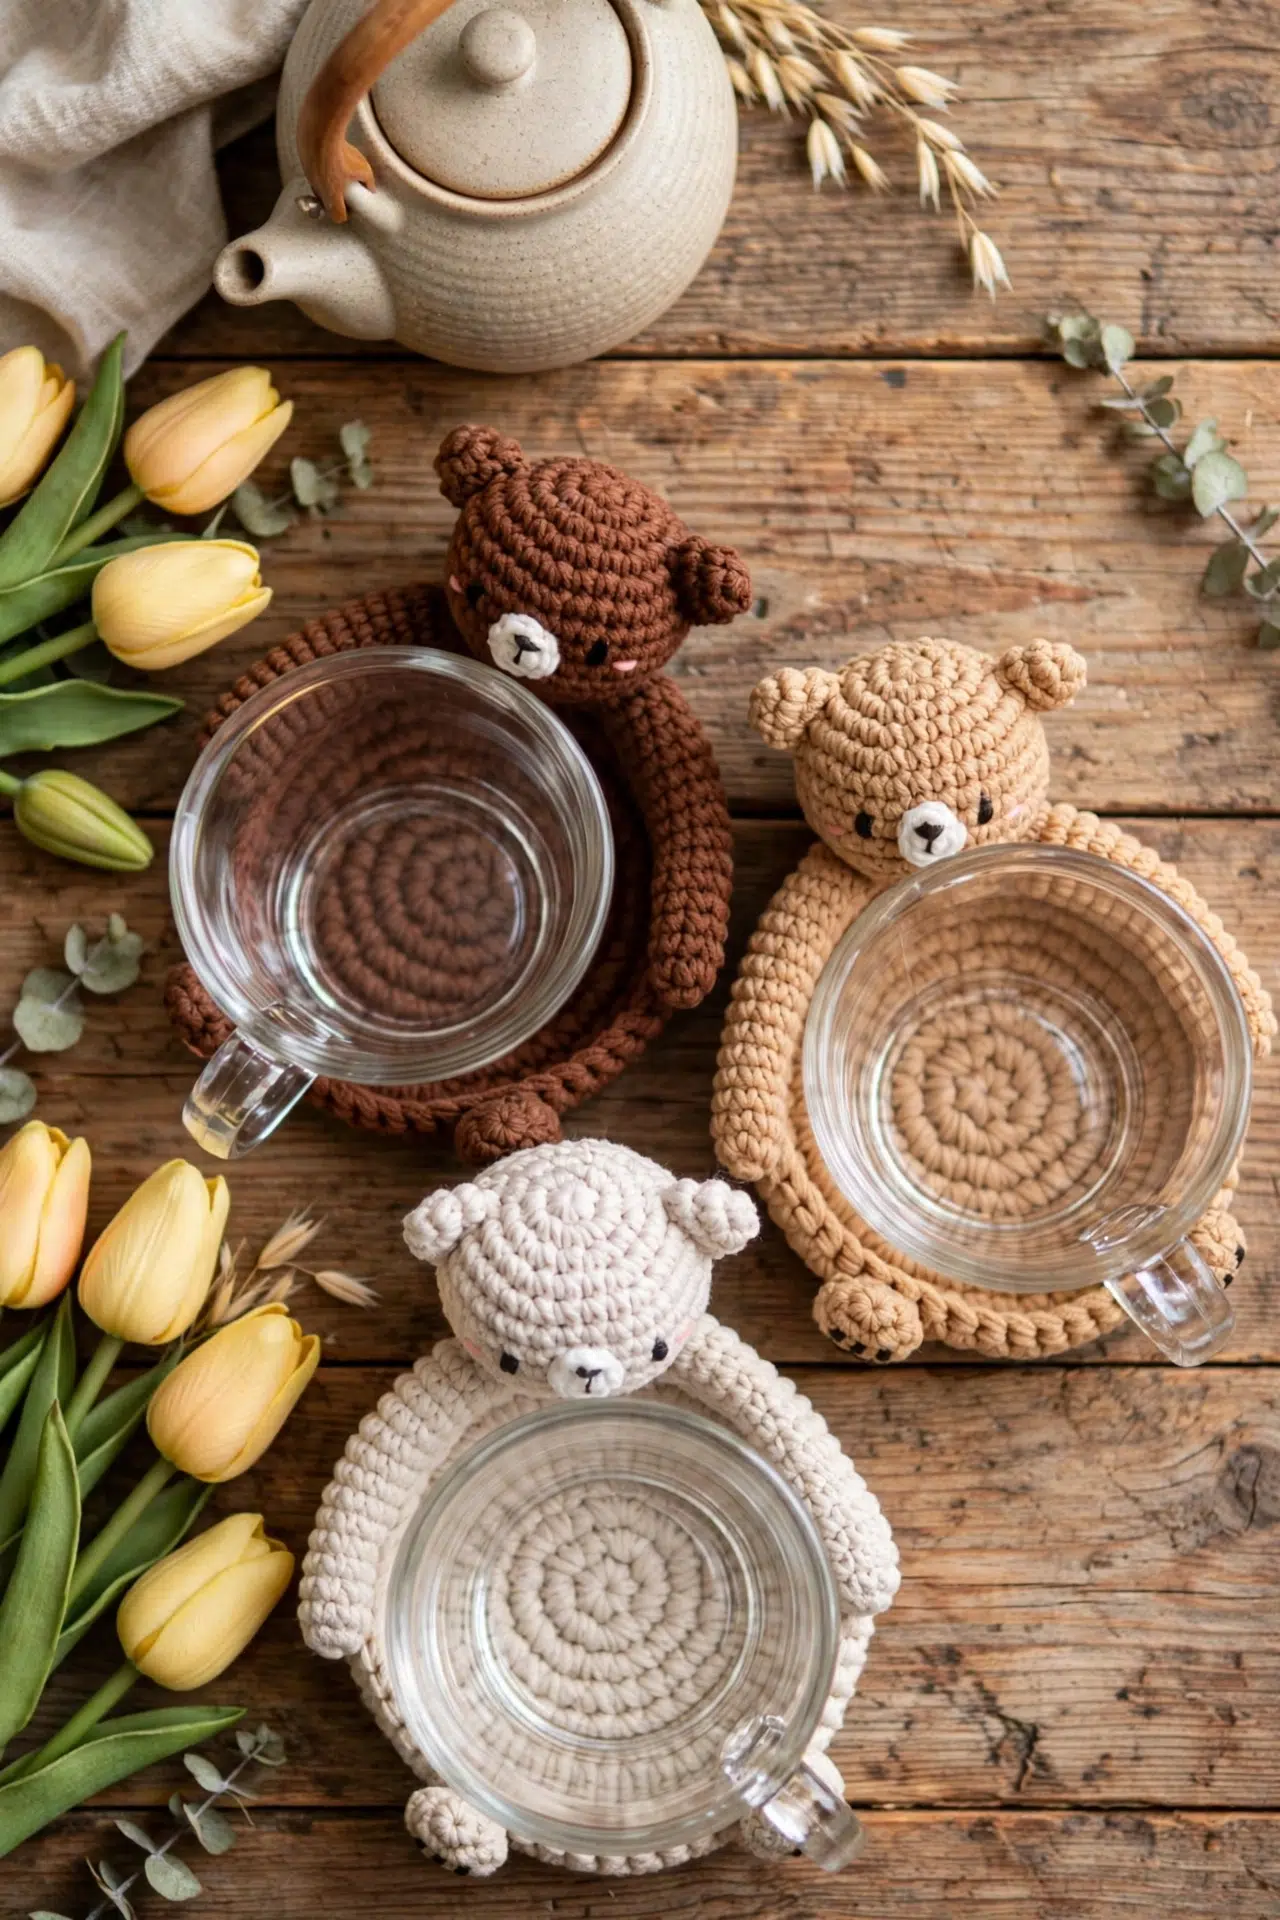
I'd make this for anyone who appreciates a cute, handmade touch on a tea tray or nightstand. It's also a really good one for gifting, especially paired with a nice tea blend or a little mug. Cozy, personal, and actually useful.
Why You'll Want to Make This
It's a quick, beginner-friendly make that doubles as a genuinely charming handmade gift.
- Skill level: Rated easy, so if you're comfortable with basic crochet shapes, you'll have no trouble at all.
- Time investment: Small enough to finish in a single sitting, which makes it great for last-minute gifting.
- Gifting potential: Works beautifully as a standalone gift or tucked into a tea-themed gift set.
- Make multiples: The pattern really lends itself to batch-making, so you can knock out a whole set pretty quickly.
- Scrap-friendly: A no-brainer for using up small amounts of yarn you've already got sitting around.
Gather Your Supplies
Two hook sizes are in play here, so grab both before you sit down.
- Worsted Weight Yarn (Size 4 Medium): This weight is a good fit for amigurumi bears because it gives you enough structure to hold the stuffed shapes without the fabric going floppy. A smooth worsted works best here since textured or fuzzy yarn makes it harder to see your stitches, and with small pieces like ears and arms, you really do want to see what you're doing. Yardage isn't specified in the pattern, but for a small stuffed bear with a tray, a single 100g skein in your main light beige color should get you through most of it, with small amounts of 2 to 3 coordinating colors for accents and a scrap of contrast yarn for the foot embroidery.
- Crochet Hook, Size 7 (US): This larger hook is used only for the tray, where you're holding two strands together. The double strand gives the tray more body so it actually holds its shape as a little coaster or dish.
- Crochet Hook, Size 5 (US): The smaller hook is for all the bear pieces worked in single strand. Dropping down in hook size tightens up the fabric so the stuffing doesn't show through, which matters a lot with amigurumi.
- Polyester fiberfill: You won't need much. The head gets the most stuffing. The legs and feet are only lightly stuffed or left flat depending on your preference, and the ears and arms stay unstuffed entirely, so one small bag of polyfil will cover this project with plenty left over.
- Also needed: yarn needle, scissors, stitch marker
At a Glance
A double-stranded tray base with a little bear head propped up on the side — it's a functional coaster that also just sits there being cute.
| Skill Level | Easy |
| Pattern Gauge | Gauge is not critical for this project. Use a hook size that creates a firm fabric appropriate for a coaster/tray, and keep tension consistent so the tray lies flat. |
| Finished Size | Approx. 4.5 in (11.5 cm) diameter tray; bear head approx. 2.5 in (6.5 cm) tall when assembled |
| Yarn Weight | 4 Medium / Worsted |
| Fiber | Not specified — check the yarn label |
| Terminology | US |
Stitch Guide & Abbreviations
All basic stitches — nothing here will slow you down.
- ch = chain
- sc = single crochet
- sl st = slip stitch
- st(s) = stitch(es)
- inc = increase (2 sc in same st)
- dec = decrease (sc2tog)
- sc2tog = single crochet 2 together
Special Stitches
- sc2tog (dec): Insert hook in next st, yarn over, pull up a loop; insert hook in next st, yarn over, pull up a loop; yarn over, pull through all 3 loops on hook.
Important Notes
The tray is worked holding two strands of yarn together throughout. That's what gives it the structure to actually function as a tray rather than flopping flat. The bear pieces — head, ears, arms, and legs — are all worked with a single strand.
Most pieces are worked in a continuous spiral. No joining at the end of each round unless the pattern specifically says so, and no turning chains between rounds. Keep a stitch marker in the first stitch of each round so you don't lose your place.
A few notes on finishing the bear parts: the ears aren't stuffed, and the arms are left flat and unstuffed as well. The legs and feet can go either way. A little stuffing gives them some shape, but leaving them flat works fine too. For the feet, if you want to add a sole detail, you can work 2 to 3 rows of straight surface embroidery across the flattened sole using a contrast yarn. Run the stitches in a zigzag or ladder pattern, keep the tension loose so the fabric doesn't pucker, and anchor everything on the inside so no knots show on the visible side.
Step-by-Step Instructions
Work each piece separately, then assemble your teddy bear tea coaster once all parts are complete.
Tray (Make 1)
The tray is the flat circular base everything else sits on. I work it with the hook size 7 (US) and yarn held double, so it comes out dense and sturdy enough to hold its shape under the assembled bear.
Round 1: Magic ring, 7 sc into ring. [7 sc]
Round 2: inc in each st around. [14 sc]
Round 3: (1 sc, inc) x7. [21 sc]
Round 4: (2 sc, inc) x7. [28 sc]
Round 5: (3 sc, inc) x7. [35 sc]
Round 6: (4 sc, inc) x7. [42 sc]
Round 7: (5 sc, inc) x7. [49 sc]
Round 8: sc in each st around. [49 sc]
Round 9: sc in each st around. [49 sc]
Fasten off, leaving a long tail.
Head (Make 1)
The head is worked in a single strand with a size 5 (US) hook, so the fabric is tighter and holds the stuffing well. This is the centerpiece of the whole design, so take your time with the shaping rounds.
Round 1: Magic ring, 6 sc into ring. [6 sc]
Round 2: inc in each st around. [12 sc]
Round 3: (1 sc, inc) x6. [18 sc]
Round 4: (2 sc, inc) x6. [24 sc]
Round 5: (3 sc, inc) x6. [30 sc]
Rounds 6–10: Round 6: sc in each st around. [30 sc]
Round 7: sc in each st around. [30 sc]
Round 8: sc in each st around. [30 sc]
Round 9: sc in each st around. [30 sc]
Round 10: sc in each st around. [30 sc] Five even rounds to build the body of the head before the decreases start.
Round 11: (3 sc, dec) x6. [24 sc]
Round 12: (2 sc, dec) x6. [18 sc]
Stuff firmly now.
Round 13: (1 sc, dec) x6. [12 sc]
Add a little more stuffing to fill out the muzzle area.
Round 14: dec in each st around. [6 sc]
Fasten off, leaving a long tail. Weave through front loops only of remaining 6 sts, pull tight to close, and secure.
Ears (Make 2)
The ears are small and quick — hook size 5 (US), single strand. I make both before moving on so I can compare them side by side and make sure they match before sewing.
Round 1: Magic ring, 4 sc into ring. [4 sc]
Round 2: inc in each st around. [8 sc]
Round 3: sc in each st around. [8 sc]
Fasten off, leaving a long tail for sewing. Do not stuff.
Arms (Make 2)
The arms are worked as a long narrow tube with hook size 5 (US), single strand. They stay unstuffed and get flattened before sewing, so the tube needs to be even and consistent through all those middle rounds.
Round 1: Magic ring, 4 sc into ring. [4 sc]
Round 2: inc in each st around. [8 sc]
Rounds 3–14: Round 3: sc in each st around. [8 sc]
Round 4: sc in each st around. [8 sc]
Round 5: sc in each st around. [8 sc]
Round 6: sc in each st around. [8 sc]
Round 7: sc in each st around. [8 sc]
Round 8: sc in each st around. [8 sc]
Round 9: sc in each st around. [8 sc]
Round 10: sc in each st around. [8 sc]
Round 11: sc in each st around. [8 sc]
Round 12: sc in each st around. [8 sc]
Round 13: sc in each st around. [8 sc]
Round 14: sc in each st around. [8 sc] Twelve rounds of even sc to build the arm length.
Round 15: dec x4. [4 sc]
Fasten off, leaving a long tail. Leave unstuffed; flatten tube before sewing.
Legs / Feet (Make 2)
The legs are short and compact, worked with hook size 5 (US), single strand. I make both at the same time if I can, just to keep them consistent before attaching them to the tray.
Round 1: Magic ring, 5 sc into ring. [5 sc]
Round 2: inc in each st around. [10 sc]
Rounds 3–5: Round 3: sc in each st around. [10 sc]
Round 4: sc in each st around. [10 sc]
Round 5: sc in each st around. [10 sc]
Round 6: dec x5. [5 sc]
Fasten off, leaving a long tail. Lightly stuff if desired, or leave flat.
Finishing
With all pieces complete, it's time to put the bear together. I find it helps to lay everything out on the tray first and just look at the arrangement before committing to any sewing. A stitch marker or two to pin positions temporarily saves a lot of unpicking.
Step 1: Ears: Position each ear flat against the head between Rounds 4–7, spaced about 3 sts apart (leave a 1–2 st gap between them at the top). Whip-stitch each ear around its edge. Take your time working around the full edge of each ear so they sit flat and don't curl forward.
Step 2: Face: Place eyes around Round 8, spaced about 1.5–2 sts apart on either side of center. Embroider or use safety eyes. Add a small nose/muzzle detail just below and between the eyes. If you're using safety eyes, insert them before the head is fully closed — it's much easier than trying to work through a finished piece.
Step 3: Arms: Position arms on either side of where the head will sit on the tray, about 3–4 sts up from the tray's edge. Whip-stitch through the tray and the flattened arm, keeping the arm from twisting. The arm should lie flat against the tray surface — check the orientation before you sew more than a few stitches in.
Step 4: Head: Center head between the two arms, tilting slightly forward/downward. Whip-stitch the base of the head securely to the tray. Go around the base more than once if needed — the head carries most of the visual weight of the piece and needs to be firmly attached.
Step 5: Legs: Space legs evenly apart on the tray (about 4 sts apart), angled slightly outward. Sew tops of legs to the tray edge.
Step 6: Weave in all remaining ends securely on the underside of the tray.
Care Instructions
Because this coaster has a stuffed head and limbs sewn directly onto the tray, I'd skip the washing machine entirely. Spot-clean the tray surface with a damp cloth if it gets a ring under a teacup, and let it air dry flat so the tray keeps its shape. The polyester fiberfill inside the head holds up fine as long as you're not soaking it. If the bear starts looking a little squished over time, just reshape the head gently with your hands while it's still slightly damp.
Frequently Asked Questions
Holding two strands together with the larger hook gives the tray enough body to actually sit flat and hold its shape under a cup. A single strand at that hook size would come out floppy. The double strand is what makes it functional as a coaster rather than just decorative.
No. The ears are left flat and just whip-stitched around the edge onto the head. The arms stay unstuffed too. You flatten the arm tube before sewing it down to the tray, which keeps them from bunching up. Only the head gets stuffed, and the legs can go either way depending on how you want them to sit.
Stuff the head firmly at Round 12, right after the first decrease round. The pattern also says to add a little more stuffing at Round 13 to fill out the muzzle area. Don't wait until the opening is fully closed or you'll be trying to push fiberfill through a very small gap.
Attach the ears to the head first, then add the face details. After that, sew the arms onto the tray before attaching the head, because the head sits centered between the arms. Legs go on last. Doing it in that order makes it much easier to position everything without pieces getting in the way of each other.
The pattern lists light beige as the main color with a couple of coordinating colors as optional. There's no separate muzzle piece crocheted here, so any muzzle detail is embroidered on. You could absolutely embroider it in a contrast color, or use a contrast yarn for the embroidered sole detail on the feet if you want a little extra personality.
Final Thoughts
This little bear coaster is one of those projects that takes up almost no yarn but ends up being genuinely hard to put down once you start assembling it. Watching the pieces come together into an actual sitting bear is a LOT of fun for such a small make. If you end up making one, I'd love to see what color combinations you go with. Tag me on Instagram or drop a photo in the comments below. And if you want to save this for later, the Pin button is right there waiting for you.



