
I've been on a serious amigurumi kick lately, and this one might be my favorite thing I've made all year. The Soufflé Teddy Bear Crochet Pattern is a classic stuffed bear done in a way that feels a little more special than your average toy project. It's easy enough that you're not going to get stuck, but the finished result looks like you put in way more effort than you actually did.

Jump to:
The Inspiration
I wanted to make a bear that felt like a real keepsake. Not just a quick little project you toss in a gift bag, but something someone would actually hold onto. The kind of toy that ends up on a shelf or gets carried around by a kid who won't put it down. That was the whole goal going in.
What I really love about how this one came together is that the construction is straightforward but the result doesn't feel basic. It's a great make for a baby shower, a birthday, or honestly just because you want to. I've already made a few of these and I keep finding reasons to make another one.
Why You'll Love This Pattern
This bear is an easy, satisfying make that looks like a proper handmade heirloom.
- Beginner-friendly build: The skill level is easy, so you're not going to hit any frustrating roadblocks along the way.
- Great gift potential: This is one of those projects that genuinely looks like a thoughtful, intentional gift, not just a quick craft.
- Satisfying finished size: The bear sits at a really nice, holdable size. Big enough to feel substantial, small enough to finish in a reasonable amount of time.
- Technique practice: If you're building your amigurumi skills, this is actually a fun one to work through because it covers all the core construction techniques without overwhelming you.
What You'll Need
One color, one hook, and a small pile of notions — that is basically the whole list.
- Bulky weight bouclé or teddy-style yarn (cream white): The texture is the whole point here. A bouclé or looped teddy-style yarn in bulky weight gives the bear that soft, fluffy look without any extra work on your part. You'll need approximately 160–190 yd (145–175 m), and because you're crocheting tightly to keep the stuffing from showing through, a yarn with some loft and body holds its shape well between stitches.
- 4.5 mm (US 7) crochet hook: This is slightly smaller than you might expect for a bulky yarn, and that's on purpose. Going down in hook size tightens up the fabric so the fiberfill stays hidden inside the bear where it belongs.
- Safety eyes (12 mm, dark green or black): These go in between Rounds 10 and 11, about 7 stitches apart, before you finish stuffing the head. Dark green gives the bear a bit of personality, but black works just as well if that's what you have. If you're making this for a child under 3, skip the safety eyes entirely and embroider the eyes instead.
- Fiberfill stuffing (approx. 2.5–3 oz / 70–85 g): You'll stuff the head firmly before closing it up, and the body gets stuffed as you go. Having enough on hand matters — a loosely stuffed bear won't sit upright, and if yours tips backward, a bit more stuffing low in the front of the body usually fixes it.
- Black embroidery floss or thin black yarn: This is for the nose and mouth. A small triangle nose with a short vertical stitch down and a little smile is all it takes. Do the embroidery before stuffing so you can hide the knots inside the head.
- Pink organza ribbon: Tied in a generous bow around the bear's neck once everything is assembled. It's a finishing touch, but it makes a real difference to the overall look.
- Also needed: tapestry needle, scissors, stitch marker, locking pins or sewing pins
Alternative Yarns
Bouclé and teddy-style yarns can be harder to find depending on where you shop, so it's worth knowing what else works. The texture will be different, but the bear will still come together fine.
- Bulky weight chenille yarn: Chenille has a similar softness and a velvety finish that works really well for amigurumi. It's widely available, usually around 100–130 yd per 100 g skein, and crochets up into a dense fabric that holds its shape nicely.
- Worsted weight (#4) smooth yarn with a 3.5 mm hook: If bouclé isn't your thing or you want more stitch definition, a standard worsted works. The finished bear will come out a bit smaller — closer to 6.5 in (16 cm) — and the texture will be smoother, but the construction is exactly the same.
Pattern Overview
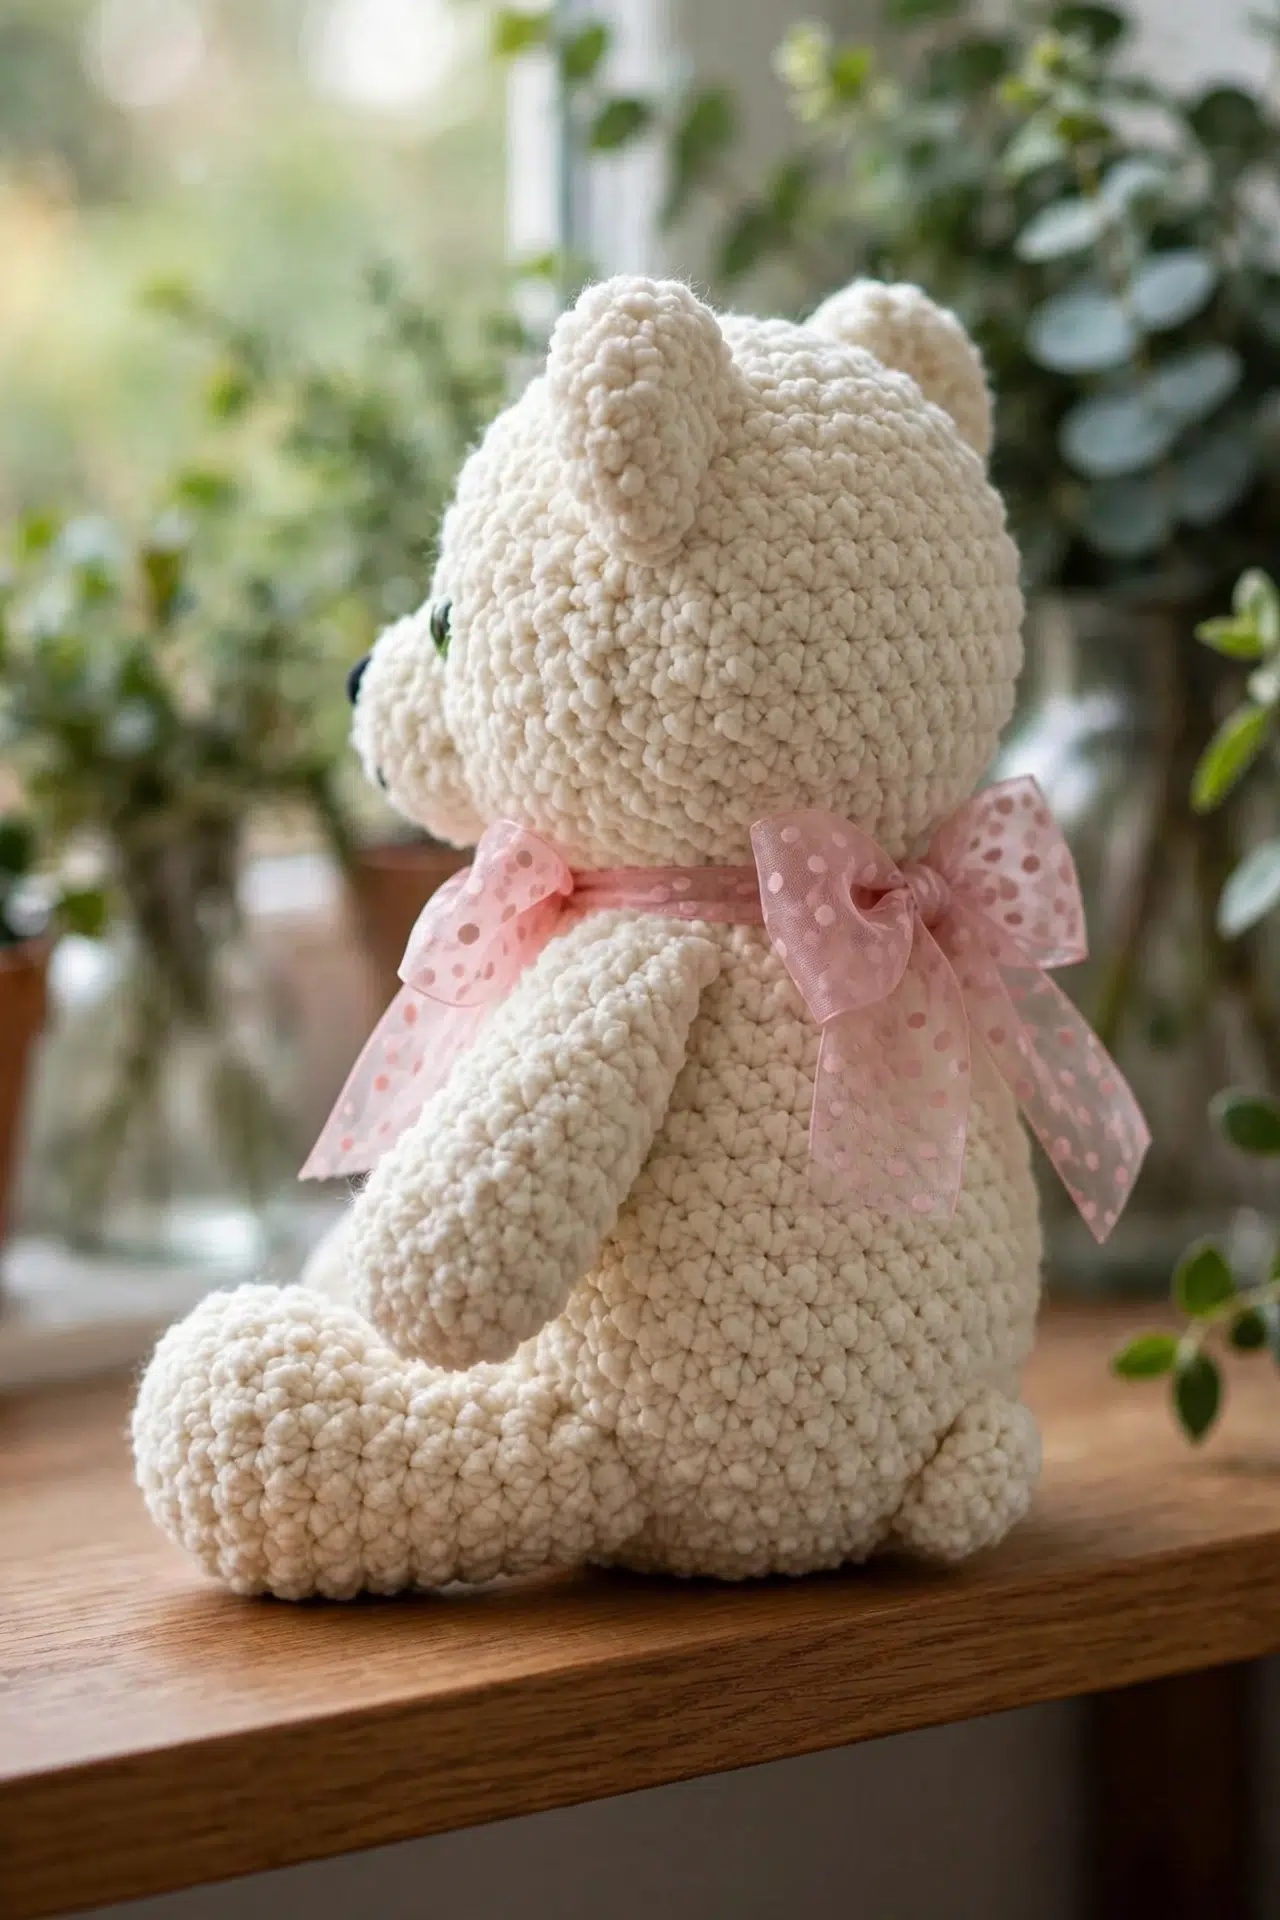
This little bear is worked in pieces, all in continuous spiral rounds, then assembled into a seated stuffed toy about 8 inches tall.
| Skill Level | Easy |
| Pattern Gauge | Gauge is not critical for this project. Use a hook size that creates a tight, firm fabric so stuffing does not show through. |
| Finished Size | Finished bear sits approx. 8 in (20 cm) tall and 4.5 in (11 cm) wide in the listed yarn. |
| Yarn Weight | 5 Bulky |
| Terminology | US |
Stitches & Abbreviations
Four stitches total. That's it.
- ch = chain
- rnd(s) = round(s)
- sc = single crochet
- st(s) = stitch(es)
Before You Begin
Every piece in this pattern, the head, body, ears, arms, and feet, is worked in continuous spiral rounds. Don't join at the end of rounds and don't turn. Just keep going and move your stitch marker up as you go. That marker matters more than you'd think; it's easy to lose your place in a spiral.
If the magic ring gives you trouble, start with ch 2 and work 6 sc in the second chain from the hook. Same result, less fuss.
Crochet tightly throughout. With bulky yarn especially, loose tension lets the stuffing peek through, and it's hard to fix after assembly.
Before you stuff and close the head, do the face. Insert safety eyes between Rounds 10 and 11, about 7 stitches apart. Then embroider the nose: a small triangle centered between the eyes, one round below them. From the base of the triangle, add a short vertical stitch down and a small curved smile to form a "Y" shape. Getting the knots tied and hidden inside is much easier before the head is stuffed, so don't skip ahead.
When sewing pieces together, use small stitches through both layers of each flattened edge. For placement: ears go on the sides of the head across Rounds 3–6, angled slightly outward at roughly 10 o'clock and 2 o'clock. Sew the full flattened edge and add a couple of stitches at each corner to keep them from flopping. Arms attach to the sides of the body at Rounds 18–19, just below the neck, with the openings facing inward. Feet pin to the lower front of the body around Rounds 25–27, side by side with a small gap between them, pointing forward. Sew around the opening of each foot, closing it against the body as you go.
Once the bear is assembled, sit it upright. If it tips backward, push a little extra stuffing into the lower front of the body through a gap between stitches. That usually sorts it.
For a child under 3: embroider the eyes instead of using safety eyes, and replace any ribbon with a crocheted bow or one that's very securely sewn down. Safety eyes and loose ribbon are both choking hazards at that age.
If you'd rather use a lighter yarn, any #4 worsted with a 3.5 mm hook works fine. The finished bear will come out closer to 6.5 in (16 cm) tall.
How to Make the Soufflé Teddy Bear Crochet Pattern
Follow these steps to assemble your Soufflé Teddy Bear crochet pattern from finished pieces into a complete, sitting bear.
Assembling the Bear
This is where all the separate pieces come together. I take my time with the pinning before committing to any sewing — bouclé hides seams beautifully, but it also hides misalignment until it's too late to fix easily.
Step 1: Step 1: Ears: Pin the flattened ears to the sides of the head across Rounds 3–6, angled slightly outward (roughly at the "10 o'clock" and "2 o'clock" positions when viewed from the front). Sew the full flattened edge to the head with the yarn tails, adding a couple of stitches at each corner so they never flop.
Step 2: Step 2: Arms: Pin the flattened arm tops to the sides of the body at Rounds 18–19, just below the neck, openings facing the body. Sew across the flattened edge.
Step 3: Step 3: Feet: Pin the feet to the lower front of the body around Rounds 25–27, side by side with a small gap between, so they point forward while he sits. Sew around the opening of each foot, closing it against the body as you go.
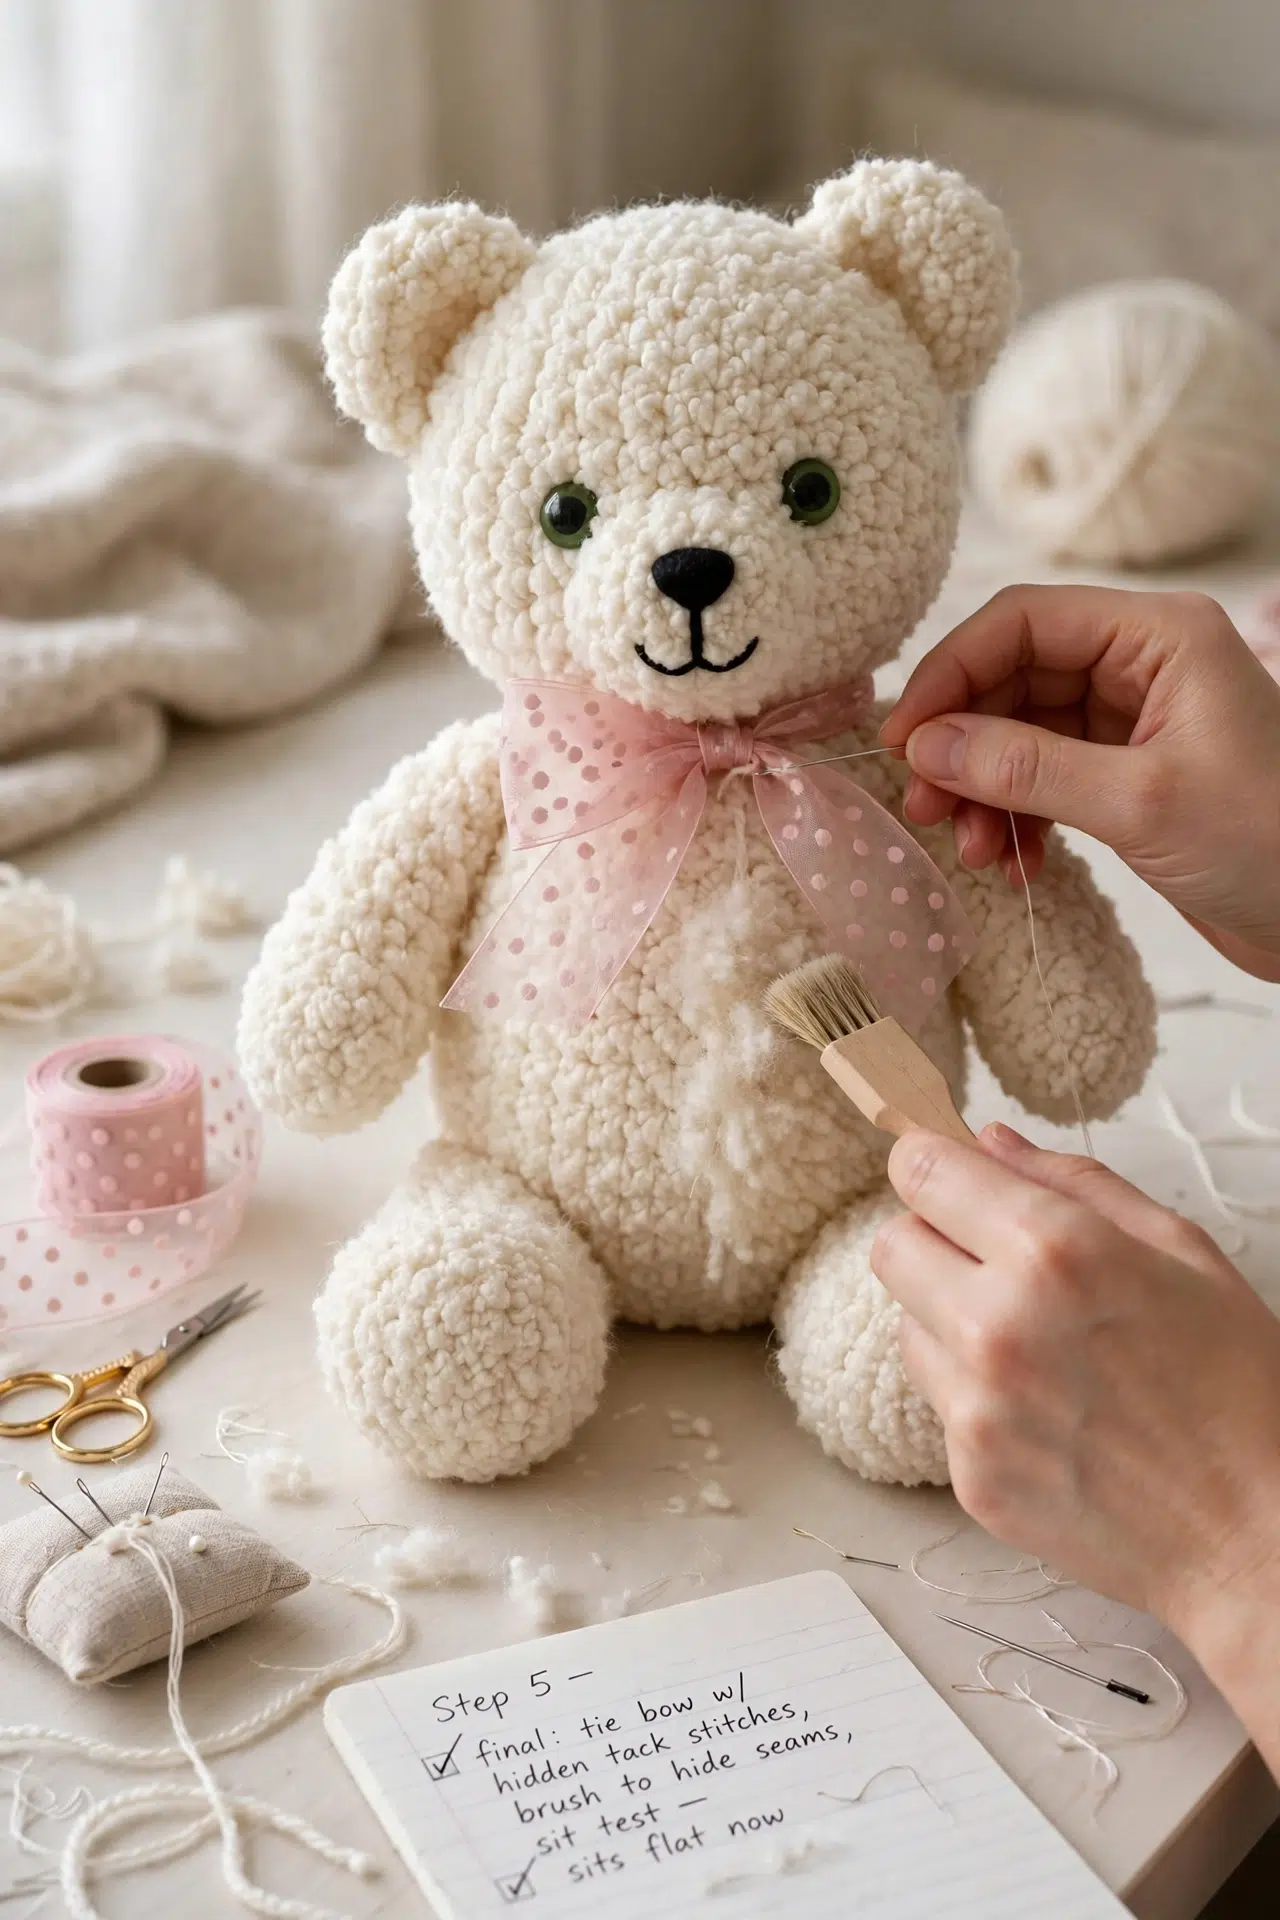
Step 4: Step 4: Sit test: Place him on a flat surface. If he tips backward, add a few more wisps of stuffing low in the front of the body through a gap between stitches (nudge them apart with your needle — bouclé closes right back up). Worth doing before the ribbon goes on.
Step 5: Step 5: Ribbon: Tie the pink organza ribbon around his neck in a generous bow, trim the tails at an angle, and add two tiny hidden tack stitches through the knot into the body so it can't be pulled off.
Step 6: Step 6: Fluff: Brush him gently all over with your fingertips (or a soft toothbrush, very lightly) to lift the bouclé loops along the seams and make every join disappear. I do this last, after everything is sewn and secured, so the fluffing covers any thread that peeked through.
Putting It All Together
The ears, arms, and feet are all sewn onto the body as separate pieces, so the order matters. I attach the ears to the head first, then join the head to the body if that step is part of your pattern, then add the arms and finally the feet. Pinning everything before you sew a single stitch lets you step back and check the proportions — I usually pin all three sets of pieces at once and look at him from the front before I'm happy with the placement. The feet especially benefit from this: getting that side-by-side, forward-facing angle right is what makes him sit properly rather than sprawl.
Care Instructions
Spot-cleaning is your best bet with a teddy-style bouclé bear. A damp cloth with a tiny drop of gentle soap works on most surface dirt, and it keeps the stuffing from shifting around inside. If you do need to hand-wash the whole thing, squeeze out the water gently and reshape him before laying him flat to air-dry. The 12 mm safety eyes will survive a gentle hand-wash just fine, but I'd keep him out of the washing machine entirely. The bouclé loops can mat and the fiberfill tends to clump unevenly once it gets fully saturated and spun around.
Baby & Child Safety Notes
The 12 mm safety eyes are the main thing to think about here. For any child under 3, skip them entirely and embroider the eyes instead with black floss or thin yarn. Safety eyes have a locking washer on the back, but no washer is truly pry-proof in small determined hands. The pink organza ribbon is the other concern: it's decorative and not meant for a baby to wear or chew. Swap it out for a crocheted or firmly sewn fabric bow if this bear is going to a very young child. Check the seams every so often too, especially around the feet and ears where tugging tends to happen first.
Frequently Asked Questions
Insert them before you stuff the head, between Rounds 10 and 11, about 7 stitches apart. Once the stuffing is in, you can't easily reach the back of the fabric to press the locking washer on, so this step really does need to happen first. Embroider the nose and mouth at this same stage too, so you can hide the knots inside before closing up.
Add a few small wisps of fiberfill low in the front of the body through a gap between stitches. With bouclé yarn you can nudge the loops apart with your tapestry needle and they close right back up, so there's no need to unpick anything. A little extra weight at the front base is usually all it takes.
Yes, any worsted weight yarn with a 3.5 mm hook works. The finished bear will come out a bit smaller, around 6.5 in (16 cm) tall, and the seams will be more visible since smooth yarn doesn't hide joins the way bouclé does. Gauge isn't critical here, but do crochet tightly so the stuffing doesn't peek through.
Plan for 160 to 190 yards (145 to 175 m) of the cream white bouclé. That covers every piece: the head, body, arms, feet, and ears. Most single skeins of bulky bouclé or teddy-style yarn come in around 100 yards, so pick up two to be safe. You won't use all of the second skein, but running short mid-body is not a fun situation.
After assembly, brush him gently all over with your fingertips or a soft toothbrush, very lightly. This lifts the bouclé loops along the seams and blends everything together. It sounds almost too simple, but it genuinely makes the joins disappear. Don't skip this step.
Tie the pink organza ribbon around his neck in a generous bow, trim the tails at an angle, then add two small hidden tack stitches right through the knot and into the body. That's it. The bow stays put and still looks like a proper bow, not something that's been sewn flat.
Before You Go
I'd love to see your Soufflé bear when he's done. Tag me on Instagram or drop a photo in the comments, especially if you tried him in a different colorway or swapped the bouclé for something smooth. If you're saving this for later, pin it now so it doesn't get buried in your browser tabs. And if something in the pattern tripped you up, just leave a comment below. I read every one.



