
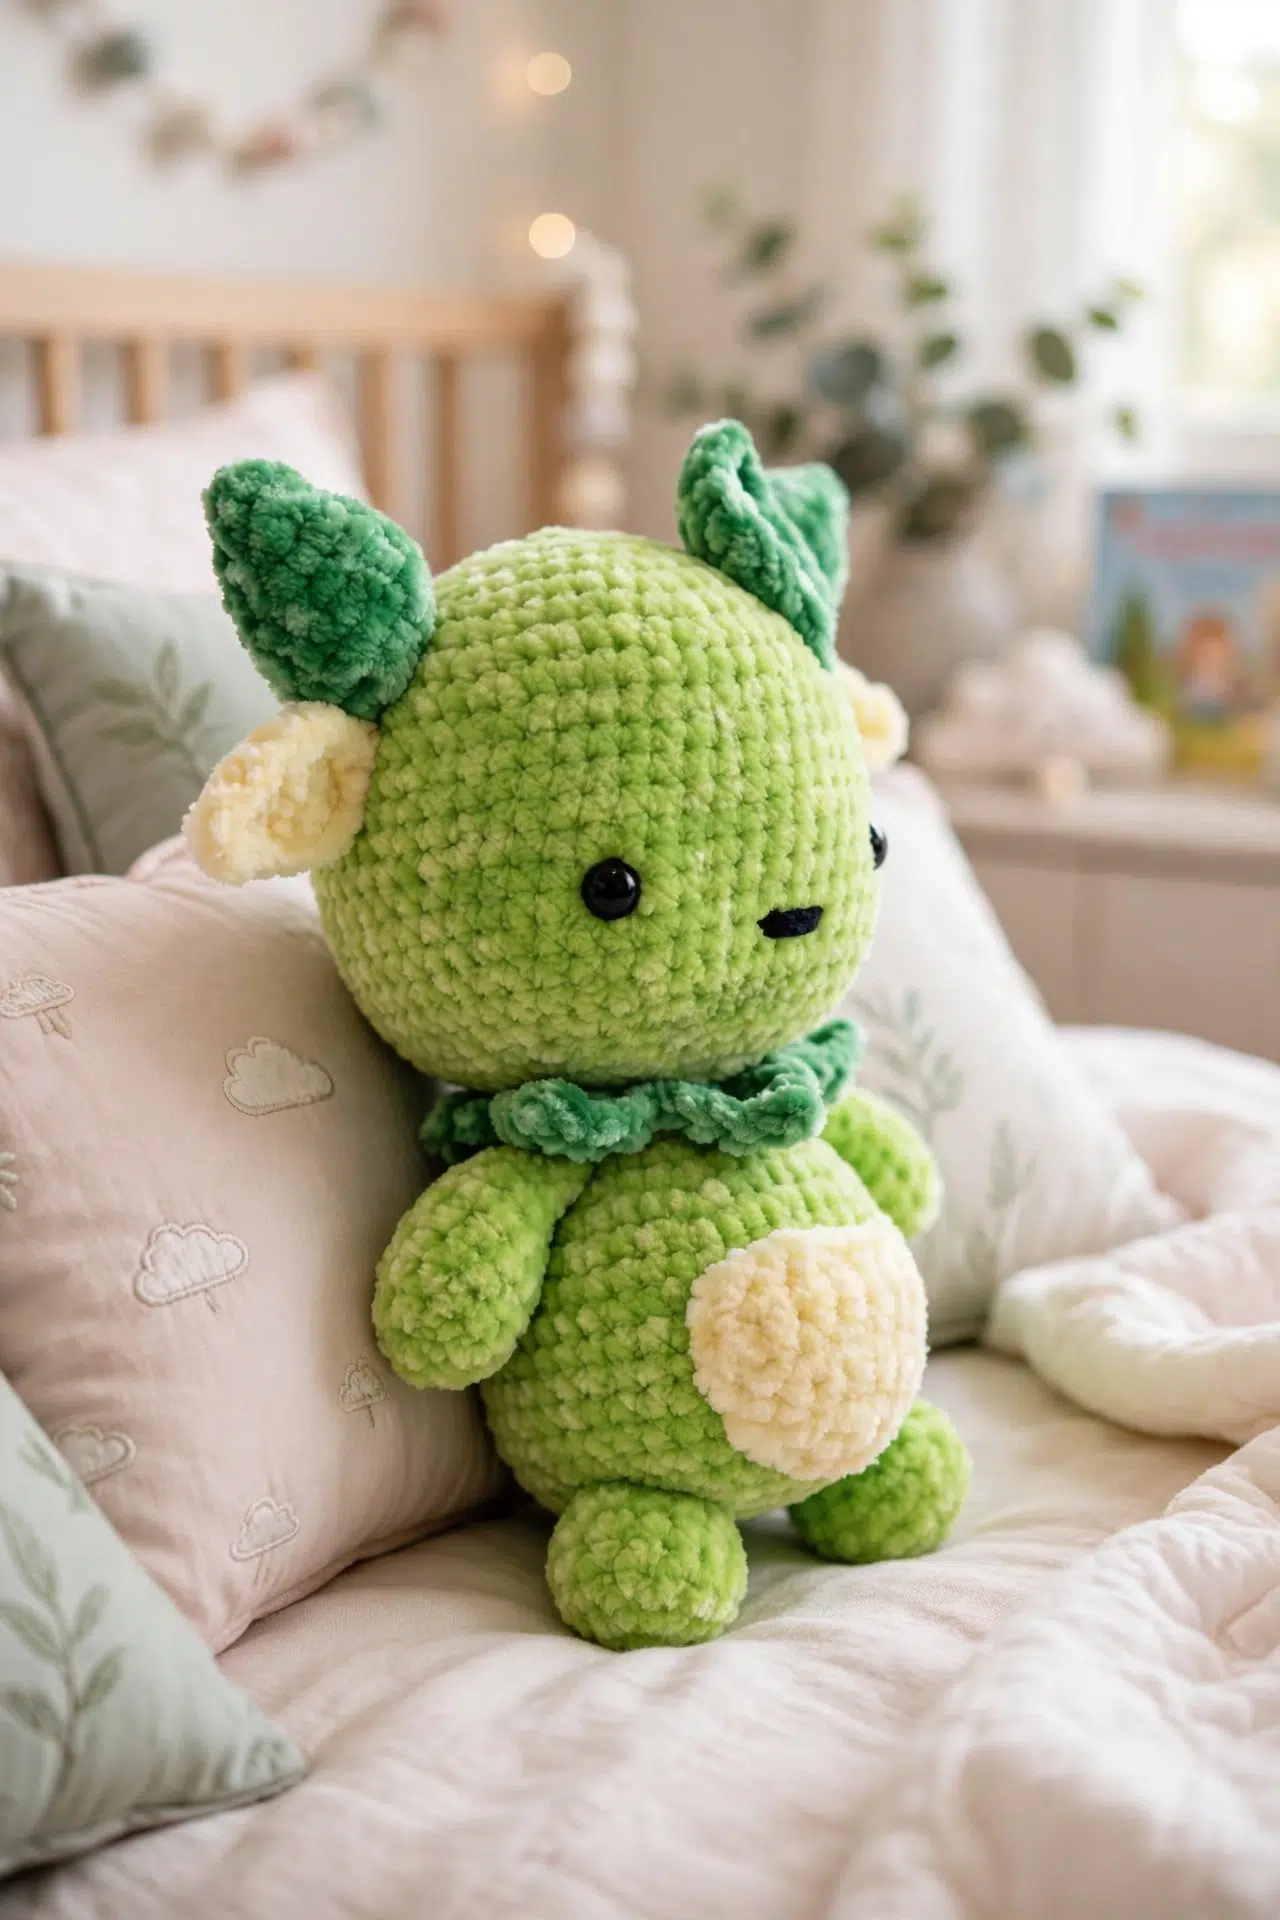
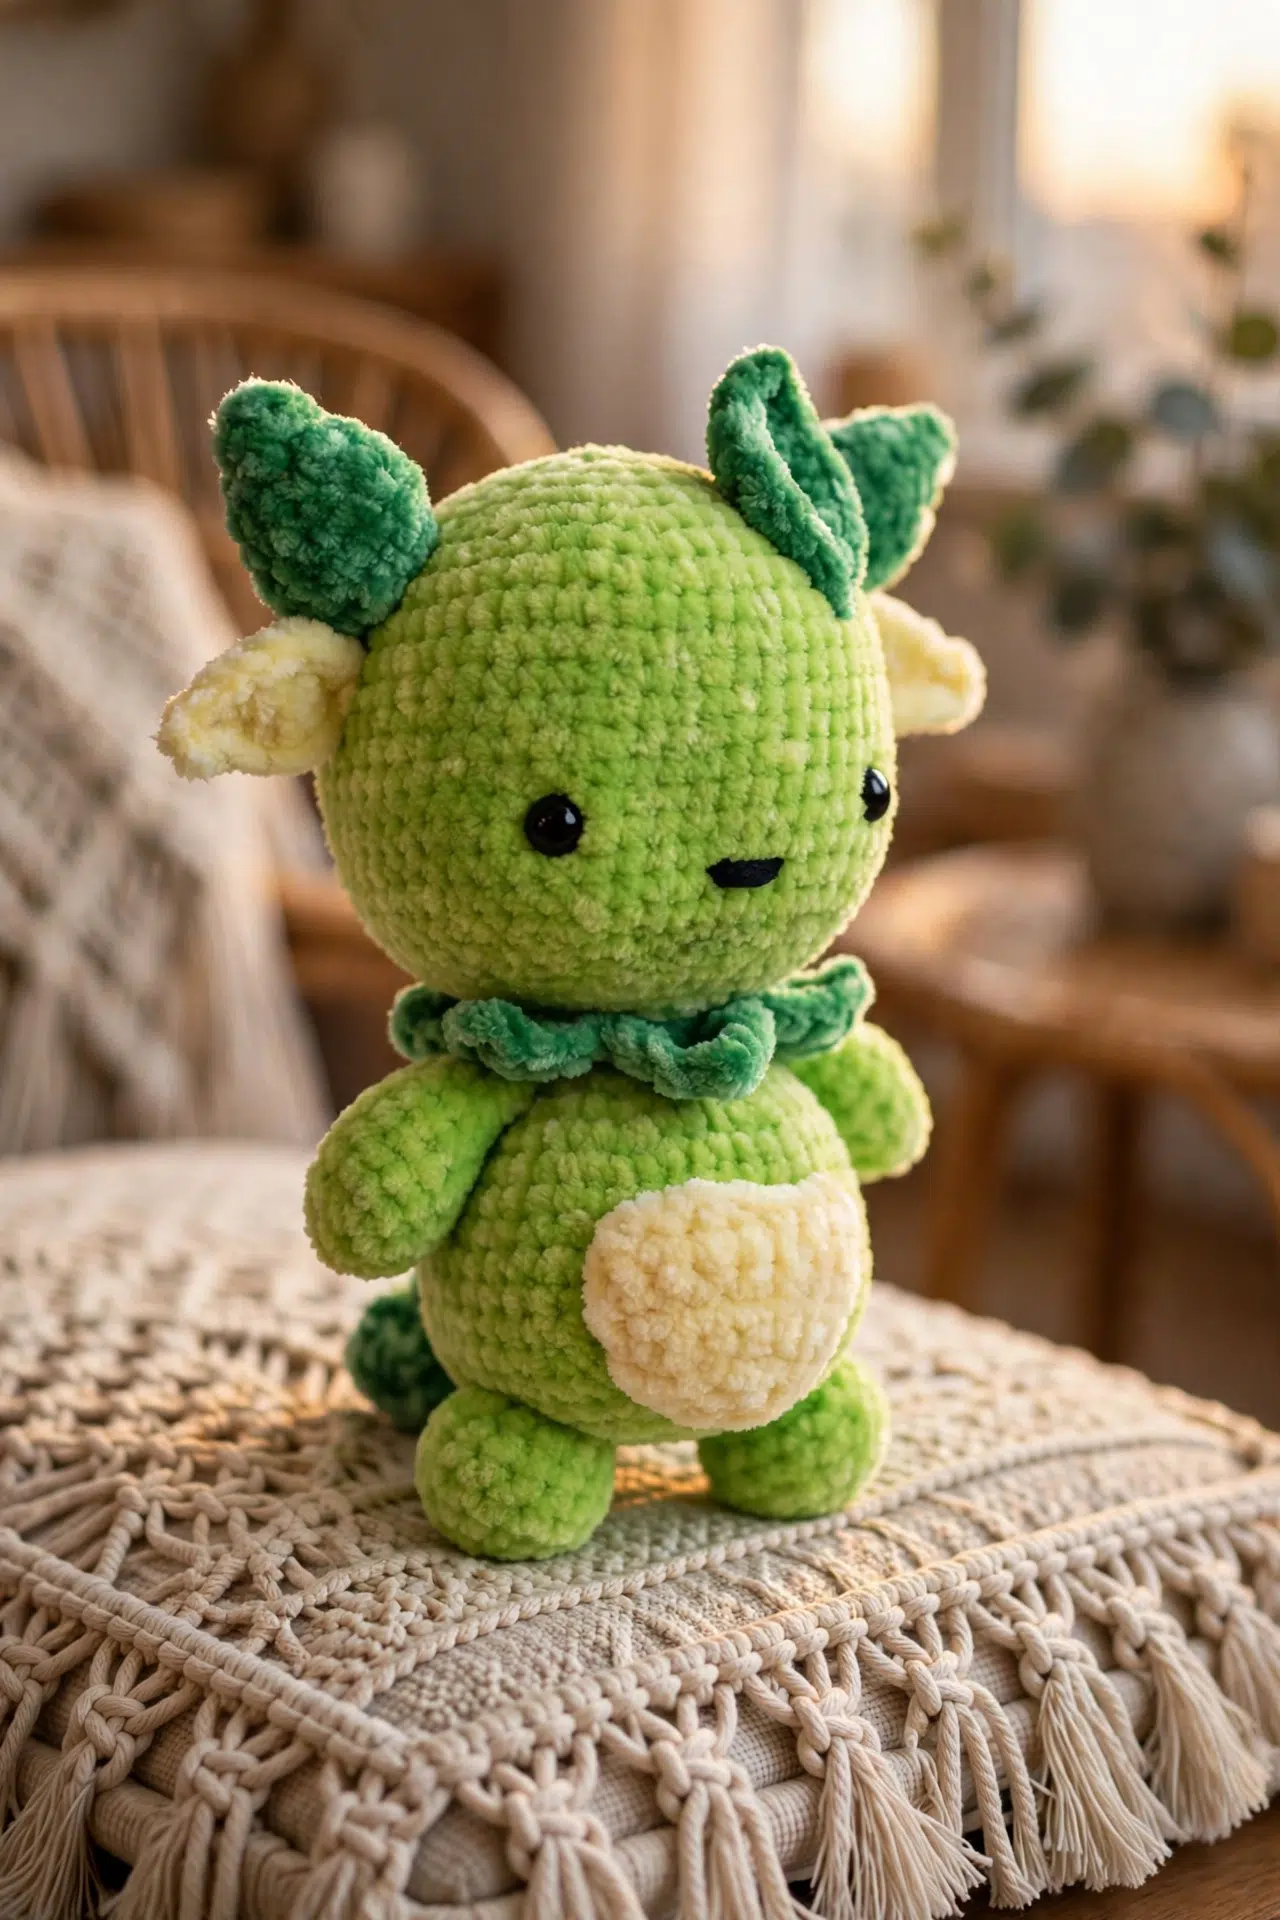
Getting a project that's enjoyable in your hands and useful afterward is a lovely double reward, and Seedling Crochet Amigurumi delivers both. Your finished character can keep you company at a desk, settle into a reading corner, or join in imaginative play where a small handmade friend earns plenty of attention.

Most of the making is calm single crochet in continuous rounds, with familiar increases and decreases shaping the head, body, limbs, and tail. The smaller leaf pieces bring in hdc, dc, and tr stitches, so your hands get a pleasant change of pace without facing complicated construction.
Jump to:
- Why I Love This Pattern
- Pattern Details
- Materials for This Amigurumi
- Abbreviations
- How to Crochet the Seedling Amigurumi
- Crochet Tips
- How to Keep the Flat Leaves on Course
- Yarn and Detail Options for Your Seedling
- Keeping Your Seedling's Shape on Track
- A Little Character for Everyday Spaces
- Washing & Care
- More Crochet Botanical Patterns
- Frequently Asked Questions
Why I Love This Pattern
- A streamlined center: The head and body are crocheted as one continuous piece, which keeps the main construction simple and cuts down on major seams.
- Helpful stitch checkpoints: Every shaping round includes a stitch count, giving you regular chances to catch an extra or missed stitch before it affects the next section.
- Manageable finishing: The arms, legs, leaves, pocket, necklace, and tail are all small components. You can finish them one at a time instead of managing several large pieces at once.
- Beginner-friendly shaping: The rounded sections rely on repeated sc increases and sc2tog decreases. Once you recognize that rhythm, the shaping is easy to follow.
Pattern Details
- Skill Level: Beginner
- Yarn Weight: DK / Light Worsted
- Time to Make: about 8-12 hours
Materials for This Amigurumi
Gather your chenille yarn, hook, stuffing, eyes, and basic sewing tools before you begin so you can move straight from crocheting into assembly.
- DK/Light Worsted Weight Chenille Yarn (3) in Dark Green, Light Green, Cream, and Black: Chenille can hide individual stitches, especially during decrease rounds. The optional stitch marker is genuinely useful for marking the first stitch of every continuous round.
- 3.5 mm crochet hook
- Yarn needle
- Scissors
- Toy stuffing
- 2 x 8 mm toy safety eyes: Safety eyes need to be installed before the head becomes difficult to reach. For a toy intended for a child who may mouth it, embroidered eyes are the safer choice.
- Stitch marker, optional
Abbreviations
- st(s) - stitch(es)
- ch - chain
- sl st - slip stitch
- sc - single crochet
- sc2tog - single crochet 2 stitches together
- hdc - half double crochet
- dc - double crochet
- tr - treble crochet
- DG - Dark Green
- LG - Light Green
- C - Cream
- B - Black
How to Crochet the Seedling Amigurumi
Read through the placement notes before starting, particularly the eye and stuffing instructions in the Main Body.
Color key: DG = Dark Green, LG = Light Green, C = Cream, and B = Black. Do not join the continuous rounds where indicated. The Small Leaves and Face Leaf are worked along one side of the foundation chain and then back along the opposite side.
Main Body
- Round 1: In LG, ch 4, sl st in first ch to form a loop, then work 7 sc in center of loop. Do not join rounds. Alternatively, use a magic ring. (7)
- Round 2: 2 sc in each st around. (14)
- Round 3: *1 sc in next st, 2 sc in next st; rep from * around. (21)
- Round 4: *1 sc in next 2 sts, 2 sc in next st; rep from * around. (28)
- Round 5: *1 sc in next 3 sts, 2 sc in next st; rep from * around. (35)
- Round 6: *1 sc in next 4 sts, 2 sc in next st; rep from * around. (42)
- Round 7: *1 sc in next 5 sts, 2 sc in next st; rep from * around. (49)
- Round 8: *1 sc in next 6 sts, 2 sc in next st; rep from * around. (56)
- Rounds 9-20: 1 sc in each st around. (56)
- Round 21: *1 sc in next 6 sts, sc2tog; rep from * around. (49)
- Round 22: *1 sc in next 5 sts, sc2tog; rep from * around. (42)
- Round 23: *1 sc in next 4 sts, sc2tog; rep from * around. (35)
- Round 24: *1 sc in next 3 sts, sc2tog; rep from * around. (28)
- Round 25: *1 sc in next 2 sts, sc2tog; rep from * around. (21)
- Round 26: *1 sc in next st, sc2tog; rep from * around. (14)
- Round 27: 1 sc in each st around. (14)
Stuff the head at this point and add the safety eyes between Rounds 16 and 17, placing them 8 to 10 sts apart.
- Round 28: *1 sc in next st, 2 sc in next st; rep from * around. (21)
- Round 29: *1 sc in next 2 sts, 2 sc in next st; rep from * around. (28)
- Round 30: *1 sc in next 3 sts, 2 sc in next st; rep from * around. (35)
- Round 31: *1 sc in next 4 sts, 2 sc in next st; rep from * around. (42)
- Rounds 32-41: 1 sc in each st around. (42)
- Round 42: *sc2tog; rep from * around. (21)
- Round 43: *sc2tog; rep from * around until last st, 1 sc in last st. (11)
Stuff the body at this point.
- Round 44: *sc2tog; rep from * around until last st, 1 sc in last st. Fasten off, sew the remaining hole closed, and weave in all ends. (6)
Arms x 2
- Round 1: In LG, ch 4, sl st in first ch to form a loop, then work 6 sc in center of loop. Do not join rounds. Alternatively, use a magic loop. (6)
- Round 2: 2 sc in each st around. (12)
- Rounds 3-6: 1 sc in each st around. (12)
- Round 7: *1 sc in next st, sc2tog; rep from * around. (8)
- Rounds 8-10: 1 sc in each st around. Fasten off, stuff slightly, fold flat at the top, and sew onto the body. (8)
Legs x 2
- Round 1: In LG, ch 4, sl st in first ch to form a loop, then work 7 sc in center of loop. Do not join rounds. Alternatively, use a magic loop. (7)
- Round 2: 2 sc in each st around. (14)
- Rounds 3-6: 1 sc in each st around. Fasten off, stuff slightly, and sew onto the body. (14)
Large Leaves/Horns x 2
- Round 1: In DG, ch 8, sl st in first ch to form a large loop, ch 1. (8)
- Round 2: Starting in the same ch as the previous sl st, work 1 sc in each ch around. Do not join rounds. (8)
- Round 3: *1 sc in next st, 2 sc in next st; rep from * around. (12)
- Rounds 4-5: 1 sc in each st around. (12)
- Round 6: *1 sc in next st, sc2tog; rep from * around. (8)
- Round 7: 1 sc in each st around. (8)
- Round 8: *sc2tog; rep from * around. (4)
- Round 9: 1 sc in each st around. Fasten off, sew the remaining hole closed, stuff slightly, and sew onto the head. (4)
Small Leaves x 2
- Row 1: In C, ch 7, sl st in second ch from hook, 1 sc in next ch, 1 dc in next 2 chs, 1 sc in next ch, sl st in last ch. (6)
- Row 2: Crochet back into the chains in the opposite direction, starting with a sl st in the same last ch as the previous sl st, 1 sc in next ch, 1 dc in next 2 chs, 1 sc in next ch, sl st in last ch, ch 2, sl st in next st, which is the first st from Row 1. Fasten off and sew onto the head under the Large Leaves/Horns.
Leaf Necklace
- Row 1: In DG, ch 21. Starting in second ch from hook, *[1 sc, 1 hdc] in next ch, [1 dc, 1 tr, ch 2, sl st in top of previous tr, 1 dc] in next ch, [1 hdc, 1 sc] in next ch, sl st in next ch; rep from * 4 more times. Fasten off, wrap around the neck, and sew into place.
Face Leaf
- Row 1: In DG, ch 9, sl st in second ch from hook, 1 sc in next ch, 1 hdc in next ch, 1 dc in next 2 chs, 1 hdc in next ch, 1 sc in next ch, sl st in last ch. (8)
- Row 2: Crochet back into the chains in the opposite direction, starting with a sl st in the same last ch as the previous sl st, 1 sc in next ch, 1 hdc in next ch, 1 dc in next 2 chs, 1 hdc in next ch, 1 sc in next ch, sl st in last ch.
- Row 3: Ch 1, sl st in next st, which is the first st from Row 1, 1 sc in next st, 1 hdc in next st, 2 dc in next 2 sts, 1 hdc in next st, 1 sc in next st, sl st in last st. Fasten off and sew onto the head.
- Row 1: In C, ch 9, 1 sc in second ch from hook and in each ch along. Turn. (8)
- Rows 2-5: 1 sc in each st along. Turn. (8)
- Row 6: (sc2tog) 4 times. Turn. (4)
- Row 7: (sc2tog) 2 times. Fasten off and sew onto the body. (2)
Tail
- Round 1: In DG, ch 16, sl st in first ch to form a large loop, ch 1. (16)
- Rounds 2-4: Starting in the same ch as the previous sl st, work 1 sc in each st around. Do not join rounds. (16)
- Round 5: *1 sc in next st, sc2tog; rep from * around until last st, 1 sc in last st. (11)
- Rounds 6-9: 1 sc in each st around. (11)
- Round 10: *sc2tog; rep from * around until last st, 1 sc in last st. (6)
- Rounds 11-13: 1 sc in each st around. (6)
- Round 14: *sc2tog; rep from * around. Fasten off, sew the remaining hole closed, stuff slightly, and sew onto the body. (3)
Finishing
- Step 1: In B, sew on a small mouth over 3 sts.
Crochet Tips
- Mark every round: Move your stitch marker into the first stitch of each continuous round. Chenille makes the joinless transition subtle, and losing the start point can shift the shaping.
- Count the shaping rounds: Pause after each increase or decrease round and confirm the listed count. The following round assumes that every repeat fits evenly into the previous stitch total.
- Install the eyes on time: Place the safety eyes between Rounds 16 and 17 after completing Round 27. The narrow neck section gives you a clear pause for stuffing and positioning before the body widens again.
- Keep appendages lightly filled: The arms, legs, Large Leaves/Horns, and tail are only stuffed slightly. Overfilling makes their openings harder to flatten or sew securely to the body.
How to Keep the Flat Leaves on Course
For the Small Leaves and Face Leaf, work the first row down one side of the foundation chain. Instead of turning as you would for a normal row, rotate the chain and crochet back along its opposite side.
Keep the foundation chain relaxed enough that you can identify those unused loops. Working into both sides lets the stitches meet around the chain and completes each leaf as a single piece.
Yarn and Detail Options for Your Seedling
- Smooth DK yarn: A smooth DK yarn can replace chenille and will make the stitches easier to see. Its fabric may feel less plush, so check that your tension is firm enough to keep stuffing from showing.
- Another yarn weight: You can resize the character by changing yarn weight and choosing a hook that creates a dense amigurumi fabric. A heavier yarn makes every component larger, so adjust the eye size and stuffing amount to match.
- Embroidered eyes: Replace the safety eyes with black yarn embroidery when you need a fully stitched face. Mark the positions between Rounds 16 and 17 first and keep them 8 to 10 sts apart.
- A new color arrangement: Different colors work well as long as you keep track of the four pattern roles. Relabel your choices as DG, LG, C, and B before starting so every piece ends up in its intended color.
- Stuffing firmness: A firmer head and body will hold their shaping more strongly, while lighter stuffing creates a softer result. Keep the smaller attachments only slightly stuffed so they remain easy to sew in place.
Keeping Your Seedling's Shape on Track
- The body count has drifted: Return to the most recent shaping round and check each repeat as a complete group. An increase adds one stitch and each sc2tog removes one, so a single missed operation changes every later total.
- The chenille stitches are hard to find: Feel for the top loops with your fingertips and count stitches as you complete them rather than at the end of a long round. A marker in the first stitch prevents you from accidentally working past the round boundary.
- A flat leaf is twisting: Make sure you didn't turn for the second pass. Rotate the foundation chain and work into the unused loops on its opposite side, keeping your tension relaxed around the ends so the chain isn't pulled into a tight curl.
A Little Character for Everyday Spaces
Set your finished Seedling near the places where you spend quiet time, such as a desk, craft shelf, or reading nook. Its compact amigurumi construction also makes it easy to move between rooms when you want a little handmade company.
For a thoughtful gift, pair the character with a small note about the yarn colors you chose. When giving it to a child, use embroidered eyes in place of safety eyes whenever age or mouthing is a concern.
Washing & Care
Check the chenille yarn label before washing because fiber content and laundering instructions vary. Spot cleaning is the gentlest option for preserving the stuffing and sewn details. When the yarn permits washing, use cool water, protect the amigurumi in a laundry bag, reshape it, and let it air-dry completely.
More Crochet Botanical Patterns
- The Secret-Heart Tulip Pot: A Crochet Pattern That Hides a Sweet Surprise Inside
- Pumpkin Vines Home Decor Crochet Pattern
- Boho Daisy Leaf Mobile Crochet Pattern
Frequently Asked Questions
When should I add the eyes and stuff the head?
Add the eyes and stuff the head after completing Round 27. Place the eyes between Rounds 16 and 17, spaced 8 to 10 sts apart. Doing this before the body increases begin gives your fingers access through the neck opening and lets you judge the face placement on the filled head.
Can I begin with a magic ring instead of the chain loop?
Yes, a magic ring can replace the chain-loop start for the Main Body, Arms, and Legs. Work the stated number of sc into the ring, tighten it, and continue without joining. The Large Leaves/Horns and tail need their larger chain loops because those openings are part of their tube construction.
Why is the head stuffed before the body is crocheted?
The head is stuffed at Round 27 because the design narrows to 14 sts at the neck before increasing again for the body. Once the body grows, reaching back into the head becomes awkward and the eye backs are harder to access. This pause also helps keep stuffing from drifting between the two sections.
How many leaf repeats are worked in the necklace?
Work the four-chain leaf sequence 5 times across the foundation chain. Starting in the second chain leaves 20 chains available, and each repeat uses 4 chains. Keeping that rhythm prevents unused chains at the end and gives the necklace the intended length for wrapping around the neck.
Come share how your Seedling turned out in the comments because I'd love to hear about the choices you made! 🧶



