
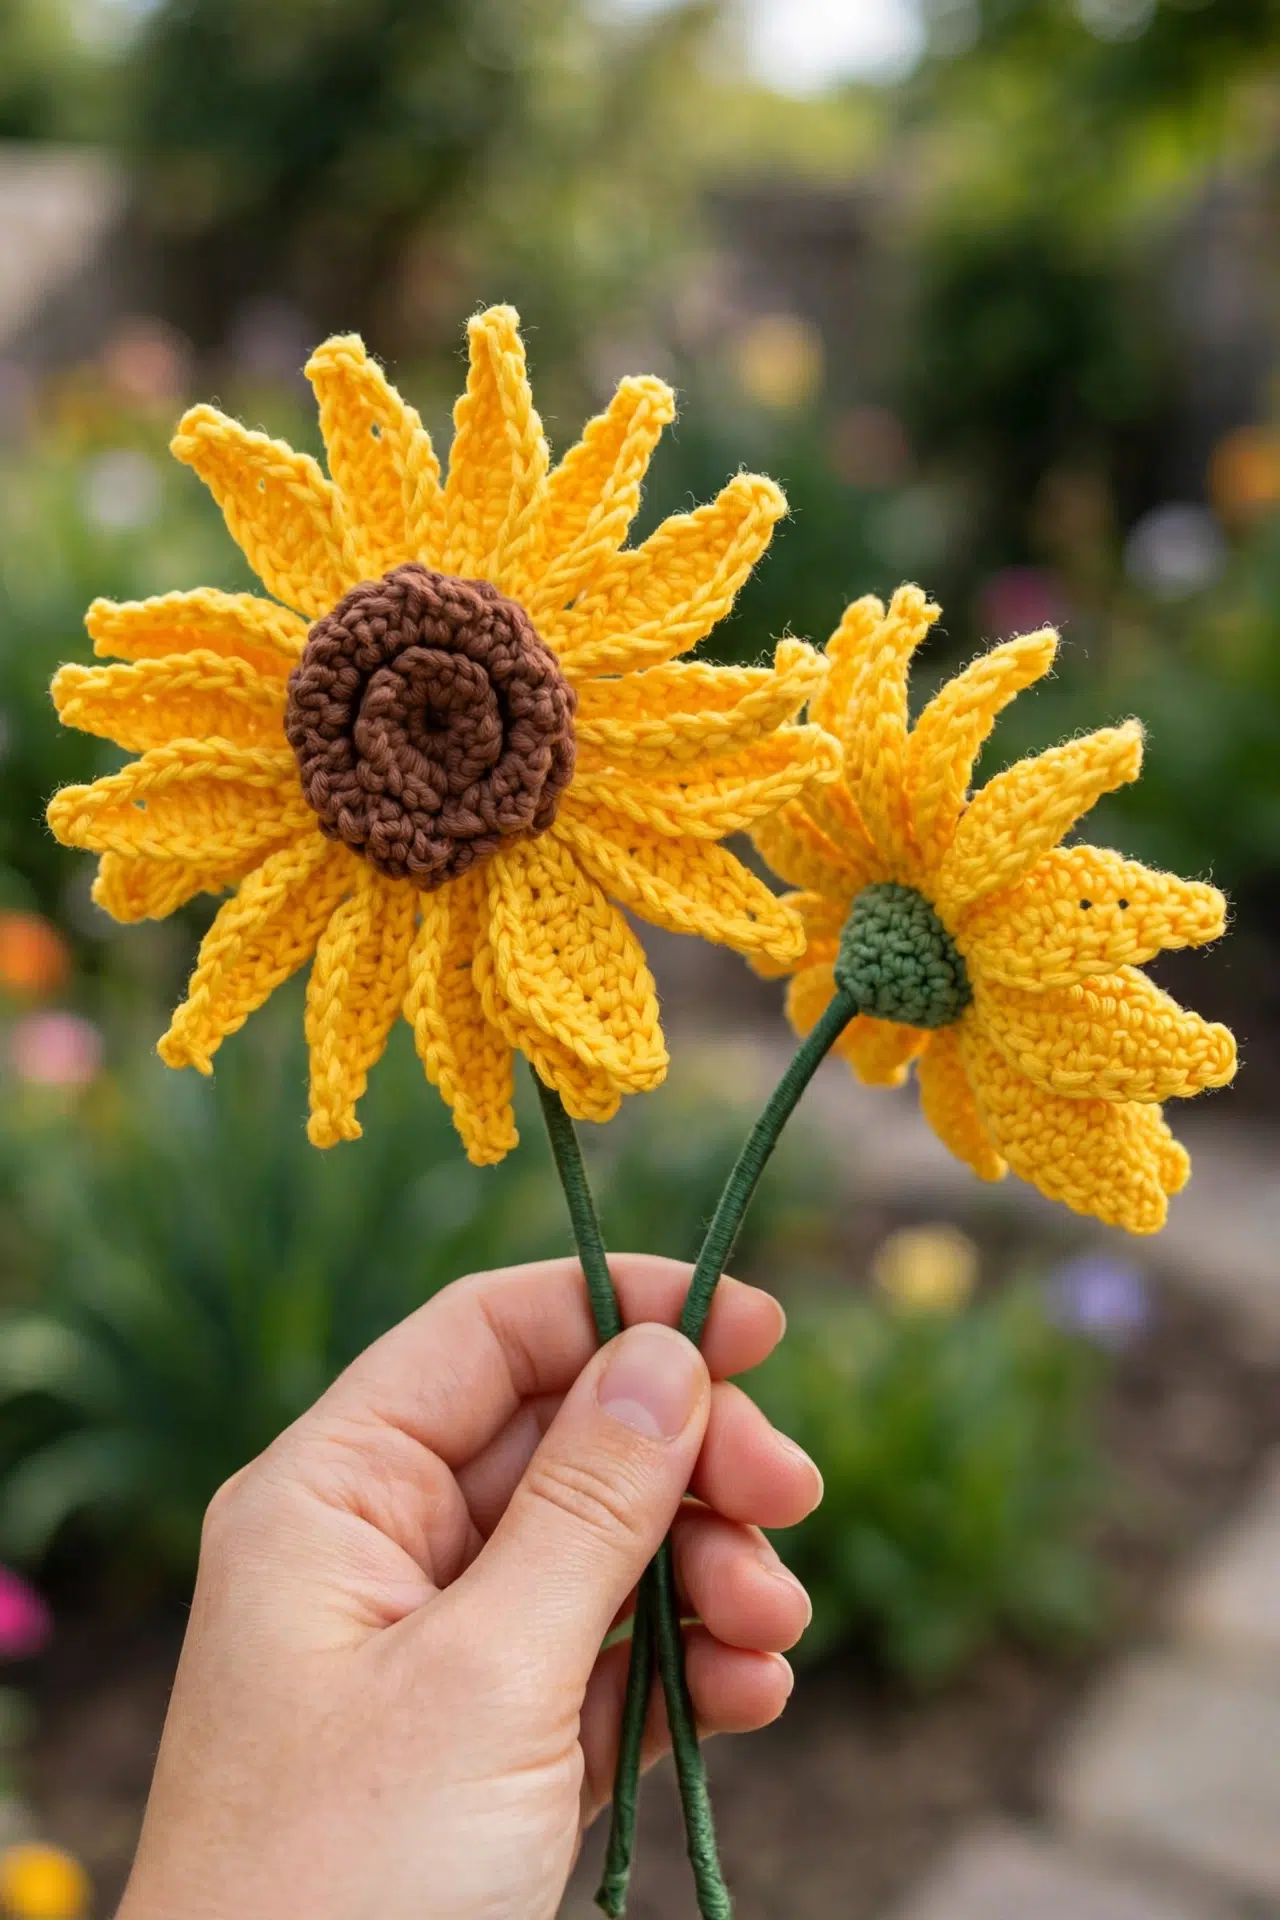
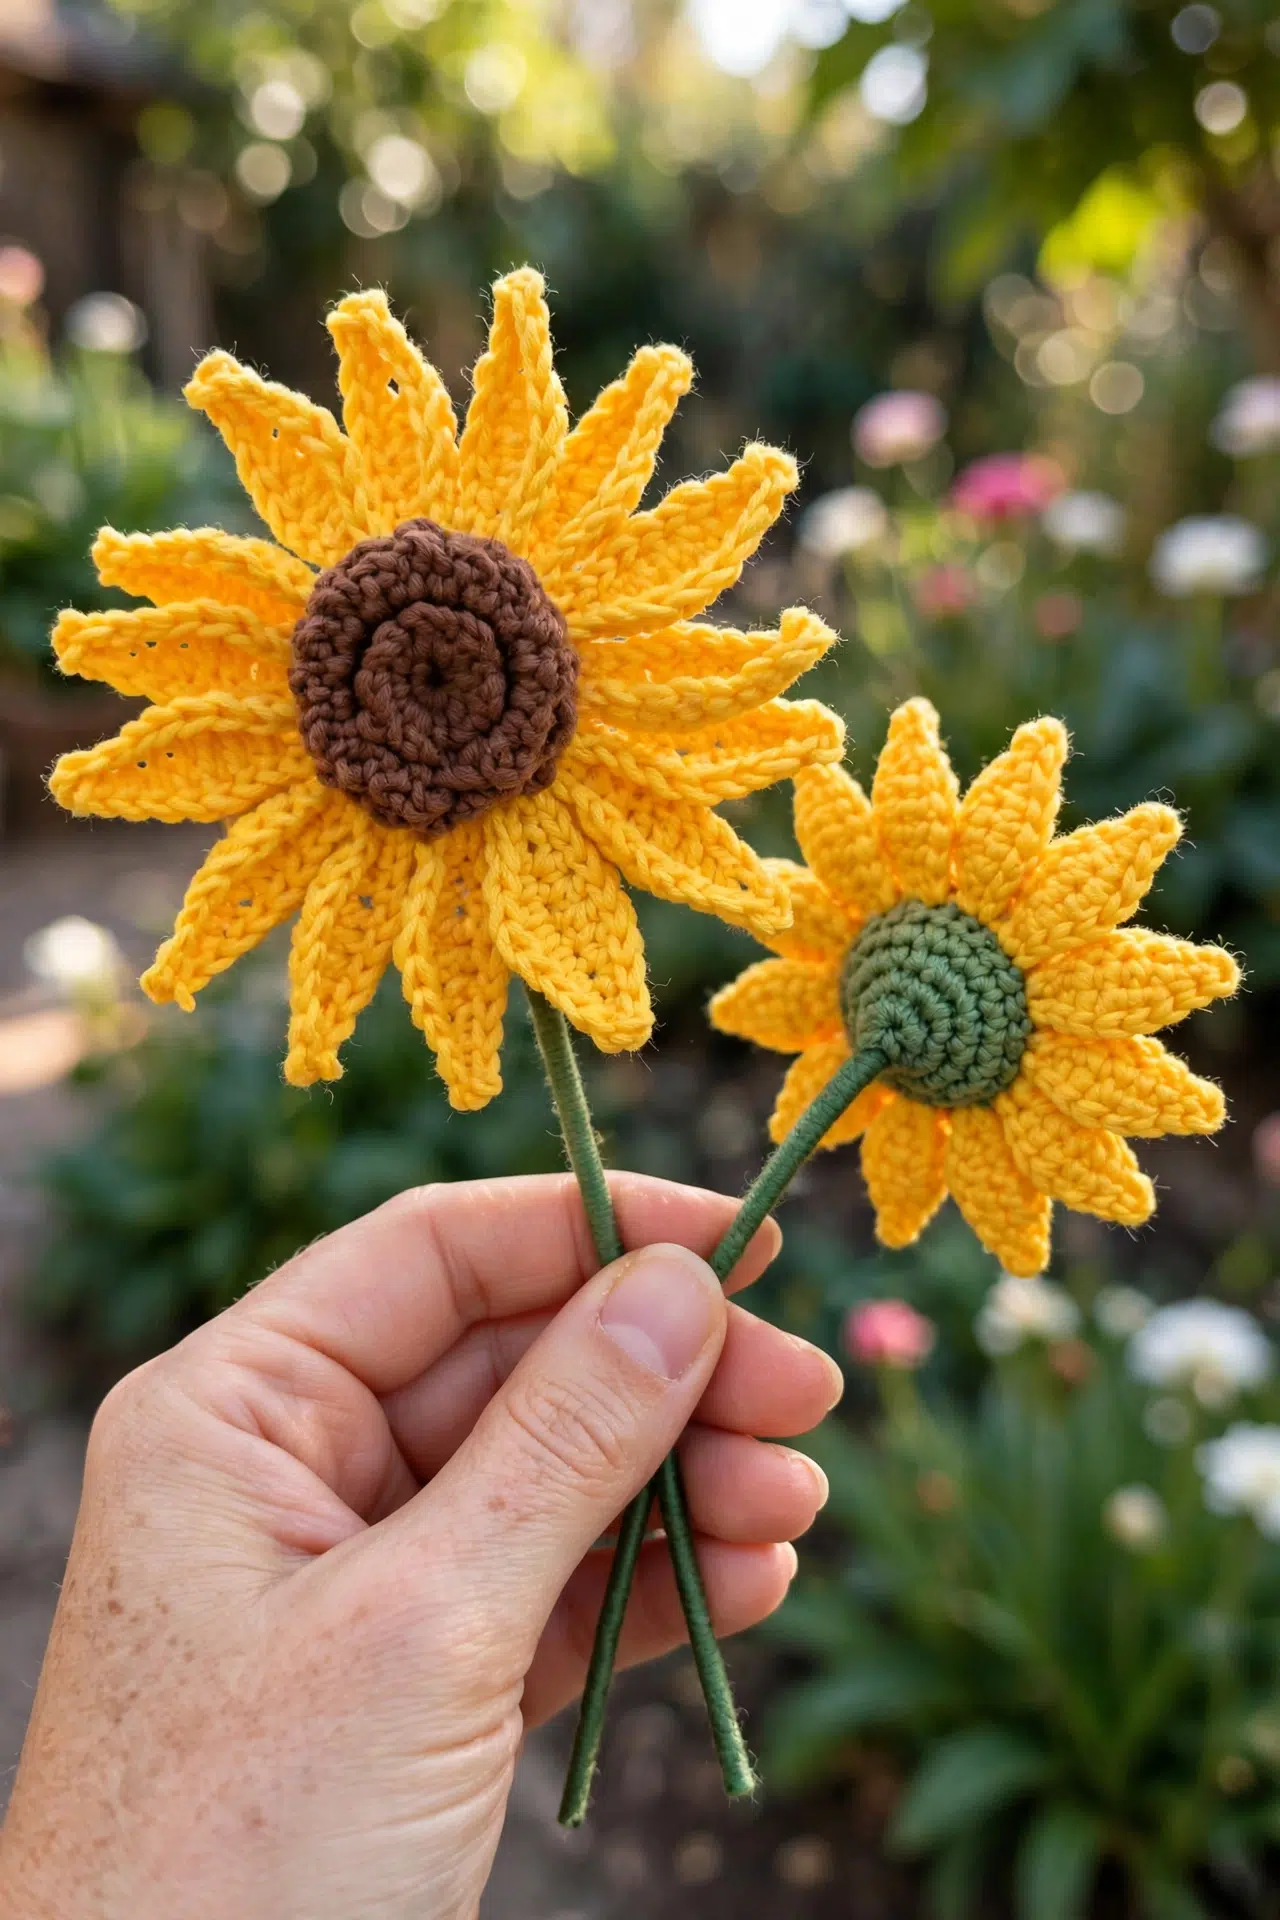
There's a satisfying amount of detail in my Realistic Crochet Sunflower with Stem, from the loop-only centre rounds to the carefully built petals and optional wired stem. It's an advanced project, but if you're comfortable following detailed repeats and keeping track of unused loops, each stage gives you a clear job to do.

I especially love the two-pass petal construction because your hands can settle into the shaping before completing each petal on the return pass. Choose your own yarn combination or stop after the flower head if that suits your plans better. Ready to begin!
Jump to:
- Why You'll Love This Pattern
- Pattern Details
- Materials You'll Need
- Stitches & Abbreviations
- How to Crochet the Realistic Sunflower with Stem
- Crochet Tips
- Keep Both Petal Passes Aligned
- Ways to Adapt Your Crochet Sunflower
- Fixing Petal and Stem Problems
- Where Your Sunflower Can Sit
- Washing & Care
- More Crochet Flower Home Decor Patterns
- Frequently Asked Questions
Why You'll Love This Pattern
- Purposeful loop work: Front-loop details create the centre rounds while the unused back loops remain ready for the next stage. Nothing is skipped without a reason.
- A steady petal rhythm: All 16 petals follow the same sequence. Once you've worked the first few carefully, the shaping becomes much easier to anticipate.
- Your choice of finish: You can keep the completed flower head on its own or add the optional wire, green crochet and florist tape for a stem.
Pattern Details
- Skill Level: Advanced
- Yarn Weight: Sport/Baby (2)
- Time to Make: about 4-6 hours
Materials You'll Need
Gather all three yarn colors before you start, and keep the optional stem supplies nearby if you're making the complete wired version.
- Sport/Baby weight yarn (2) in yellow, brown and green: Use the same yarn weight for all three sections so the centre, petal base and stem loops fit together as intended. A different fiber can work, but it may change the firmness of the petals.
- 3.00 mm crochet hook or similar
- Yarn needle
- Scissors
- Optional: green florist tape
- Optional: 0.35 mm florist wire or similar: The pattern folds 2 lengths in half for added support. Handle cut ends carefully and keep wire cutters away from children and pets.
- Optional: wire cutters
Stitches & Abbreviations
- ch - chain
- sl st - slip stitch
- st(s) - stitch(es)
- sc - single crochet
- hdc - half double crochet
- dc - double crochet
- sc2tog - single crochet 2 stitches together for decrease
magic circle: Make an adjustable yarn loop, work the specified stitches into the loop, then pull the yarn tail to close it.
How to Crochet the Realistic Sunflower with Stem
Read through the stem construction before starting so you can decide whether to reserve the yarn tails for the wired finish.
Always start the first stitch in the same stitch as the previous sl st. The beginning ch 1 does not count as a stitch here or throughout the pattern.
Centre
- Round 1: With brown yarn, crochet 8 sc into a magic circle or ch 4 loop, sl st in first sc to join, ch 1. (8)
- Round 2: In front loops only, *ch 3, sl st in same st below, sl st in next st; rep from * around. Sl st in first skipped back loop to finish, ch 1.
- Round 3: In skipped back loops only, crochet 2 sc in each st around, sl st in first sc to join, ch 1. (16)
- Round 4: In front loops only, *ch 3, sl st in same st below, sl st in next st; rep from * around. Sl st in first skipped back loop to finish, ch 1.
- Round 5: In skipped back loops only, crochet 1 sc in each st around, sl st in first sc to join, ch 1. (16)
- Round 6: In front loops only, *ch 3, sl st in same st below, sl st in next st; rep from * around. Sl st in first skipped back loop to finish, ch 1.
- Round 7: In skipped back loops only, crochet 1 sc in each st around, sl st in first sc to join. Fasten off brown yarn. Sew ends to centre at back; do not weave in. (16)
Petals
Keep the unused back loops easy to find as you work, since they're needed when you add the optional stem.
- Round 1: With yellow yarn, crochet 8 sc into a magic circle or ch 4 loop, sl st in first sc to join, ch 1. (8)
- Round 2: Crochet 2 sc in each st around, sl st in first sc to join, ch 1. (16)
- Round 3: In front loops only, *ch 11, sl st in second ch from hook, 1 sc in next 2 ch, 1 hdc in next ch, 1 dc in next 2 ch, 1 hdc in next ch, 1 sc in next 2 ch, sl st in last ch, sl st in next front loop on main circle; rep from * around. (16)
This round makes 16 half petals.
- Round 4: Working back into the petal ch again, *sl st in first ch, 1 sc in next 2 ch, 1 hdc in next ch, 1 dc in next 2 ch, 1 hdc in next ch, 1 sc in next 2 ch, sl st in last ch at top, sl st down edge of petal back to main circle, then crochet into next half petal; rep from * around. Fasten off yellow yarn. Sew ends to centre at back; do not weave in. (16)
This round completes the 16 petals.
Stems
The stem is optional. Work into the previously skipped back loops.
- Round 1: With green yarn, crochet 1 sc in each back loop around, sl st in first sc to join, ch 1. (16)
- Round 2: Crochet 1 sc in each st around, sl st in first sc to join, ch 1. (16)
- Round 3: *1 sc in next st, sc2tog; rep from * until last st, 1 sc in last st, sl st in first sc to join, ch 1. (11)
Pause here to construct the stem.
Stem Construction
Add the wire before closing the green section so you can secure it directly behind the flower.
- Step 1: Stuff the green section if desired.
- Step 2: Cut 2 short lengths of florist wire about 20 cm long and fold each in half. Thread them through the back of the flower and twist into place. If the wire is thin enough, you can use a yarn needle. Twist both pieces together and pull the remaining yarn tails alongside the wire.
Stem Closure
- Round 4: Sc2tog until last st, 1 sc in last st, sl st in first sc to join. Sew any remaining hole closed and place the tail alongside the others. (6)
Finishing
- Step 1: Cover the wire and remaining yarn ends, which should be shorter than the wire, with florist tape. Start at the top by the flower and work down. Continue slightly beyond the end of the wire, fold the tape over, twist it back up slightly and finish. Stretch the tape to activate the glue. To avoid sticky stems, wipe your fingers on a wet cloth as you work.
Crochet Tips
- Mark the first stitch: The ch 1 never counts as a stitch, so place a marker in the first sc of each applicable round. This makes the joins and final counts much easier to check.
- Protect the back loops: On front-loop rounds, angle your hook slightly upward so you don't split or catch the back loop. Those loops need to remain available for later rounds.
- Check one petal first: Work the first half petal slowly and confirm that the stitches fit along the chain before repeating it around. Use that first petal as your reference for the remaining repeats.
- Pause before closing: Don't work Stem Round 4 until the folded wire and yarn tails are in place. The reduced opening is meant to close snugly around them.
Keep Both Petal Passes Aligned
Round 3 builds one stitched side of every petal from a chain. Round 4 returns to those same chains and works the other side, so keep the chains untwisted and facing the same way as you move around.
At the top of each petal, place the sl st in the final chain before working down the edge. Return fully to the main circle before moving into the next half petal, or the bases can crowd together.
Ways to Adapt Your Crochet Sunflower
- Make only the flower head: Skip the Stems, Stem Construction and Stem Closure sections. In this version, weave the brown and yellow tails securely into the back instead of saving them to run beside the wire.
- Try another sport-weight fiber: Cotton can give the stitches a firmer hand, while acrylic may feel more flexible. Keep all three yarns similar in thickness so the layered rounds still meet neatly.
- Adjust the hook carefully: A slightly smaller hook can make the fabric denser, while a larger hook can loosen the petals and change the overall size. Choose a hook that keeps the stitches tidy without making them difficult to enter.
- Change the yarn colors: Replace any of the listed brown, yellow or green yarns with your preferred combination. This won't alter the stitch counts or construction.
- Leave the green section unstuffed: Stuffing is optional. Without it, the crocheted base will be less padded, but the folded florist wire still supplies the main stem support.
Fixing Petal and Stem Problems
- The skipped loops are hard to find: Tilt the work and identify the horizontal loops that weren't used during the previous front-loop round. If one was caught accidentally, ease the stitch out and redo it before continuing.
- A petal twists during Round 4: Flatten the half petal before starting its return pass and check that you're working into the same chain foundation. Correct the twist before the top sl st, since working down the edge will lock its position.
- The stem doesn't end with 11 stitches: Round 3 uses 5 decrease repeats across the first 15 stitches, followed by 1 sc in the final stitch. If your count differs, check for a missed sc2tog or an accidental stitch in the joining sl st.
Where Your Sunflower Can Sit
Place the wired flower in a narrow vase or make several stems for a grouped arrangement. If you omit the stem, the finished flower head can be attached to another decor project once all ends are secured.
Washing & Care
Check the yarn label before cleaning because the fiber content isn't specified. For the wired version, spot clean gently and avoid soaking the florist tape or wire. Reshape the petals with your fingers and let the piece dry fully.
More Crochet Flower Home Decor Patterns
Frequently Asked Questions
Can I make the sunflower without a stem?
Yes, the entire stem is optional. Stop after the petals and secure the brown and yellow ends neatly at the back. The instruction not to weave them in supports the wired version, where those tails run beside the wire and disappear beneath florist tape; without a stem, they need a normal secure finish.
Which back loops do I use for the stem?
Use the back loops left unused when Petals Round 3 was worked in the front loops of Petals Round 2. These loops form a complete ring behind the petals. Check that you have 16 available before beginning the green yarn, since that number controls the stem shaping that follows.
Why aren't the brown and yellow ends woven in right away?
Those ends are carried down beside the florist wire in the stemmed version. Florist tape covers the yarn tails and wire together, helping create one wrapped length without extra bumps at the back of the flower. Keep the tails shorter than the wire so they don't extend beyond its covered end.
How many petals should I have?
You should have 16 complete petals after Petals Round 4. Round 3 makes 16 half petals by using each front loop around the 16-stitch circle, and Round 4 completes the opposite side of each one. If the number is off, check whether a front loop was skipped or used more than once.
Can I skip the florist wire?
Yes, if you're making only the flower head. For the full stemmed version, the folded wire provides the support that yarn and florist tape alone can't reliably supply. The pattern uses 2 folded lengths twisted together, so replacing them with a single thin strand may leave the stem less stable.
What did you change or add to your sunflower, whether it was the colors, stem or another finishing detail? Tell me about your version in the comments.



