
When you're ready for a relaxed seasonal project, the Pumpkin Motif Crochet Throw gives your hands a satisfying mix of repeated rounds and small appliqué details. You can settle into the square-making rhythm, then enjoy giving each pumpkin its own features.

You won't have to wrestle with an entire throw in one piece or manage complicated garment shaping. Most of the fabric grows through familiar dc rounds, while the smaller face and letter pieces add welcome changes of pace!
Jump to:
- Why You'll Love This Pattern
- Pattern Details
- Yarn and Supplies
- Stitches & Abbreviations
- How to Crochet the Pumpkin Motif Throw
- Tips for the Best Results
- Ways to Make This Pumpkin Throw Your Own
- Throw Ideas for Halloween at Home
- Washing & Care
- More Crochet Patterns for Seasonal Home Decor
- Frequently Asked Questions
Why You'll Love This Pattern
- Portable square construction: You make the throw as separate squares, so most of the project stays easy to hold and carry until assembly.
- A steady central rhythm: The square rounds repeat the same corner structure as they grow, which keeps the larger portion of the crochet calm and predictable.
- Varied appliqué practice: The four faces use circles, rows, increases, basic shaping, and work along both sides of a foundation chain. You'll get variety without committing to a large shaped piece.
- Clear final layout: All nine square positions are listed in the assembly instructions, so you can build the grid methodically before sewing.
Pattern Details
- Skill Level: Easy
- Finished Size: Approx. 49 in. × 49 in. [124.5 × 124.5 cm].
- Gauge: 16 sts = 5 in. [12.7 cm]; 6 rows = 4 in. [10 cm].
- Yarn Weight: Medium (4)
- Time to Make: about 20-30 hours
Yarn and Supplies
Gather all five yarn colors before you begin, since the squares, appliqués, seams, and border each call for specific color roles. Keep a yarn needle nearby because the long appliqué tails become your sewing strands later.
- Red Heart Super Saver, solid colors: 7 oz [198 g], 364 yd [333 m]; heathers: 5 oz [141 g], 244 yd [223 m]. Color A: 312 Black, 2 skeins; Color B: 254 Pumpkin, 2 skeins; Color C: 400 Grey Heather, 1 skein; Color D: 356 Amethyst, 1 skein; Color E: 672 Spring Green, 1 skein.: If you substitute yarn, choose a medium-weight option and make a gauge swatch first. Compare yardage rather than skein count because the solid and heather skeins listed here contain different amounts.
- Size U.S. I-9 [5.5 mm] Susan Bates crochet hook, or size needed to obtain gauge: The listed hook is a starting point. Change hook size if needed to match gauge so all nine squares finish consistently.
- Yarn needle
- Scissors
Stitches & Abbreviations
- ch - chain
- dc - double crochet
- dc3tog - double crochet 3 stitches together
- hdc - half double crochet
- sc - single crochet
- sl st - slip stitch
- st(s) - stitch(es)
- tr - treble crochet
corner: Work (2 dc, 1 tr) in the first indicated st and (1 tr, 2 dc) in the next indicated st.
How to Crochet the Pumpkin Motif Throw
Make the squares first, complete and attach the appliqués, join the grid, and finish with the two-round border.
The beginning ch-3 counts as the first dc throughout the blanket squares. Use the long appliqué tails to sew the face features and letters in place. The written layout identifies the position of every square, but the exact placement and orientation of the individual face features and letters depend on the assembly diagram.
Pumpkin Squares (Make 5)
- Round 1: With B, ch 4 and join with sl st in first ch to form a ring. Ch 3, 11 dc in ring, join with sl st in top of beginning ch-3. (12)
- Round 2: Ch 3, *corner in next 2 dc, dc in next dc; rep from * 2 more times, corner in next 2 dc, join with sl st in top of beginning ch-3.
- Round 3: Ch 3, dc in next 2 dc, *corner in next 2 tr, dc in next 5 dc; rep from * 2 more times, corner in next 2 tr, dc in next 2 dc, join with sl st in top of beginning ch-3.
- Round 4: Ch 3, dc in next 4 dc, *corner in next 2 tr, dc in next 9 dc; rep from * 2 more times, corner in next 2 tr, dc in next 4 dc, join with sl st in top of beginning ch-3.
- Round 5: Ch 3, dc in each dc across to corner tr, *corner in next 2 tr, dc in each dc across to corner tr; rep from * 2 more times, corner in next 2 tr, dc in each remaining dc across, join with sl st in top of beginning ch-3.
- Rounds 6-9: Repeat Round 5. Fasten off at end of last round.
- Round 10: Join A in same st as last round join and repeat Round 5. Fasten off.
Striped Squares (Make 4)
- Rounds 1-2: With B, work as for Rounds 1 and 2 of Pumpkin Square. Fasten off at end of last round.
- Rounds 3-5: Join E in same st as last round join and repeat Rounds 3-5 of Pumpkin Square. Fasten off at end of last round.
- Rounds 6-7: Join D in same st as last round join and repeat Round 5 of Pumpkin Square. Fasten off at end of last round.
- Rounds 8-9: Join C in same st as last round join and repeat Round 5 of Pumpkin Square. Fasten off at end of last round.
- Round 10: Repeat Round 10 of Pumpkin Square with A. Fasten off.
Pumpkin Face #1, Eye (Make 2)
This face is assigned to the top-left square on the assembly diagram.
- Round 1: With A, ch 2. Work 6 sc in 2nd ch from hook. (6)
- Round 2: Work 2 sc in each sc around. (12)
- Round 3: *Sc in next sc, 2 sc in next sc; rep from * around. Fasten off, leaving a long end. (18)
Pumpkin Face #1, Nose
- Rounds 1-2: With A, ch 2. Repeat Rounds 1 and 2 of Face #1 Eye. Fasten off, leaving a long end. (12)
Pumpkin Face #1, Mouth
- Round 1: With A, ch 12 and join with sl st in first ch to form a loop. Ch 2, which counts as first hdc, work 23 hdc in ring, and join with sl st in top of beginning ch-2. Fasten off, leaving a long end. (24)
Pumpkin Face #1, Eyebrow (Make 2)
- Row 1: With A, ch 7. Sc in 2nd ch from hook and in next ch, 2 sc in each of next 2 chs, sc in last 2 chs. Fasten off, leaving a long end.
Pumpkin Face #2, Eye (Make 2)
This face is assigned to the bottom-left square on the assembly diagram.
- Round 1: With A, ch 2. Work 6 sc in 2nd ch from hook.
- Round 2: (3 sc in next sc, sc in next sc) 3 times. (12)
- Round 3: Sc in next sc, (3 sc in next sc, sc in next 3 sc) 2 times, 3 sc in next sc, sc in next 2 sc, join with sl st in first sc. Fasten off, leaving a long end.
Pumpkin Face #2, Nose
- Rounds 1-3: Work Rounds 1-3 as given for Face #2 Eye. Fasten off, leaving a long end.
Pumpkin Face #2, Mouth
- Row 1: With A, ch 5. Sc in 2nd ch from hook and each remaining ch across, ch 1, turn. (4)
- Row 2: Sc in each sc across, ch 1, turn.
- Row 3: Sc in each sc across, ch 5, turn.
- Row 4: Sc in 2nd ch from hook and in next 3 chs, ch 1, turn. (4)
- Row 5: Sc in each sc across, ch 1, turn.
- Row 6: Sc in each sc across, ch 1, do not turn; work 6 sc across top of teeth, ch 4, turn.
- Row 7: Sl st in 2nd ch from hook and in next 2 chs, sc in next 6 sc, ch 4, turn.
- Row 8: Sl st in 2nd ch from hook and in next 2 chs, sl st in next sc. Fasten off, leaving a long end.
Pumpkin Face #3, Eye (Make 2)
This face is assigned to the top-right square on the assembly diagram.
- Row 1: With A, ch 6. Sc in 2nd ch from hook, hdc in next st, dc in next 2 sts, tr in last st, ch 1, turn.
- Row 2: Sc in next 5 sts, 3 sc in tip; working along opposite side of foundation ch, sc in next 5 chs, ch 1, turn.
- Row 3: Sc in next 6 sc, 3 sc in next sc, sc in remaining 6 sc. Fasten off, leaving a long end.
Pumpkin Face #3, Nose
- Rows 1-2: Repeat Rows 1 and 2 of Face #3 Eye. Fasten off at end of last row, leaving a long end.
Pumpkin Face #3, Mouth
- Row 1: With A, ch 25. Dc in 4th ch from hook, dc in next 2 chs, (3 dc in next ch, dc in next ch, dc3tog, dc in next ch) 3 times, dc in last ch. Fasten off, leaving a long end.
Pumpkin Face #4, Eye (Make 2)
This face is assigned to the bottom-right square on the assembly diagram.
- Round 1: With A, ch 6. Sc in 2nd ch from hook and in next 3 chs, 3 sc in last ch; working on opposite side of ch, work sc in next 3 chs, 2 sc in last ch. (12)
- Round 2: Work 2 sc in next sc, sc in next 3 sc, 2 sc in next 3 sc, sc in next 3 sc, 2 sc in next 2 sc. (18)
- Round 3: *Sc in next 2 sc, 2 sc in next sc; rep from * around. Fasten off, leaving a long end. (24)
Pumpkin Face #4, Nose
- Row 1: With A, ch 4 and join with sl st in first ch to form a ring. Ch 3, 9 dc in ring, ch 1, turn. (10)
- Row 2: Work 2 sc in next dc, sc in next 8 dc, 2 sc in last dc. Fasten off, leaving a long end.
Pumpkin Face #4, Mouth
- Row 1: With A, ch 21. Sc in 2nd ch from hook and in next 2 chs, hdc in next 3 chs, dc in next 8 chs, hdc in next 3 chs, sc in remaining 3 chs. Fasten off, leaving a long end.
BOO! Appliqué, Letter B
These letters are attached to the center Pumpkin Square.
- Row 1: With A, ch 13. Sc in 2nd ch from hook and in each remaining ch across, ch 9, turn.
- Row 2: Skip next 5 sc, sc in next sc, ch 9, skip next 5 sc, sc in last sc, ch 1, turn.
- Row 3: Sc in next sc, sc in next 9 chs, sl st in next sc, sc in next 9 chs, sl st in top of last st. Fasten off, leaving a long end.
BOO! Appliqué, Letter O (Make 2)
- Round 1: With A, ch 25 and join with sl st in first ch to form a ring. Ch 1, sc in same ch as joining and each remaining ch around, join with sl st in first sc. Fasten off, leaving a long end.
BOO! Appliqué, Exclamation Point Top
- Row 1: With A, ch 14. Hdc in 3rd ch from hook and in next 7 chs, sc in last 4 chs. Fasten off, leaving a long end.
BOO! Appliqué, Exclamation Point Dot
- Round 1: With A, ch 2. Work 6 sc in 2nd ch from hook, join with sl st in first sc. Fasten off, leaving a long end.
Assembly
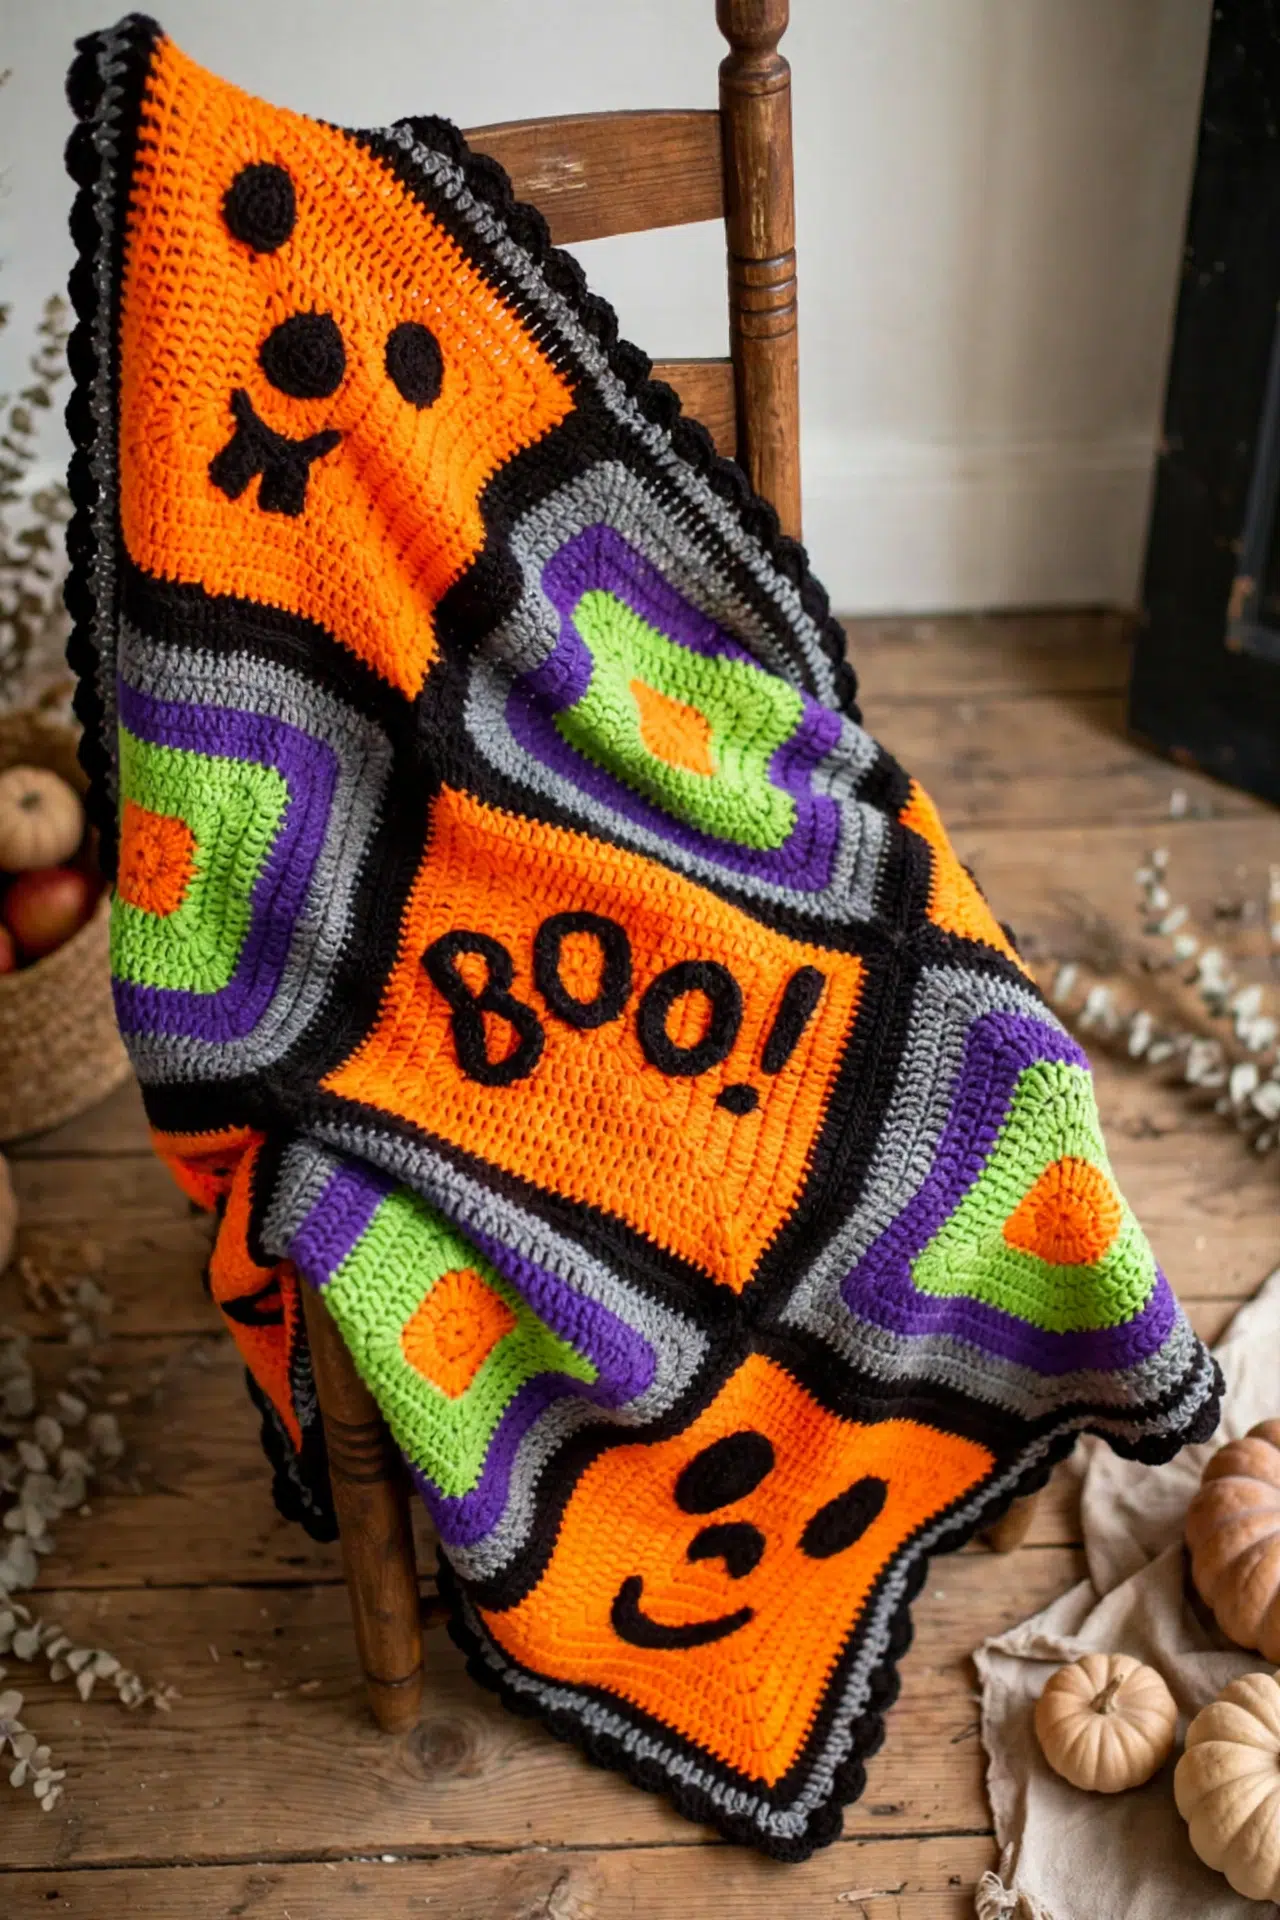
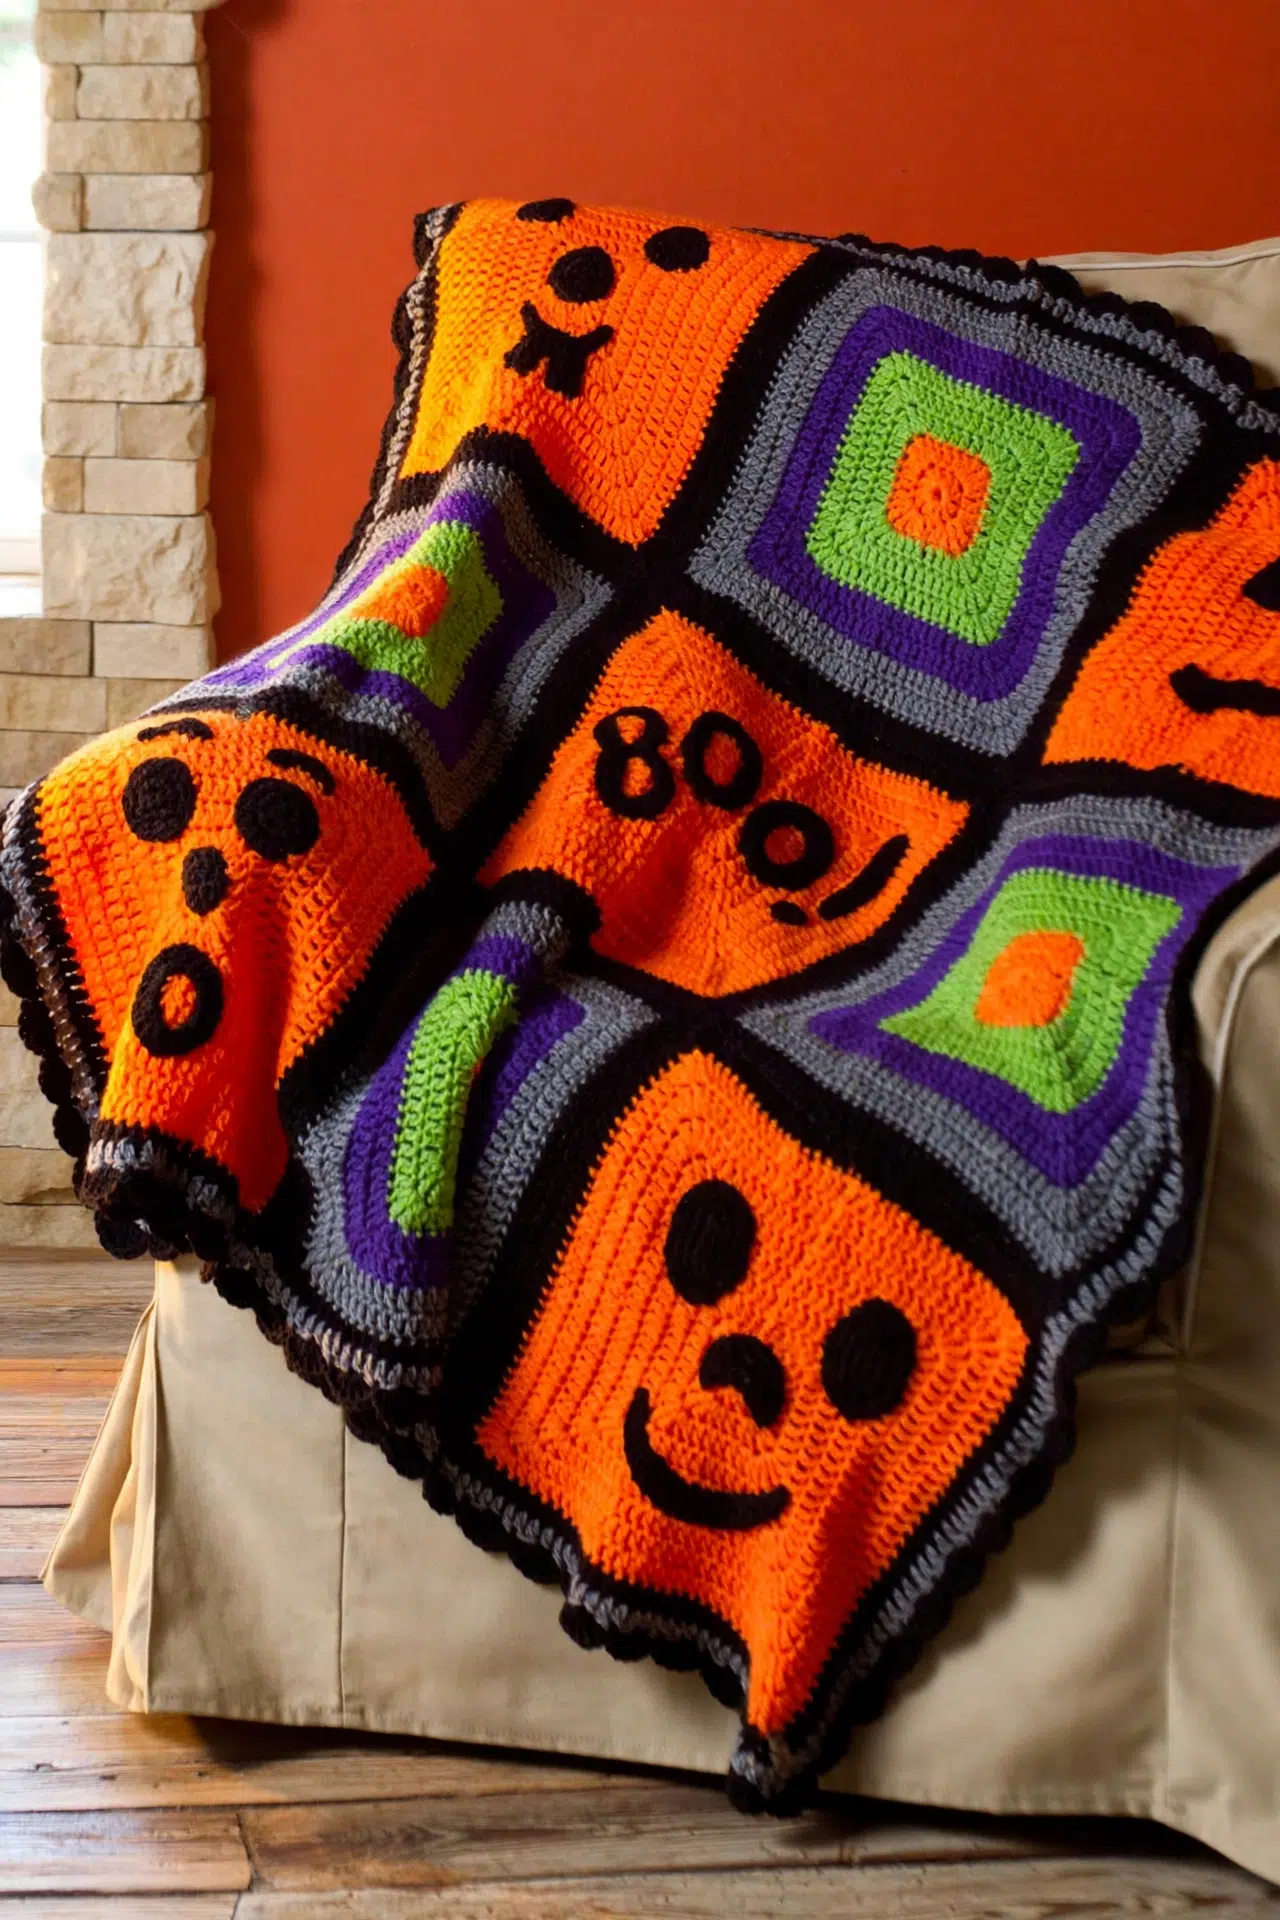
- Step 1: Using the long yarn tails, stitch the face features and letters onto the Pumpkin Squares according to the assembly diagram. Arrange the squares as follows: Top Left, Pumpkin Face #1; Top Center, Striped Square; Top Right, Pumpkin Face #3; Middle Left, Striped Square; Center, Pumpkin Square with BOO!; Middle Right, Striped Square; Bottom Left, Pumpkin Face #2; Bottom Center, Striped Square; Bottom Right, Pumpkin Face #4.
Use the assembly diagram for the exact placement and orientation of the individual appliqué pieces.
- Step 2: Join all 9 squares in a 3 × 3 grid by sewing through the back loops only of Round 10.
Border
- Round 1: Join C with sl st in any dc on the outside edge of the throw. Ch 3, dc in each st around, working 5 dc between the 2 outside corner tr sts. Join with sl st in first st. Fasten off and weave in ends.
- Round 2: Join A with sc in any dc of Round 1. *Skip next dc, 5 dc in next dc, skip next dc, sc in next dc; rep from * around. Join with sl st in first sc. Fasten off and weave in all yarn tails.
Tips for the Best Results
- Count the first square carefully: The beginning ch-3 counts as a dc throughout the blanket squares. Mark it if needed so you don't add an extra stitch beside the join.
- Keep every corner easy to find: Place a marker between the 2 tr stitches at each corner. Later rounds tell you to crochet across to the corner tr, so clear markers make the repeated round much easier to follow.
- Block before assembly: Bring all nine squares to matching measurements before sewing. Even edges help the back-loop seams lie smoothly and make Border Round 1 easier to space.
- Pin the appliqués first: Arrange every eye, nose, mouth, eyebrow, and letter with the diagram before sewing. Pinning prevents small pieces from shifting and lets you check the whole face before committing the long tails.
Ways to Make This Pumpkin Throw Your Own
- Try another medium-weight yarn: A different medium-weight yarn can work, but match both parts of the gauge and confirm your yardage. A change in fiber or twist can alter the square size, appliqué firmness, and finished drape.
- Choose a new color plan: You can replace any of the five colors while keeping the A-E labels consistent. Write your new color beside each letter before starting so the stripe changes and final border remain easy to follow.
- Move the faces around: The four face squares can trade corner positions without changing the size or construction. Keep the BOO! square in the center if you want to preserve the written grid's central focus.
- Simplify the facial pieces: Leave off the eyebrows from Face #1 or use one eye and nose style on more than one square. This reduces the number of small pieces, though it also changes the four distinct face designs.
- Use a simpler final edge: You can stop after Border Round 1 if you prefer fewer finishing stitches. The throw will be slightly smaller, and you'll omit the repeated sc-and-dc border sequence from Round 2.
Throw Ideas for Halloween at Home
A throw like this fits naturally over a sofa, reading chair, or the end of a guest bed during Halloween season. Fold it with the center square facing outward when it isn't in use, or pair it with a seasonal movie basket for a practical handmade gift.
Washing & Care
The specified Red Heart Super Saver yarn is acrylic and can be machine washed and dried according to the current yarn-label directions. Make sure every appliqué tail is firmly woven in before washing. A gentle cycle and careful reshaping afterward will help the square seams, facial pieces, and border settle evenly.
More Crochet Patterns for Seasonal Home Decor
- Pumpkin Vines Home Decor Crochet Pattern
- Autumn Crochet Pumpkin
- Sunflower Granny Square Blanket Crochet Pattern
Frequently Asked Questions
How many squares do I make altogether?
You make 9 squares in total: 5 Pumpkin Squares and 4 Striped Squares. Four Pumpkin Squares receive the numbered faces, while the fifth receives the BOO! letters and goes in the center. Completing all nine before assembly lets you compare their measurements and correct any tension differences.
Does the beginning ch-3 count as a stitch?
Yes, the beginning ch-3 counts as the first dc throughout the blanket squares. Treating it as a stitch keeps each side balanced and prevents an extra dc from appearing near the round join. Joining into the top of that ch-3 also closes each round in the intended place.
When should I sew on the faces and letters?
Attach all appliqués before joining the nine squares. Individual squares are easier to rotate and hold while you sew small features in place, and the long finishing tails remain manageable. Once the faces and center lettering are secure, arrange the full grid and sew through the back loops of Round 10.
Can I complete the assembly without the diagram?
You can build the 3 × 3 square grid from the written position list, but the diagram is needed for the exact placement and orientation of each facial feature and letter. Pin those pieces first and check their spacing as a group, since small changes in angle or distance affect how the components relate to one another.
Share this pattern with a Halloween-loving crocheter who'd enjoy making each pumpkin face their own. I'd love to hear which appliqué was your favorite in the comments.



