
That waiting medium-weight yarn is a good excuse to put a Colorful Crochet Adult Hat between your larger projects. The body uses steady half double crochet rounds, while the smaller flowers and leaves give your hands a welcome change of pace.

Once the ends are woven in, you've got an adult hat with handmade floral details placed exactly where you want them. It's useful, personal, and satisfying to finish!
Jump to:
Why I Make These on Repeat
- Steady hat construction: Most of the hat is worked in joined half double crochet rounds, so you can settle into an easy rhythm without complicated shaping.
- Small contrast sections: Each flower and leaf uses a modest amount of yarn, making the motifs practical for medium-weight leftovers that match the pattern gauge.
- Portable motif work: The roses, pansy, daisy, and leaves are separate pieces. You can make them in short sessions, then arrange everything before committing to the final placement.
- Room for your choices: The embellishments aren't attached until the end, so you control their spacing and grouping rather than trying to crochet them directly into the hat.
Pattern Details
- Skill Level: Easy
- Finished Size: One size to fit Adult.
- Gauge: 12 hdc and 10 rows = 4 in. [10 cm].
- Yarn Weight: Medium (4)
- Time to Make: about 8-12 hours
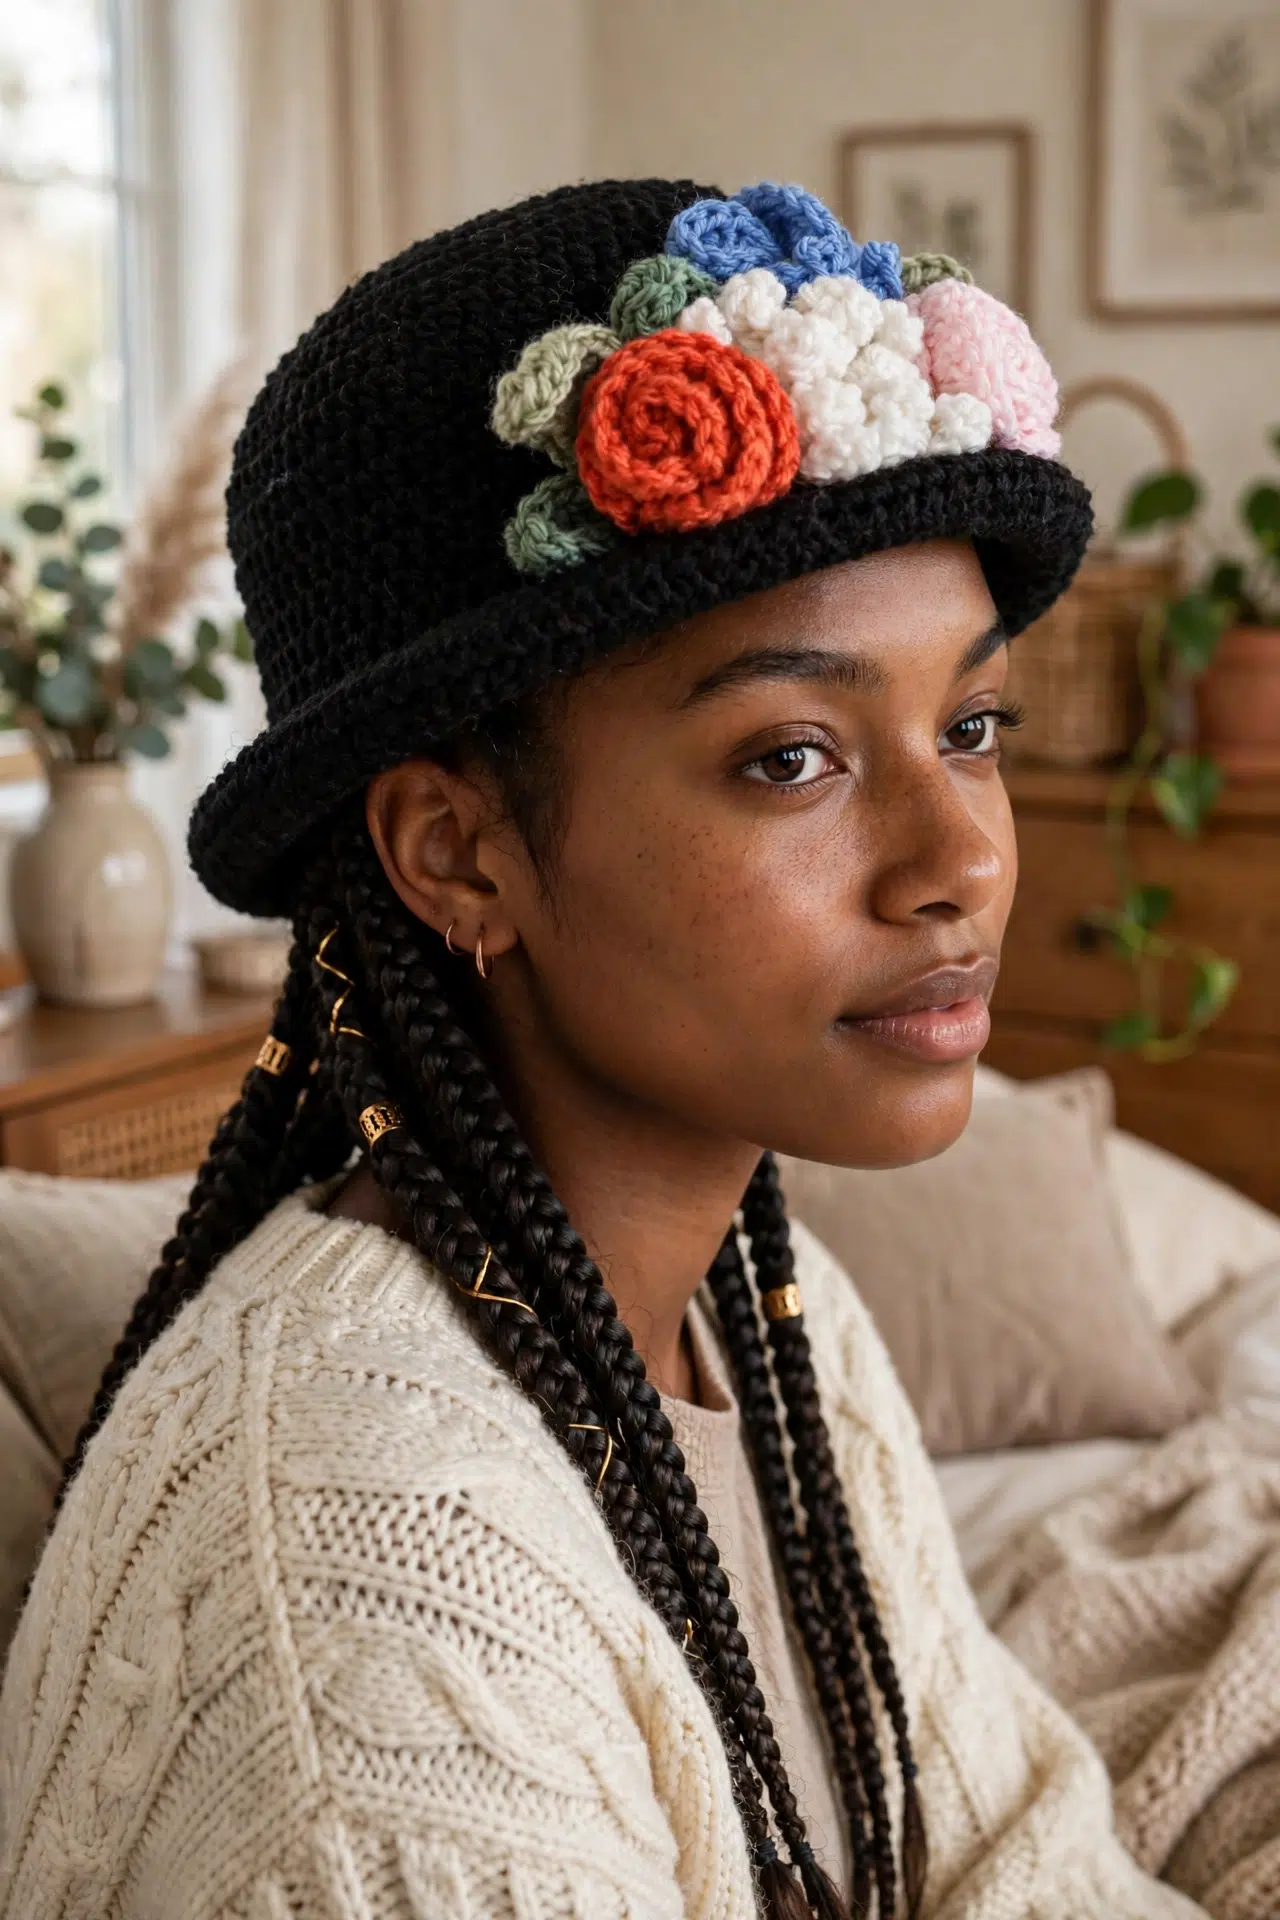
Yarn and Supplies
Gather your medium-weight yarn, a 5.5 mm hook, a marker, and a yarn needle before you begin. The marker is especially helpful for identifying the first stitch in each joined round.
- Red Heart Super Saver (7 oz / 198 g; 362 yds / 333 m): Main Color (MC), Black (0312), 1 ball or 157 yds / 143.5 m
- Red Heart Super Saver Super Craft Kit Pastels (12 balls: 50 g / 1.7 oz each; 85 m / 93 yds each): Contrast A, Light Sage, 1 ball or 15 yds / 14 m
- Contrast B, Frosty Green, 1 ball or 20 yds / 18 m
- Contrast C, Winter White, 1 ball or 20 yds / 18 m
- Contrast D, Coral, 1 ball or 18 yds / 16.5 m
- Contrast E, Light Periwinkle, 1 ball or 15 yds / 14 m
- Contrast F, Baby Pink, 1 ball or 18 yds / 16.5 m
- Contrast G, Pale Yellow, 1 ball or 10 yds / 9 m
- Size U.S. I/9 (5.5 mm) Susan Bates Silvalume crochet hook, or size needed to obtain gauge: Use the listed hook as a starting point, but change sizes if needed to match the gauge. Hat fit depends on the fabric you make, not the number printed on the hook.
- Susan Bates yarn needle: Choose a needle that passes comfortably through the motif layers. You'll use it to secure the coiled roses and attach every flower and leaf.
- Susan Bates stitch marker
Stitches & Abbreviations
- approx - approximately
- beg - begin, beginning, or begins
- ch - chain or chains
- dc - double crochet
- hdc - half double crochet
- rem - remain or remaining
- rep - repeat
- rnd(s) - round or rounds
- RS - right side
- sc - single crochet
- sl st - slip stitch
- sp(s) - space or spaces
- st(s) - stitch or stitches
- WS - wrong side
picot: Ch 3. Sl st in 3rd ch from hook.
How to Crochet the Colorful Adult Hat
Make the hat first, crochet each flower and leaf separately, then arrange and sew the motifs onto the side band or brim.
Ch 2 at the beginning of a round does not count as a stitch. Join all rounds with a sl st to the first stitch. Work the hat crown and body with MC. Contrast A is reserved for the small leaves. The exact flower and leaf placement is guided by the project photo rather than stitch-by-stitch placement.
Hat
- Step 1: With MC, ch 3.
- Round 1: 10 hdc in 3rd ch from hook. Join with sl st to first hdc. (10)
- Round 2: Ch 2. 2 hdc in each hdc around. Join with sl st to first hdc. (20)
- Round 3: Ch 2. *1 hdc in next hdc, 2 hdc in next hdc; rep from * around. Join with sl st to first hdc. (30)
- Round 4: Ch 2. *1 hdc in each of next 2 hdc, 2 hdc in next hdc; rep from * around. Join with sl st to first hdc. (40)
- Round 5: Ch 2. *1 hdc in each of next 3 hdc, 2 hdc in next hdc; rep from * around. Join with sl st to first hdc. (50)
- Round 6: Ch 2. *1 hdc in each of next 4 hdc, 2 hdc in next hdc; rep from * around. Join with sl st to first hdc. (60)
- Rounds 7-14: Ch 2. 1 hdc in each hdc around. Join with sl st to first hdc.
- Round 15: Ch 2. *1 hdc in each of next 5 hdc, 2 hdc in next hdc; rep from * around. Join with sl st to first hdc. (70)
- Round 16: Ch 2. *1 hdc in each of next 6 hdc, 2 hdc in next hdc; rep from * around. Join with sl st to first hdc. (80)
- Round 17: Ch 2. *1 hdc in each of next 7 hdc, 2 hdc in next hdc; rep from * around. Join with sl st to first hdc. (90)
- Rounds 18-21: Ch 2. 1 hdc in each hdc around. Join with sl st to first hdc.
- Round 22: Ch 1. Sl st in each hdc around. Join with sl st to first sl st. Fasten off.
Roses
Make 1 each with D and F.
- Step 1: Ch 27.
- Row 1: 1 dc in 4th ch from hook; the turning chain and this dc count as 2 dc. 1 dc in each ch to last ch. 1 hdc in last ch. Turn. (25)
- Row 2: Ch 3. *3 dc in each of next 3 dc, sl st in next dc; rep from * to end of row. Fasten off.
- Finishing Rose: Coil strip into a rose shape and sew through the layers to secure.
Pansy
Make 1.
- Step 1: With G, ch 4. Join with sl st to form a ring.
- Round 1: Ch 1. (2 sc in ring, ch 2) 2 times. (2 sc in ring, ch 5) 3 times. Join with sl st to first sc. Fasten off.
- Round 2: Join E with sl st to first ch-2 sp. Ch 2. (2 hdc, picot, 2 hdc) all in same ch-2 sp. Skip next sc. Sl st in next sc. (2 hdc, picot, 2 hdc) all in next ch-2 sp. *Skip next sc, sl st in next sc, (1 hdc, 9 dc, 1 hdc) all in next ch-5 sp; rep from * 2 more times. Skip next sc. Sl st in next sc. Join with sl st to first hdc. Fasten off.
Daisy
Make 1.
- Step 1: With G, ch 2.
- Round 1: 5 sc in 2nd ch from hook. Join with sl st to first sc. (5)
- Round 2: Ch 1. 2 sc in each sc around. Join with sl st to first sc. Fasten off. (10)
- Round 3: Join C with sl st to first sc. Ch 1. 1 sc in same sp as sl st. *Ch 7, 1 hdc in 3rd ch from hook, 1 hdc in next ch, 1 dc in each of next 3 ch, skip next sc of last rnd, 1 sc in next sc; rep from * around, ending with sl st in first sc. Five petals are formed.
The 5 petals from Round 3 alternate with the 5 petals from Round 4.
- Round 4: Ch 1. Working behind last rnd, 1 sc in next skipped sc from Round 2. *Ch 7, 1 hdc in 3rd ch from hook, 1 hdc in next ch, 1 dc in each of next 3 ch, skip next sc of Round 3, 1 sc in next skipped sc from Round 2; rep from * around, ending with sl st in first sc. Five petals are formed. Fasten off.
Large Leaf
Make 3.
- Step 1: With B, ch 8.
- Round 1: 1 sc in 2nd ch from hook. 1 hdc in each of next 2 ch. 1 dc in each of next 2 ch. 1 hdc in next ch. 5 hdc in last ch. Do not turn. Working into the opposite side in the remaining loops of the foundation chain, 1 hdc in next ch, 1 dc in each of next 2 ch, 1 hdc in each of next 2 ch, 1 sc in last ch. Join with sl st to first sc. Fasten off.
Small Leaf
Make 3.
- Step 1: With A, ch 5.
- Round 1: 1 sc in 2nd ch from hook. 1 hdc in next ch. 1 dc in next ch. (2 hdc, ch 2, sl st in 2nd ch from hook, 2 hdc) in last ch. Do not turn. Working into the opposite side in the remaining loops of the foundation ch, 1 dc in next ch, 1 hdc in next ch, 1 sc in last ch. Join with sl st to first sc. Fasten off.
Assembly
- Step 1: Using the yarn ends and a yarn needle, arrange and sew the completed flowers and leaves securely onto the side band or brim area of the hat.
Arrange the motifs as shown in the project photo or choose your own placement.
My Best Tips
- Mark the first stitch: Place your marker in the first hdc of each hat round. The beginning ch 2 doesn't count, and marking the true first stitch helps keep the join from shifting.
- Check every increase round: Count after Rounds 1-6 and again after Rounds 15-17. Those counts establish the crown and lower shaping, so it's much easier to correct a missed increase immediately.
- Set out the motifs first: Arrange all flowers and leaves on the finished hat before sewing. Pin or tack them temporarily if needed, then check that the grouping sits comfortably on the side band or brim.
- Secure the rose layers: Pass the yarn needle through several layers of each coiled strip, not only the bottom edge. This keeps the rose together while you're attaching it to the hat.
Ways to Adapt Your Crochet Hat
- Use a single motif color: You can crochet all the flowers and leaves in one contrast color. Keep the yarn at medium weight so the motif size and fabric remain close to the pattern.
- Change the hat depth: Add or remove plain rounds within Rounds 7-14 if you need a different depth. Try the hat on before Round 15 because those later rounds begin increasing the lower edge.
- Reduce the embellishments: It's fine to attach fewer motifs. Make the complete hat first, then stop adding flowers or leaves when the arrangement feels balanced and remains comfortable to wear.
- Move the grouping: The flowers and leaves can be placed anywhere along the side band or brim. Arrange them before threading your needle because moving a fully sewn rose takes more work than shifting a loose piece.
- Try another medium yarn: A different medium-weight yarn can work if it meets gauge. Softer fibers may make the hat and motifs less firm, while denser yarn can produce a stiffer fabric and a smaller fit.
Fixing Crown and Motif Problems
- The crown is rippling: First confirm the stitch counts and gauge. Extra increases or loose tension can create excess fabric, so recount the current round and compare your half double crochet gauge before continuing.
- The crown is cupping too soon: Check for missed increases in Rounds 2-6. Tight tension can also pull the crown inward, and moving to a larger hook may help if your stitch count is correct but your gauge is too small.
- The daisy petals aren't alternating: Work Round 4 behind Round 3 and anchor each new petal in a skipped sc from Round 2. Using those unused stitches positions the second set between the first five petals.
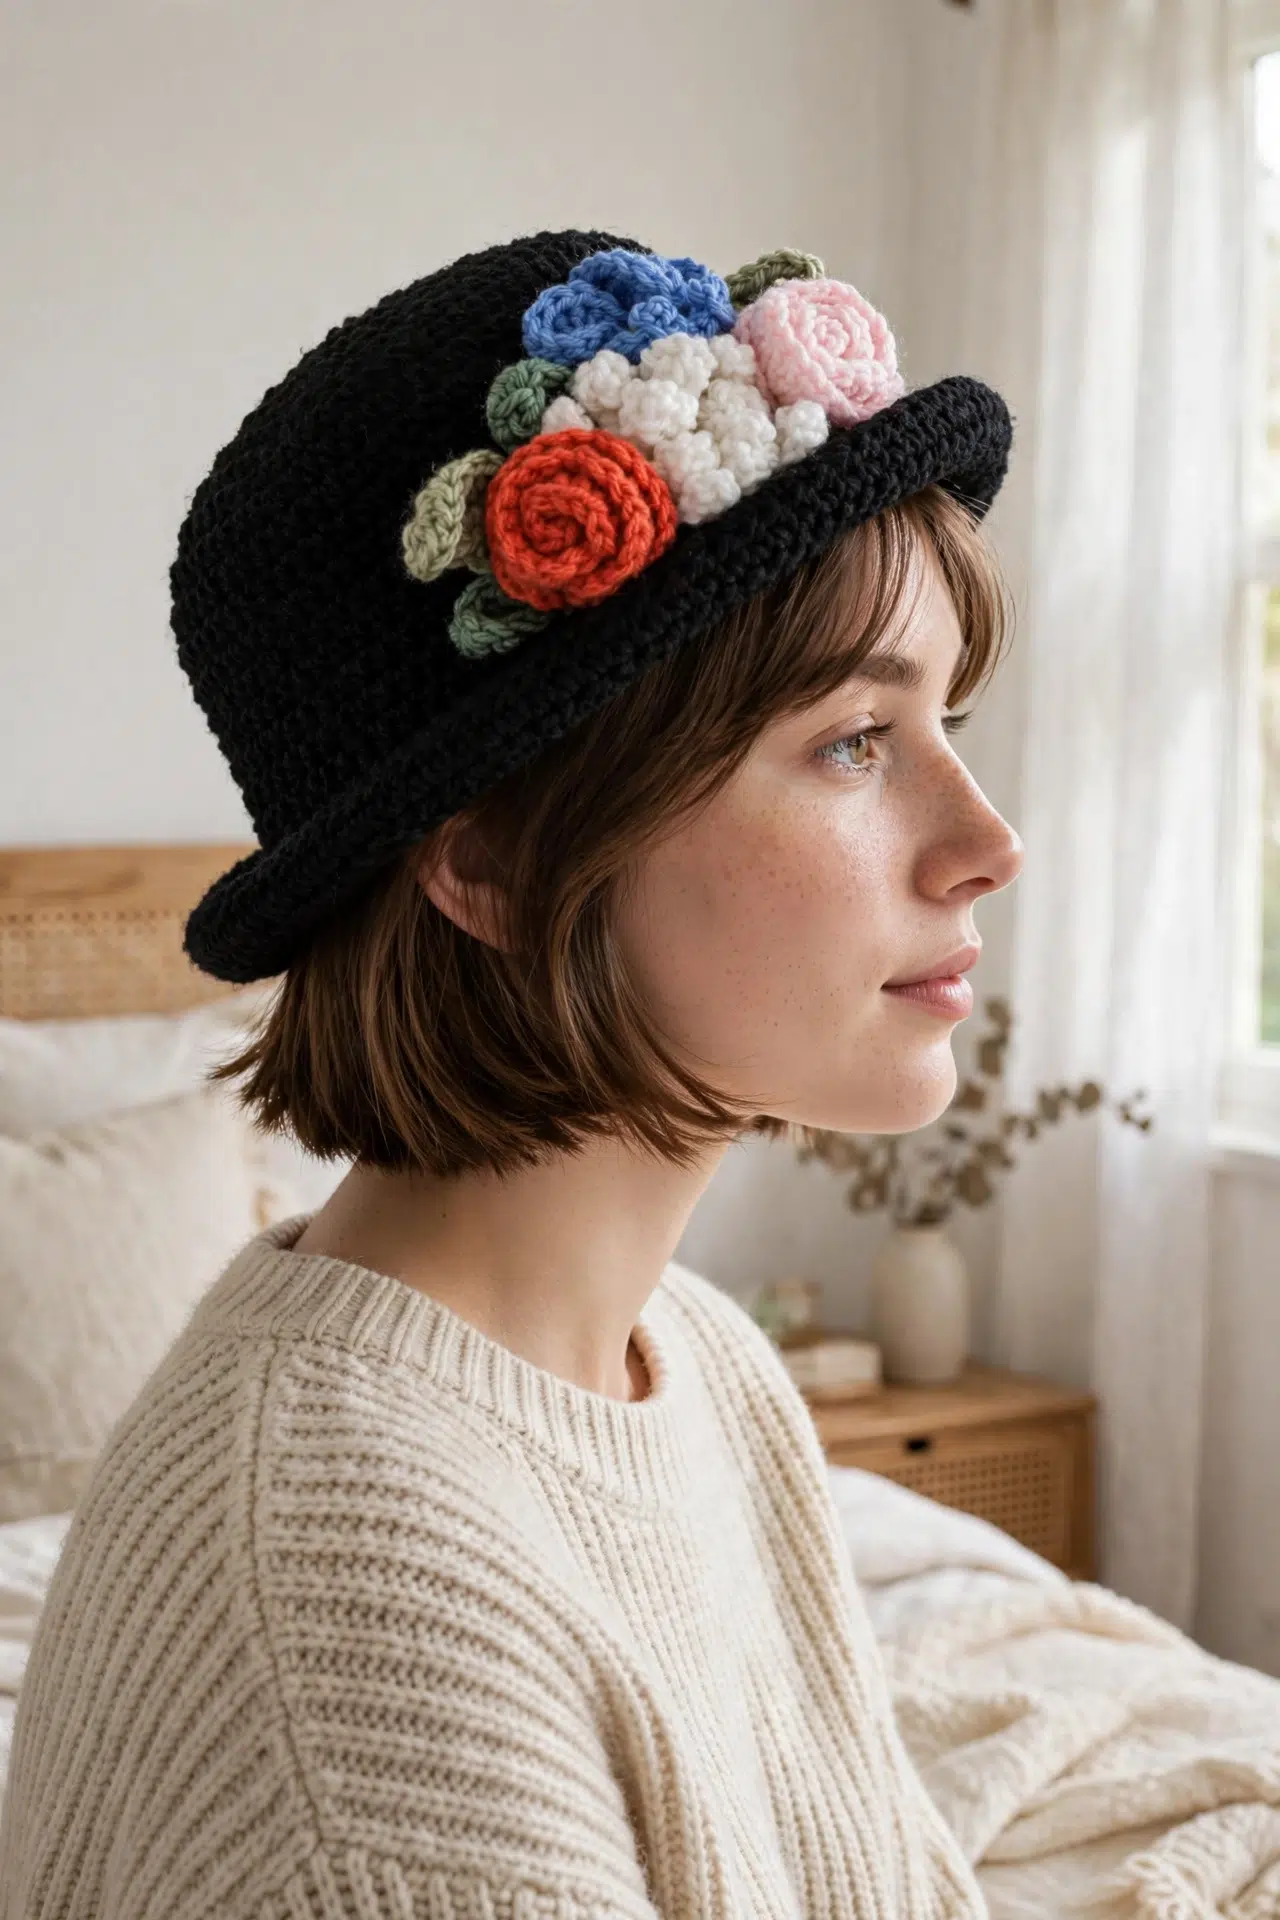
Washing & Care
Follow the washing instructions on both yarn labels, especially if you substitute a different fiber. For the listed acrylic yarns, avoid high heat because it can flatten the flowers and permanently change the fabric. Reshape the motifs after washing and let the hat finish drying in its proper form.
More Crochet Flower Patterns
- Sunflower Granny Stitch Phone Bag Crochet Pattern
- Flower Chain Bracelet Crochet Pattern
- Granny Flower Water Bottle Cozy Crochet Pattern
- Spring Crochet Flower Chains
Frequently Asked Questions
Which color do I use to begin the hat?
Begin the hat with MC, Black, and use it throughout the hat body. Contrast A is needed later for the three small leaves. Keeping those assignments separate also preserves the listed contrast amount for the leaf motifs and avoids an unintended color change between the crown and body.
Does the beginning ch 2 count as a half double crochet?
No, the beginning ch 2 never counts as a stitch. Work the first hdc into the first actual stitch of the previous round, then join to that hdc. If you count the chain as a stitch, you'll create an extra stitch and the increase totals will stop matching.
How many stitches should the plain hat rounds have?
Rounds 7-14 maintain 60 hdc, and Rounds 18-21 maintain 90 hdc. No increases are worked in those ranges, so each hdc receives one hdc. If your number changes, look near the join for a skipped first stitch or an accidental stitch in the beginning chain.
Can I make the hat deeper before starting the lower increases?
Yes, add plain hdc rounds after Round 7 and before Round 15, or remove some of Rounds 7-14. This changes depth without changing the 60-stitch circumference at that point. Try it on before proceeding because Rounds 15-17 widen the lower section.
When should I attach the flowers and leaves?
Attach every motif after the hat, flowers, and leaves are fully crocheted and fastened off. Loose pieces are easier to rearrange, and you can check the whole grouping before sewing. Secure the coiled roses through their layers first, then stitch all motifs firmly to the side band or brim.
What did you change or add to your hat, whether it was the colors, depth, or motif arrangement? Tell me about your version in the comments.



