
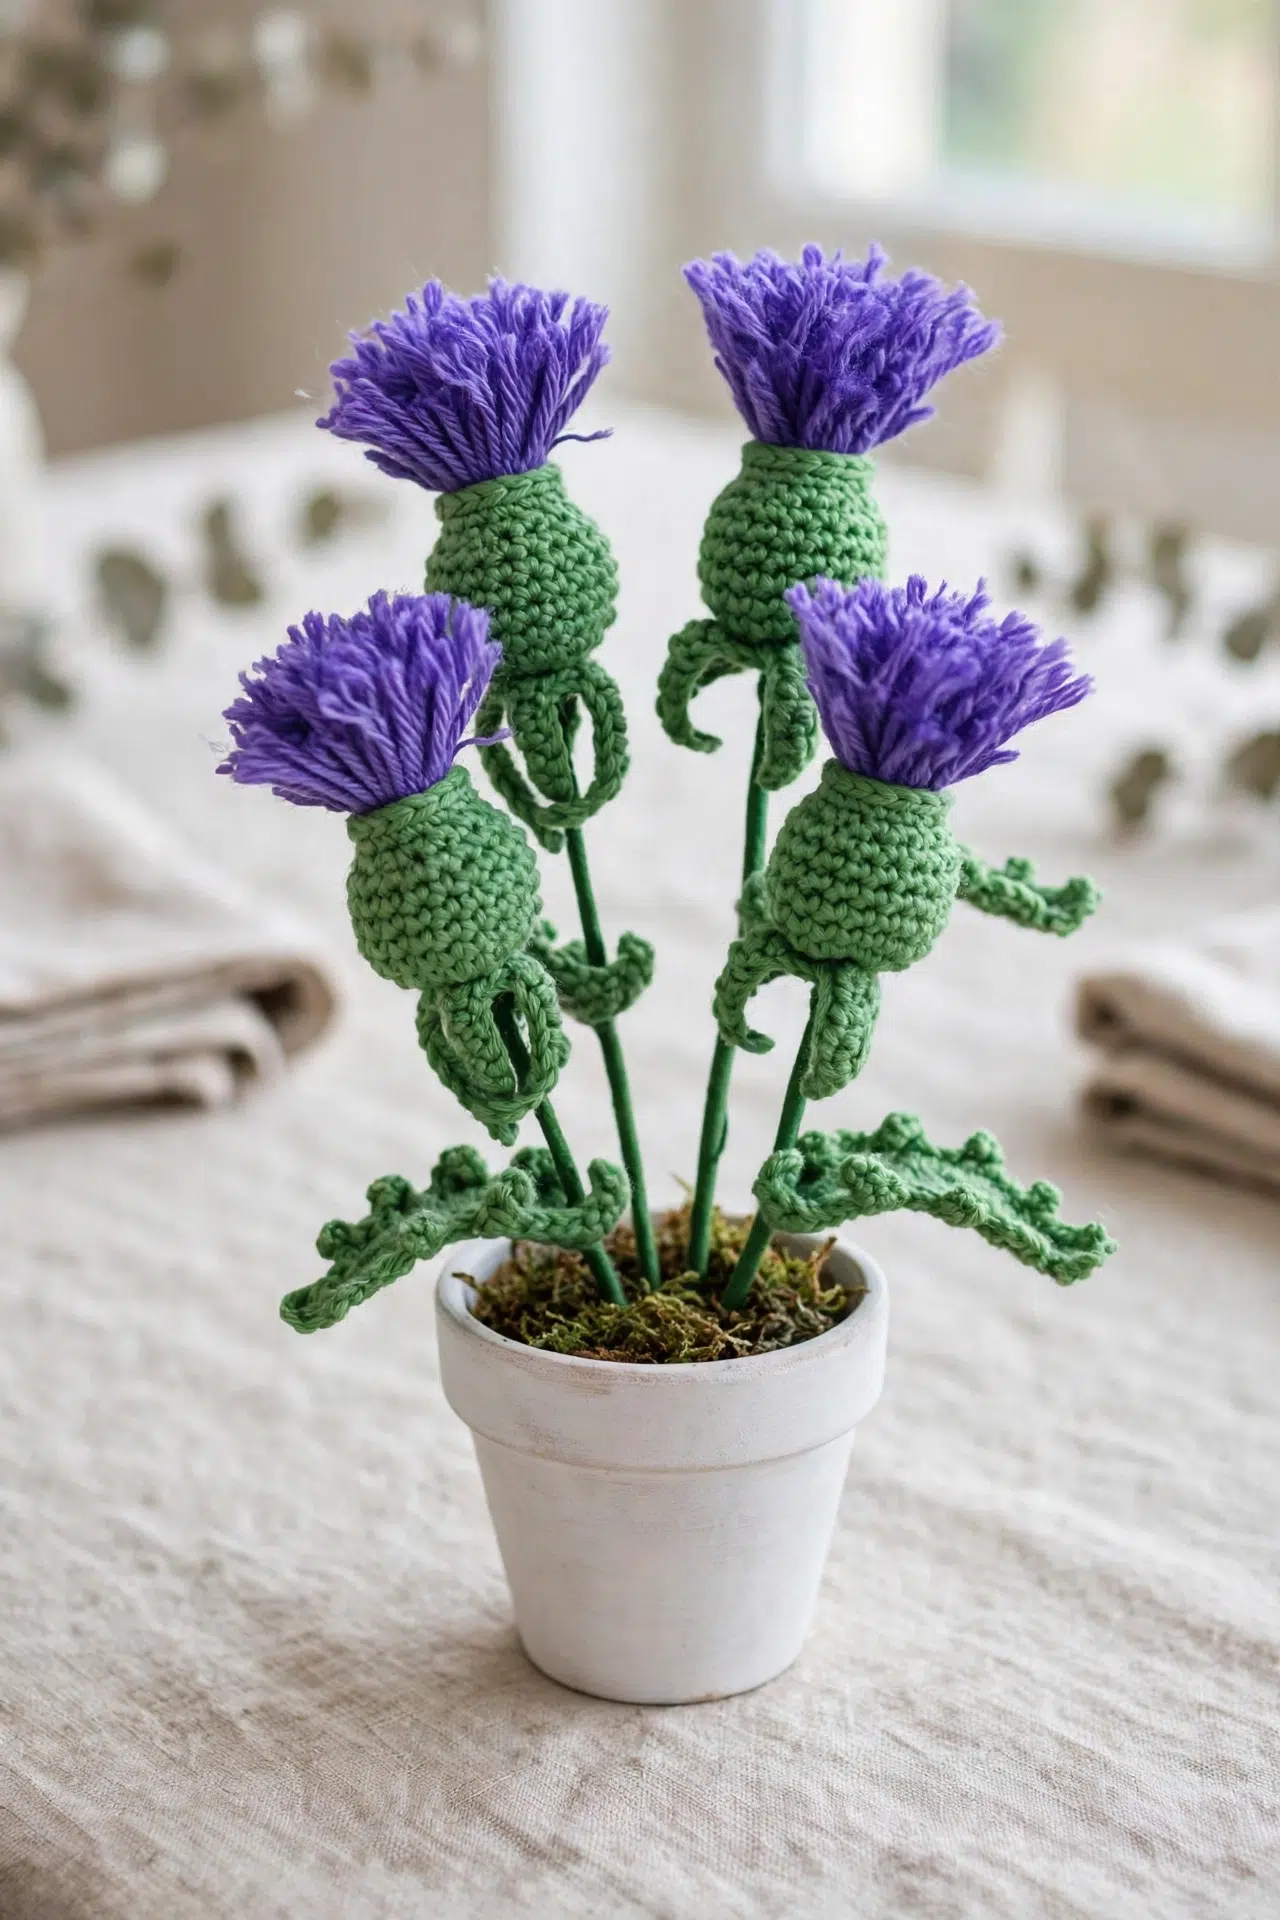
There’s something satisfyingly practical about a Purple Crochet Thistle Flower: basic stitches build the cup and leaf, while wire and florist tape give your hands the final shaping work. If you’re comfortable crocheting in rounds, decreasing, and working along both sides of a chain, you can settle into this project with confidence.

My favorite detail is the way the unused front loops from the cup become anchors for the final pointed round. You can adjust the bundle fullness, stem length, and number of leaves while keeping the same construction. Gather your yarn and wire, and enjoy each little stage!
Jump to:
- What Makes This Pattern Work
- Pattern Details
- Materials for This Flower
- Abbreviations
- How to Crochet the Purple Thistle Flower
- Tips for Success
- Ways to Adapt Your Crocheted Thistle
- Fixing Counts, Leaves, and Loose Centers
- Where Your Finished Thistle Can Stand
- Washing & Care
- More Crochet Flower Patterns
- Frequently Asked Questions
What Makes This Pattern Work
- Reserved loops do useful work: Round 2 is worked through the back loops so the front loops remain available for Round 12. That gives the final crochet details a secure attachment point without a separate seam.
- The center is enclosed as you crochet: You place the tied yarn bundle inside before Round 9, then the decrease round closes the cup around it. There’s no stuffing or complicated internal assembly.
- The stem has firm support: Four lengths of wire are twisted together, while florist tape secures the structure and traps the yarn tails. Folding the ends is an important part of making the stem safer to handle.
- Leaves are optional and repeatable: One leaf pattern is included, and you can repeat it for additional leaves. Each leaf is wired separately and attached close to the main stem rather than being given a long stem of its own.
Pattern Details
- Yarn Weight: Sport/Baby weight
- Time to Make: about 3-5 hours
Materials for This Flower
This flower combines ordinary crochet supplies with a few floral construction materials, so set out the wire tools before you begin assembly.
- Sport/Baby weight yarn in green and purple: Choose yarn that can be separated gently after the top loops are cut, and keep the green crochet fabric firm enough to hold the bundle.
- 2 mm crochet hook or similar
- Yarn needle
- Scissors
- Green florist tape
- 0.35 mm gauge florist wire or similar
- Wire cutters
Abbreviations
- ch - chain
- sl st - slip stitch
- st(s) - stitch(es)
- sc - single crochet
- hdc - half double crochet
- dc - double crochet
- chsp - chain space
- sc2tog - single crochet 2 together
How to Crochet the Purple Thistle Flower
Crochet the flower cup and leaf first, then add the wire, wrap the stem, and cut the center loops only after construction is complete.
Always start the first stitch of a new round in the same stitch as the previous sl st. The ch 1 at the end of a round does not count as a stitch throughout the pattern. Round 12 is worked into the skipped front loops from Round 2.
Flower
Keep the purple bundle tied securely and set it aside while you crochet the green cup through Round 8.
- Step 1: Using purple yarn, wrap the yarn around 4 fingers until you have a good puffy bundle. Tie the bundle in the middle by passing a short length of the same colored yarn through your fingers, then remove it from your hand. You will have a bow shape.
- Round 1: Using green yarn, crochet 7 sc into a ch-4 loop or magic circle, sl st in first sc to join, ch 1. (7)
- Round 2: In back loops only for this round, crochet 2 sc in each st around, sl st in first sc to join, ch 1. (14)
- Round 3: *1 sc in next st, 2 sc in next st; rep from * around. Sl st in first sc to join, ch 1. (21)
- Rounds 4-8: 1 sc in each st around, sl st in first sc to join, ch 1. (21)
- Round 9: *1 sc in next st, sc2tog; rep from * around. Sl st in first sc to join, ch 1. (14)
Place one end of the purple bow bundle into the green cup before working this round, then crochet around the bottom half of the bundle. This can be fiddly. Do not worry if the central knot shows because the following rounds will cover it.
- Round 10: 1 sc in each st around, sl st in first sc to join, ch 1. (14)
- Round 11: Sl st in each st around, sl st in first st to join. Fasten off and tie in all ends. Sew the remaining tail end to the bottom of the green cup. (14)
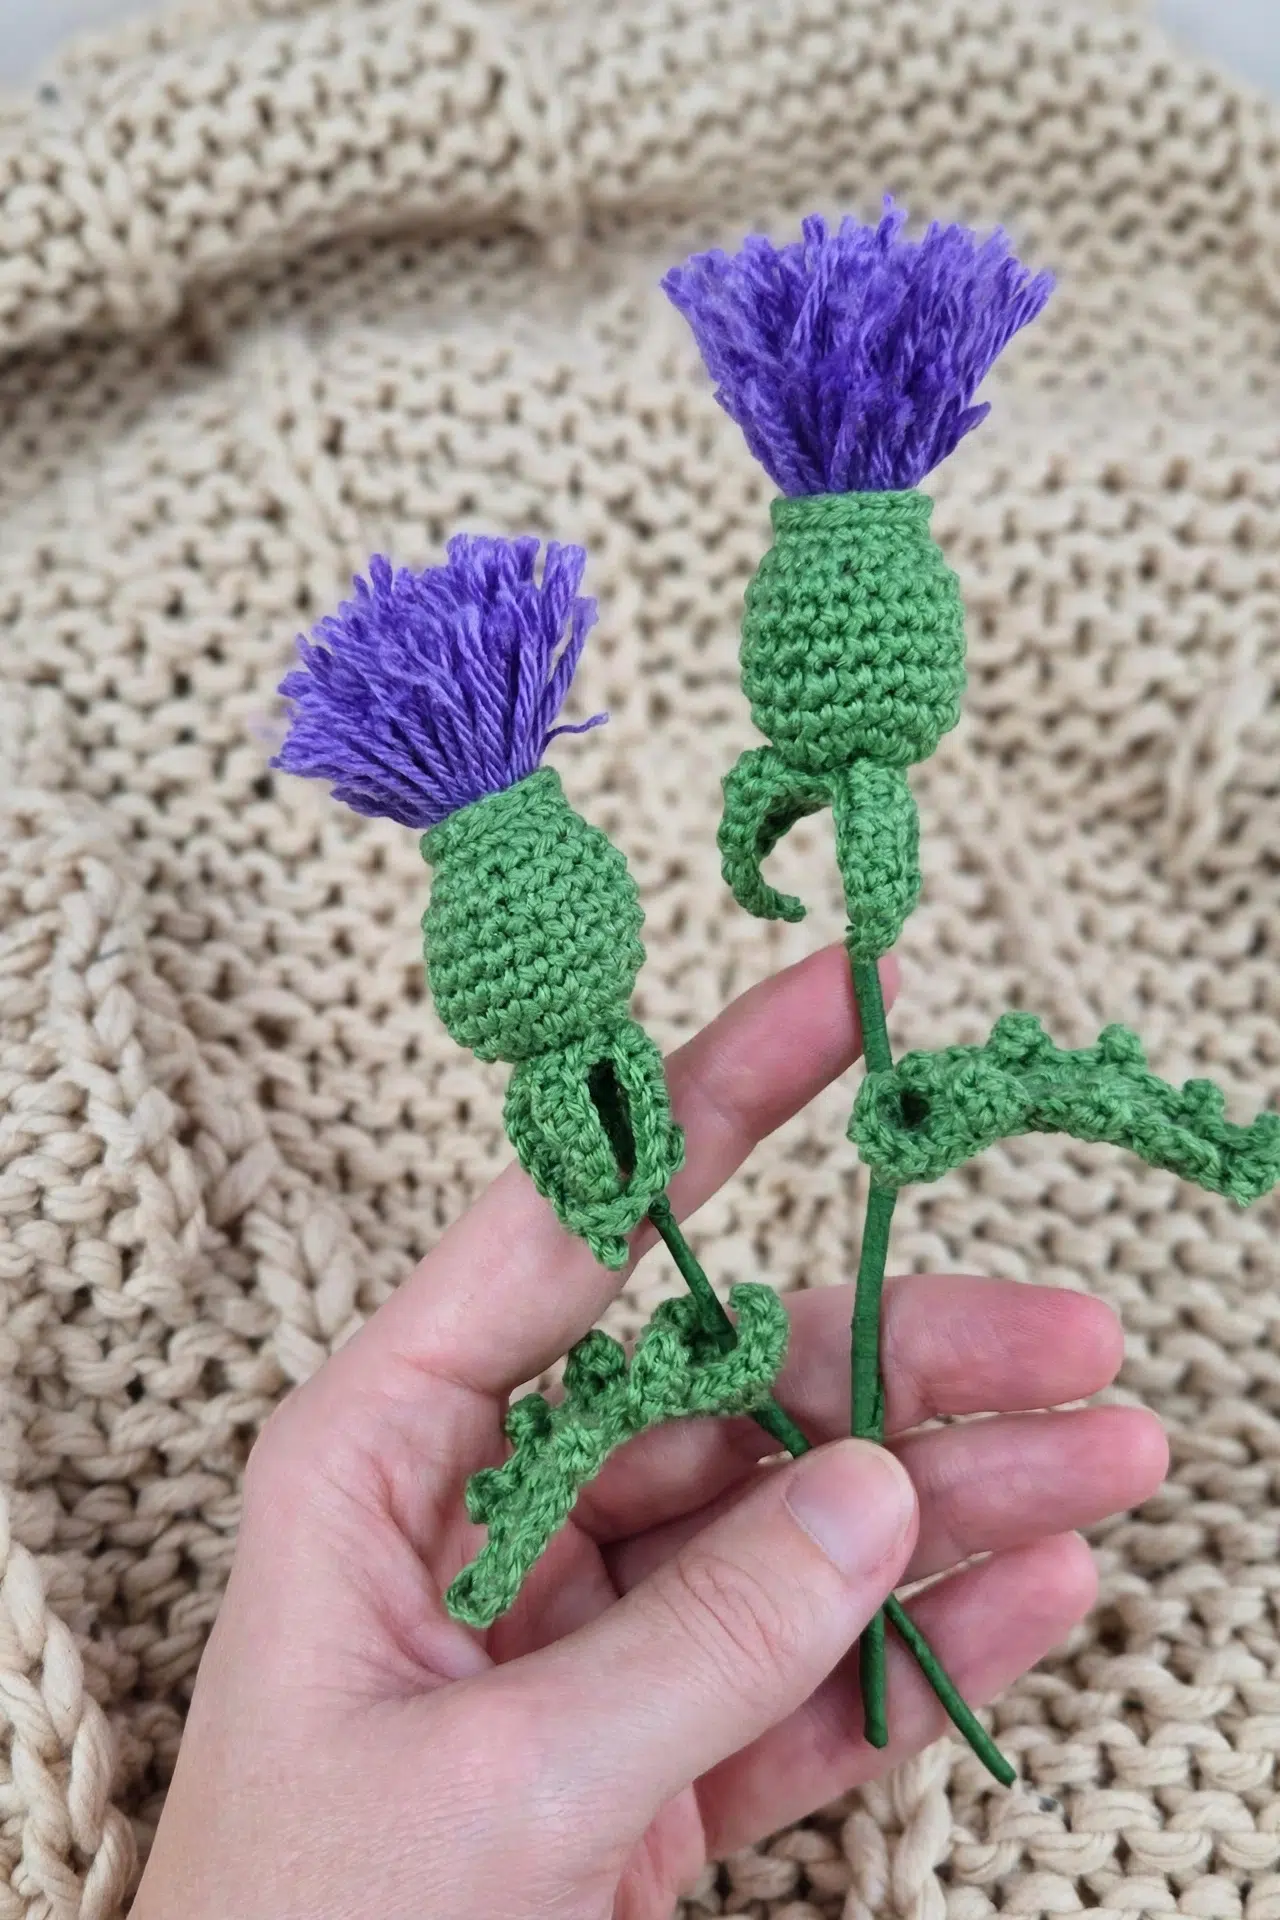
- Round 12: Rejoin green yarn in any skipped front loop from Round 2, ch 9, sl st in second ch from hook and in next ch, 1 sc in next 2 chs, 1 hdc in each ch to end, sl st in next 2 skipped front loops on main green cup, ch 6, sl st in second ch from hook and in next ch, 1 sc in next 2 chs, 1 hdc in each ch to end, sl st in next 2 skipped front loops on main green cup, ch 9, sl st in second ch from hook and in next ch, 1 sc in next 2 chs, 1 hdc in each ch to end, sl st in next 2 skipped front loops on main green cup, ch 7, sl st in second ch from hook and in next ch, 1 sc in next 2 chs, 1 hdc in each ch to end, sl st on main green cup to join. Fasten off and tie in all ends. Sew the remaining tail end to the bottom of the green cup.
Leaf
- Round 1: In green yarn, ch 13, sl st in second ch from hook and in next 2 chs, 1 sc in next 3 chs, 1 hdc in next 3 chs, 1 dc in last 3 chs, ch 3, sl st in same ch as previous dc, ch 3. Crochet back into the chs in the opposite direction, starting in the same ch as the last dc with 1 dc, 1 dc in next 2 chs, 1 hdc in next 3 chs, 1 sc in next 3 chs, sl st in last 3 chs.
- Round 2: Sl st in next st, ch 3, sl st in same st as previous sl st, sl st in next 3 sts, ch 3, sl st in next 3 sts, ch 3, sl st in second ch from hook, 1 sc in next ch, sl st in next 3 sts, ch 4, sl st in second ch from hook, 1 sc in next ch, 1 hdc in next ch, sl st in next 3 sts, ch 5, sl st in second ch from hook, 1 sc in next ch, 1 hdc in next ch, 1 dc in next ch, sl st in next ch, sl st in next ch-3 sp, sl st in next ch-3 sp on opposite side, ch 5, sl st in second ch from hook, 1 sc in next ch, 1 hdc in next ch, 1 dc in next ch, sl st in next 3 sts, ch 4, sl st in second ch from hook, 1 sc in next ch, 1 hdc in next ch, sl st in next 3 sts, ch 3, sl st in second ch from hook, 1 sc in next ch, sl st in next 3 sts, ch 3, sl st in same st as previous sl st, sl st in last 3 sts. Fasten off and tie in all ends. Sew the remaining tail end to the bottom of the leaf.
Construction
Check every cut wire end as you assemble, folding it over before it’s covered with florist tape.
- Step 1: Weave a length of wire about 30 cm long through the bottom of the green cup to create 2 pieces of wire for the stem. Repeat this again so you have 4 pieces of wire for the stem. Twist them all together. Fold over the wire at the bottom to avoid sharp points.
- Step 2: Weave a short length of wire through the center of the leaf. Fold over the end of the wire at the top to avoid a sharp point. Twist the wire onto the flower stem and repeat for any other leaves. Keep each leaf close to the flower stem. The leaf should not have its own stem.
- Step 3: Starting at the top of the flower stem, twist and gently pull florist tape around the stem. Work slightly diagonally as you go so the tape moves down the stem. Avoid the leaves and trap the yarn tail ends as you go to thicken the stem. Fold the tape over the bottom and work back up slightly to finish. Avoid a sticky stem by wiping your fingers on a damp cloth as you work.
- Step 4: Cut the purple loops at the top of the flower to make a pom pom. Gently separate the yarn lengths without pulling them out to make the bundle fluffier. Trim any uneven lengths to finish.
Tips for Success
- Protect the front loops: Work Round 2 through the back loops only. Those skipped front loops are needed later, so pause after the first few stitches and check that a clear loop remains on the outside of each stitch.
- Keep the joins consistent: Begin the first stitch in the same stitch as the previous sl st, and don’t count the ch 1 as a stitch. A marker in the first sc can help you avoid accidentally adding a stitch at the join.
- Hold the bundle low in the cup: Insert one end of the tied bundle before Round 9 and keep the central tie inside the cup while you decrease. The next rounds cover that area, so concentrate on securing it rather than forcing the knot out of sight immediately.
- Finish the wire ends first: Fold every exposed wire tip before wrapping the stem. Florist tape can hide a point, but it doesn’t remove it, so run your fingers carefully over the structure before covering it.
Ways to Adapt Your Crocheted Thistle
- Change the yarn within the same weight: Another sport or baby-weight yarn is the simplest substitution. Use a hook that produces a firm cup, since loose stitches may not grip the center bundle as securely.
- Scale the whole flower with yarn weight: A heavier or lighter yarn can be used with a suitable hook, but the flower, leaf, and pointed details will all change in scale. The wire may also need to be stronger or finer to suit the new weight.
- Choose a different yarn combination: Changing the green and purple yarns doesn’t affect the stitch instructions. Keep enough contrast between working strands for your own comfort when you rejoin into the skipped front loops.
- Adjust the stem length: You can cut longer or shorter wire than 30 cm for a different stem length. Use matching lengths for both passes through the cup so the 4 twisted wire sections end evenly.
- Add more leaves: Repeat the Leaf section as needed, wire each leaf through its center, and twist it directly onto the main flower stem. Keep it close to that stem rather than creating a separate branch.
Fixing Counts, Leaves, and Loose Centers
- The cup count is drifting: Round 2 must increase from 7 to 14 stitches, and Round 3 must increase from 14 to 21. Mark the first sc, skip the joining sl st, and remember that the ch 1 never counts as a stitch.
- The bundle feels loose: Make sure the tie around the purple bundle is secure before insertion. Hold the tied end inside the cup as you work Round 9, then let the sc2tog stitches draw the opening inward around it.
- The leaf path is hard to follow: Round 1 travels down the foundation chain and back along the opposite side. In Round 2, identify the 2 ch-3 spaces at the tip before continuing onto the opposite edge so you don’t turn back along the same side.
- The florist tape stays sticky: Stretch and overlap the tape gently while moving diagonally down the stem. Wipe your fingers on a damp cloth as you work, just as you would when the adhesive begins building up.
Where Your Finished Thistle Can Stand
Stand one finished stem in a small vase or combine several stems in an arrangement. The internal wire supports the piece, and you can make extra leaves when you want a fuller grouping.
Because the construction contains wire, place it where young children and pets won’t handle or chew it. It also makes a thoughtful addition to a handmade floral display when you want something that doesn’t need water.
Washing & Care
Check the yarn label before using any cleaner, since the fiber content isn’t specified. Spot cleaning with a barely damp cloth is safest because the flower contains florist wire and tape; don’t soak it or put it in a washing machine. Gently reshape the yarn bundle and leaves, then let the piece air dry completely.
More Crochet Flower Patterns
- Realistic Crochet Daffodils
- Boho Daisy Leaf Mobile Crochet Pattern
- Daffodil Granny Square Crochet Pattern
- Sunflower Granny Square Blanket Crochet Pattern
- Tulip Butterfly Granny Square Crochet Pattern
Frequently Asked Questions
How many stitches should the flower cup have before I insert the bundle?
The cup should have 21 stitches at the end of Round 8. Round 1 begins with 7 sc, Round 2 doubles that count to 14, and Round 3 adds 7 evenly spaced increases for 21. Keeping that count through Rounds 4-8 gives you the correct setup for the decreases in Round 9.
Why do I work Round 2 through the back loops only?
The skipped front loops provide the attachment points for Round 12. If you crochet through both loops in Round 2, you’ll lose the clear line of loops needed for rejoining the green yarn. The cup will still form, but adding the final pointed details will be much more awkward.
When should I put the purple yarn bundle into the cup?
Insert the bundle after Round 8 and before starting Round 9. The cup is still open at that stage, while the sc2tog sequence in Round 9 begins closing it around the tied end. Waiting until later makes insertion difficult and can stretch the reduced opening.
Can I make more than one leaf?
Yes, repeat both leaf rounds for every additional leaf you want. Wire each finished leaf through its center, fold over the top wire end, and twist the remaining wire onto the main stem. Keep the leaf close to the flower stem because the construction isn’t intended to give each leaf a separate long branch.
What did you change or add to your thistle, whether it was the yarn combination, stem length, bundle fullness, or extra leaves? Tell me about your version in the comments.



