
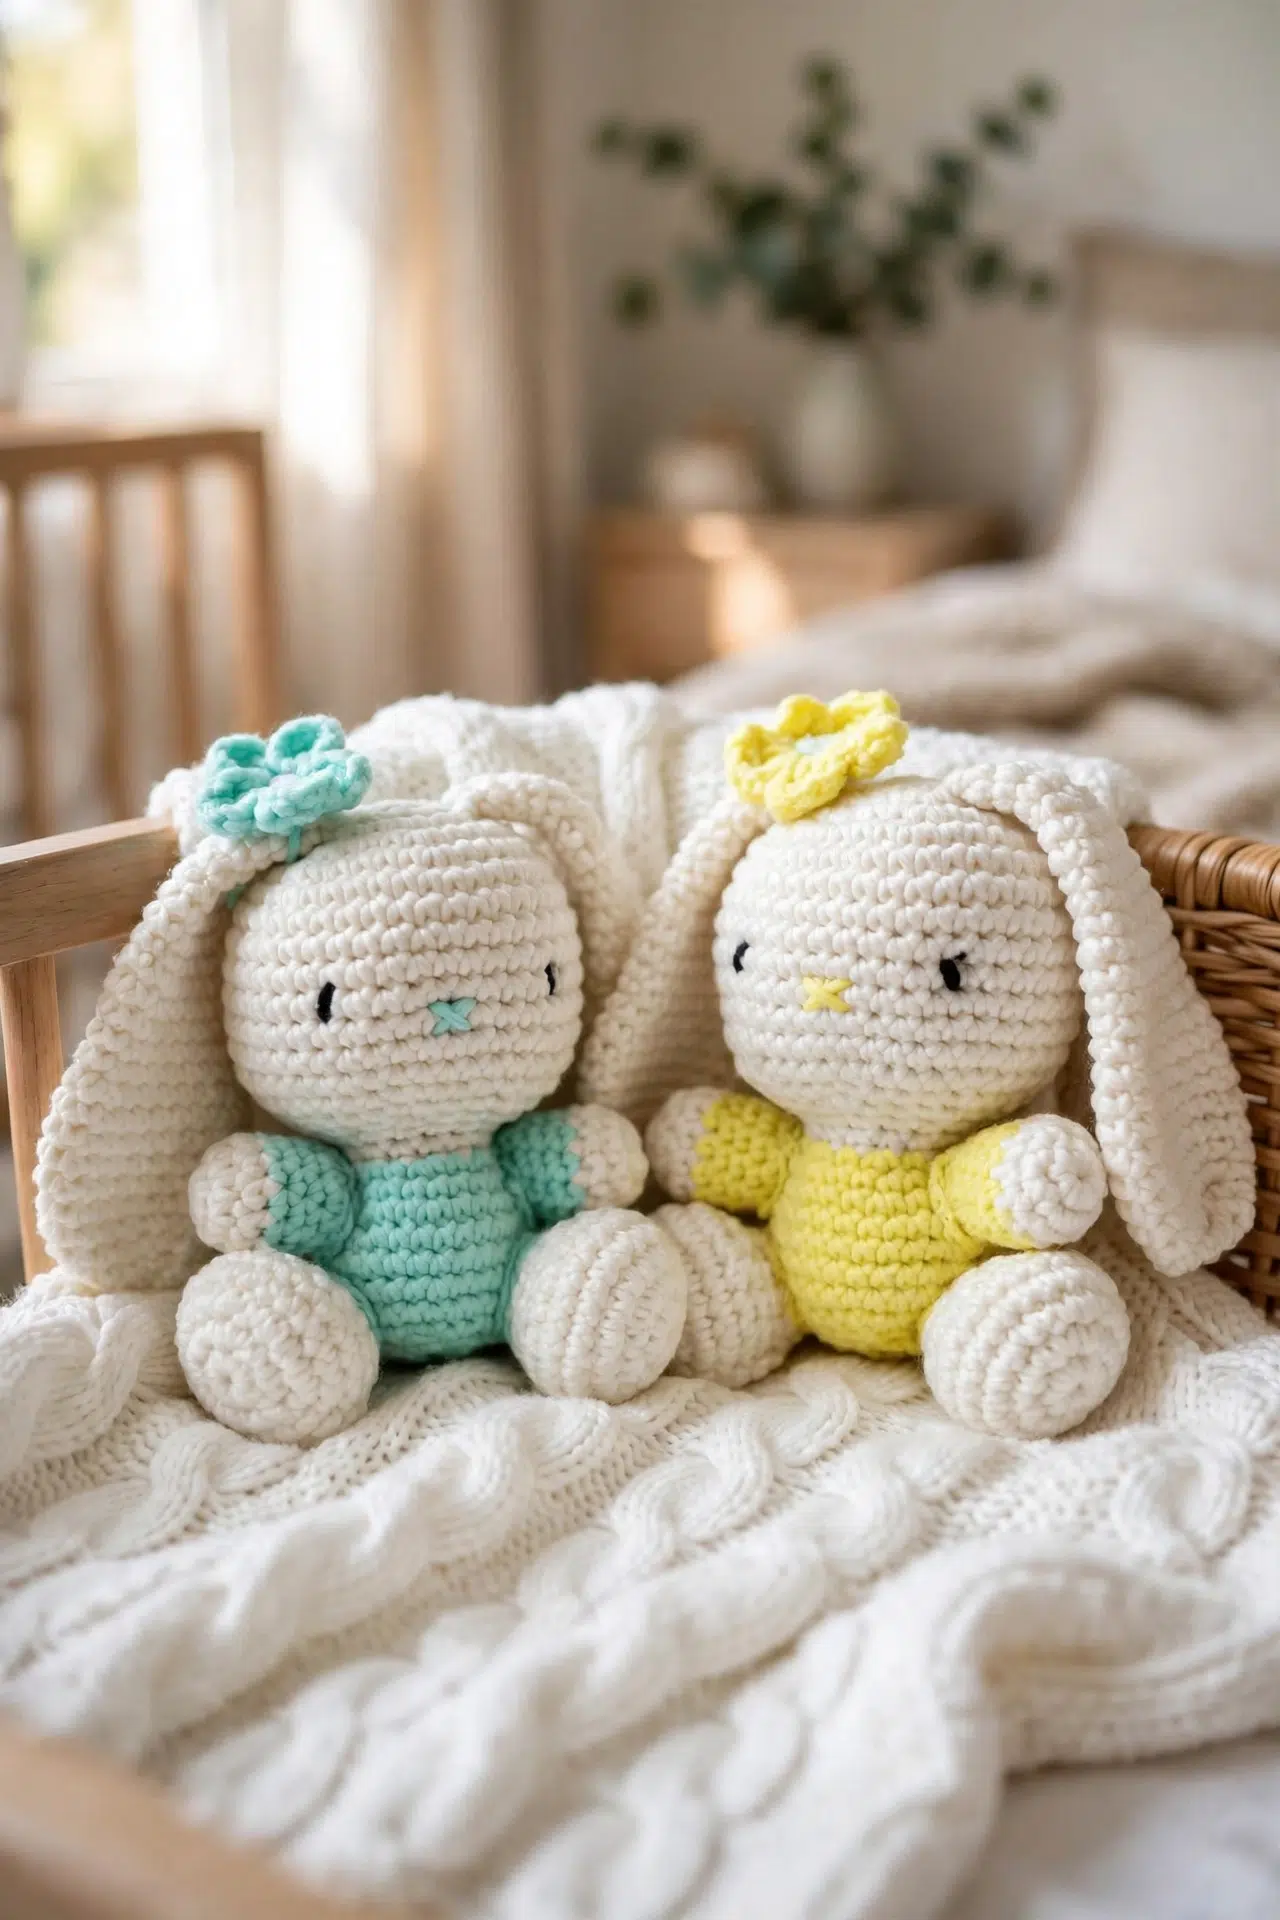
You get a satisfying project and a useful little handmade companion in one, because this Floral Crochet Rabbit Amigurumi can tuck into an Easter basket, sit on a nursery shelf, or travel along as a small soft friend. Its embroidered features also mean there aren't separate eye pieces to attach.

The making stays lively with compact single crochet, steady increases and decreases, and a five-petal flower worked in treble crochet. I love how the head flows straight into the body, so your hands can settle into the rhythm before moving on to the smaller parts.
Jump to:
- What Makes This Pattern Work
- Pattern Details
- What You'll Need
- Stitches & Abbreviations
- How to Crochet the Floral Rabbit Amigurumi
- Tips for Success
- Ways to Adapt Your Crochet Rabbit
- Fixing Round Counts and Shaping
- Where Your Rabbit Can Settle In
- Care Instructions
- More Cute Animal Amigurumi Patterns
- Frequently Asked Questions
What Makes This Pattern Work
- A continuous main piece: The head and body are worked in sequence, so there's no separate neck seam to sew. That gives you less assembly and keeps the stuffing process easy to manage.
- Clear shaping: Regular increase and decrease rounds build the head, body, feet, and ears. The counts change in predictable stages, so you can check your work before moving ahead.
- Embroidered details: The eyes and criss-cross nose use yarn rather than separate eye notions. You can secure every stitch from inside the piece during finishing.
- A complete crocheted accent: The flower is made from the same yarn and hook as the rabbit. Its short petal round gives you a cheerful final bit of crochet before assembly is complete!
Pattern Details
- Skill Level: Intermediate
- Finished Size: Approximately 4-5 in. [10-12.5 cm] in height
- Yarn Weight: DK / Light Worsted
- Time to Make: about 8-12 hours
What You'll Need
Gather your DK or light worsted yarn, a small hook, and a modest amount of stuffing before you begin. You'll also want a yarn needle ready for the limbs, ears, face, and flower.
- DK / Light Worsted weight yarn in white: Staying with this weight and the listed hook helps keep the fabric dense enough for stuffing. A thicker or thinner yarn will change the finished size.
- DK / Light Worsted weight yarn in an alternate colour
- DK / Light Worsted weight yarn in black for the eyes
- 2.5 mm crochet hook
- Yarn needle
- Scissors
- Toy stuffing: Add small portions at a time so you can shape the head, body, feet, and arms without stretching gaps between the stitches.
Stitches & Abbreviations
- W - white
- AC - alternate colour
- B - black
- ch - chain
- sc - single crochet
- sc2tog - single crochet 2 stitches together
- sl st - slip stitch
- tr - treble crochet
- st - stitch
- sts - stitches
- rep - repeat
Magic circle: Make an adjustable loop, work the specified stitches into the loop, then pull the yarn tail to tighten the centre.
How to Crochet the Floral Rabbit Amigurumi
Read through the colour changes and stuffing notes first, then keep a close eye on the ending count for each shaping round.
The ch 1 at the beginning of joined rounds counts as a stitch throughout. The head and body are worked as one piece, with AC joined on the final head round. From Round 2 onward, the ears are worked without beginning chains or slip-stitch joins. The flower is included in the pattern.
Head
- Round 1: Using W and a 2.5 mm crochet hook, work 8 sc into a magic circle. Pull to tighten and sl st to join. Alternatively, ch 4, sl st in 1st ch to form a loop, work 8 sc into the loop, and sl st to join. (8)
- Round 2: Ch 1, 1 sc in same st as previous sl st below ch 1, *2 sc in next st; rep from * around. Sl st in ch 1 to join. (16)
- Round 3: Ch 1, 2 sc in next st, *1 sc in next st, 2 sc in next st; rep from * around. Sl st in ch 1 to join. (24)
- Round 4: Ch 1, 1 sc in next st, 2 sc in next st, *1 sc in next 2 sts, 2 sc in next st; rep from * around. Sl st in ch 1 to join. (32)
- Round 5: Ch 1, 1 sc in next 2 sts, 2 sc in next st, *1 sc in next 3 sts, 2 sc in next st; rep from * around. Sl st in ch 1 to join. (40)
- Rounds 6-13: Ch 1, 1 sc in next st and in each st around. Sl st in ch 1 to join. (40)
- Round 14: Ch 1, 1 sc in next 2 sts, sc2tog, *1 sc in next 3 sts, sc2tog; rep from * around. Sl st in ch 1 to join. (32)
- Round 15: Ch 1, 1 sc in next st, sc2tog, *1 sc in next 2 sts, sc2tog; rep from * around. Sl st in ch 1 to join. (24)
- Round 16: Ch 1, sc2tog, *1 sc in next st, sc2tog; rep from * around. Sl st in ch 1 to join. (16)
- Rounds 17-18: Ch 1, 1 sc in next st and in each st around. Sl st in ch 1 to join. (16)
Join AC in the sl st on the last round. Stuff the head at this point.
Body
- Round 19: Continuing in AC, ch 1, 2 sc in next st, *1 sc in next st, 2 sc in next st; rep from * around. Sl st in ch 1 to join. (24)
- Round 20: Ch 1, 1 sc in next st and in each st around. Sl st in ch 1 to join. (24)
- Round 21: Ch 1, 1 sc in next st, 2 sc in next st, *1 sc in next 2 sts, 2 sc in next st; rep from * around. Sl st in ch 1 to join. (32)
- Rounds 22-25: Ch 1, 1 sc in next st and in each st around. Sl st in ch 1 to join. (32)
- Round 26: Ch 1, 1 sc in next st, sc2tog, *1 sc in next 2 sts, sc2tog; rep from * around. Sl st in ch 1 to join. (24)
- Round 27: Ch 1, sc2tog, *1 sc in next st, sc2tog; rep from * around. Sl st in ch 1 to join. (16)
Stuff the body at this point.
- Rounds 28 onward: Without chaining, *sc2tog; rep from * around. Continue repeating this round until the opening becomes too fiddly to work. Sew the remaining gap closed, fasten off, and weave in all tails.
Feet
Make 2.
- Round 1: Using W and a 2.5 mm crochet hook, work 8 sc into a magic circle. Pull to tighten and sl st to join. Alternatively, ch 4, sl st in 1st ch to form a loop, work 8 sc into the loop, and sl st to join. (8)
- Round 2: Ch 1, 1 sc in same st as previous sl st below ch 1, *2 sc in next st; rep from * around. Sl st in ch 1 to join. (16)
- Round 3: Ch 1, 2 sc in next st, *1 sc in next st, 2 sc in next st; rep from * around. Sl st in ch 1 to join. (24)
- Rounds 4-5: Ch 1, 1 sc in next st and in each st around. Sl st in ch 1 to join. (24)
- Round 6: Ch 1, sc2tog, *1 sc in next st, sc2tog; rep from * around. Sl st in ch 1 to join. (16)
- Round 7: Ch 1, 1 sc in next 3 sts, *sc2tog; rep from * 3 more times. 1 sc in next 4 sts, sl st in ch 1 to join. (12)
- Round 8: Ch 1, 1 sc in next st and in each st around. Sl st in ch 1 to join. (12)
Join AC in the sl st on this round.
- Round 9: Continuing in AC, ch 1, 1 sc in next st and in each st around. Sl st in ch 1 to join. (12)
Stuff the foot, fasten off, and leave the remaining yarn for sewing the foot to the body.
Arms
Make 2.
- Round 1: Using W and a 2.5 mm crochet hook, work 6 sc into a magic circle. Pull to tighten and sl st to join. Alternatively, ch 4, sl st in 1st ch to form a loop, work 6 sc into the loop, and sl st to join. (6)
- Round 2: Ch 1, 1 sc in same st as previous sl st below ch 1, *2 sc in next st; rep from * around. Sl st in ch 1 to join. (12)
- Round 3: Ch 1, 1 sc in next st and in each st around. Sl st in ch 1 to join. (12)
Join AC in the sl st on this round.
- Rounds 4-5: Continuing in AC, ch 1, 1 sc in next st and in each st around. Sl st in ch 1 to join. (12)
- Rounds 6-8: Ch 1, 1 sc in next 3 sts, sl st in next 4 sts, 1 sc in next 4 sts, sl st in ch 1 to join. (12)
Stuff the arm. On the last round, fasten off and leave the remaining yarn for sewing the arm to the body.
Ears
Make 2.
- Round 1: Using W and a 2.5 mm crochet hook, ch 5. Work 2 sc in 2nd ch from hook, 1 sc in next 2 chs, and 2 sc in last ch. Crochet back along the opposite side of the chains with 2 sc in 1st ch, 1 sc in next 2 chs, and 2 sc in last ch. (12)
- Round 2: Do not chain at the beginning or sl st at the end. Work 1 sc in each st around. (12)
- Round 3: *1 sc in next st, 2 sc in next st, 1 sc in next 3 sts, 2 sc in next st; rep from * once more. (16)
- Round 4: 1 sc in each st around. (16)
- Round 5: *1 sc in next 2 sts, 2 sc in next st, 1 sc in next 4 sts, 2 sc in next st; rep from * once more. (20)
- Rounds 6-9: 1 sc in each st around. (20)
- Round 10: *1 sc in next 2 sts, sc2tog, 1 sc in next 4 sts, sc2tog; rep from * once more. (16)
- Rounds 11-14: 1 sc in each st around. (16)
- Round 15: *1 sc in next st, sc2tog, 1 sc in next 3 sts, sc2tog; rep from * once more. (12)
- Rounds 16-19: 1 sc in each st around. (12)
- Round 20: *sc2tog, 1 sc in next 2 sts, sc2tog; rep from * once more. (8)
- Rounds 21-24: 1 sc in each st around. (8)
Do not stuff the ears. On the last round, fasten off and leave the remaining yarn for sewing each ear to the head.
Finishing
- Step 1: Using AC, sew a small criss-cross nose. Using B, sew the eyes.
Flower
- Round 1: Using W and a 2.5 mm crochet hook, ch 4 and sl st in 1st ch to form a loop. Work 5 sc into the loop. Join AC with a sl st in 1st sc. (5)
- Round 2, petals: Continuing in AC, *ch 2, 3 tr in same st as sl st, ch 2, sl st in same st, sl st in next st; rep from * around. You will have 5 petals. Sl st into the first petal at the end, fasten off, and tie or sew the flower onto the head.
Tips for Success
- Count the beginning chain: The ch 1 counts as a stitch in the joined rounds. Include it when checking your total, or each round will seem one stitch short.
- Stuff before the openings narrow: Fill the head after Round 18 and the body after Round 27 as directed. Once the decrease-only rounds begin, there won't be enough room to adjust the stuffing comfortably.
- Keep the ears flat: Don't add stuffing to the ears. Smooth them between your fingers before sewing so both layers sit together and the long shaping remains easy to position.
- Check matching parts together: Place both feet, arms, or ears side by side before fastening off the second one. Matching the round counts and tension now makes assembly much easier.
Ways to Adapt Your Crochet Rabbit
- Try another DK yarn: Cotton, acrylic, or a blend can work if it matches the listed weight. Cotton tends to make firm stitches, while a springier yarn may need slightly more careful stuffing to keep the fabric from spreading.
- Change the contrast placement: You can choose any two main yarn shades and follow the same W and AC change points. Keeping those changes in their written rounds preserves the construction.
- Leave off the flower: The rabbit is fully constructed before the flower is attached, so you can omit it without changing any other step. Fasten off after the facial embroidery instead.
- Resize with yarn and hook: A heavier yarn with a suitable larger hook makes a larger rabbit, while finer yarn and a smaller hook make a smaller one. Your yarn needs and finished measurements will change in either direction.
- Vary the embroidery: You can adjust the size of the yarn eyes or the criss-cross nose. Keep the stitches snug, knot the ends securely inside the head, and avoid pulling hard enough to dent the stuffing.
Fixing Round Counts and Shaping
- The round is one stitch short: Check whether you counted the beginning ch 1. It forms the first stitch in the joined rounds, and the final sl st is worked into that chain rather than counted as another stitch.
- The ear foundation twists: Work slowly around both sides of the starting chain and make sure the final group lands in the remaining end chain. After Round 2, flatten the oval gently to confirm that all 12 stitches sit around the foundation.
- The closing gap won't tighten: Stop crocheting when repeated sc2tog stitches become awkward. Thread the remaining yarn through the final stitches with a yarn needle, pull the opening closed, and secure the tail inside the body.
Where Your Rabbit Can Settle In
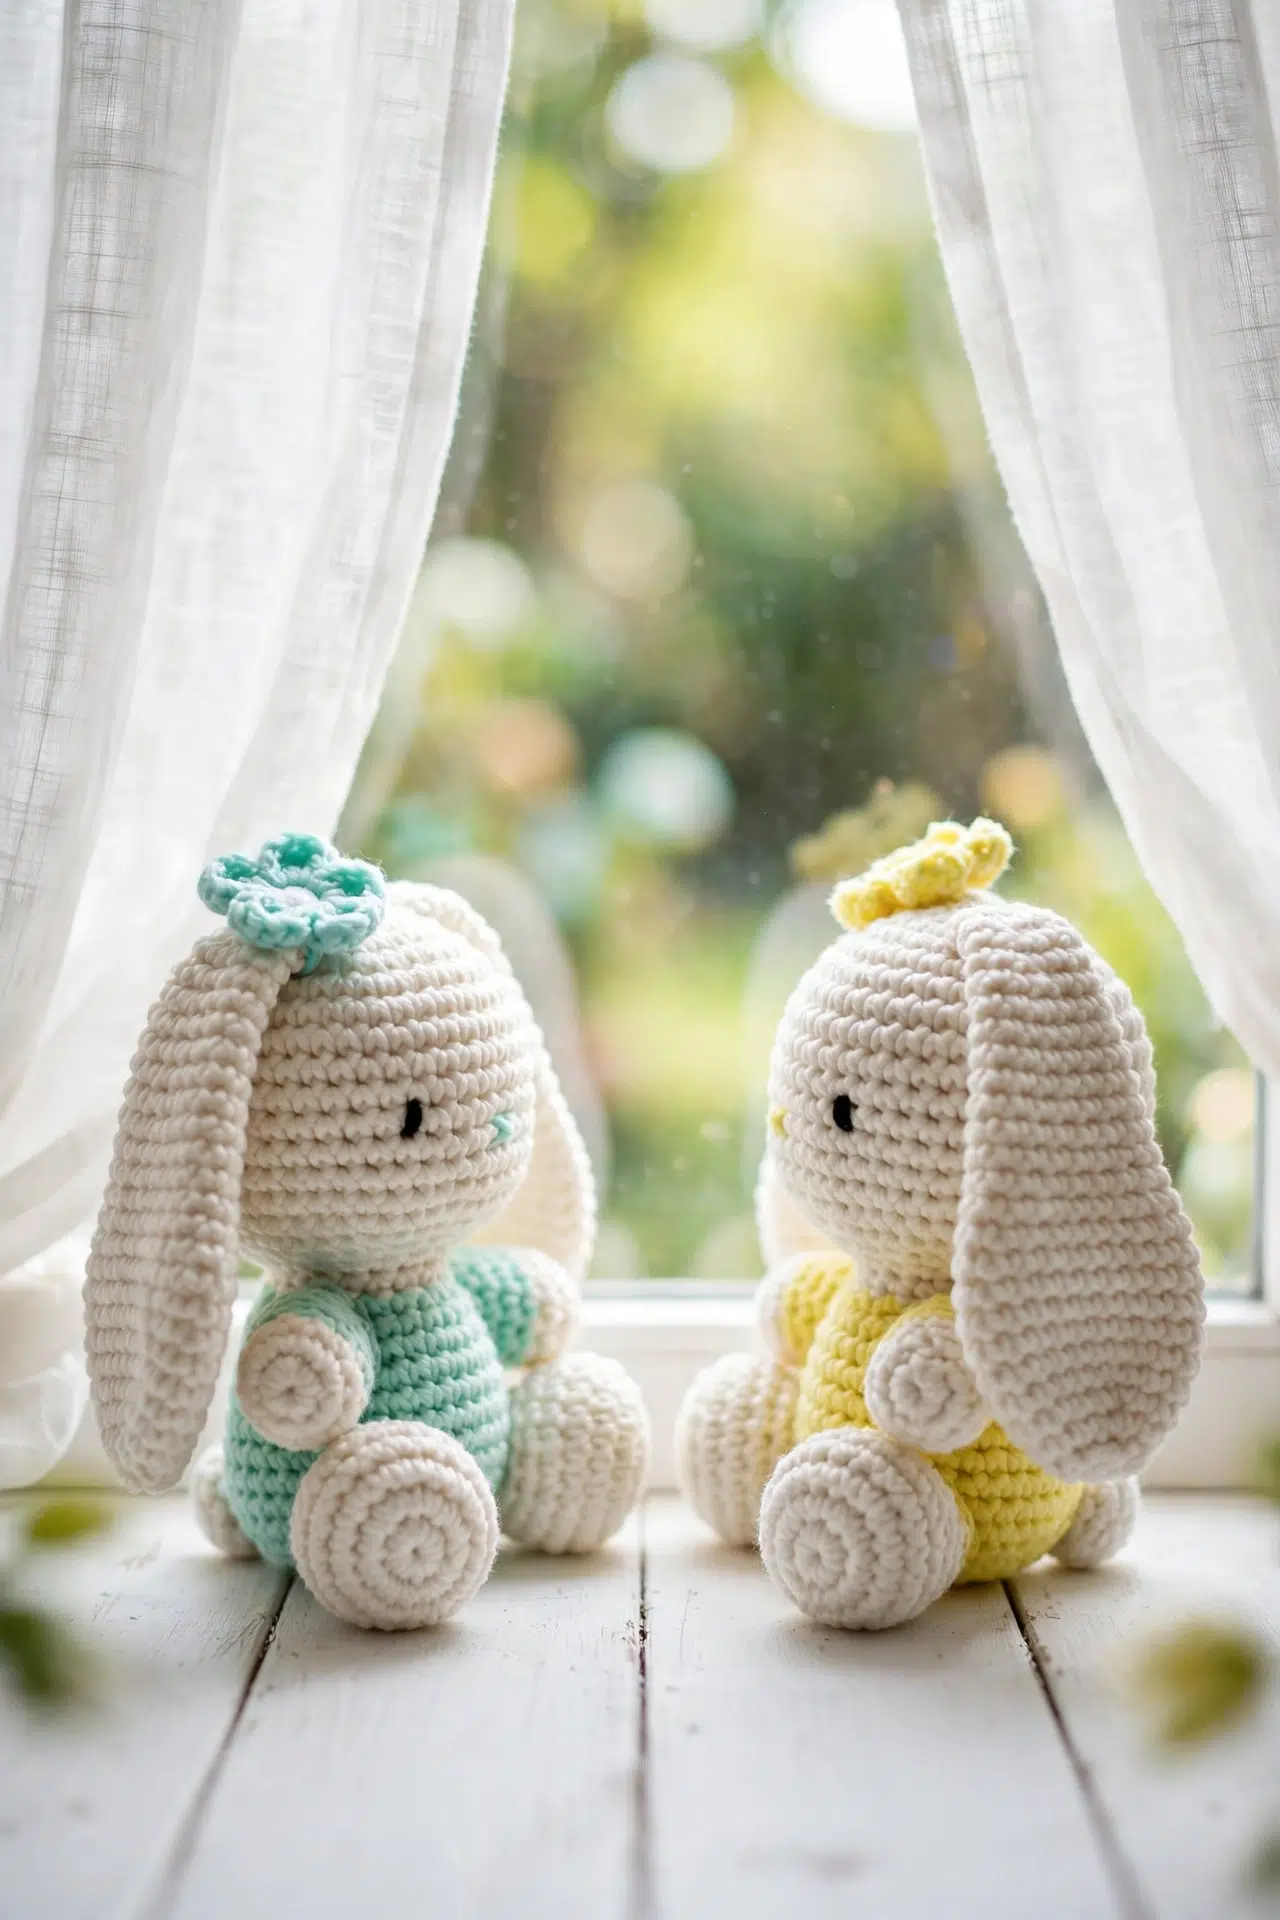
This small rabbit fits naturally into an Easter basket or on a nursery shelf, bookcase, or desk. It also pairs nicely with a handmade blanket or basket when you're putting together a thoughtful crochet gift.
Care Instructions
Check the yarn label first because washing instructions depend on the fiber you choose. Spot cleaning is the safest option for the stuffed piece and its embroidered details. When the yarn and stuffing are washable, gently hand wash in cool water, press out moisture without twisting, reshape, and let it dry completely.
More Cute Animal Amigurumi Patterns
- These AI-Inspired Amigurumi Bunnies Are the Sweetest Baby Gift You Can Crochet
- How to Crochet an Amigurumi Bunny (A Beginner-Friendly Plushie Tutorial)
- Black Cat Amigurumi Crochet Pattern
- A Beginner-Friendly Amigurumi Bear Head: The Perfect First Crochet Project
Frequently Asked Questions
Does the ch 1 count as a stitch?
Yes, the ch 1 counts as the first stitch in every joined round. Include it in the stated total and work the closing sl st into that chain. Treating it only as a turning chain will add an extra stitch to each round and shift the increase or decrease pattern.
When should I stuff the rabbit?
Stuff the head after Round 18 and the body after Round 27. The following body rounds decrease repeatedly until the opening is too small to crochet comfortably, so delaying the stuffing will make it difficult to fill the wider areas evenly. Stuff each foot and arm before fastening it off.
Should the ears be stuffed?
No, the ears remain unstuffed. Their long rounds are designed to lie as two layers of crocheted fabric, and filling them would add bulk at the narrow base. Smooth each ear flat before sewing it to the head so you can compare both pieces and position them consistently.
Are the head and body sewn together?
No, the head and body are crocheted as one continuous main piece. AC is joined in the slip stitch on the final head round, and Round 19 begins the body shaping immediately. Only the feet, arms, ears, flower, and embroidered facial details need to be attached afterward.
Can I start without a magic circle?
Yes, ch 4 and join with a sl st to form a loop instead. Work the required 8 sc for the head and feet or 6 sc for the arms into that loop. This option leaves a less adjustable centre, so secure the starting tail carefully if a small opening remains.
Tell me how your little rabbit turned out in the comments, especially which yarn combination you chose! 🧶



