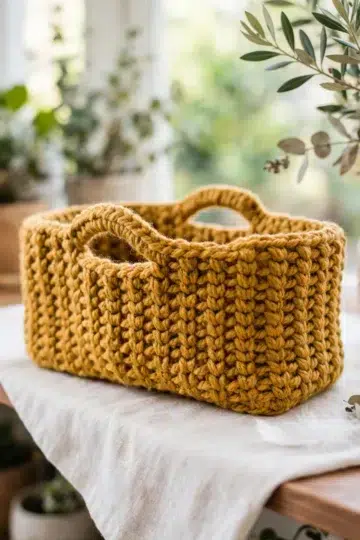
I've been on a serious home organization kick lately, and this Chunky Round Basket Crochet Pattern has been one of my favorite things to come out of it. There's something so satisfying about making something that's actually useful around the house, and this basket really does deliver on that. It works up into a sturdy, substantial piece that earns its spot in any room.

Jump to:
The Inspiration
Honestly, I made this because I kept buying baskets and none of them were ever quite right. Too small, too flimsy, not the right shape. So I decided to just make one myself, and I'm really glad I did. The construction is what I find most interesting about this one. Working in the round with chunky weight gives it this great structural integrity, and the whole thing holds its shape without any fuss.
This is the kind of project I'd make as a gift without hesitation. It suits pretty much anyone, any home, any occasion. Housewarming, holiday, just because. It's also genuinely fun to make, which doesn't always go hand in hand with functional projects.
Why You Need This on Your Hook
A chunky, sturdy basket you'll actually use every single day.
- Intermediate skill level: You'll need to be comfortable working in the round, but there's no advanced technique that should slow you down.
- Quick time investment: Chunky yarn means this works up fast, so you're not committing to a weeks-long project.
- Great for gifting: It's a practical, beautiful handmade gift that pretty much anyone can use in their home.
- Technique building: Working a structured base and building up the sides is a really solid skill to have in your toolkit.
- Genuinely useful: This isn't just a pretty make. It holds things, it holds its shape, and it earns its place in a room.
Gather Your Supplies
Two hook sizes are in play, so grab both before you sit down.
- Super Bulky Acrylic-Wool Blend Yarn (Weight 6): The 80% acrylic, 20% wool blend is doing a lot of work here. The acrylic keeps the basket sturdy and holds its shape after blocking, while the wool content adds just enough grip that your stitches sit where you put them instead of sliding around. You'll need 3 skeins total, held double throughout. If you're working from three skeins, divide that third one into two equal balls so you always have two strands feeding at once.
- 8 mm Clover Amour Hook (base and body): Holding two strands of super bulky together means you need a hook with some real size to it. The 8 mm keeps your tension from getting too tight and lets the fabric stay flexible rather than stiff and dense.
- 7 mm Clover Amour Hook (edging): The final round is worked on the smaller hook, and it's worked in the opposite direction. Dropping down a size here tightens up the top edge so it finishes cleanly instead of flaring out.
- Clover Felting Needle Tool and Foam Mat: Optional, but useful if you want to add any surface texture or felt the fabric slightly for extra structure. Not required to finish the basket.
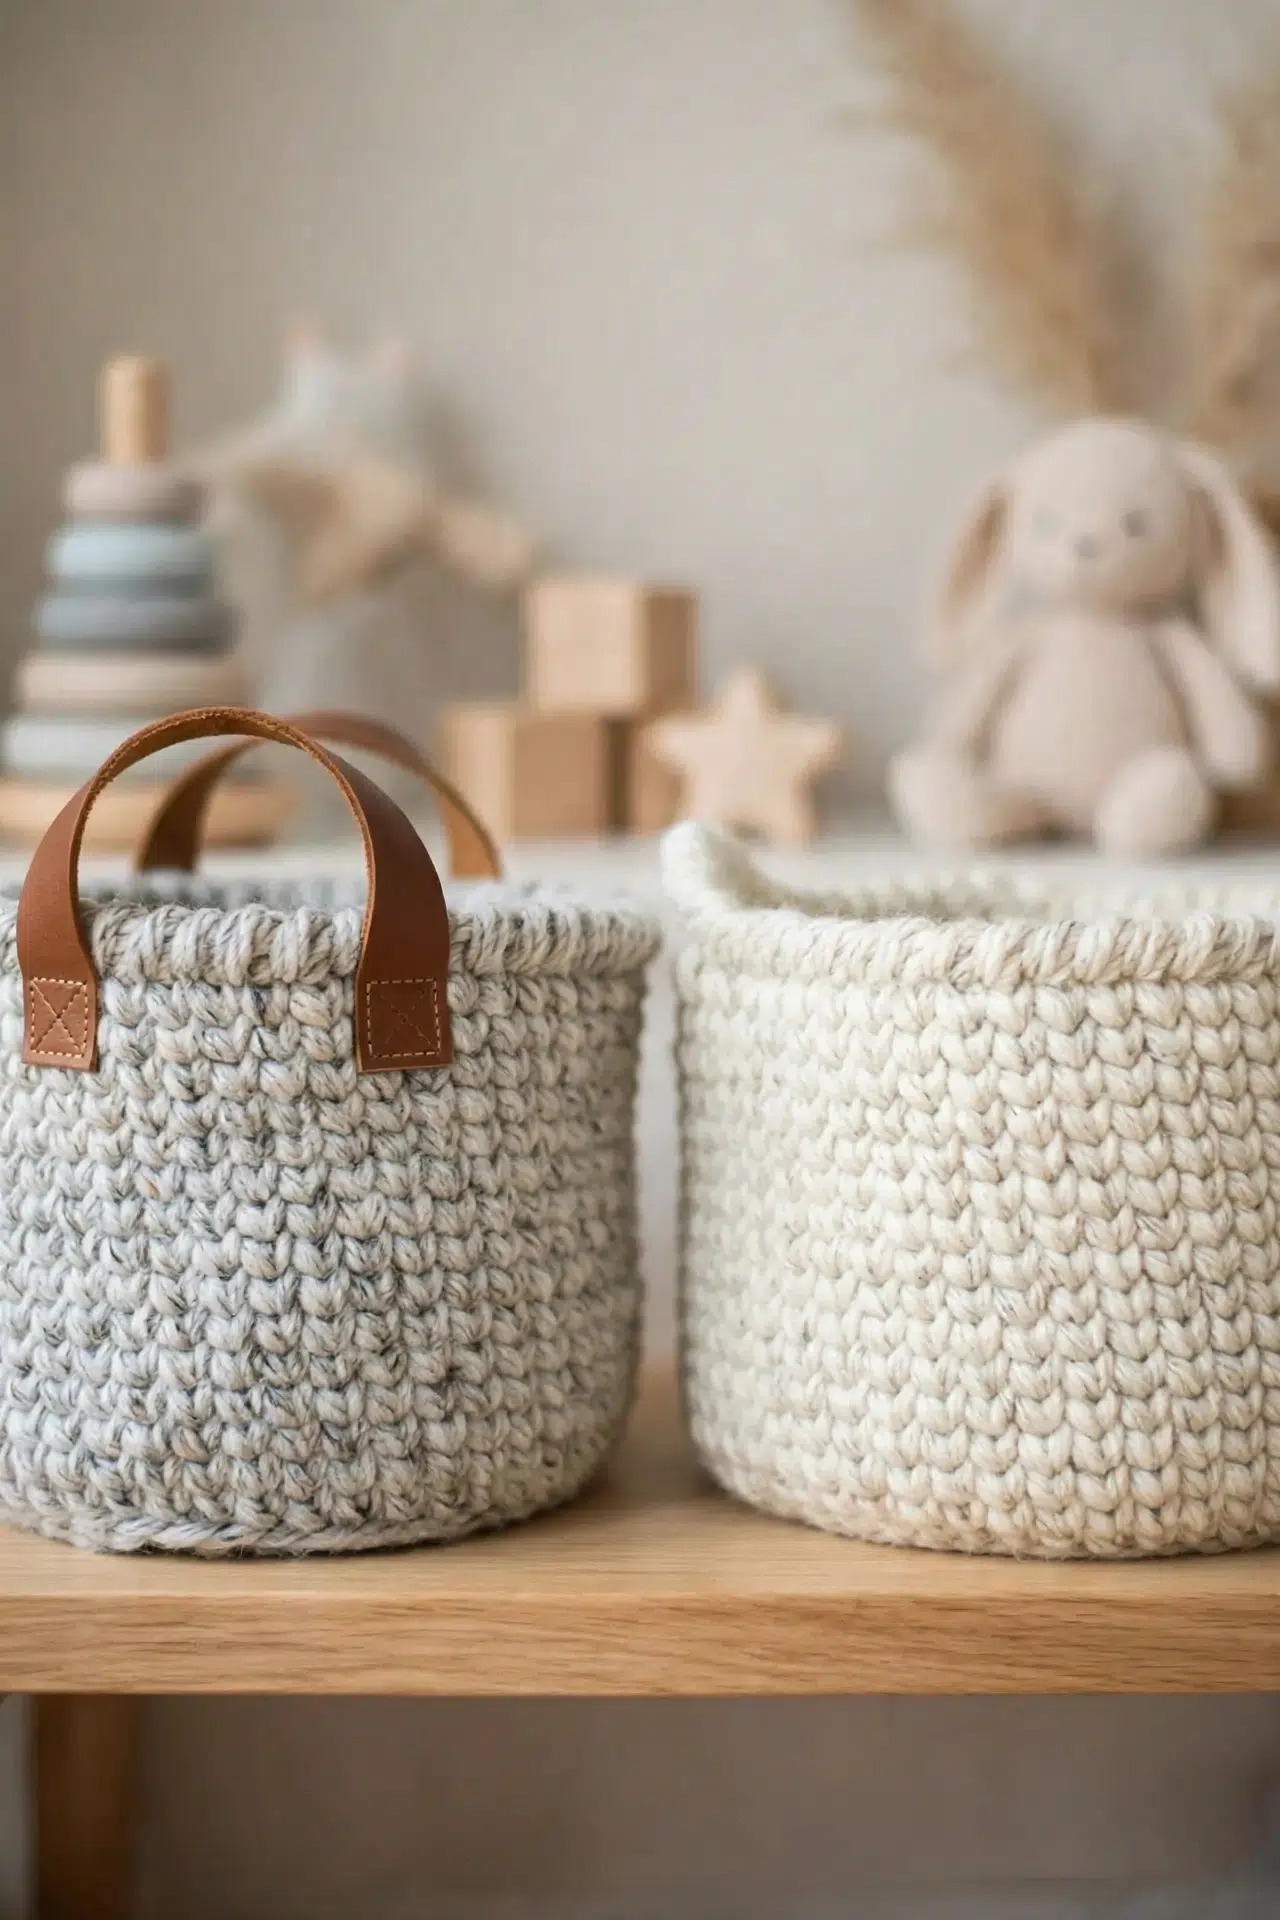
- Leather handles kit: Optional add-on if you want to give the basket a more finished, functional look. These typically attach after the basket is complete.
- Garment tag: Optional, but a nice touch if you're making this as a gift.
- Also needed: scissors, tapestry needle, stitch markers
Quick Details
A double-stranded super bulky basket worked in hdc and waistcoat stitch, with a joined base and continuous body rounds.
| Skill Level | Intermediate |
| Pattern Gauge | Using 8 mm hook: first 3 rounds = 4.75 in / 12 cm across |
| Finished Size | 7 in tall x 8.5 in diameter x 27 in circumference |
| Yarn Weight | 6 Super Bulky |
| Fiber | 80% Acrylic, 20% Wool |
| Terminology | US |
Abbreviations & Stitches Used
Short list, mostly familiar stitches with two specialty ones worth reading before you start.
- ch = chain
- csc = center single crochet (waistcoat stitch): Insert hook into the center of the V of the stitch from the previous round (between the two legs), yo, pull up a loop, yo, pull through 2 loops.
- hdc = half double crochet
- inc = increase (2 hdc in next st)
- rep = repeat
- rsc = reverse single crochet (crab stitch): Working right to left, insert hook from front to back in the stitch to the right, yo, pull up a loop, yo, pull through 2 loops.
- sc = single crochet
- sk = skip
- sl st = slip stitch
- st(s) = stitch(es)
- yo = yarn over
Special Stitches
- Center single crochet (waistcoat stitch) (csc): Insert hook into the center of the V of the stitch from the previous round (between the two legs), yo, pull up a loop, yo, pull through 2 loops.
- Reverse single crochet (crab stitch) (rsc): Working right to left, insert hook from front to back in the stitch to the right, yo, pull up a loop, yo, pull through 2 loops.
Before You Begin
Hold two strands of yarn together for the entire project. If you're working from three skeins, divide the third skein into two equal balls before you start. This pattern comes in two colorways: Wheat and Grey Marble. There are no color changes either way; you'll work the whole basket in one color.
The base and body are worked differently, so it's worth knowing the distinction up front. The base uses joined rounds of hdc. At the end of each base round, sl st to the first hdc, not the ch-2. When you ch 2 to begin a new round, work your first stitch into that same joining stitch. The body switches to continuous, unjoined rounds. For the transition between the base and body, you'll work into the third loop of the hdc round below.
For the final round, switch to a 7 mm hook and work in the opposite direction, counter-clockwise. This creates the crab stitch edging and keeps the top edge from flaring.
Let's Make the Chunky Round Basket Crochet Pattern
Here's how the basket comes together, from the flat base up through the body and finishing edge.
Building the Base
The base is worked in joined rounds with your 8 mm hook, starting from a magic ring and expanding outward with each round. These five rounds build the flat circle your basket will stand on.
Round 1: Ch 2, 10 hdc in magic ring. Sl st to first hdc. [10 hdc]
Round 2: Ch 2. Inc rep 10 times. Sl st to first hdc. [20 hdc]
Round 3: Ch 2. (hdc 1, inc) rep 10 times. Sl st to first hdc. [30 hdc]
Round 4: Ch 2. (hdc 2, inc) rep 10 times. Sl st to first hdc. [40 hdc]
Round 5: Ch 2. (hdc 3, inc) rep 10 times. Sl st to first hdc. [50 hdc]
Working Up the Body
The body switches to continuous unjoined rounds with your 8 mm hook, and you'll also be switching stitch type here. Working into the third loop of the hdc creates a clean ridge at the base of the walls and lets the sides stand upright.
Round 6: Ch 1, sc in third loop of each hdc around. [50 sc]
(ignore ch-1 in next round)
Rounds 7–20: csc around. [50 csc] These 14 rounds build the straight walls of the basket with no shaping. Keep your tension consistent and the sides will stay upright on their own.
Adding the Handles
The handles are formed in two rounds at the top of the basket. Round 21 creates the chain gaps that become the handle openings, and Round 22 fills them in with reverse single crochet worked in the opposite direction for a finished, rope-like edge.
Round 21: csc 10, ch 8, sk 6, csc 19, ch 8, sk 6, csc 9. [54 csc] The two chain gaps sit opposite each other across the basket opening. Skipping 6 stitches at each handle placement keeps the opening proportional to the chains you just laid.
Round 22: Switch to 7 mm hook and reverse crocheting direction (counter-clockwise). Starting in the stitch just finished, rsc 9, rsc 10 in chain gap, rsc 19, rsc 10 in chain gap, rsc 10. [58 rsc] Switching to the smaller hook for the reverse single crochet edge keeps the top rim from flaring. Working 10 rsc into each 8-chain gap fills it snugly.
Fasten off. Slip ends through top of first rsc. Wrap yarn ends around edge to mimic rsc. Weave in end.
Modification: No Crocheted Handles
If you're planning to add leather, rope, or fabric handles separately, skip the chain gaps entirely and just close out the top with two clean rounds.
Round 21: csc around. [50 csc]
Round 22: Switch to 7 mm hook and reverse direction. Starting in stitch just finished, rsc around. [50 rsc]
Fasten off. Slip ends through top of first rsc. Wrap yarn ends around edge to mimic rsc. Weave in end.
Care Instructions
This basket holds up well to regular use, but because the yarn is an 80/20 acrylic-wool blend, I'd skip the washing machine entirely. Spot clean it with a damp cloth when something spills inside, and let it air dry upright so it keeps its round shape. If you added the optional leather handles, keep those dry too since water can stiffen and crack the leather over time. Storing it stuffed with a few towels between uses helps it hold its structure if you're not keeping anything in it.
Frequently Asked Questions
The 8 mm hook builds the base and body with enough structure to hold the basket's shape. The 7 mm hook comes in only for the final round of reverse single crochet, and the slightly tighter tension gives the top edge a cleaner, firmer finish. It's a small switch but it makes a noticeable difference in how the rim sits.
Every hdc stitch has a front loop, a back loop, and a third loop sitting behind those two at the back of the stitch. Working into that third loop for Round 6 creates a clear horizontal ridge where the base meets the body, which helps the basket sit flat and transition cleanly into the upright sides.
You hold two strands together for the entire basket, so you're burning through yarn faster than a single-strand project. Three skeins gives you enough yardage when you split the third skein into two equal balls and run those alongside each other. Two skeins won't get you there.
Instead of chaining across for handle openings in Round 21, you just csc straight around without any gaps. Then the final rsc round finishes the edge the same way. It's worth doing if you plan to use the optional leather handles kit, since those attach separately and you won't need the crocheted openings at all.
Joined rounds with a ch-2 start work well for flat circles because they let you increase evenly without a visible seam pulling the shape. Once you move into the body and stop increasing, continuous rounds keep the sides smooth with no jog where each round begins. The two methods are doing different jobs.
Before You Go
I hope you love how this basket turns out. It's one of those projects that looks so much more complicated than it actually is, and the finished size is genuinely useful around the house. If you make one, I'd love to see it. Tag me on Instagram or drop a photo in the comments below. And if you're saving this for later, pinning it to your crochet board is the best way to find it again when you're ready to cast on.