Small yarn leftovers can be frustrating when they're too useful to throw away but too short for most projects. I designed the Tiny Crochet Gonk Gnome to turn those bits into a complete little make instead of another bundle at the bottom of your yarn bag.

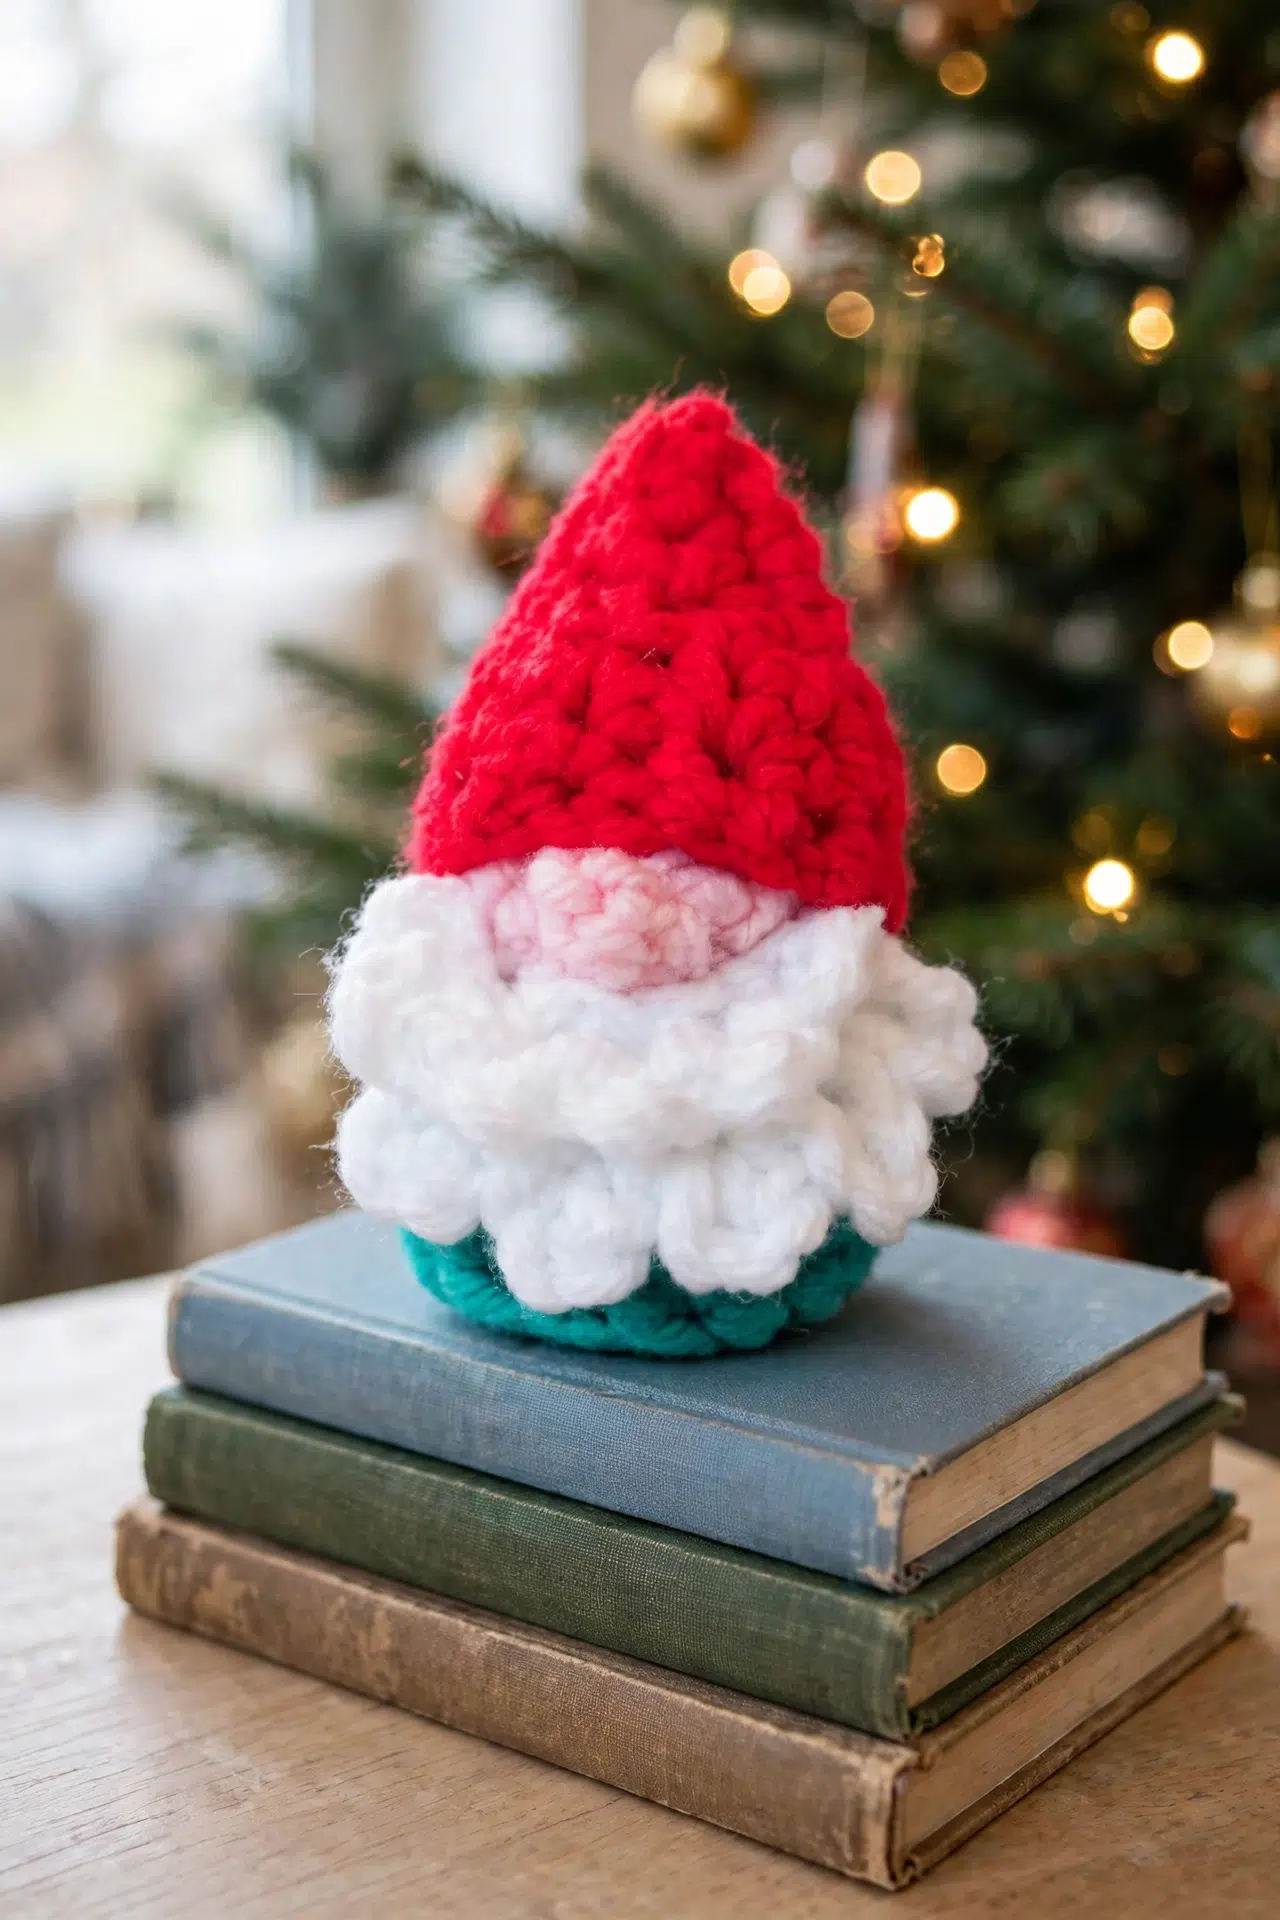
The compact body uses short rounds, while the nose is formed right into the face. A separate folded hat and looped beard finish the gnome without complicated shaping.
Jump to:
What Makes This Pattern Work
- Made for leftovers: Each part has its own yarn role, so short lengths left from other projects can be put to work instead of needing full skeins.
- A built-in nose: The chain loop in the face round forms the nose as you crochet. There's no separate stuffed piece to shape and attach.
- Flexible construction: You can begin with a chain loop or magic ring, and the body transition can be worked around the posts, through the back loops, or normally.
- Manageable finishing: The body closes with one small seam, while the hat is folded and sewn before it's attached. The beard is worked flat and stitched beneath the nose.
Pattern Details
- Yarn Weight: DK/light worsted weight (3)
- Time to Make: about 2-3 hours
Materials for This Gnome
Gather a few yarn leftovers, your 4 mm hook, and a small amount of filling before you begin. Keeping the four yarn roles separated will make each change easy to follow.
- DK/light worsted weight (3) yarn in Clothing Colour (CC), Face Colour (FC), Hat Colour (HC), and Beard Colour (BC): The 4 mm hook is paired with the suggested yarn weight. If you use a thicker or thinner yarn, choose a hook that gives you a firm fabric so the stuffing stays contained.
- 4 mm crochet hook
- Yarn needle
- Scissors
- Toy stuffing or scraps for stuffing: Either option works for this small body. Cut scrap filling into small pieces so it spreads evenly instead of forming firm lumps.
Abbreviations
- ch - chain
- sl st - slip stitch
- st(s) - stitch(es)
- sc - single crochet
- sc2tog - single crochet 2 stitches together for decrease
- hdc - half double crochet
- bps - back post stitch
- rep - repeat
- CC - Clothing Colour
- FC - Face Colour
- HC - Hat Colour
- BC - Beard Colour
How to Crochet the Tiny Gonk Gnome
Work the body first, then crochet and attach the folded hat and two-layer beard.
Always start each round in the same st as the previous sl st. Any yarn can be used for this project.
Main Body
- Round 1: In CC, ch 4, sl st in first ch to form a loop, 7 sc in centre of loop, sl st in first sc to join. Ch 1. (7)
You can use a magic ring or loop instead.
- Round 2: 2 sc in each st around, sl st in first sc to join. Ch 1. (14)
- Round 3: 1 sc bps around each previous sc post, sl st in first sc to join. Ch 1. (14)
If it's easier, you can crochet into the back loops only or work the sts as normal.
- Rounds 4-5: 1 sc in each st around, sl st in first sc to join. Ch 1. (14)
- Round 6: *1 sc in next st, sc2tog; rep from * 3 more times. 1 sc in each of last 2 sts, sl st in first sc to join. Join FC with ch 1. (10)
- Round 7: 1 sc in first 5 sts, ch 4, sl st in same st as previous sc, 1 sc in last 5 sts, sl st in first sc to join. Ch 1. (10)
The count does not include the chs and sl st used for the nose.
- Round 8: 1 sc in first 5 sts, skip the ch 4 and sl st that form the nose, 1 sc in last 5 sts, sl st in first sc to join. Ch 1. (10)
- Round 9: 1 sc in each st around, sl st in first sc to join. Ch 1. (10)
Stuff at this point.
- Round 10: Sc2tog around, sl st in first sc to join. Fasten off and sew the remaining hole closed. (5)
Hat
- Row 1: In HC, ch 7, sl st in second ch from hook and in next ch, 1 sc in next 2 chs, 1 hdc in last 2 chs. Ch 1, turn. (6)
- Row 2: 1 hdc in first 2 sts, 1 sc in next 2 sts, sl st in last 2 sts. Ch 1, turn. (6)
- Rows 3-9: Rep Rows 1 and 2.
Hat Finishing
- Step 1: Fasten off, leaving a long tail for sewing.
- Step 2: Fold the hat in half and sew it up lengthways.
- Step 3: Sew the top end closed.
- Step 4: Sew the hat onto the head so only the nose can be seen.
Beard
- Row 1: In BC, ch 7, sl st in second ch from hook and in each ch along. Turn. (6)
- Row 2: Work in front loops only for this row. *Ch 4, sl st in next front loop; rep from * 5 more times. Turn.
- Row 3: Working in the skipped back loops, *ch 2, sl st in next skipped back loop; rep from * 5 more times. Fasten off and sew the beard onto the face under the nose.
Tips for Success
- Track the joined rounds: Place a marker in the first sc of each round. The ch 1 and joining sl st aren't body sts, and marking that first sc helps you keep the increases and decreases aligned.
- Check Round 6 carefully: Work four decrease groups before crocheting into the final two sts. You should finish with 10 sc so the face rounds and nose placement divide evenly.
- Stuff before the final decrease: Add filling after Round 9 as directed, using small portions and pressing them toward the base. Once Round 10 is complete, the opening is much harder to adjust.
- Pin before sewing: Place the beard under the nose first, then position the hat so the nose remains uncovered. A couple of pins or spare yarn ties will stop the pieces from shifting while you sew.
Ways to Adapt Your Tiny Gnome
- Change the yarn weight: You can use any yarn for this gnome. A thicker yarn creates a larger body and needs more stuffing, while a thinner yarn makes a smaller piece and demands more care when closing the gaps.
- Start with a magic ring: Use a magic ring instead of the chain-4 loop if that's more comfortable in your hands. Tighten it securely after completing the first seven sc.
- Use back loops in Round 3: Working through the back loops only is the closest simple alternative to the bps round. It preserves a defined change in stitch direction without requiring you to work around each post.
- Crochet Round 3 normally: Standard sc through both loops also works when you want the easiest option. The body construction and stitch count stay the same, though the transition will be less pronounced.
- Fill with clean scraps: Small yarn ends or finely cut fabric scraps can replace toy stuffing. Add them gradually because dense scraps can make such a small body feel uneven or overly firm.
- Reduce the number of yarn changes: The same yarn can fill more than one color role if your leftovers are limited. The construction won't change, but those sections will no longer be marked by a yarn change.
Fixing the Fiddly Parts
- The body count keeps changing: Make sure you're starting in the same st as the previous joining sl st. Don't work into the ch 1 or count the sl st as part of the round.
- The beard's second row has nowhere to go: Row 2 must use only the front loops of the six beard sts. Turn the work and use the six untouched back loops for Row 3.
- The hat covers the nose: Pin the hat before sewing and adjust its lower edge until only the nose remains visible. Attach it a little at a time, checking the placement after every few stitches.
Place Your Gnome Around the House
Set your finished gnome on a shelf, desk, mantel, or craft-room ledge where its small size can fill an open spot without needing much room.
It also works as a small seasonal accent or an extra handmade piece tucked into a gift. Keep it away from pets and very young children because the stuffed crochet piece isn't intended as a toy.
Caring for Your Gnome
Because the yarn fiber can vary, follow the washing guidance on the yarn label. Spot clean the stuffed gnome when possible, reshape it gently, and let it air-dry completely before returning it to display.
More Small Crochet Amigurumi
- Mini Crochet Halloween Cat
- Pocket Parrot Amigurumi: A Low-Sew Crochet Pattern With Just Two Seams
- Pocket Capybara Amigurumi: A No-Sew Crochet Pattern You Can Finish in Under 40 Minutes
- Pocket Alien & UFO Amigurumi: A Two-Piece Crochet Pattern With Puff Stitch Details
Frequently Asked Questions
Can I use a magic ring for the body?
Yes, a magic ring can replace the chain-4 loop in Round 1. Work the seven sc into the ring, tighten it, and join to the first sc as usual. This closes the centre more firmly, while the remaining rounds and stitch counts stay exactly the same.
When should I stuff the gnome?
Stuff the body after Round 9 and before working the five decreases in Round 10. At that point, the opening is still wide enough for you to distribute small pieces of filling toward the base and sides. Waiting until after the final decrease makes even stuffing and reshaping much harder.
Do I have to work back post stitches in Round 3?
No, Round 3 can be worked through the back loops or as normal sc instead. The bps method changes the direction of the fabric at the body transition, but neither alternative affects the 14-st count. Choose the version that lets your hands maintain comfortable, even tension.
How do I repeat the hat rows through Row 9?
Alternate the two established row patterns through Row 9. Work the Row 1 stitch order for Rows 3, 5, 7, and 9, and the Row 2 order for Rows 4, 6, and 8. On later repeats, work across the six existing sts rather than making another foundation chain.
Mini Crochet Gonk Gnome is a scrap-friendly project I expect you'll return to whenever a few useful yarn ends need a purpose. Tell me in the comments which yarn substitutions you chose!