
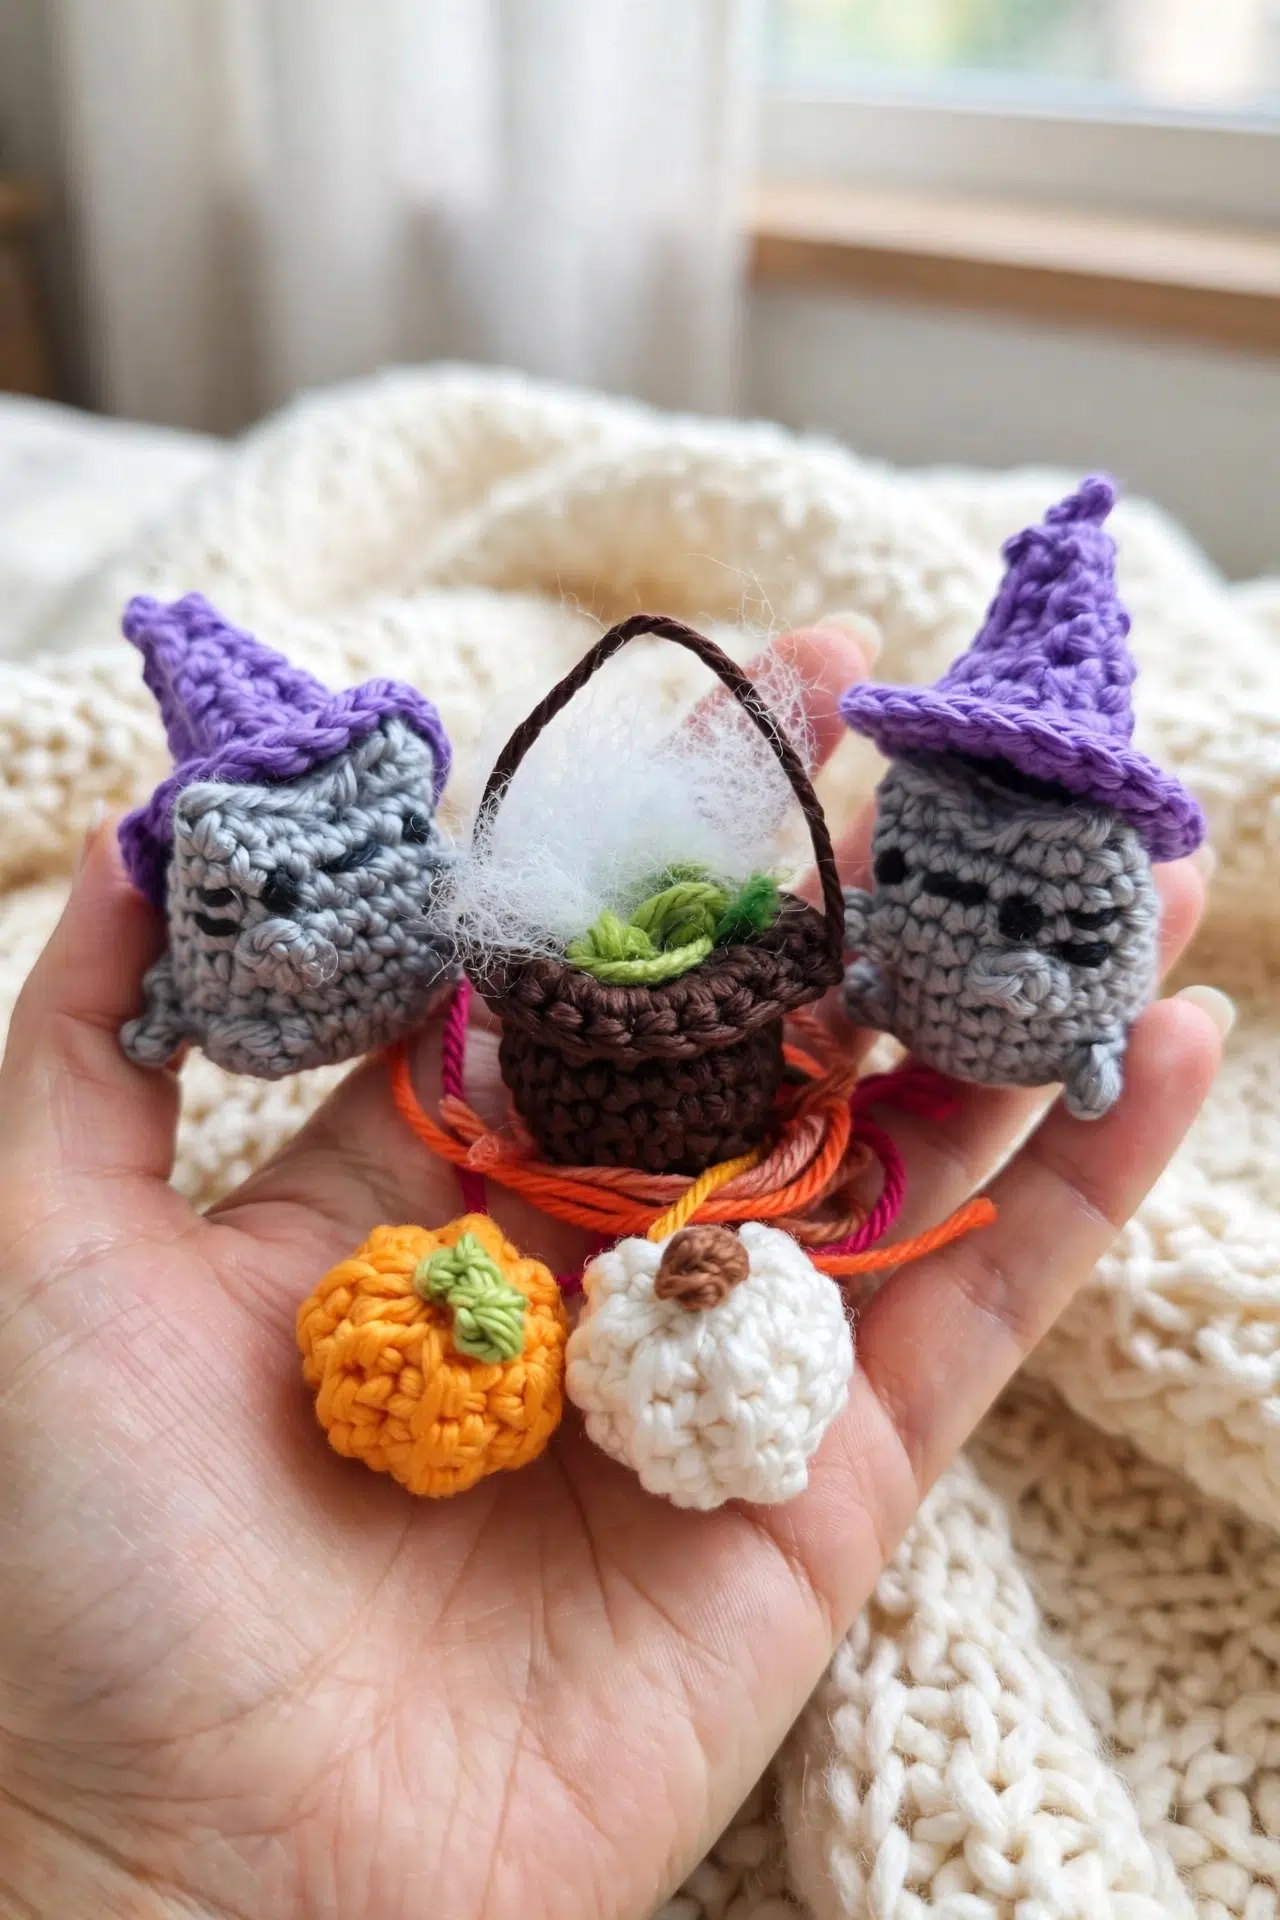
Small projects bring plenty of playful choice to your hook, and this Mini Crochet Halloween Cat gives you a cat plus three tiny accessories without long rows or complicated shaping. If you're comfortable with basic stitches, joined rounds, and a little sewing, you'll find each piece pleasantly manageable.

I especially love that the hat, pumpkin, and cauldron all use different construction methods. Make the full group, choose one accessory, or change the yarn colors to suit what you have. Pick a piece and settle in for some tiny crochet fun!
Jump to:
- Why You'll Love This Pattern
- Pattern Details
- Yarn and Supplies
- Stitches & Abbreviations
- How to Crochet the Mini Halloween Cat
- Tips for the Best Results
- Ways to Make Your Mini Cat Set Your Own
- Fixing the Fiddly Parts
- A Tiny Halloween Grouping
- Caring for Your Cat
- More Spooky Amigurumi to Crochet
- Frequently Asked Questions
Why You'll Love This Pattern
- Short sections: The pieces are divided into compact rounds, rows, and finishing steps, so you can pause at natural points instead of keeping track of a long sequence.
- Varied construction: You'll crochet joined rounds, shape a hat with short rows, build a ribbed pumpkin, and finish with simple sewing.
- Approachable stitches: Most of the pattern uses sc, hdc, dc, and sl st. The cauldron's front-post round even includes a flo alternative.
- Independent accessories: Each accessory stands as its own small project, so you don't need to complete every piece before enjoying the cat.
Pattern Details
- Yarn Weight: 2, Sport/Baby weight
- Time to Make: about 4-6 hours
Yarn and Supplies
Gather your yarn colors before you begin, along with a small hook, stuffing, and the basic tools you'll need for assembly.
- Sport/Baby weight yarn in purple, black, orange, green, and grey: Using the same yarn weight across the cat and accessories helps keep their scale consistent.
- 2.00 mm crochet hook or similar
- Toy stuffing or yarn scraps for stuffing and cauldron extras: Add stuffing in small pieces so you can control the shape without stretching the stitches.
- Yarn needle
- Scissors
Stitches & Abbreviations
- ch - chain
- st(s) - stitch(es)
- sl st - slip stitch
- sc - single crochet
- sc2tog - single crochet 2 stitches together for decrease
- hdc - half double crochet
- dc - double crochet
- blo - back loops only
- flo - front loops only
Magic ring: An adjustable loop used as the center of the first round.
sc front post st: Work the sc around the post of the previous sc rather than through the loops at the top.
Draw-string sewing: Sew inwards, then sew outwards, pulling as you go to draw in the material.
How to Crochet the Mini Halloween Cat
Read through the finishing steps before you begin so you'll know when to stuff, fold, and leave a useful sewing tail.
When working in rounds, always start the round in the same stitch as the previous sl st. A beginning ch 1 does not count as a st throughout the pattern. Instructions between asterisks are repeated as stated.
Cat
- Round 1: In grey yarn, crochet 8 sc into a magic ring or ch-4 loop; sl st in first sc to join. Ch 1. (8)
The ch 1 does not count as a st.
- Round 2: 2 sc in each st around; sl st in first sc to join. Ch 1. (16)
- Round 3: 1 sc in first 4 sts, ch 4, sl st in same st as last sc, 1 sc in next 6 sts, ch 4, sl st in same st as last sc, 1 sc in next 4 sts, ch 9, sl st in second ch from hook and in each ch along, 1 sc in last 2 sts; sl st in first sc to join. Ch 1. (16)
The count does not include chs and sl sts.
- Rounds 4-5: 1 sc in each st around, skipping chs and sl sts; sl st in first sc to join. Ch 1. (16)
- Round 6: 1 sc in first 6 sts, ch 4, sl st in same st as last sc, 1 sc in next 4 sts, ch 4, sl st in same st as last sc, 1 sc in last 6 sts; sl st in first sc to join. Ch 1. (16)
The count does not include chs and sl sts.
- Rounds 7-9: 1 sc in each st around, skipping chs and sl sts; sl st in first sc to join. Ch 1. (16)
- Round 10: Sl st in first 3 sts, 1 sc in next 4 sts, sl st in next 3 sts, 1 sc in next 4 sts, sl st in last 2 sts. Fasten off, stuff, flatten, and sew along the edge to close.
Cat Finishing
- Step 1: Cut two short lengths of black yarn and tie 2 knots in the center of each.
- Step 2: Sew the ends into the head so the knots catch on the outside to form eyes.
- Step 3: Use the remaining tail end to sew on a mouth and stripes or whiskers.
Witch's Hat
- Row 1: In purple yarn, ch 10. Work 1 hdc in second ch from hook and in next ch, 1 sc in next 2 chs, sl st in next 3 chs, skip remaining chs. Turn. (7)
- Row 2: Skip first st, sl st in next 2 sts, 1 sc in next 2 sts, 1 hdc in last 2 sts. Ch 1 and turn. (6)
The ch 1 does not count as a st.
- Row 3: 1 hdc in first 2 sts, 1 sc in next 2 sts, sl st in last 2 sts. Ch 1 and turn. (6)
- Rows 4-7: Repeat Rows 2 and 3, ending at the top of the hat.
Hat Finishing
- Step 1: Fold lengthways and sl st in each st along, joining with the opposite side and ending at the base of the hat.
- Step 2: Ch 2 and crochet 23 dc around the base of the hat as neatly as possible, working 2 at a time in the same makeshift st. (23)
- Step 3: Fasten off and tie in all ends, sewing down the top of the hat into a point.
Pumpkin
- Row 1: In orange yarn, ch 6. Crochet 1 sc in second ch from hook and in each ch along. Ch 1 and turn. (5)
The ch 1 does not count as a st.
- Rows 2-14: Working blo for every row, crochet 1 sc in each st along. Ch 1 and turn. (5)
Pumpkin Finishing
- Step 1: On the final row, fasten off, fold in half, and sew the short edges together to form a ring.
- Step 2: Draw-string sew the bottom hole closed, stuff the pumpkin, and draw-string sew the remaining top hole closed. Hide all remaining tail ends.
Stalk
- Step 1: Using green yarn, ch 5 and fasten off.
- Step 2: Sew the remaining tail end along the chains to the opposite end, pull gently to fold up the chains, and sew onto the top of the pumpkin.
Cauldron
- Round 1: In black yarn, crochet 8 sc into a magic ring or ch-4 loop; sl st in first sc to join. Ch 1. (8)
The ch 1 does not count as a st.
- Round 2: 2 sc in each st around; sl st in first sc to join. Ch 1. (16)
- Rounds 3-7: 1 sc in each st around; sl st in first sc to join. Ch 1. (16)
- Round 8: Work 1 sc front post st around each previous sc st, or work into flo; sl st in first sc to join. Ch 1. (16)
- Round 9: *1 sc in next st, 2 sc in next st; rep from * around. Sl st in first sc to join. Fasten off, leaving a long tail end. (24)
Cauldron Finishing
- Step 1: Sew slightly in toward the center of the cauldron and then into the opposite edge to form a handle; secure and tie in all remaining ends.
- Step 2: Use toy stuffing for steam and add yarn scraps underneath for a fire or inside for cauldron goop.
Tips for the Best Results
- Protect the cat's stitch count: Treat the added chains and their sl sts as separate details. Skip them on the following rounds so the main round remains at 16 sts.
- Stuff a little at a time: Small pieces fill quickly, so add tiny portions and spread them with your fingers before closing each opening.
- Distribute the hat brim: The brim is worked into makeshift spaces around the base. Space the 23 dc as evenly as you can rather than forcing them all into one tight area.
- Close the pumpkin gradually: Take small, evenly spaced draw-string stitches and pull in stages. This gives you more control over both openings.
Ways to Make Your Mini Cat Set Your Own
- Change the yarn weight: You can use a different yarn weight with a suitable hook, but every piece will change in size and may require a different amount of stuffing.
- Choose another palette: Changing the yarn colors won't affect the stitch counts or construction, so you can work entirely from yarn you already enjoy using.
- Swap the starting loop: Use a magic ring when you want an adjustable center, or choose the ch-4 loop if that's more comfortable for your hands.
- Simplify the cauldron round: Work Round 8 into flo instead of around the front posts. You'll keep the same 16-st count while avoiding the front-post technique.
- Adjust the embroidered details: The mouth, stripes, and whiskers are sewn after the cat is closed, so you can choose which details to add without changing the crochet.
Fixing the Fiddly Parts
- The cat has more than 16 sts: You've probably worked into one of the added chains or sl sts. On Rounds 4-5 and 7-9, skip those details and place sc only in the 16 main sts.
- The hat brim feels crowded: Spread the 23 dc around the entire base and use the available makeshift spaces more than once where directed. Relaxing your tension slightly can also keep the base from becoming too tight.
- The pumpkin opening won't close: Use small draw-string stitches close to the edge, then pull each section gradually. Close the bottom first, add the stuffing, and only then draw the top shut.
A Tiny Halloween Grouping
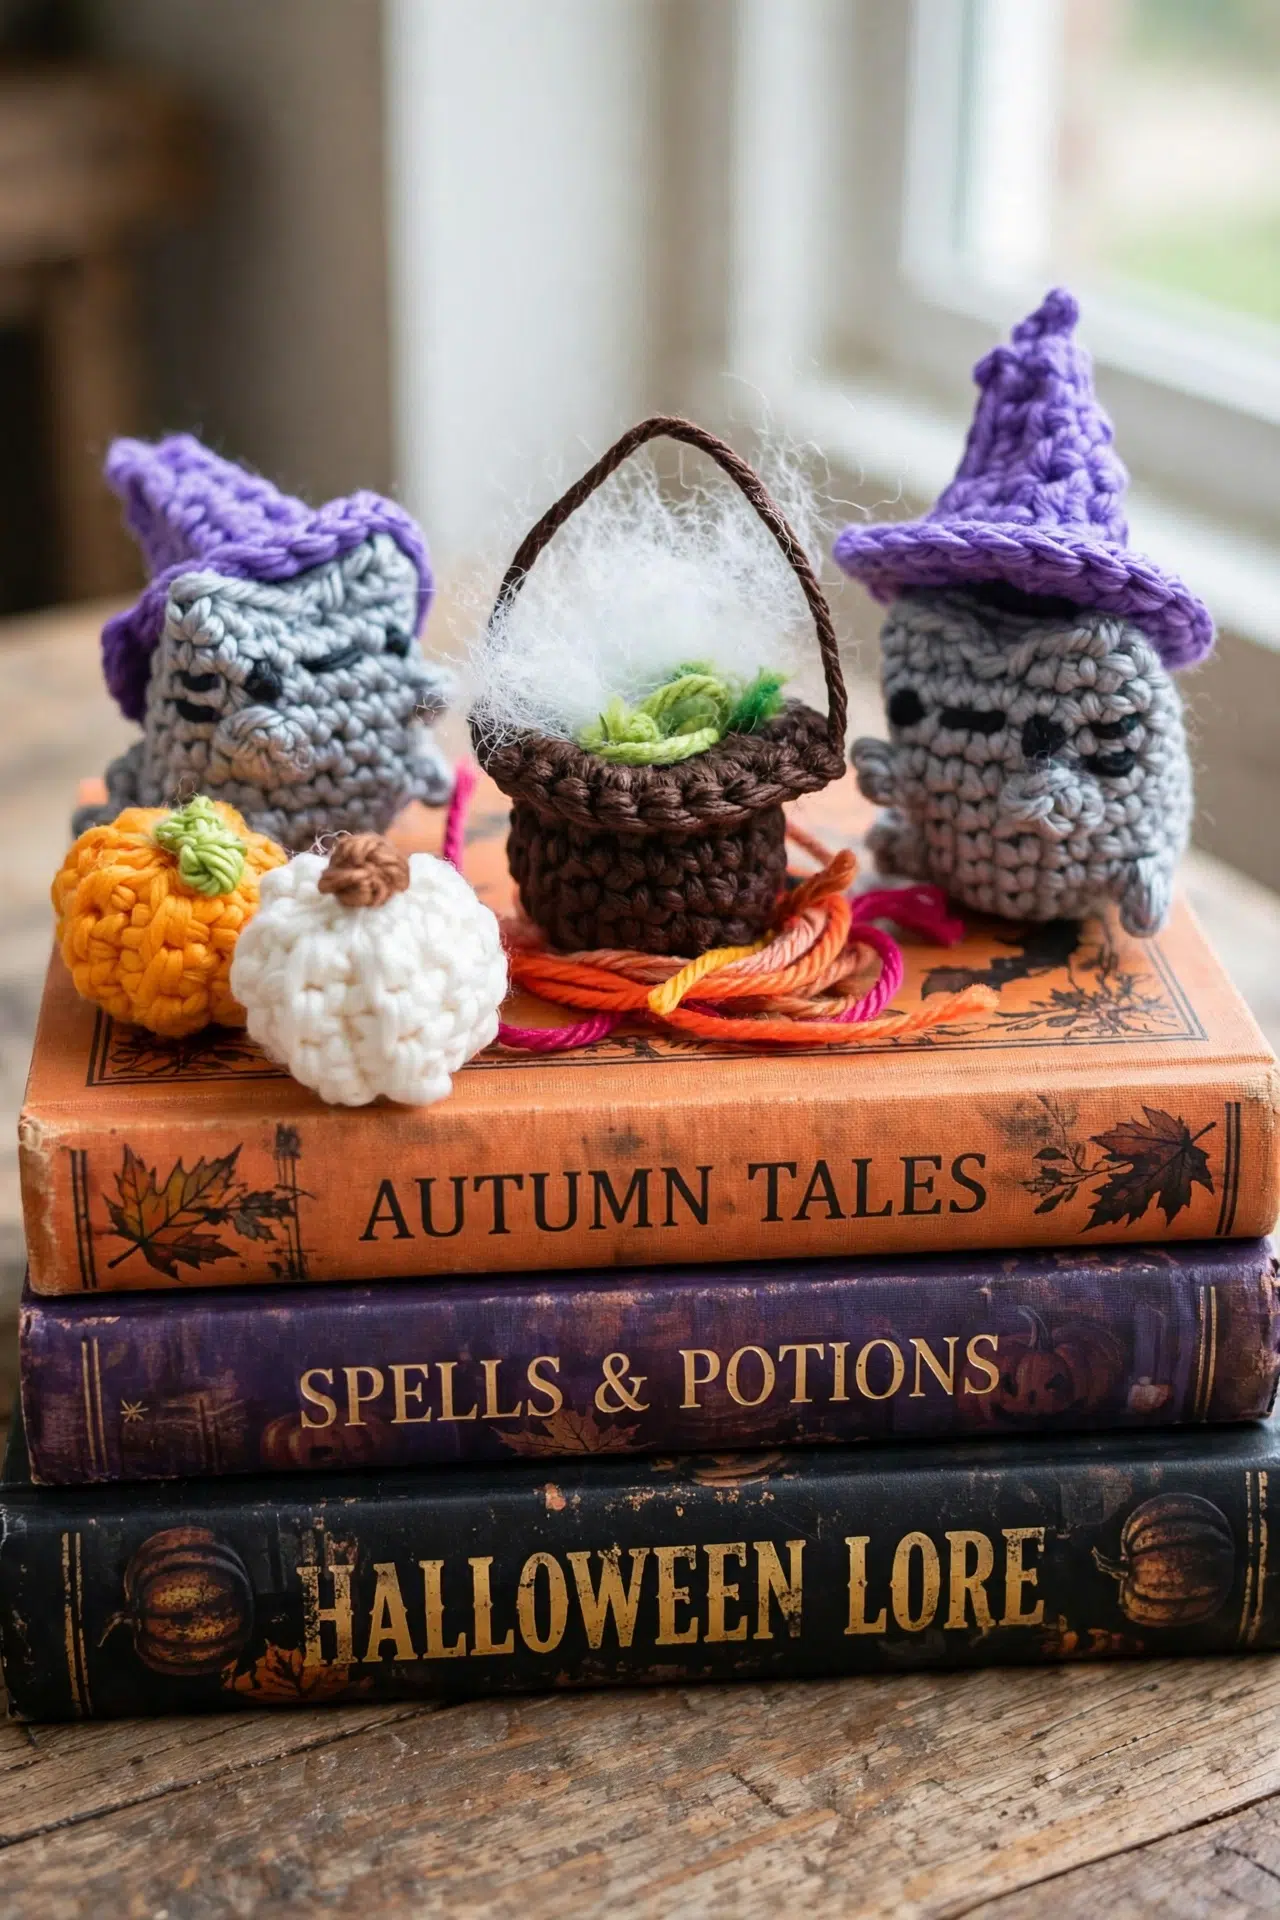
Keep the cat, pumpkin, hat, and cauldron together as a small Halloween grouping on a stable shelf or tabletop. Since the pieces and sewn details are tiny, place them out of reach of young children and pets.
Caring for Your Cat
Because the yarn fiber isn't specified, follow the washing directions on your yarn label. Spot cleaning is the safest choice for the stuffing, embroidery, and assembled details. Reshape gently and let every piece air-dry fully.
More Spooky Amigurumi to Crochet
Frequently Asked Questions
Do the cat's chain sections count as stitches?
No, the ch-4 and ch-9 sections aren't included in the cat's 16-st count. They're anchored with sl sts, then skipped during the following plain rounds. Working into those chains would add unintended stitches and make the body wider.
When should I stuff the cat?
Stuff the cat during Round 10, after fastening off and before sewing the flattened edge closed. Add small portions so the filling reaches the earlier rounds without distorting the 16-st body. Once the edge is sewn, you won't have another opening for adjustment.
Why does the hat decrease from 7 stitches to 6?
Row 2 intentionally skips the first st, reducing the working row from 7 sts to 6. The remaining rows repeat the 6-st sequence while alternating the placement of hdc, sc, and sl st. Keep that skipped stitch out of Row 2 whenever it repeats.
Can I use flo instead of front-post stitches on the cauldron?
Yes, Round 8 specifically allows flo as an alternative to the sc front post sts. Whichever method you choose, work one sc for each previous sc and finish with 16 sts. Don't combine both methods within the round unless you can keep the tension consistent.
Do I have to make every accessory?
No, the hat, pumpkin, stalk, and cauldron are worked separately from the cat. You can stop after any completed section or choose only the pieces you want. Remember that the stalk belongs to the pumpkin finishing, while the cauldron handle uses the long tail left after Round 9.
Tell me in the comments which pieces you made and how your tiny crochet group turned out 🧶



