
I've been on a serious bag kick lately, and this one really does check every box. The Crochet Japanese Knot Bag (Mosu Bag) Using the Moss Stitch is one of those projects that feels special the moment you finish it. The Japanese knot bag silhouette is so clever in how it works, and pairing it with the moss stitch gives the whole thing a texture and rhythm that makes the crocheting itself genuinely enjoyable. If you've been looking for a bag pattern that's a little more interesting than the usual tote, this is actually a fun one.

Jump to:
About the Design
What I love most about this bag is the construction. The Japanese knot bag style uses an asymmetrical flap and looped handles that wrap and tuck through each other to close. It sounds complicated but it's really not. Once you understand the logic of it, the whole thing clicks into place, and you end up with a bag that closes securely without any hardware or zippers at all. That's the part I find most satisfying, honestly. It's just clever design.
I'd make this for anyone who appreciates something a little out of the ordinary. It's the kind of bag you hand someone and they immediately ask where you got it. Great for a gift, great to keep for yourself. It works for a farmers market run or a casual dinner out, something you just grab on the way out the door.
Why This Pattern Stands Out
A no-hardware bag closure that's actually genius once you make it.
- Skill level: Intermediate, so you'll want some basic bag construction experience, but nothing here is out of reach.
- Technique value: The moss stitch is a great one to have in your toolkit, and this project gives you real practice with it over a substantial piece.
- Unique closure: The knotted handle system means no buttons, snaps, or hardware to source or sew on.
- Gifting potential: This makes a genuinely impressive handmade gift that looks far more complex than it is to make.
- Time investment: A solid weekend project, not a months-long commitment.
Your Supply List
The supply list here is refreshingly short, especially for a bag with this much personality.
- Worsted Weight Yarn: A worsted weight cotton or cotton-blend works really well for this kind of structured bag. It holds its shape through the oval base and the body without being stiff, and the fabric lining option (more on that below) pairs better with a yarn that doesn't stretch out. For a bag roughly 23 cm wide by 20 cm tall, you're probably looking at somewhere around 150 to 200 meters, though that can shift depending on your tension and how long you make the straps. Check your yarn label for fiber content since the pattern leaves that open, and the fiber you pick will affect drape and durability more than anything else here.
- Hook Size: No specific size is listed in the pattern, so go with whatever hook your yarn label recommends for a firm, structured fabric. For most worsted weight yarns that lands around a 5.0 mm or 5.5 mm. You want the stitches tight enough that the bag holds its shape when loaded up.
- Stitch Marker: Since the body is worked in continuous rounds, a stitch marker is the only way to keep track of where your rounds begin and end. One is enough, just move it up as you go.
- Cloth for Optional Fabric Lining: The lining is optional, but it makes the finished bag a lot more practical if you plan to carry anything small in it. A scrap of cotton quilting fabric or even an old pillowcase works. Cut it to fit the interior once the bag is done.
- Also needed: yarn needle, scissors
The Quick Stats
The closing mechanism on this bag is a knot, not a zipper or button — the longer strap loops through the shorter one to cinch it shut.
| Skill Level | Intermediate |
| Pattern Gauge | Gauge is not critical for this project. Use a hook size that creates a firm fabric with the moss stitch so the bag holds its shape. |
| Finished Size | Roughly 23 cm wide by 20 cm tall |
| Yarn Weight | 4 Medium / Worsted |
| Fiber | Not specified — check the yarn label |
| Terminology | US |
Customizing the Size
The foundation chain controls the width of the bag. Start with any odd number of chains: fewer chains give you a smaller bag, more give you a larger one. The video uses 31 chains to land at roughly 23 cm wide by 20 cm tall. Go up or down in increments of 2 to keep the chain count odd, which the moss stitch pattern requires.
Stitches & Abbreviations
Short list — mostly stitches you already know.
- ch = chain
- sc = single crochet
- sl st = slip stitch
- st(s) = stitch(es)
- inc = increase (2 sc in same st)
- sk = skip
- tog = together
Special Stitches
- Moss stitch (sc-ch1): Work 1 sc, ch 1, sk next st. On following rounds or rows, work sc into each ch-1 space, with ch 1 between each sc.
The Critical Details
This bag is worked bottom-up. It starts with an oval base, then the body is worked in continuous rounds using the moss stitch. Once the body is done, you switch to working in rows to build two straps: one short, one long. They're not the same length on purpose. To close the bag, you loop the longer strap through the opening formed by the shorter one and pull it into a knot. That's the whole closure mechanism.
The foundation chain needs to be an odd number for the moss stitch to work out correctly. The video uses 31 chains. If you're adjusting size, keep that odd-number rule in mind as you go up or down.
Hook size isn't tied to a specific gauge here, but it does matter for structure. Too loose and the bag won't hold its shape. Work a small swatch of the moss stitch and squeeze it a bit — if it feels floppy, go down a hook size.
The Crochet Japanese Knot Bag (Mosu Bag) Using the Moss Stitch Pattern Steps
Here's how I work through this bag from the foundation chain all the way to the finished straps.
Foundation Chain
Everything starts here. The number of chains you cast on determines the length of the oval base, so count carefully before moving on.
Step 1: Start with a slip knot and crochet an odd number of chains. The pattern uses 31 chains as the example, but any odd number works depending on how long you want your base.
Oval Base
The oval base is worked in rounds, building out from the foundation chain on both sides. The increases happen at each short end of the oval, so you'll be shaping two curves simultaneously as you go up.
Round 1: Work into the 2nd ch from hook: 2 sc in same ch (inc).
Round 1: 1 sc in each ch across until you reach the last ch (28 sc if starting with 31 ch).
Round 1: In the very last ch: 3 sc in same ch. This triple increase turns the corner at the far end of the oval.
Round 1: Working along the other side of the foundation ch: 1 sc in each loop across.
Round 1: Place a stitch marker at the end of the round. Move it up each round so you always know where the round ends.
Round 2: Inc in next st, inc in following st.
Round 2: Sc 28 across.
Round 2: Inc in each of the next 3 sts.
Round 2: Sc 28 down the opposite side.
Round 2: Inc in the last st.
Round 3: (1 sc, inc) twice.
Round 3: Sc 28 across.
Round 3: Around the curve: (1 sc, inc) 3 times.
Round 3: Sc 28 across.
Round 3: 1 sc, inc in the last two sts.
Round 4: (2 sc, inc) twice.
Round 4: Sc 28 across.
Round 4: Around the curve: (2 sc, inc) 3 times.
Round 4: Sc 28 across.
Round 4: 2 sc, inc in the last sts.
Round 5: (3 sc, inc) twice.
Round 5: Sc 28 across.
Round 5: Around the curve: (3 sc, inc) 3 times.
Round 5: Sc 28 across.
Round 5: 3 sc, inc in the last four sts. After Round 5 the base is complete and you're ready to start building the walls.
Body of the Bag in Moss Stitch
This section is worked in continuous rounds. The moss stitch (also called the linen stitch or granite stitch) alternates single crochets with chain-1 spaces, creating that dense, textured fabric the bag is known for. Round 6 is a plain transition round before the pattern begins in Round 7.
Round 6: Sc in each st around with no increases. This even round establishes a clean base for the moss stitch pattern to sit on.
Round 7: [1 sc in 1st st, ch 1, sk next st] repeat around.
Round 7: Finish the round with ch 1. This sets up the offset chain spaces that the following rounds will work into.
Round 8: Sc in the first sc.
Round 8: Ch 1, then 1 sc in the next ch-1 space.
Round 8: [Ch 1, 1 sc in next ch-1 space] repeat around. Notice that you're working into the chain spaces from the previous round, not into the single crochets. That's what keeps the moss stitch interlocking correctly.
Rounds 9+: Repeat Round 8 in continuous rounds until the body reaches the desired height (e.g., approximately 20 cm / 8 inches).
Rounds 9+: Stop at a sc on the side edge of the bag before starting the straps. Where you stop matters here because the straps branch off from this point, so take a moment to make sure you're at a side edge rather than the front or back.
Strap 1: The Short Strap
The short strap is worked in rows directly from where you stopped on the bag body, continuing the moss stitch pattern. You're narrowing down to just 8 stitches wide, so the strap will feel much smaller than the bag body.
Row 1: Ch 2, turn.
Row 1: Sc in the 1st ch-1 space.
Row 1: [Ch 1, sc in next ch-1 space] across for a total of 8 sc. (8)
Row 2: Ch 2, turn.
Row 2: Sc in 1st ch-1 space, [ch 1, sc in next ch-1 space] across.
Row 2: Place the 8th (final) sc into the space between the starting ch-2 and the first sc of the previous row. (8) The ch-2 turning chain creates a small space at the start of each row, and that's where your last sc lands to keep the stitch count consistent.
Row 2: Repeat Row 2 until Strap 1 reaches approximately 12 cm / 4.7 inches in length.
Row 2: Fasten off leaving a long yarn tail for sewing.
Attaching Strap 1
Once the short strap is complete, you'll fold it across and sew it down to close the first handle loop.
Step 1: Fold the strap over to the opposite side of the bag and use a yarn needle to whip stitch/sew it securely to the top edge.
Strap 2: Joining Yarn for the Long Strap
Before working the long strap, you need to rejoin your yarn at the correct position on the bag. Taking a moment to lay the bag flat and align the edges before joining ensures the two straps sit symmetrically.
Step 1: Lay the bag flat, align with the opposite edge, and join yarn with a hook inside a sc at the side edge.
Strap 2: The Long Strap
The long strap is worked the same way as the short one, just considerably longer. It's the strap that wraps around and creates the knot closure the bag is named for, so the extra length is intentional.
Row 1: Ch 2 to start.
Row 1: [Sc in next ch-1 space, ch 1] across for a total of 8 sc. (8)
Row 2: Ch 2, turn.
Row 2: Sc in 1st ch-1 space, [ch 1, sc in next ch-1 space] across.
Row 2: Place the 8th sc between the starting ch-2 and sc of the previous row. (8)
Row 2: Repeat Row 2 until Strap 2 reaches approximately 30 cm / 11.8 inches in length. Leave a long tail before fastening off — you'll need it for sewing.
Sewing the Long Strap
With the long strap finished, you'll fold and sew it down the same way as the short strap. Working stitch by stitch keeps the join tidy and holds the strap flat against the bag edge.
Step 1: Fold the long strap over to the top edge of the opposite side of the bag.
Step 2: Thread the long yarn tail into a yarn needle.
Step 3: Whip stitch across, matching stitch by stitch along the top edge of the bag.
Weaving in Ends
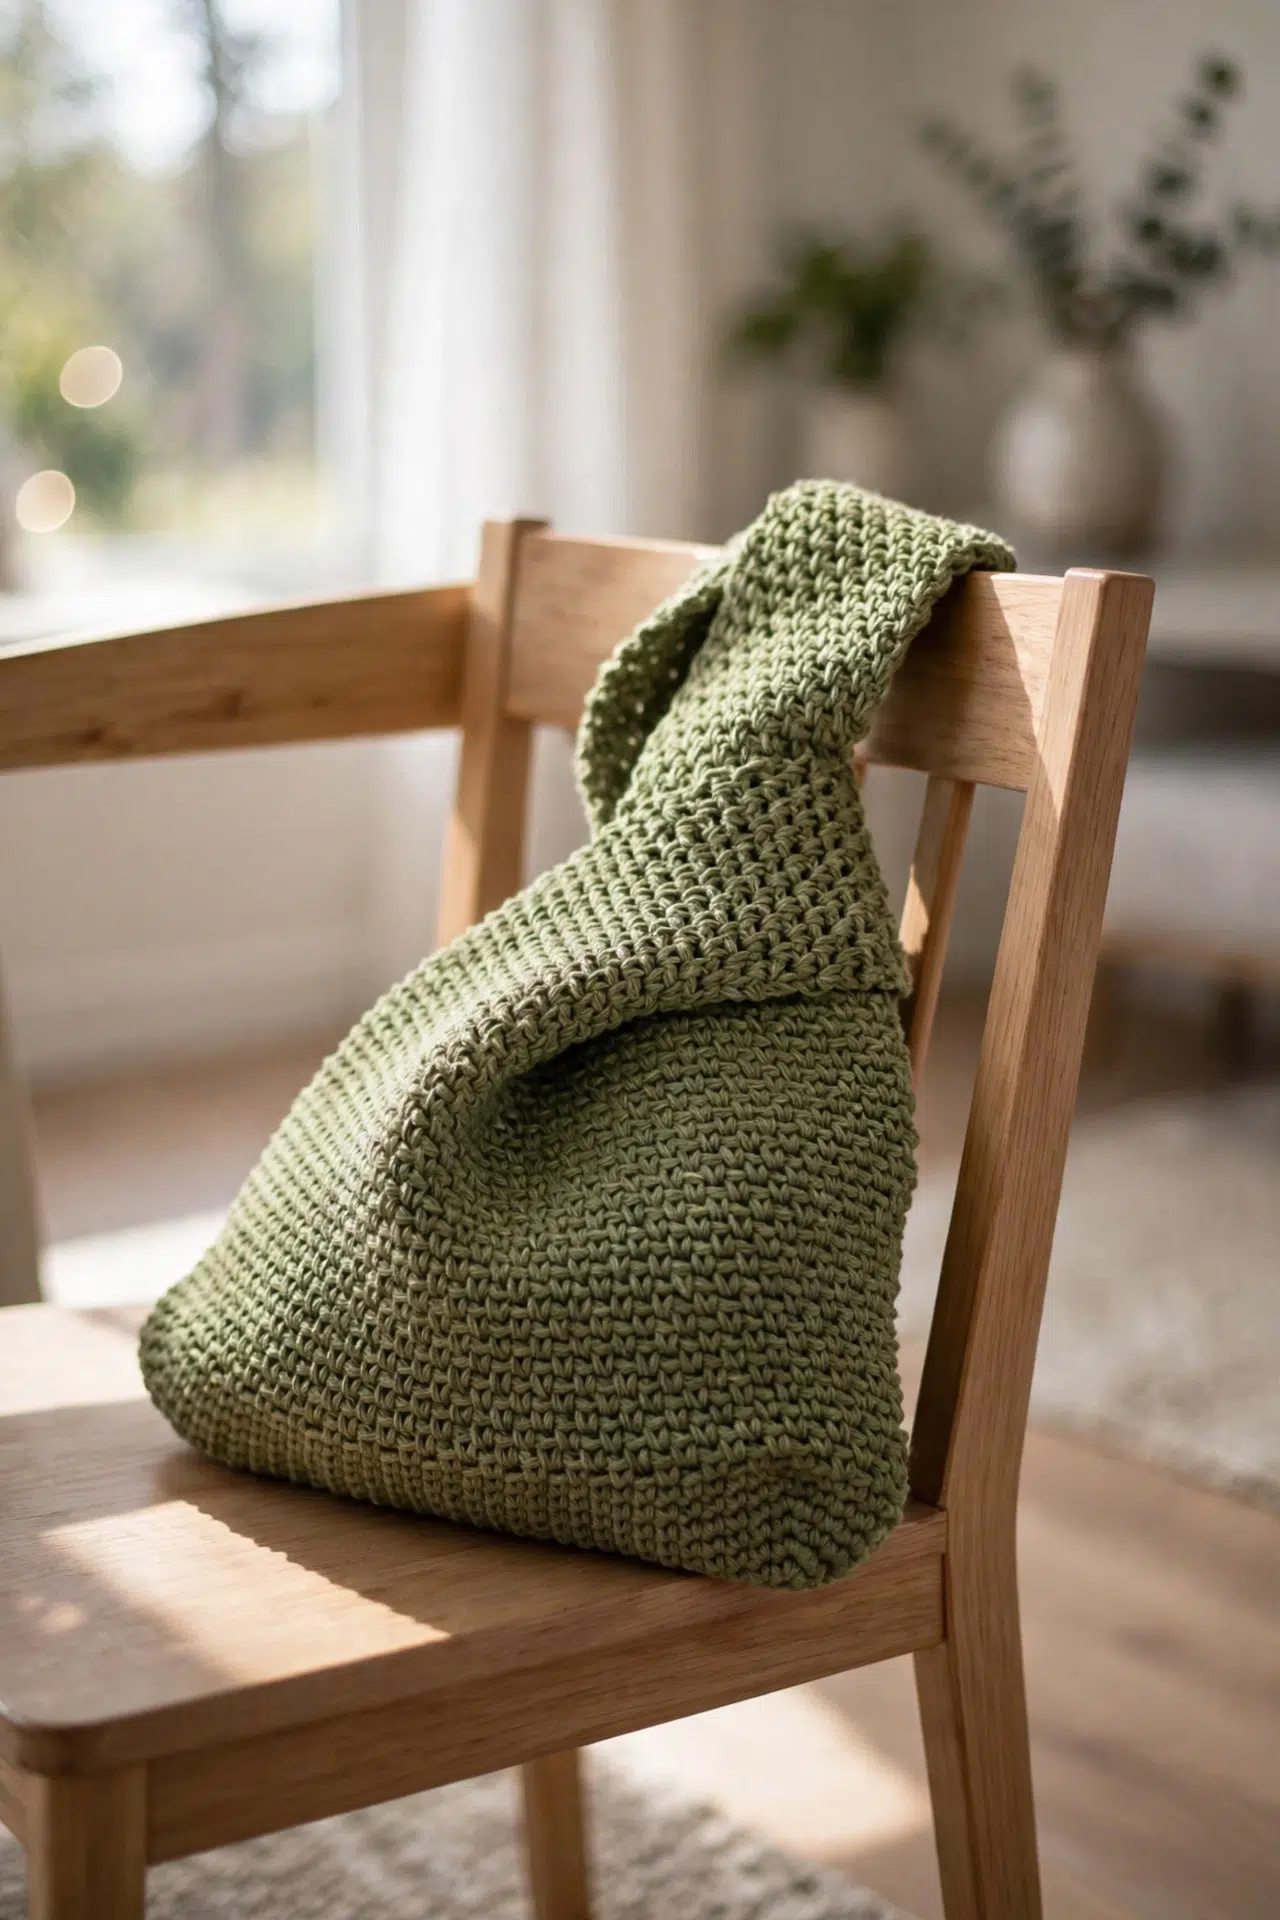
A few ends to weave in and the bag is done. I work through the inner stitches so nothing shows on the outside.
Step 1: Weave the yarn through inner stitches.
Step 2: Separate strands, tie a secure triple knot, and trim excess yarn.
Optional Fabric Lining
A lining is worth considering if you're using a yarn with a lot of stretch, since it helps the bag hold its shape and keeps small items from poking through the moss stitch gaps.
Step 1: If using non-cotton stretch yarn, cut two pieces of cloth matching the bag's dimensions, sew the outer edges, insert into the bag, and stitch along the top rim using matching yarn.
Care Instructions
For day-to-day use, spot cleaning is your best friend with this bag. The straps are sewn down with whip stitch, and submerging the whole thing repeatedly can loosen those seams over time. If you added a fabric lining, that's another reason to keep it out of the washing machine. A damp cloth handles most surface dirt just fine. Store it stuffed with a bit of tissue paper or a small pouch to help it hold its shape between uses.
Frequently Asked Questions
The closing mechanism is the whole point of this style. The long strap loops through the opening created by the short strap, and that tension is what holds the bag shut. No buttons, no zipper. Once you see it in action it makes total sense, but it helps to have both straps fully attached before you test it.
The short strap (about 12 cm) folds over and gets sewn to the opposite side of the bag, creating a loop. The long strap (about 30 cm) passes through that loop to close the bag. If both straps were the same length, the closure wouldn't work. The length difference is intentional and specific to this bag style.
The lining is optional. I'd say it's worth considering if you're using a stretchier yarn, since the fabric helps the bag hold its shape and keeps small items from poking through the moss stitch gaps. If you're using a firmer worsted weight, the bag stands up on its own just fine without it.
The moss stitch works in a pattern of sc, ch 1, skip. Starting with an odd number of chains keeps that alternating pattern consistent all the way around the oval base without throwing off the stitch alignment. The sample uses 31 chains, which gives you a bag roughly 23 cm wide.
You can. Change the number of foundation chains (keeping it odd) to adjust the width, and work more or fewer rounds on the body to change the height. The straps would need adjusting too if you go significantly larger. The construction is straightforward enough that scaling it up or down is pretty manageable once you understand how the pieces connect.
Before You Go
I really hope you love making this one as much as I did. There's something so satisfying about that knot closure the first time it actually works the way it's supposed to. If you make yours, I'd love to see it: tag me on Instagram or drop a photo in the comments below. And if you want to save this for later, pinning it to your crochet bags board on Pinterest is the easiest way to find it again when you're ready to cast on.



