
There's something about a tiny stuffed eagle that just makes you smile. Maybe it's the oversized head, maybe it's the little yellow beak, or maybe it's just how quickly this guy comes together, but this Bald Eagle Amigurumi is one of those patterns you start "just to try a round or two" and end up finishing in one sitting.
He stands about 8 inches tall from the top of his head to his feet, and he's built as one continuous piece from the bottom of the body all the way up to the top of the head, so there's no separate head-and-body assembly to fuss with. Add on two folded wings, a stubby little beak, and a pair of three-toed feet, and you've got a plush that looks a lot more impressive than the actual effort it takes to make him.
This one is beginner-friendly, worked entirely in single crochet with a couple of fun special stitches thrown in, and it's written in U.S. crochet terms throughout.
Quick Overview
Skill Level: Easy Finished Size: 8" tall, from the top of the head to the feet Terms: U.S. crochet terms Gauge: Not important for this project — just aim for a nice, tight fabric that won't let stuffing peek through
Materials
Yarn — Super Bulky Weight (#6)
- Brown — 3.5 oz
- White — 1 oz
- Yellow — ½ oz
Tools & Notions
- K/10.5 (6.50mm) crochet hook
- Poly-fil stuffing
- 12mm safety eyes
- Yarn needle with a large eye
- Scissors
This pattern is written for super bulky yarn, but it's flexible — you can make it in any yarn weight as long as you switch to an appropriately sized hook. For example, if you want a smaller eagle in worsted weight yarn, a G/6 (4.00mm) hook is a good match. Just remember that changing your yarn weight will change your finished size, since gauge isn't the focus here — consistency in your stitches is what matters most.
A Few Notes Before You Start
- The beginning ch-1 does not count as a stitch.
- Wherever you see asterisks (*), repeat everything between them as instructed.
- Wherever you see parentheses, work all of those stitches into the same stitch or space.
- The body and head are worked as one continuous piece, starting at the bottom of the body and finishing at the top of the head.
Stitch Abbreviations Used
- arnd = around
- ch = chain
- dc = double crochet
- sc = single crochet
- sl st(s) = slip stitch(es)
- st(s) = stitch(es)
Special Stitches
Long Single Crochet (Lsc) (also known as a Spike Stitch) — Insert your hook into the space between stitches one row below, working over the stitches of the row(s) in between. Pull up a loop to match the height of your current working row, yarn over, and pull through both loops on your hook.
Single Crochet Three Together (sc3tog) — Insert your hook into the next stitch, yarn over, and draw up a loop. Repeat this two more times into the following two stitches (you'll have 4 loops on your hook total). Yarn over one final time and pull through all 4 loops on the hook.
Pattern Instructions

Body (Brown)
- R1: Magic ring, ch 1, 6 sc in ring (6)
- R2: 2 sc in each st around (12)
- R3: 2 sc, sc around (18)
- R4: 2 sc, sc x 2 around (24)
- R5: 2 sc, sc x 3 around (30)
- R6: 2 sc, sc x 4 around (36)
- R7–12: sc around (36)
- R13: dec, sc x 4 around (30)
- R14: dec, sc x 3 around (24)
Head (White)
- R15: Lsc, sc around (24)
- R16–21: sc around (24)
- Insert the safety eyes between rounds 19 and 20, leaving about 4 stitches of space between them.
- R22: dec, sc x 2 around (18) — begin stuffing the body and head firmly at this point
- R23: dec, sc around (12)
- R24: dec around (6)
Weave your tail through the remaining 6 stitches, pull tight to close the top of the head, and fasten off.
Wings (Make 2, Brown)
- R1: Magic ring, ch 1, 6 sc in ring (6)
- R2: 2 sc in each st around (12)
- R3: 2 sc, sc around (18)
- R4: 2 sc, sc x 2 around (24)
- R5: 2 sc, sc x 3 around (30)
- R6: Fold the circle in half. Slip stitch across through both layers together until you have 3 stitches remaining. In each of those last 3 stitches, work (sl st, ch 5, sl st). Fasten off.
You'll end up with 12 slip stitches along the folded edge and 3 little "feathers" fanning out at the tip of each wing.
Beak (Yellow)
- R1: Ch 6, join to form a ring, sc in each chain around (6)
- R2: sc around (6)
- R3: dec, sc x 2 (4)
- R4: 2 sc, sc3tog (3)
- R5: sc3tog. Fasten off. (1)
Feet (Make 2, Yellow)
- R1: Magic ring, ch 1, 6 sc in ring (6)
- R2: 2 sc x 3, then (sl st, ch 4, sl st) x 3, sl st in next stitch. Fasten off.
This creates 3 little toes on each foot.
Finishing Up
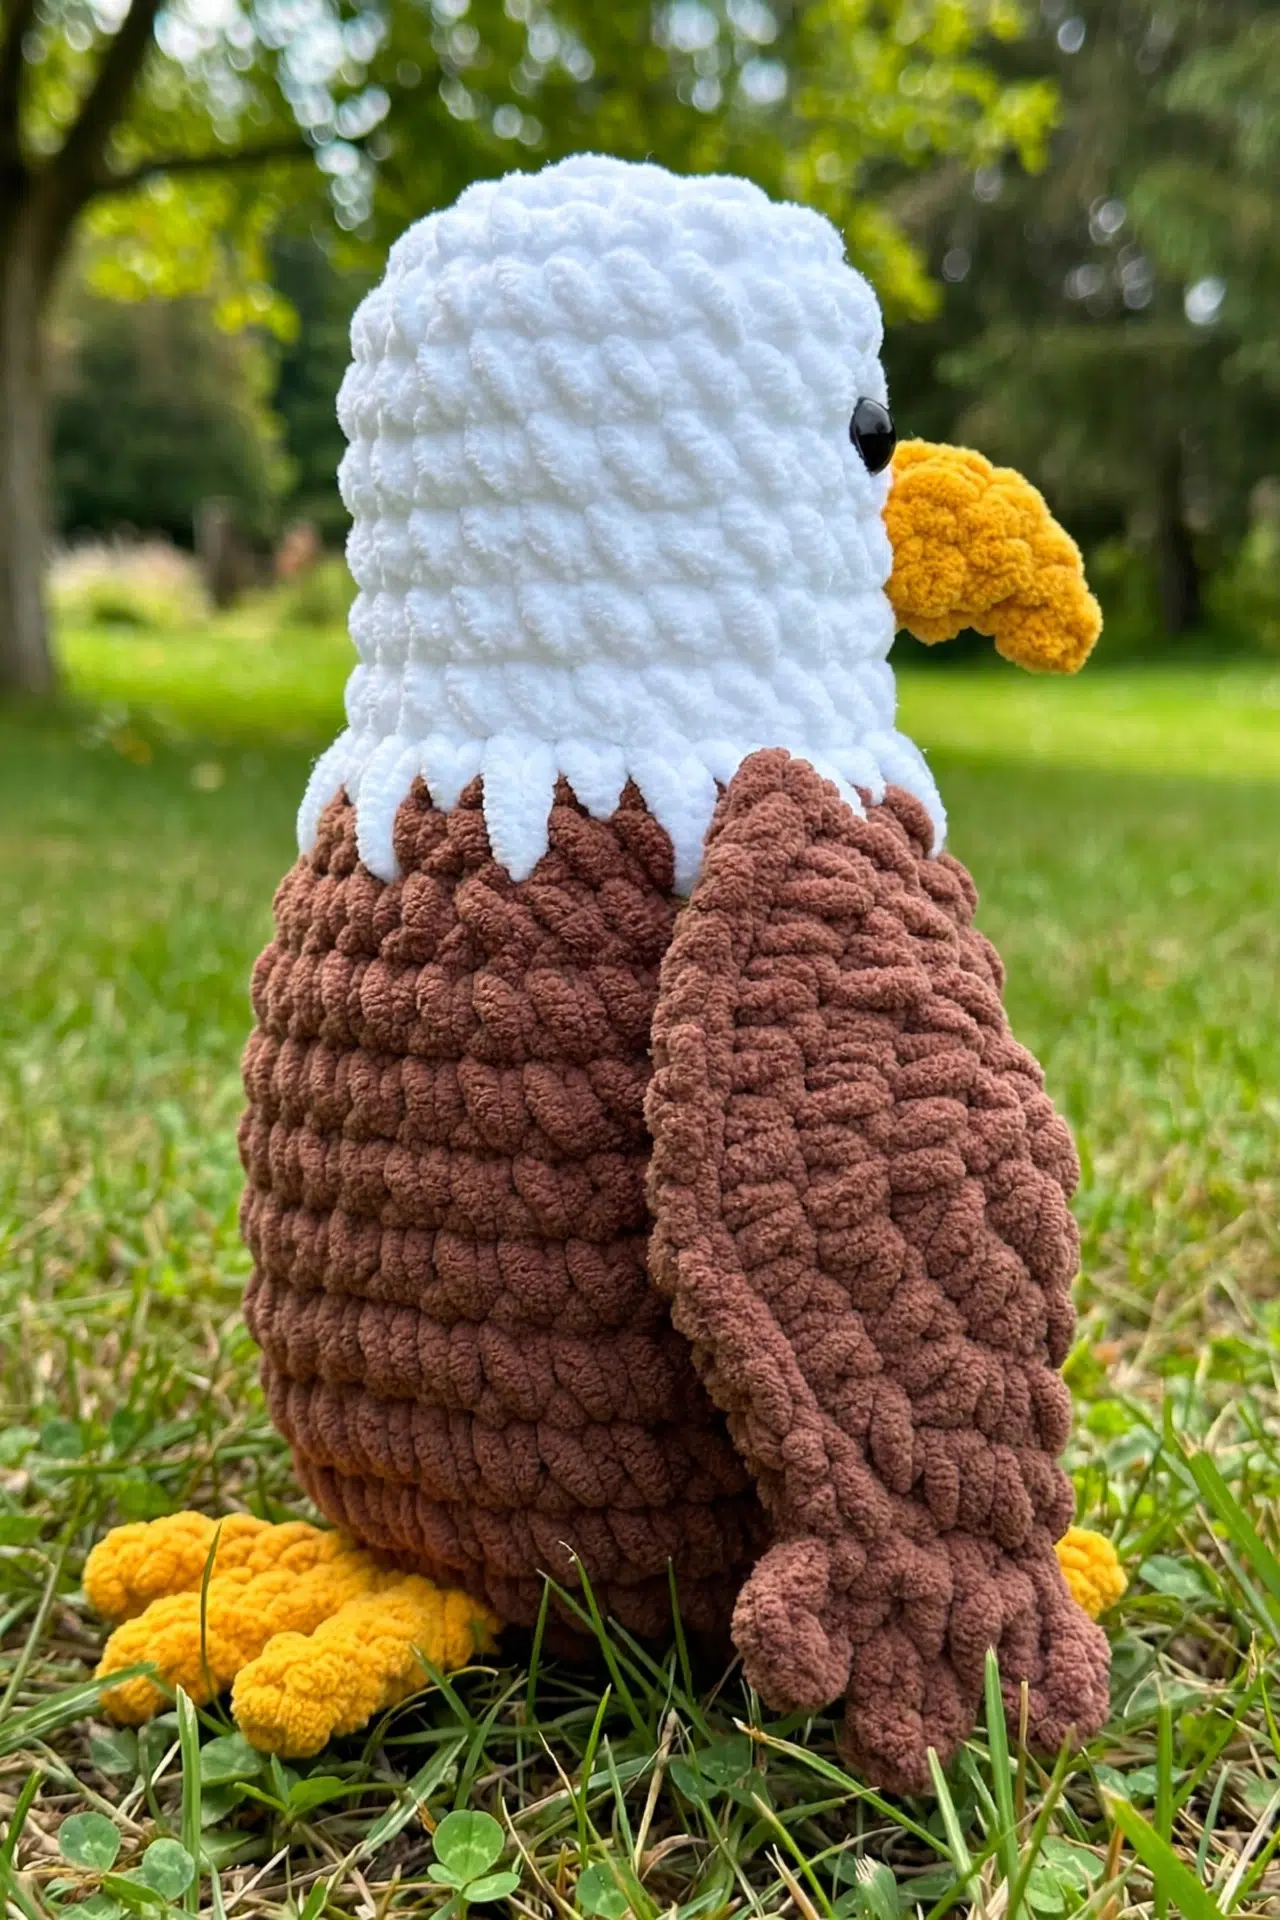
- Attach the beak over rounds 17–19 of the head, centering it between the two eyes.
- Attach the wings to the sides of the body, positioning them so round 1 of the wing faces the front of the eagle.
- Attach the feet to the bottom of the body, over rounds 2–5.
- Weave in and hide all your loose ends.
And just like that, you've got yourself a Bald Eagle Amigurumi — beak, wings, feet, and all. He's a great project if you're working through a crochet-along, adding to a growing shelf of amigurumi animals, or just want something small and satisfying to make over a weekend. The chunky yarn keeps the stitch count low and the project moving fast, so don't be surprised if you find yourself starting a second one before the first has even had its eyes attached.



