
You get a satisfying make and a useful finished decoration in the same project with Natural Crochet Roses. Set yours in a vase, add one to a Valentine’s Day table, or give a single stem as a handmade gift that can stay in use long after the day itself.

The petals and leaves grow from simple chains worked on both sides, with sc, hdc, dc, and tr stitches doing all the shaping. Those steady changes in stitch height feel pleasantly rhythmic in your hands, and making the petals one at a time keeps the work manageable.
Jump to:
- What Makes This Pattern Work
- Pattern Details
- Materials You'll Need
- Abbreviations
- How to Crochet the Natural Roses
- My Best Tips
- How to Keep Both Sides of the Chain Smooth
- Ways to Adapt Your Crochet Roses
- Fixing Petal, Leaf, and Assembly Problems
- Roses for Tables, Vases, and Gifts
- Washing & Care
- More Crochet Flower Patterns
- Frequently Asked Questions
What Makes This Pattern Work
- Small, Repeatable Pieces: Each petal is worked separately, so you can focus on one short section at a time instead of managing a large piece. Once the first petal makes sense, the remaining 5 follow the same sequence.
- Shaping Built Into the Stitches: The curves come from changing stitch heights and placing increases around the foundation chain. You don’t need complicated shaping techniques or separate edging rounds.
- Flexible Assembly: The final form develops as you roll and overlap the petals. That gives your hands room to adjust the placement before each layer is secured.
- A Supported Stem: Florist wire strengthens both the leaves and the main stem, while florist tape holds the joined pieces together and covers the wire.
Pattern Details
- Skill Level: Beginner
- Finished Size: Accurate to real roses.
- Yarn Weight: DK / Light Worsted
- Time to Make: about 5-8 hours
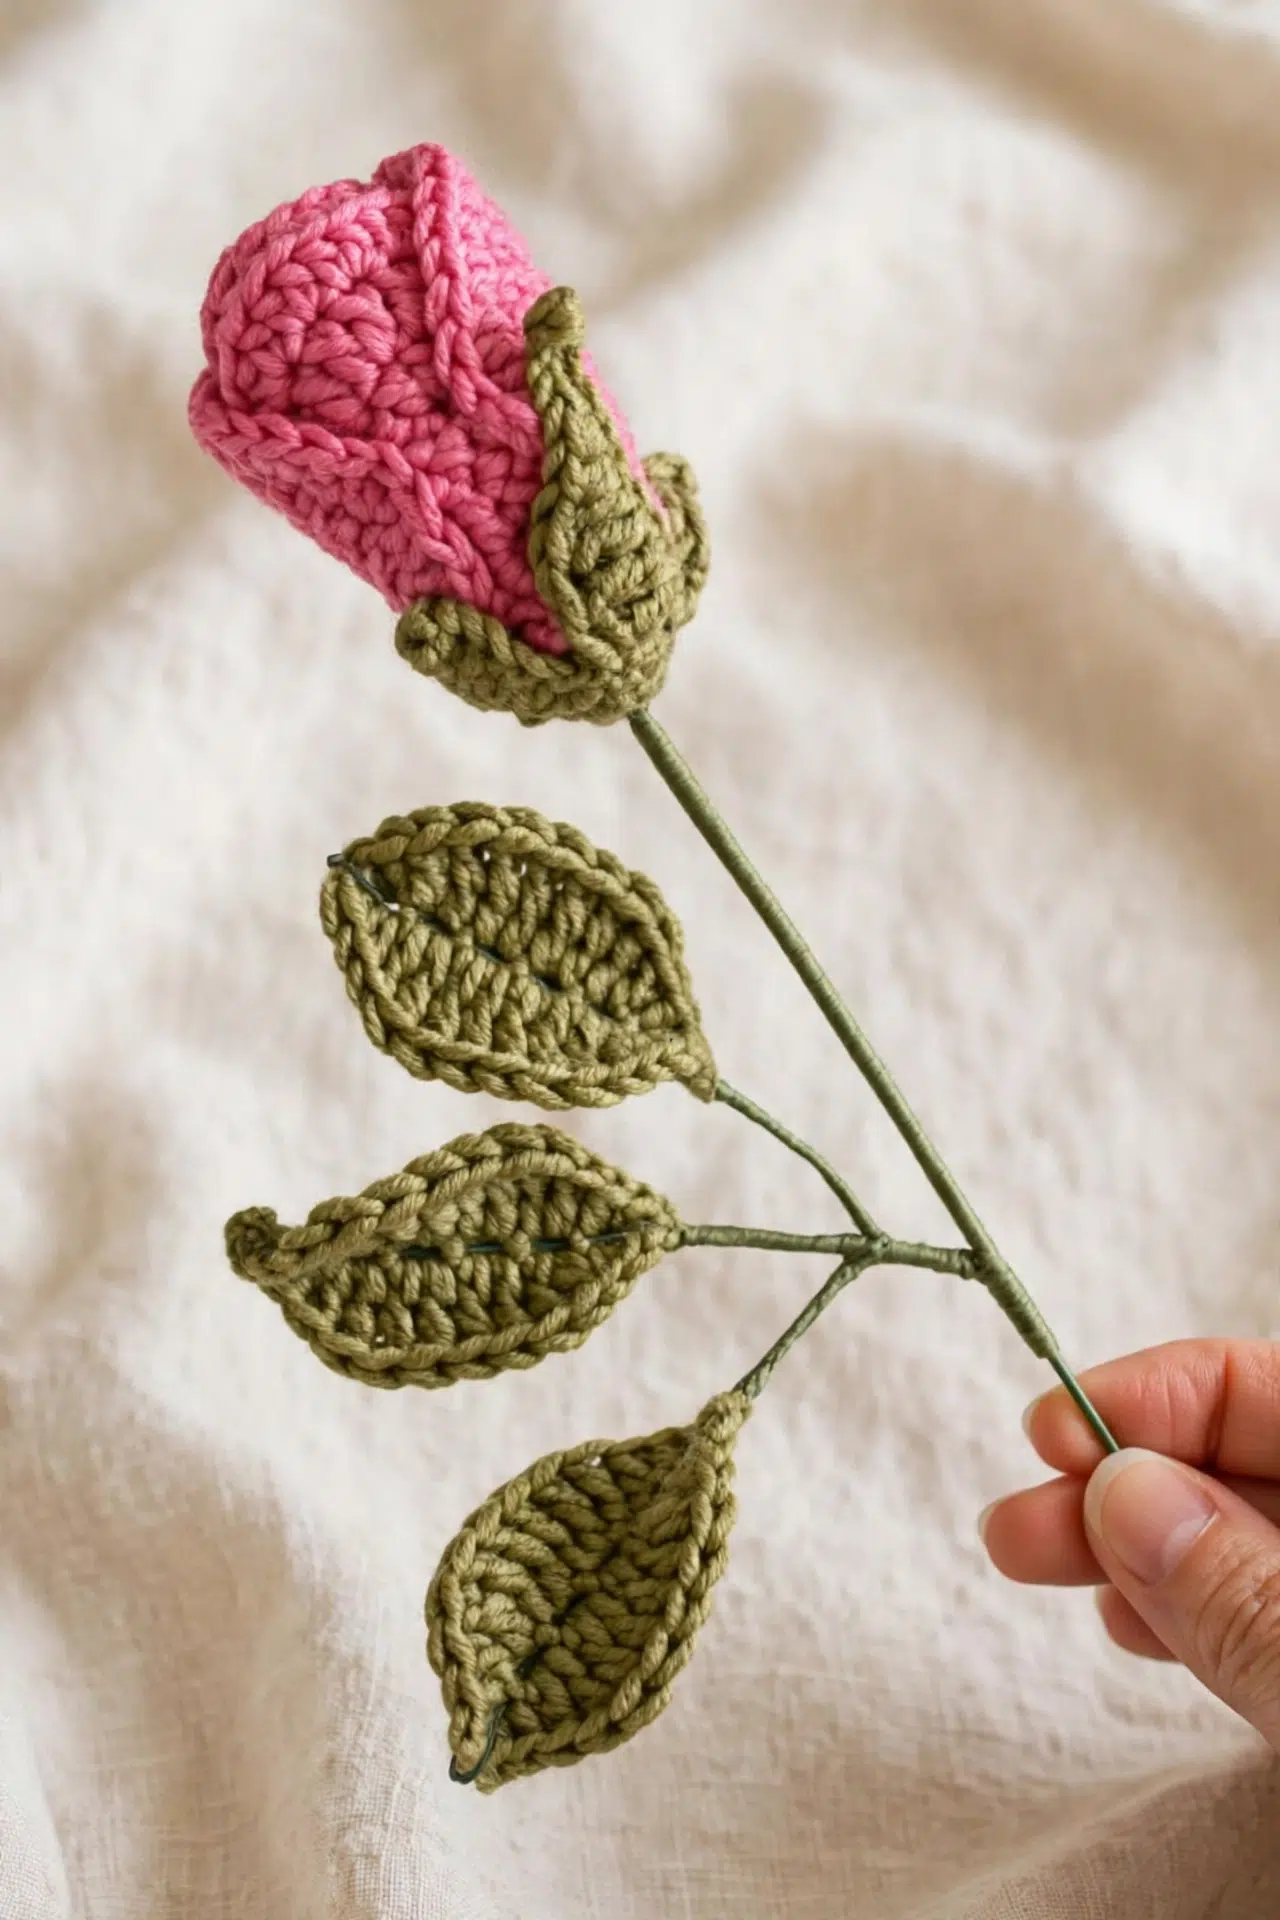
Materials You'll Need
Gather your yarn, hook, basic finishing tools, and floral supplies before you begin. The crochet uses familiar materials, but the wire and tape are important because they support the completed stem and leaves.
- DK / light worsted weight yarn in pink or red, etc., and green: Keep the yarn weight consistent across the petals, stem base, and leaves so the parts stay in proportion. A smooth yarn will also make it easier to find the foundation chains when you work along the opposite side.
- 3.5 mm crochet hook
- Yarn needle
- Scissors
- Florist tape
- Florist wire, approx. 12 in. length: The wire must be flexible enough to bend into a small loop and twist around the leaf wires, but firm enough to support the assembled rose.
Abbreviations
- P - pink
- G - green
- ch - chain
- chs - chains
- sl st - slip stitch
- sc - single crochet
- hdc - half double crochet
- dc - double crochet
- tr - treble crochet stitch
- st - stitch
- sts - stitches
- sk - skip
- rep - repeat
How to Crochet the Natural Roses
Make all 6 petals first, assemble the rose, then add the green base, leaves, wire, and florist tape.
This pattern uses US terminology. Instructions between asterisks are repeated for as long as stated. Numbers in parentheses give the total stitch count.
Petals
- Round 1: Using P and a 3.5 mm crochet hook, ch 7. Work 2 sc in second ch from hook, 1 sc in next ch, 1 hdc in next ch, 1 dc in next 2 chs, and 5 dc in last ch. Turn the work clockwise and work back into the chains in the opposite direction. The last chain worked with 5 dc now becomes the first ch. Sk this ch, work 1 dc in next 2 chs, 1 hdc in next ch, 1 sc in next ch, and 2 sc in last ch. (17)
The count includes stitches from both sides of the foundation chain.
- Round 2: Work 1 sc in next st, 2 sc in next st, 1 sc in next st, 1 hdc in next st, 1 dc in next 3 sts, 3 dc in next st, 2 dc in next 2 sts, 3 dc in next st, 1 dc in next 3 sts, 1 hdc in next st, 1 sc in next st, and 2 sc in last st. (25)
You are now working in the round. Do not join the ends or ch at the beginning.
- Round 3: Work 1 sc in next 2 sts, 2 sc in next st, 1 sc in next 2 sts, 1 hdc in next 4 sts, 2 hdc in next 9 sts, 1 hdc in next 4 sts, 1 sc in next 2 sts, and 2 sc in last st. (36)
Petal Finishing
- Step 1: Sl st in next 2 sts regardless of the round. Fasten off and weave in the tails. Make 5 more petals for 6 petals total, leaving a long tail for sewing on the last petal.
Rose Assembly
- Step 1: Roll up the petal with the long tail and sew it into place. Overlap another petal and sew it into place. Continue overlapping and sewing the petals until you have a rose shape.
Overlap the petals so they are not quite opposite each other to create a more natural effect.
Green Stem Base
- Round 1: Using G and a 3.5 mm crochet hook, ch 4 and sl st in first ch to form a loop. Crochet 6 sc into the centre of the loop and sl st in first sc to join. (6)
- Round 2: Ch 1, which does not count as a st. Work 2 sc in same st as previous sl st and 2 sc in each st around. Sl st in first sc to join. (12)
- Round 3: *Ch 11, sl st in second ch from hook, sl st in next ch, 1 sc in next 2 chs, 1 hdc in next 2 chs, 1 dc in next 2 chs, 1 tr in last 2 chs, sl st in next 2 sts on main circle, ch 7, sl st in second ch from hook, 1 sc in next ch, 1 hdc in next ch, 1 dc in next ch, 1 tr in last 2 chs, sl st in next 2 sts on main circle; rep from * once more.
Green Stem Base Finishing
- Step 1: Sew the green stem base onto the bottom of the rose, making sure to sew the tail ends through the centre of the green stem base.
Leaf
- Row 1: Using G and a 3.5 mm crochet hook, ch 15 and sl st in second ch from hook. *Work 1 sc in next ch, 1 hdc in next ch, 1 dc in next ch, 1 tr in next 6 chs, 1 dc in next ch, 1 hdc in next ch, 1 sc in next ch, and sl st in last ch. Turn the work clockwise and work back into the chains in the opposite direction. The last chain worked with the sl st now becomes the first ch. Sk this ch and rep from * once more. Fasten off and make 2 more leaves, or make as many leaves as needed.
Final Assembly
- Leaves, Step 1: Take 3 leaves. Cut 3 short pieces of florist wire, each double the length of one leaf. Thread a wire piece through the centre chains of each leaf in a concertina style, then twist the wires together to join. Cover with florist tape.
- Rose, Step 1: Take one length of florist wire and bend the end 2 times into a loop. Thread the wire through the centre of the rose so the looped end catches inside the rose. Twist the wired leaves onto the rose stem and cover everything with florist tape.
Leaf Quantity
Make 3 leaves for the stated assembly, or make as many leaves as needed.
Petal Placement
When assembling the rose, place overlapping petals slightly away from directly opposite positions for a more natural effect.
My Best Tips
- Mark the First Stitch: Round 2 begins continuous work without a chain or join. Place a removable marker in its first sc so you can identify the round boundary when it’s time to finish.
- Find Both Chain Loops: Keep the foundation chains relaxed enough to work along both sides. If they’re too tight, inserting the hook on the return side can distort the petal or leaf.
- Count Before Moving On: Check for 17 stitches after Petal Round 1, 25 after Round 2, and 36 after Round 3. A missed increase changes the edge and can make the petals harder to layer evenly.
- Secure as You Overlap: Add a few firm sewing stitches whenever you position another petal instead of waiting until every layer is arranged. This keeps the centre rolled and stops earlier petals from shifting.
How to Keep Both Sides of the Chain Smooth
The petals and leaves are worked around a foundation chain rather than in ordinary back-and-forth rows. After reaching the final chain, turn the work clockwise and continue into the unused side of that same foundation.
Keep the chain flat as you turn so it doesn’t twist. On the return side, follow the instruction to skip the chain that already holds the turning-end stitches, then continue along the remaining chains. This prevents extra stitches from crowding the tip.
Ways to Adapt Your Crochet Roses
- Choose Another Petal Color: Pink and red are suggested, but the petal yarn can be changed to another color without altering the instructions. Keep the green yarn separate for the stem base and leaves if you want to preserve the pattern’s color coding.
- Change the Leaf Count: The assembly uses 3 leaves, though you can make as many as you need. Extra leaves require additional wire and florist tape, and they add more weight around the stem.
- Try a Different Yarn Weight: A different yarn weight can work, but the finished rose will no longer match the intended real-rose scale. Use a hook appropriate for that yarn and keep every component in the same weight so the petals and leaves remain proportional.
- Adjust the Stem Length: You can cut the florist wire shorter for a more compact stem. Make sure it still reaches through the rose, extends beyond the leaf attachment point, and leaves enough wire for a secure loop at the top.
- Vary the Petal Overlap: A tighter overlap produces a more closed arrangement, while a looser overlap spreads the petal layers farther apart. Work with all 6 petals and sew each one securely before adjusting the next.
Fixing Petal, Leaf, and Assembly Problems
- The Petal Is Twisting: Check that the foundation chain stayed flat when you turned clockwise to work along its opposite side. A twisted chain redirects the second side and prevents the stitches from settling around the foundation.
- The Petal Count Is Off: Look first at the wider end of the petal, where several stitches are worked into one stitch. Missing one of the 5 dc in Round 1 or an increase in later rounds changes the stated total quickly.
- The Rose Centre Is Opening: Roll the first petal more firmly and stitch through multiple layers near its base. Continue securing every new overlap as you add it rather than relying on stitches placed only around the outside.
- The Stem Feels Loose: Confirm that the looped wire end catches inside the rose and that the wired leaves are twisted onto the main stem. Wrap the florist tape with steady tension so it grips and binds the wire joins.
Roses for Tables, Vases, and Gifts
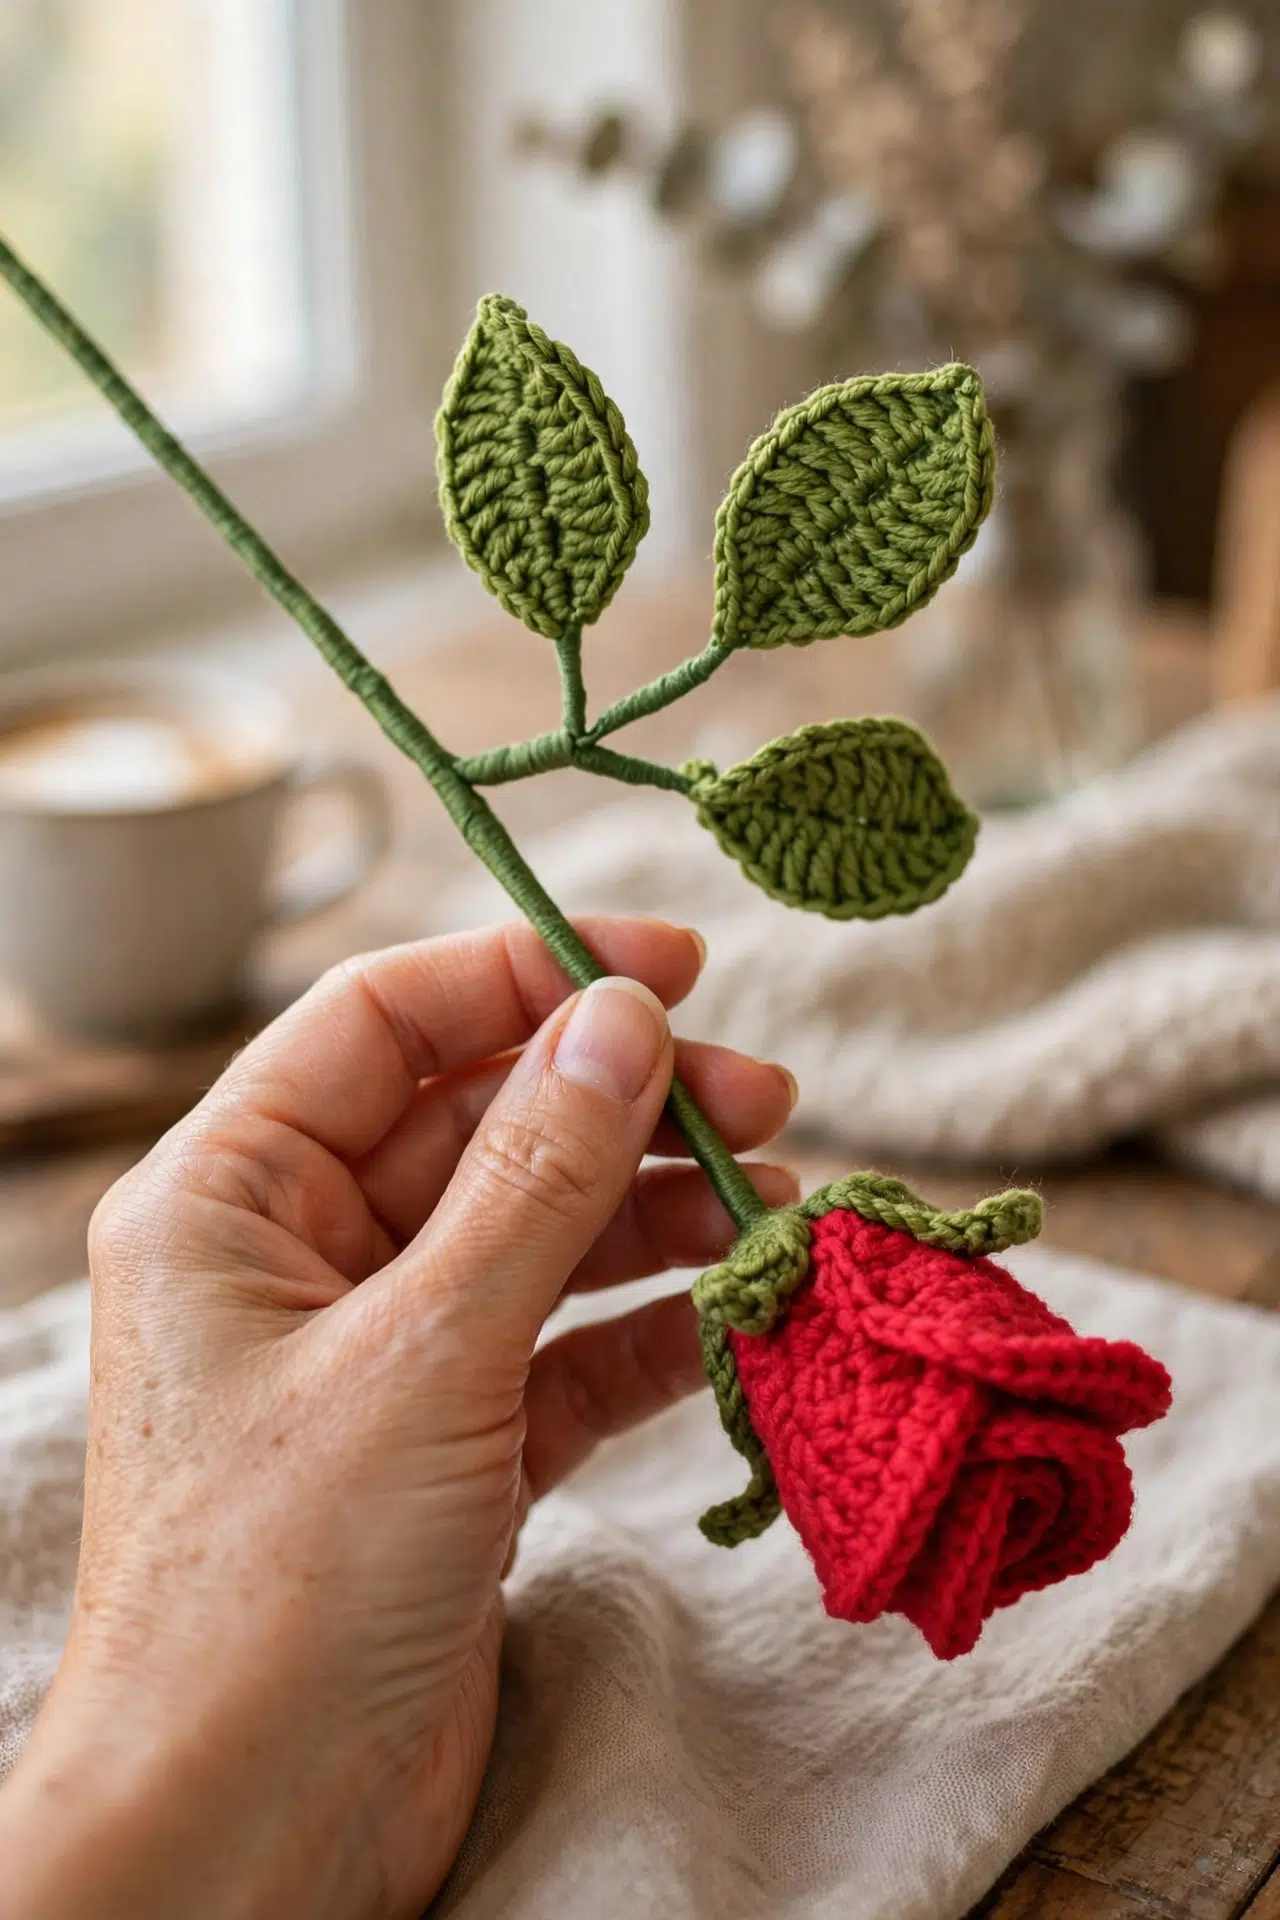
A vase gives the wired stem a practical home on a table, shelf, or desk. You can use one rose on its own or make several stems by repeating the full pattern.
For Valentine’s Day, place the rose with a card or use it as part of a table arrangement. A single completed stem also works as a small handmade gift without needing a separate container.
Washing & Care
Spot-clean the rose gently rather than soaking it, since the finished piece contains florist wire and tape as well as yarn. Follow the yarn label for fiber-specific cleaning guidance, and let any damp areas dry fully before storing. Avoid machine washing or tumble drying the assembled stem.
More Crochet Flower Patterns
Frequently Asked Questions
How many petals do I need for one rose?
You need 6 petals for one rose. Each petal is worked through the same 3 rounds, and the final petal keeps a long sewing tail. That tail begins the rolled centre and helps secure the remaining petals as you overlap them around the base.
Do I join the petal rounds?
No, don’t join or chain at the beginning of Petal Round 2. The petal continues around the shaped first round, and Round 3 follows directly from it. Use a stitch marker if needed, then work the 2 finishing slip stitches only after Round 3 is complete.
When should I add the florist wire?
Add the wire after the crochet pieces and rose assembly are complete. Wire each leaf through its centre chains first, then insert a separate looped wire through the rose. Joining the leaf wires to the main stem at the end keeps the crochet out of the way while you twist and tape.
Do I have to make exactly 3 leaves?
No, the leaf instructions allow you to make as many as needed, although the stated finishing method uses 3. If you change the number, prepare one short wire piece for each leaf and allow extra florist tape for joining the larger or smaller group to the main stem.
Natural Crochet Roses are a project I expect you’ll return to whenever you want a focused make with a lasting purpose. Tell me in the comments how many stems and leaves you made.



