
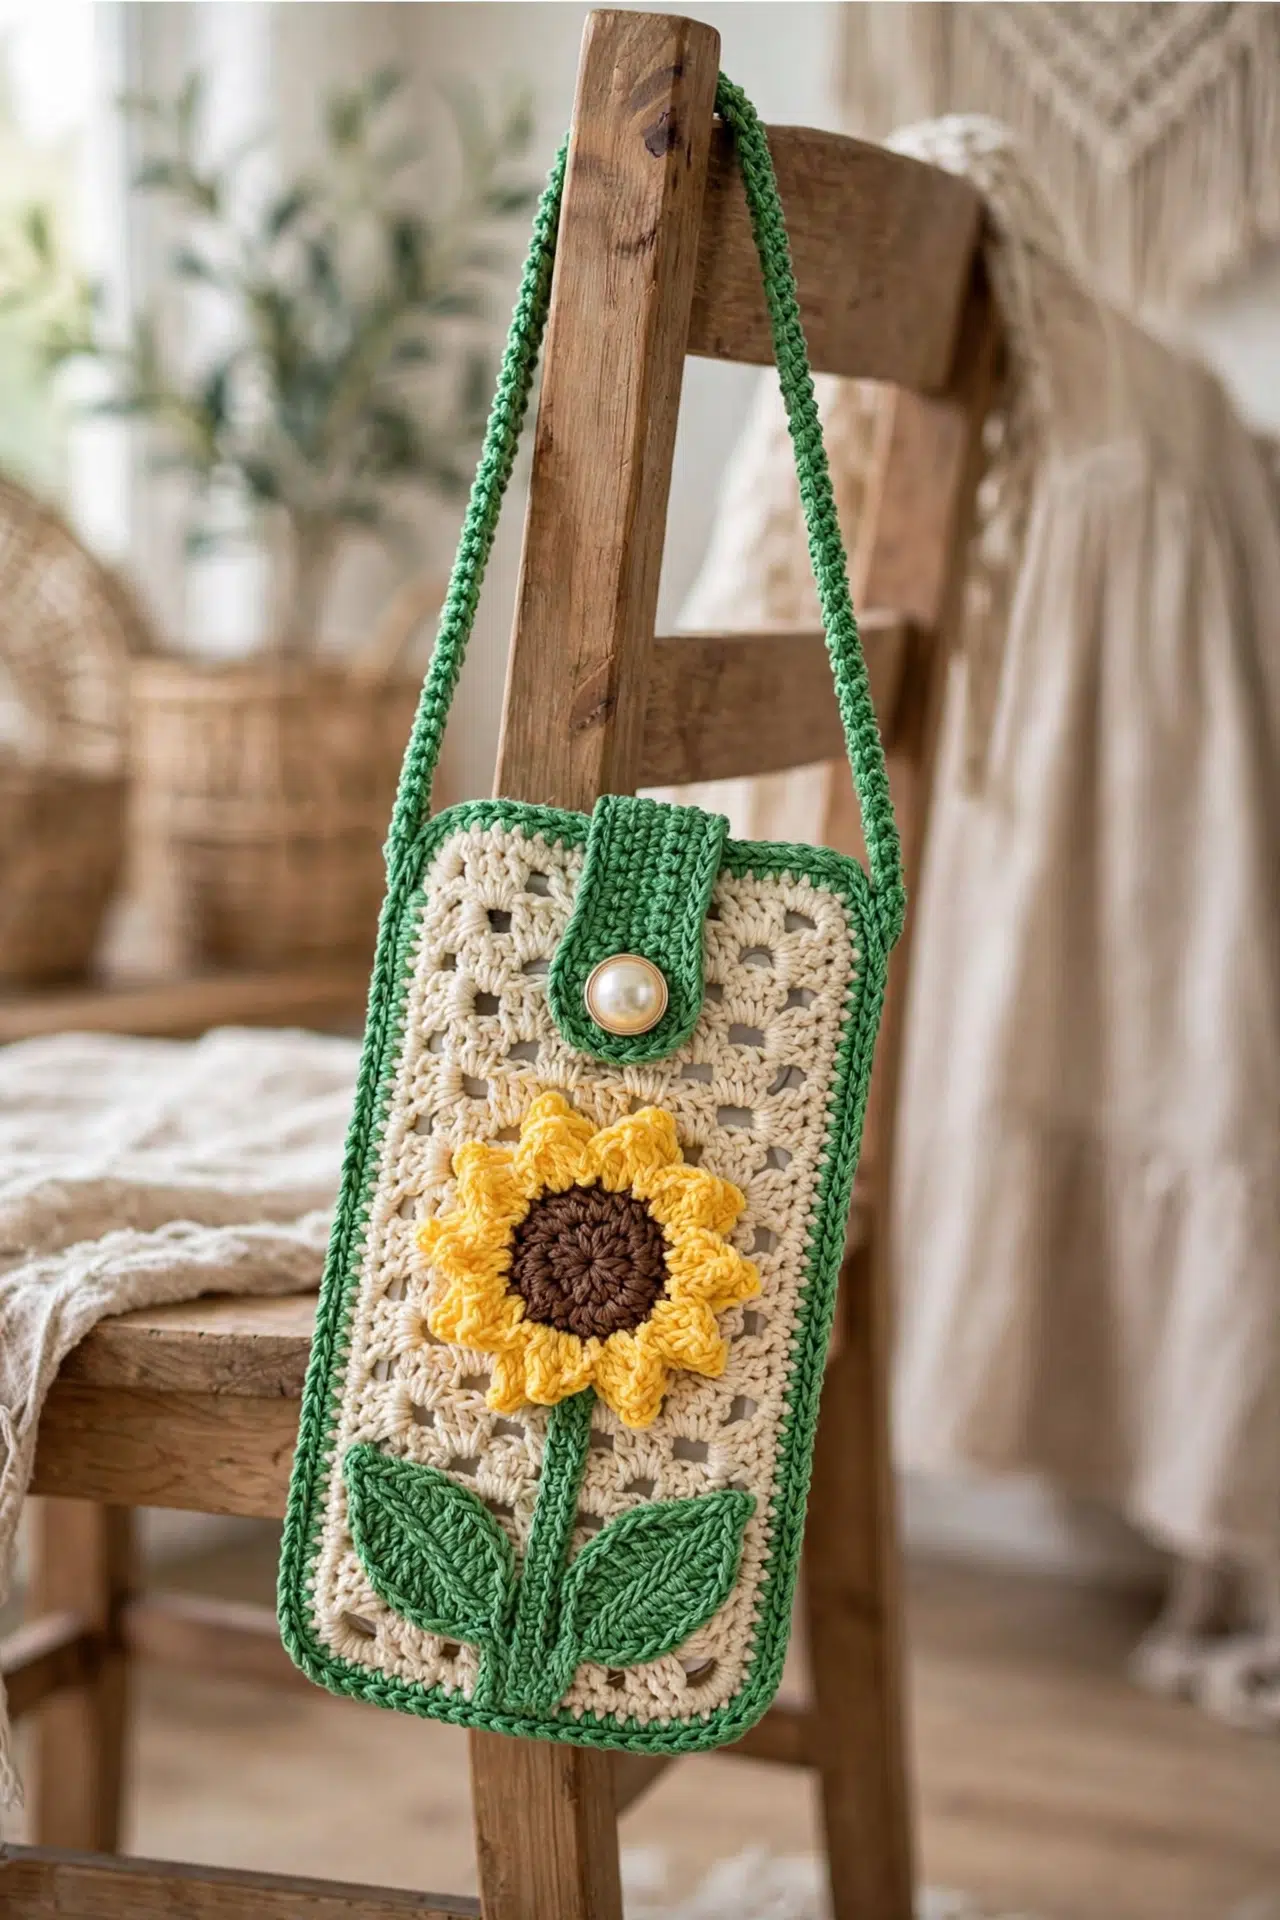
I've been on a serious small bag kick lately, and this one really does check every box. The Sunflower Granny Stitch Phone Bag Crochet Pattern is one of those projects that feels special the moment you finish it. It's compact, it's functional, and it has that handmade quality that people actually notice. If you've been looking for a pattern that's genuinely worth your time, this is it.

Jump to:
Behind the Pattern
What I love about this one is how the granny stitch construction gives the bag real structure without making it stiff or boxy. It holds its shape, which honestly isn't a given with small crochet bags. I made my first one as a little gift, and then immediately made another one to keep for myself.
The sunflower detail is what makes it feel intentional rather than just practical. It's the kind of thing you'd actually want to carry around, not just tuck in a drawer. This bag suits someone who appreciates handmade things done well, and it makes a genuinely good gift for pretty much any occasion.
What Makes This Pattern Special
A functional phone bag with a floral granny stitch design you'll actually want to carry.
- Intermediate Skill Level: You'll work with granny stitch construction and a decorative motif, so some crochet experience really helps here.
- Quick Finish: It's a small project, so you can realistically complete this in a single sitting or a couple of short sessions.
- Gifting Potential: Compact, pretty, and practical. This one is a no-brainer for birthdays, holidays, or a just-because gift.
- Technique Value: Great practice for combining a classic granny stitch base with a standalone decorative element in one cohesive project.
- Fits Most Phones: The finished size works for an average phone, so it's useful right out of the box for most people.
Gather Your Supplies
Four colors, one hook, and a single button — that is everything you need for this little pouch.
- Lace Weight Cotton or Polyester Cord (4 colors): Lace weight thread is the right call here because the finished bag needs structure and a tight stitch definition to hold its shape. Cotton is my preference since it doesn't stretch much and keeps those panel edges crisp, but a polyester macrame cord in a similar weight will also work if that's what you have. Yardage isn't specified in the pattern, but for a small pouch with four colors, budget somewhere around 50 to 100 yards total across all four, with the off-white and green doing most of the heavy lifting.
- 3.0mm Crochet Hook: A 3.0mm hook is a natural fit for lace weight thread. It keeps the fabric dense enough that the bag panels won't gap or sag, and it gives you enough control for the smaller floral pieces without making your hand cramp.
- 18mm Wooden or Pearl Button: This is the closure for the bag, so the size actually matters. An 18mm button sits right in proportion to a small pouch. Wooden gives it a natural, earthy look, and pearl dresses it up a bit. Either works structurally.
- Fabric Glue (optional): This is for securing the leaves if you'd rather not trust stitching alone on the more delicate pieces. Not required, but worth having nearby if your leaf edges tend to lift.
- Also needed: sharp scissors, yarn needle
Yarn Substitutes
Lace weight thread isn't always easy to find in every craft store, so it's worth knowing what else can step in without changing the feel of the finished bag too much.
- Size 10 Crochet Cotton Thread: This is basically the same territory as lace weight and is much easier to find at general craft stores. It crochets up with the same tight, structured result and comes in a wide range of colors, so matching all four shades shouldn't be a problem.
- Thin Fingering Weight Cotton: A very fine fingering weight cotton can work in a pinch. Just check your gauge before committing because fingering weight sits slightly thicker than true lace thread, and your finished pouch may come out a little larger than intended.
Color Sequence & Yarn Changes
The four colors each have a distinct job here: off-white and cream build the bag panels, green handles the border and joins the pieces together, yellow forms the petals, and dark brown fills in the flower center. The floral elements are worked separately and attached, so you won't be doing any mid-row color changes in the panels themselves. Keep your green yarn accessible throughout since you'll come back to it more than once for both the border rounds and the finishing seams.
Key Information
A granny stitch phone bag worked in four colors with a flower appliqué closure and wooden button.
| Skill Level | Intermediate |
| Pattern Gauge | Gauge is not critical for this project. Use a hook size that creates a firm fabric appropriate for a phone bag and adjust panel size as needed. |
| Finished Size | Approx. 4 x 7 in (10 x 18 cm) to fit an average phone |
| Yarn Weight | 0 Lace / Thread |
| Terminology | US |
Customizing the Size
Because gauge isn't fixed here, sizing is pretty flexible. Work a test panel and hold it against your phone before committing to the full length. To make the bag wider, add stitches in multiples that match your stitch pattern repeat. To make it longer, simply work additional rows before joining the panels. The flower appliqué is made separately, so it'll sit fine on a larger bag without any adjustment.
Abbreviations & Stitches Used
All standard US terms, nothing unusual in this list.
- ch = chain
- sc = single crochet
- hdc = half double crochet
- dc = double crochet
- tr = treble crochet
- sl st = slip stitch
- MR = magic ring (magic circle)
- sk = skip
- R = round
Special Stitches
- Granny stitch (dc clusters): Work 3 dc in the indicated stitch or space. That group of 3 dc is your cluster.
- Shrimp stitch (optional): A reverse single crochet worked from left to right (opposite your normal direction). It creates a neat, rope-like edging. No further steps are defined in this pattern, so use your preferred method if you choose to include it.
Important Notes
You'll need four colors for this project: Dark Brown (flower center), Yellow (petals), Green (leaves and border), and Off-white/Cream (bag panels). The yarn is 2mm cotton or polyester macrame cord, worked on a 3.0mm hook. That combination gives you a firm, structured fabric, which is exactly what you want for a phone bag that'll actually hold its shape.
For closure, you'll need an 18mm wooden or pearl button. The size matters here since the buttonhole loop needs to fit snugly around it without stretching the flap. Have your button on hand before you finish the top edge so you can size the loop accordingly.
A yarn needle is essential for this one. You'll use it both for weaving in ends and for stitching the flower and leaves onto the bag. If your leaves feel floppy or don't sit flat against the fabric, a small amount of fabric glue on the back will keep them in place without any visible stitching.
The skill level listed in the supplementary notes references beginner/intermediate. I'd lean toward intermediate, mainly because of the color changes and the appliqué construction. If you're comfortable with dc clusters and working in rounds, you'll be fine.
Let's Make the Sunflower Granny Stitch Phone Bag Crochet Pattern
Work through each piece in order and the whole thing comes together more easily than it looks.
Main Bag: The Granny Stitch Pouch
This is where the bag itself takes shape. You're making two matching rectangle panels that get joined together to form the pouch, and the granny stitch gives the whole thing that open, lacy look.
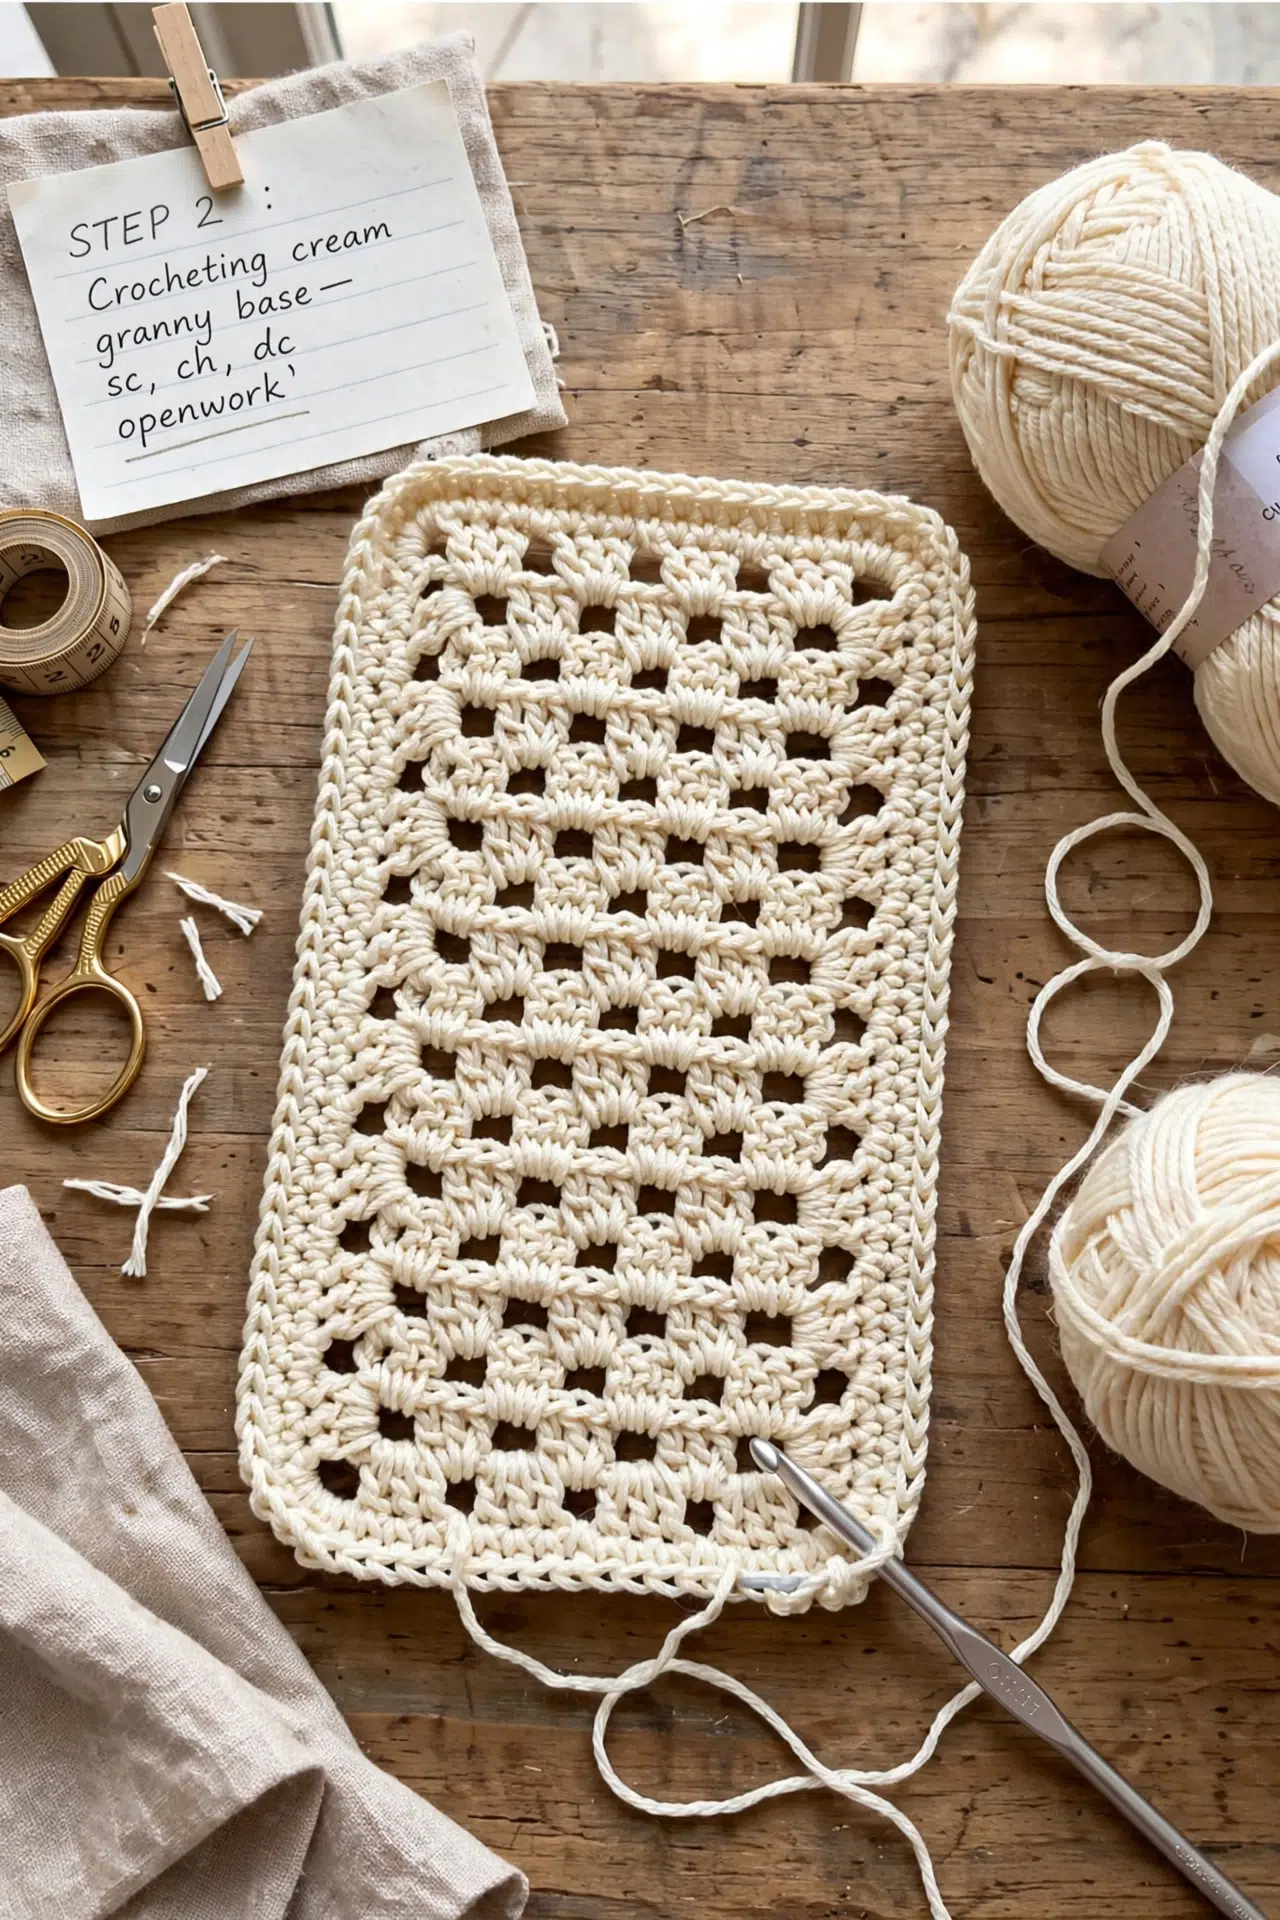
Step 1: Make two small rectangle pieces using a 3.0mm hook. These pieces have a pretty, airy pattern and are stitched together with green yarn to form the pouch. Keep your tension consistent across both panels so they match up cleanly when you go to join them.
Sunflower: The 3D Center Piece
The sunflower is worked separately and added to the bag later. It's the focal point of the whole design, so take your time with it.
Step 1: Make a 3D sunflower separately. It features a round, dark center surrounded by bright yellow petals. Work the dark center and petals as distinct layers so the flower sits with dimension rather than lying flat.
Leaves and Stem: The Green Details
These small pieces frame the sunflower and give the front of the bag that finished, botanical feel. They're quick to make and worth doing before you start assembly.
Step 1: Crochet a long green stem and small green leaves to go along with the flower.
Assembly: Putting It All Together
With all the pieces finished, you're now joining everything into the final bag. This is where it really starts to look like something.
Step 1: Attach the sunflower, stem, and leaves onto the front of the bag. I position the stem first so the flower and leaves have a natural anchor point, then sew everything down from there.
Step 2: Add a small cover flap to the top to keep your phone safe inside.
Step 3: Sew a long strap to the sides so you can wear it over your shoulder. Make sure both attachment points are secured with several passes of yarn before weaving in the ends.
Final Touches
Once the strap is on and the flap is in place, go back over every sewn join and give it a gentle tug to make sure nothing shifts. I weave in all remaining ends on the wrong side of the bag panels where they'll stay hidden. The sunflower attachment especially benefits from a few extra anchor stitches around the base of the center since that piece carries the most visual weight and will get handled the most over time.
Care Instructions
Spot-cleaning is the safest approach for this bag. The wooden or pearl button closure can warp or crack if it gets soaked, so I'd keep it away from a full wash cycle. If the bag gets a little dirty, a damp cloth with mild soap works fine on the cotton or polyester panels. Let it air dry flat so the strap doesn't stretch out of shape, and store it somewhere it won't get crushed since the 3D sunflower on the front can flatten if something heavy sits on top of it for too long.
Frequently Asked Questions
The sunflower, stem, and leaves all get attached to the front panel before final assembly. I use a yarn needle and the green yarn to stitch everything down, working through both the flower base and the bag panel a few times so nothing shifts. If the leaves feel fiddly to sew, a small dot of fabric glue underneath them holds things in place while you stitch. Just let it dry completely first.
The 18mm size is what fits the closure flap, so I'd stick close to that measurement even if you swap the style. A pearl button works just as well and gives the bag a softer, more delicate look. Whatever you choose, make sure it has a shank or flat back that sits cleanly against the flap without pulling the fabric.
The finished bag comes out to approximately 4 x 7 inches (10 x 18 cm), which covers most average-sized phones. If yours is bigger, you can work a few extra rows on each panel before stitching them together. Just make sure both panels match before you join them with the green yarn.
The strap is sewn to the sides of the bag after everything else is assembled. It's a long piece worked separately, then attached at both side seams so it sits across your shoulder. How long you make it is really up to you depending on how you want to wear it.
It's optional. I only reach for it when the leaves are too small and thin to hold steady while I sew. If you're comfortable stitching small pieces by hand, you can skip the glue entirely. It's more of a positioning aid than a permanent fix.
Now It's Your Turn!
I'd love to see how yours turns out, especially your button choice because that little detail really does change the whole look of the bag. Come tag me on Instagram or drop a photo in the comments below. And if you're saving this for later, go ahead and pin it to your crochet projects board so it doesn't get lost in your browser tabs. Happy stitching!



