
Fall decorating is one of my favorite things, and this year I wanted to make something a little more sculptural than a flat dishcloth or a basic coaster set. That's exactly how this Pumpkin Vines Home Decor Crochet Pattern came to be. It sits right on your surface, holds its shape on its own, and honestly looks like something you'd find at a boutique fall market.

Jump to:
About the Design
What I really love about this one is that the wire structure does so much of the work for you. You're not stuffing anything, you're not blocking it flat, and you're definitely not propping it up with a hidden box. The wire runs through the design and lets you pose it however you want on a shelf or tabletop. That part was actually a fun one to figure out, and once you get the hang of working around the wire, it goes pretty smoothly.
I'd make this for anyone who loves a handmade fall display but doesn't want something that looks crafty in a bad way. It's the kind of piece that sits on a console table and makes people ask where you bought it.
What Makes This Pattern Special
A wire-structured crochet display that holds its own shape, no stuffing required.
- Skill Level: Intermediate, so you'll want some basic shaping and joining experience before you start.
- Wire Construction: The built-in wire frame is what makes this freestanding, and it's a genuinely useful technique to add to your skill set.
- Seasonal Display: Designed specifically for fall decorating, so it gets real use every year without taking up much space.
- Gifting Potential: This one makes a really solid handmade gift for anyone who decorates for autumn.
- No Hanging Needed: It sits flat on any surface, which means no nails, no hooks, no measuring the wall.
Materials You'll Need
Crafting wire is the unexpected one here — it's what holds the whole structure together without needing to hang anything.
- DK Weight Cotton Yarn (Light #3): Cotton is the right call for a decor piece like this. It holds its shape well, doesn't stretch out over time the way acrylic tends to, and the slight texture gives the vines and pumpkins some visual interest up close. You'll need 125 g total split between green and yellow, so two small balls rather than one large one.
- 2.5 mm Crochet Hook: A 2.5 mm keeps the stitches tight enough that the cotton fabric doesn't gap or look loose, which matters for a desktop piece people will actually look at. It's a small hook but pretty standard for DK cotton at this gauge.
- Crafting Wire: This is what makes the finished piece work as desktop decor. The wire runs through the structure so it holds its shape without any external support, which means no frame, no hanger, nothing extra. Worth picking up a spool if you don't already have some on hand.
- Round Bamboo Ring (Branch-Style): The branch-style ring is the base everything attaches to. A plain smooth ring would work in a pinch, but the branch texture really does add to the natural, organic look of the finished piece.
- Also needed: scissors, yarn needle
Color Sequence & Yarn Changes
This pattern uses two colors throughout, green for the vines and yellow for the pumpkins, so you'll be switching back and forth as you work. Carry the unused color loosely or cut and rejoin depending on how far apart your color changes fall — for short gaps, carrying is fine, but longer stretches are cleaner if you just cut and weave in the ends as you go.
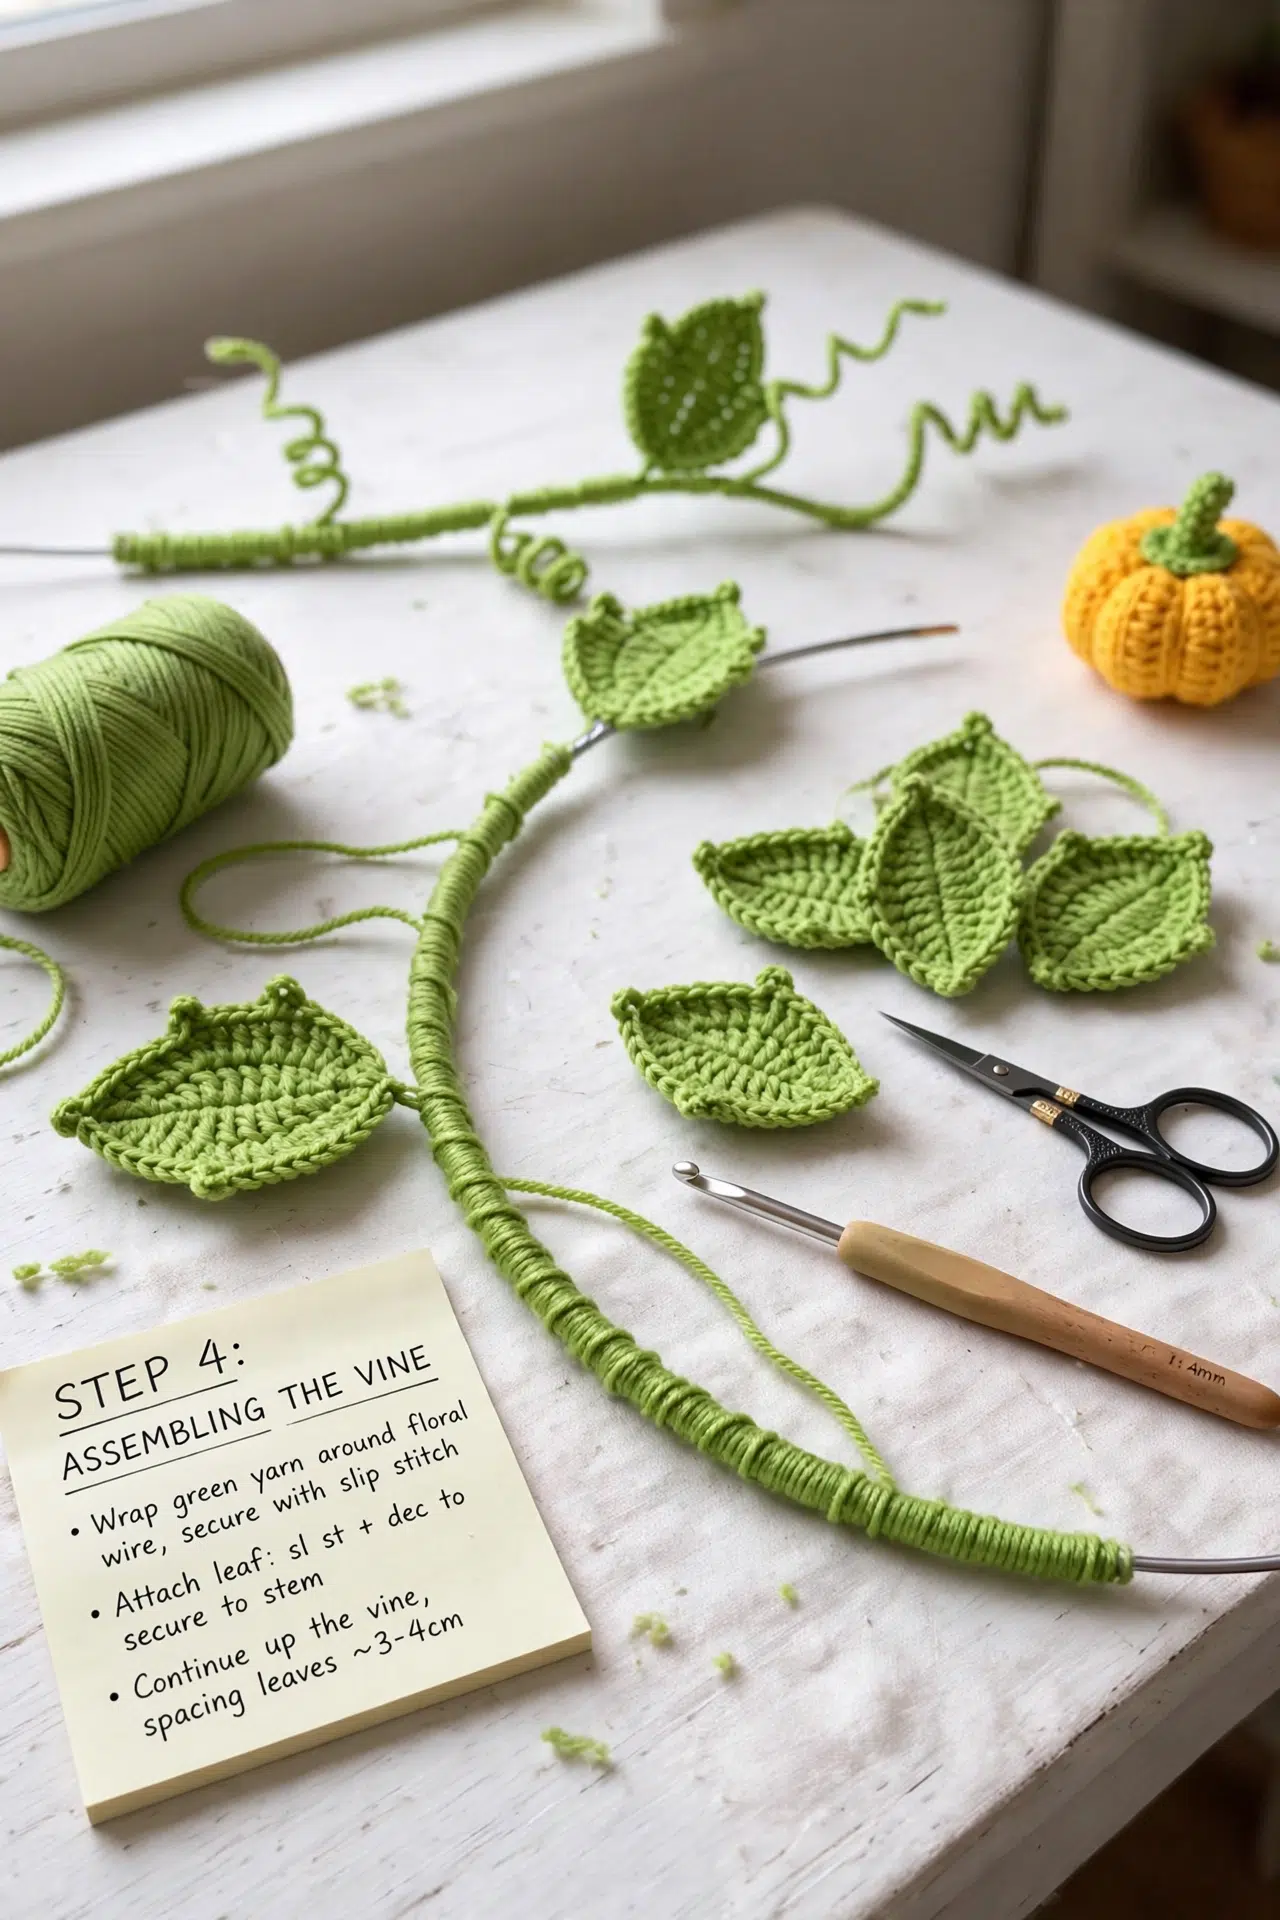
Quick Details
This one involves crafting wire, so the fabric needs to be firm enough to hold its shape once you bend and position everything.
| Skill Level | Intermediate |
| Pattern Gauge | Gauge is not critical for this project. Use a hook size that creates a firm fabric appropriate for shaping around crafting wire. |
| Finished Size | Desktop/surface decor; no hanging required due to wire structure |
| Yarn Weight | 3 Light / DK |
| Fiber | Cotton |
| Terminology | US |
Stitches & Abbreviations
Nothing unusual here — mostly standard stitches, plus BLO and FLO work.
- BLO = back loop only
- ch = chain
- dc = double crochet
- dec = decrease (sc2tog)
- FLO = front loop only
- hdc = half double crochet
- inc = increase (2 sc in same st)
- sc = single crochet
- sl st = slip stitch
- tr = treble crochet
Special Stitches
- dec (sc2tog): Insert hook into next st, yarn over, pull up a loop; insert hook into next st, yarn over, pull up a loop; yarn over, pull through all 3 loops on hook.
Pattern Notes
This pattern uses sc, dc, hdc, tr, inc, dec, sl st, and both FLO and BLO techniques throughout. You'll also be working with crafting wire and a round bamboo ring, and there are color changes involved, so it's worth having your yarn needle and scissors close by from the start.
The wire is what gives this piece its structure. Because of that, gauge isn't something you need to match exactly — but you do want a tight, firm fabric. If your stitches are loose, the wire will show through or shift around inside. A 2.5 mm hook with DK cotton tends to land in the right place, but go down a size if your swatch feels at all floppy.
Cotton is the right call here. It holds its shape, doesn't stretch out over time, and sits cleanly against the wire without bunching. The finished piece sits on a surface rather than hanging, so the wire structure does the work of keeping everything positioned once you've shaped it.
Let's Make the Pumpkin Vines Home Decor Crochet Pattern
Here's a breakdown of every stitch and technique used in this Pumpkin Vines Home Decor Crochet Pattern, so you have a solid reference before you begin.
Stitch Guide
This section walks through each stitch used in the pattern. Keep this handy as you work — it's worth reading through once before you pick up your hook so nothing catches you off guard mid-row.
Step 1: Step 1: sc (single crochet): Insert hook, yarn over, pull through, yarn over, pull through both loops.
Step 2: Step 2: inc (increase): Crochet two single crochets into the same stitch.
Step 3: Step 3: ch (chain): Yarn over, pull through the loop on the hook.
Step 4: Step 4: dc (double crochet): Yarn over, insert hook, yarn over, pull through, yarn over, pull through two loops, yarn over, pull through remaining two loops. The double crochet is taller than a single crochet, so watch your tension — it can loosen up on the first few attempts.
Step 5: Step 5: tr (treble crochet): Yarn over twice, insert hook, yarn over, pull through, yarn over, pull through two loops (repeat twice). That "repeat twice" refers to the final two pull-through sequences, not the entire stitch from the top.
Step 6: Step 6: hdc (half double crochet): Yarn over, insert hook, yarn over, pull through, yarn over, pull through all three loops.
Step 7: Step 7: sl st (slip stitch): Insert hook, yarn over, pull through both the stitch and loop on the hook.
Step 8: Step 8: dec (decrease): Insert hook into two stitches, yarn over, pull through both, yarn over, pull through two loops. This is the invisible decrease method — inserting through the front loops of two stitches keeps the seam tidy.
Step 9: Step 9: FLO (front loop only): Work stitches into the front loop of the designated stitch. The front loop is the one facing you as you work.
Step 10: Step 10: BLO (back loop only): Work stitches into the back loop of the designated stitch. The back loop is the one sitting away from you — it creates a ridge on the surface of the work.
Care Instructions
Because this piece has crafting wire running through it, you don't want to submerge it in water. If the cotton yarn picks up dust over time, a soft dry brush or a quick pass with a lint roller is usually enough to freshen it up. Keep it away from direct sunlight for long stretches since the green and yellow cotton can fade, and the wire structure means reshaping after the fact is possible but a little fiddly. Store it somewhere it won't get crushed, since the wire holds its shape well until something heavy lands on it.
Frequently Asked Questions
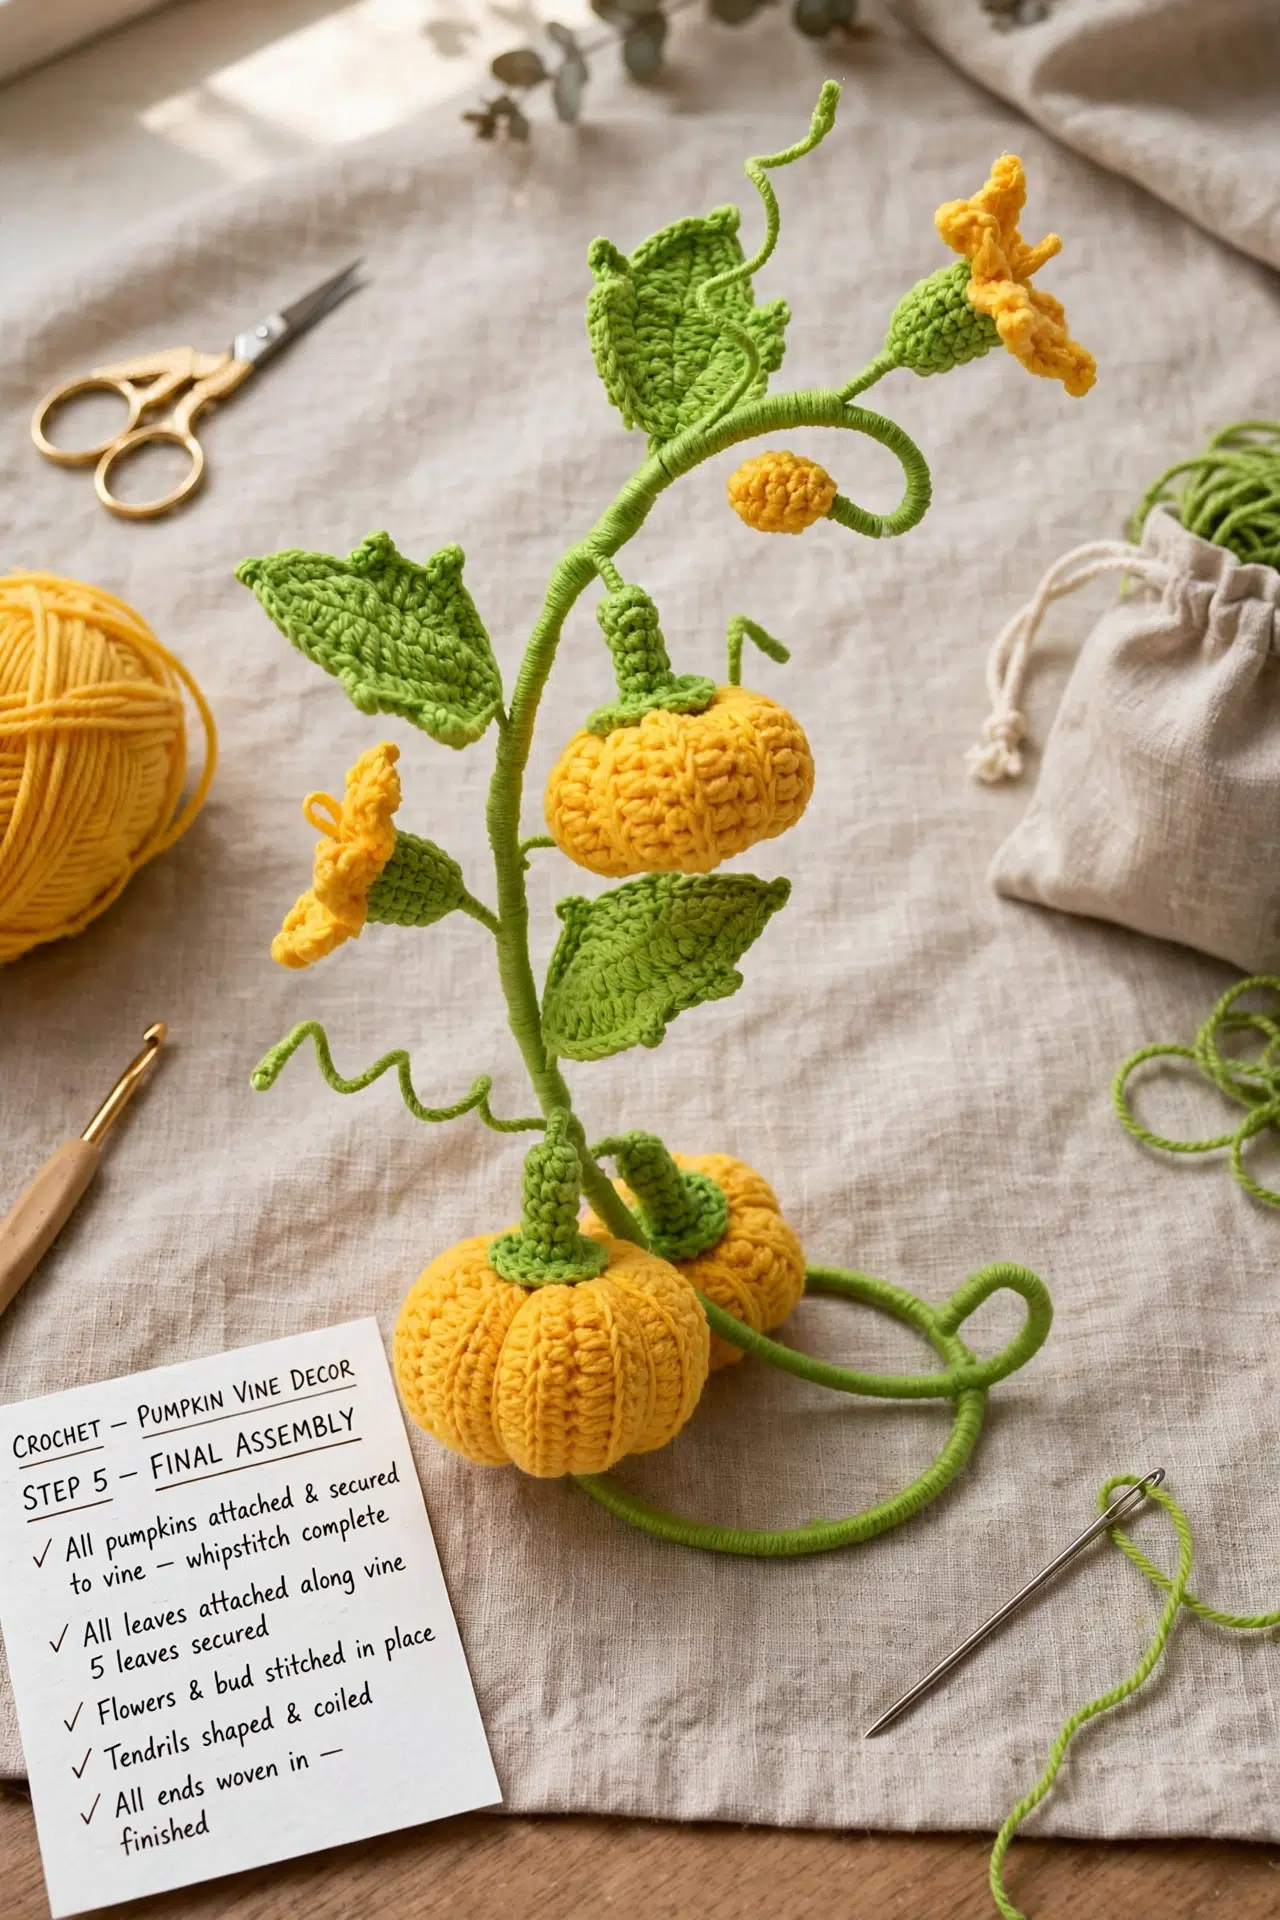
The wire is what gives the vines their shape and lets you position them however you want on your surface. Without it, the crocheted stems would just lie flat with no structure. You thread it through as you go, so the finished piece holds curves and bends on its own without needing to be pinned or propped up against anything.
It helps to have tried them at least once. Working into the front or back loop only changes the texture and creates ridges in the fabric, and in this pattern that detail matters for how the finished piece looks. If you haven't done it before, practice on a small swatch first so you're comfortable identifying which loop is which before you hit that section.
The round bamboo ring acts as the base or frame that anchors the whole arrangement. The crocheted vines attach to it, so it gives the piece a natural, organic look without needing a separate stand or display surface. The branch-style ring in particular adds to the autumn feel of the whole thing.
125 g covers the full project in both green and yellow. That said, I'd always grab a little extra of whichever color you use more heavily, just in case. Running out mid-vine when you're working wire through at the same time is not a situation you want to be in.
The 2.5 mm hook is paired with DK weight cotton to get a tight, firm fabric, which matters here because you want the stitches to hold their shape around the wire. Going up a hook size or two won't ruin it, but the fabric will be looser and the wire may shift around more inside. I'd stick close to the recommended size for this one.
Now It's Your Turn!
I'd love to see how your Pumpkin Vines piece turns out, especially how you decide to arrange the vines once that wire is in and you realize you can bend them into just about anything. Tag me on social media when yours is finished, or drop a photo in the comments below. And if you're saving this for later in the season, pin it now so you can find it when the fall decorating urge hits.



