
Halloween is basically my favorite time of year to crochet, and this Black Cat Amigurumi Crochet Pattern has honestly become one of my go-to makes for the season. It's the kind of project that feels really satisfying to finish, and it works up faster than you'd expect for something this cute.

Jump to:
About the Design
I designed this one with a pretty clean, simple construction in mind. The body builds up in a way that just makes sense as you go, and the pieces come together without a lot of fussing or backtracking. It's the kind of amigurumi where you finish assembling it and think, okay, that actually worked out exactly how I wanted it to.
I'd honestly make this for anyone. It's a natural fit for Halloween decor or a spooky season gift, but a black cat isn't really seasonal in the way a pumpkin is. It's a year-round kind of creature, which I really like. Makes it a solid option if you're looking for a handmade gift that doesn't feel too themed.
Why You'll Want to Make This
This little black cat is a genuinely fun make that works for Halloween and well beyond it.
- Beginner-friendly build: This is rated easy, so if you're fairly new to amigurumi, this is a no-trouble project to build confidence with.
- Great gifting option: Small, finished quickly, and appealing to basically everyone who likes cats. Hard to go wrong.
- Seasonal and versatile: It fits right into Halloween, but a black cat works as a year-round shelf or desk companion too.
- Solid skill practice: You'll work through the core amigurumi techniques, including working in the round and assembling separate pieces, without anything too complicated.
What You'll Need
Three colors total, and the hot glue gun is optional but worth having nearby.
- Super Bulky (Weight 6) Yarn in Black, Green, and Grey: Black does the heavy lifting here. It covers the entire body, ears, arms, and tail, so that's where most of your yardage goes. The green and grey are just small accent amounts for the eyes and nose, so even short lengths or scraps will do. For a project this size, somewhere around 100–150 yards of black is a reasonable estimate, though the exact amount will depend on how large you make it and how generously you stuff.
- 6 mm Crochet Hook: A 6 mm pairs well with super bulky yarn and keeps the fabric tight enough that the stuffing won't show through the stitches. Too large a hook and you start getting gaps, which is not what you want on an amigurumi.
- 18 mm Safety Eyes: This pattern uses 18 mm safety eyes specifically. That size reads well against the bulky fabric without looking too small or too cartoonish.
- Stuffing: Polyfil or any standard toy stuffing works fine. Because the ears, arms, and tail are worked directly into the piece with no sewing required, you'll mainly be stuffing the body. Add it before the opening gets too small to work with comfortably.
- Hot Glue (Optional): Listed as optional, and it really is. It can help secure small pieces or embellishments if you want extra hold, but it's not essential to finishing the project.
- Also needed: stitch markers, tapestry needle, scissors
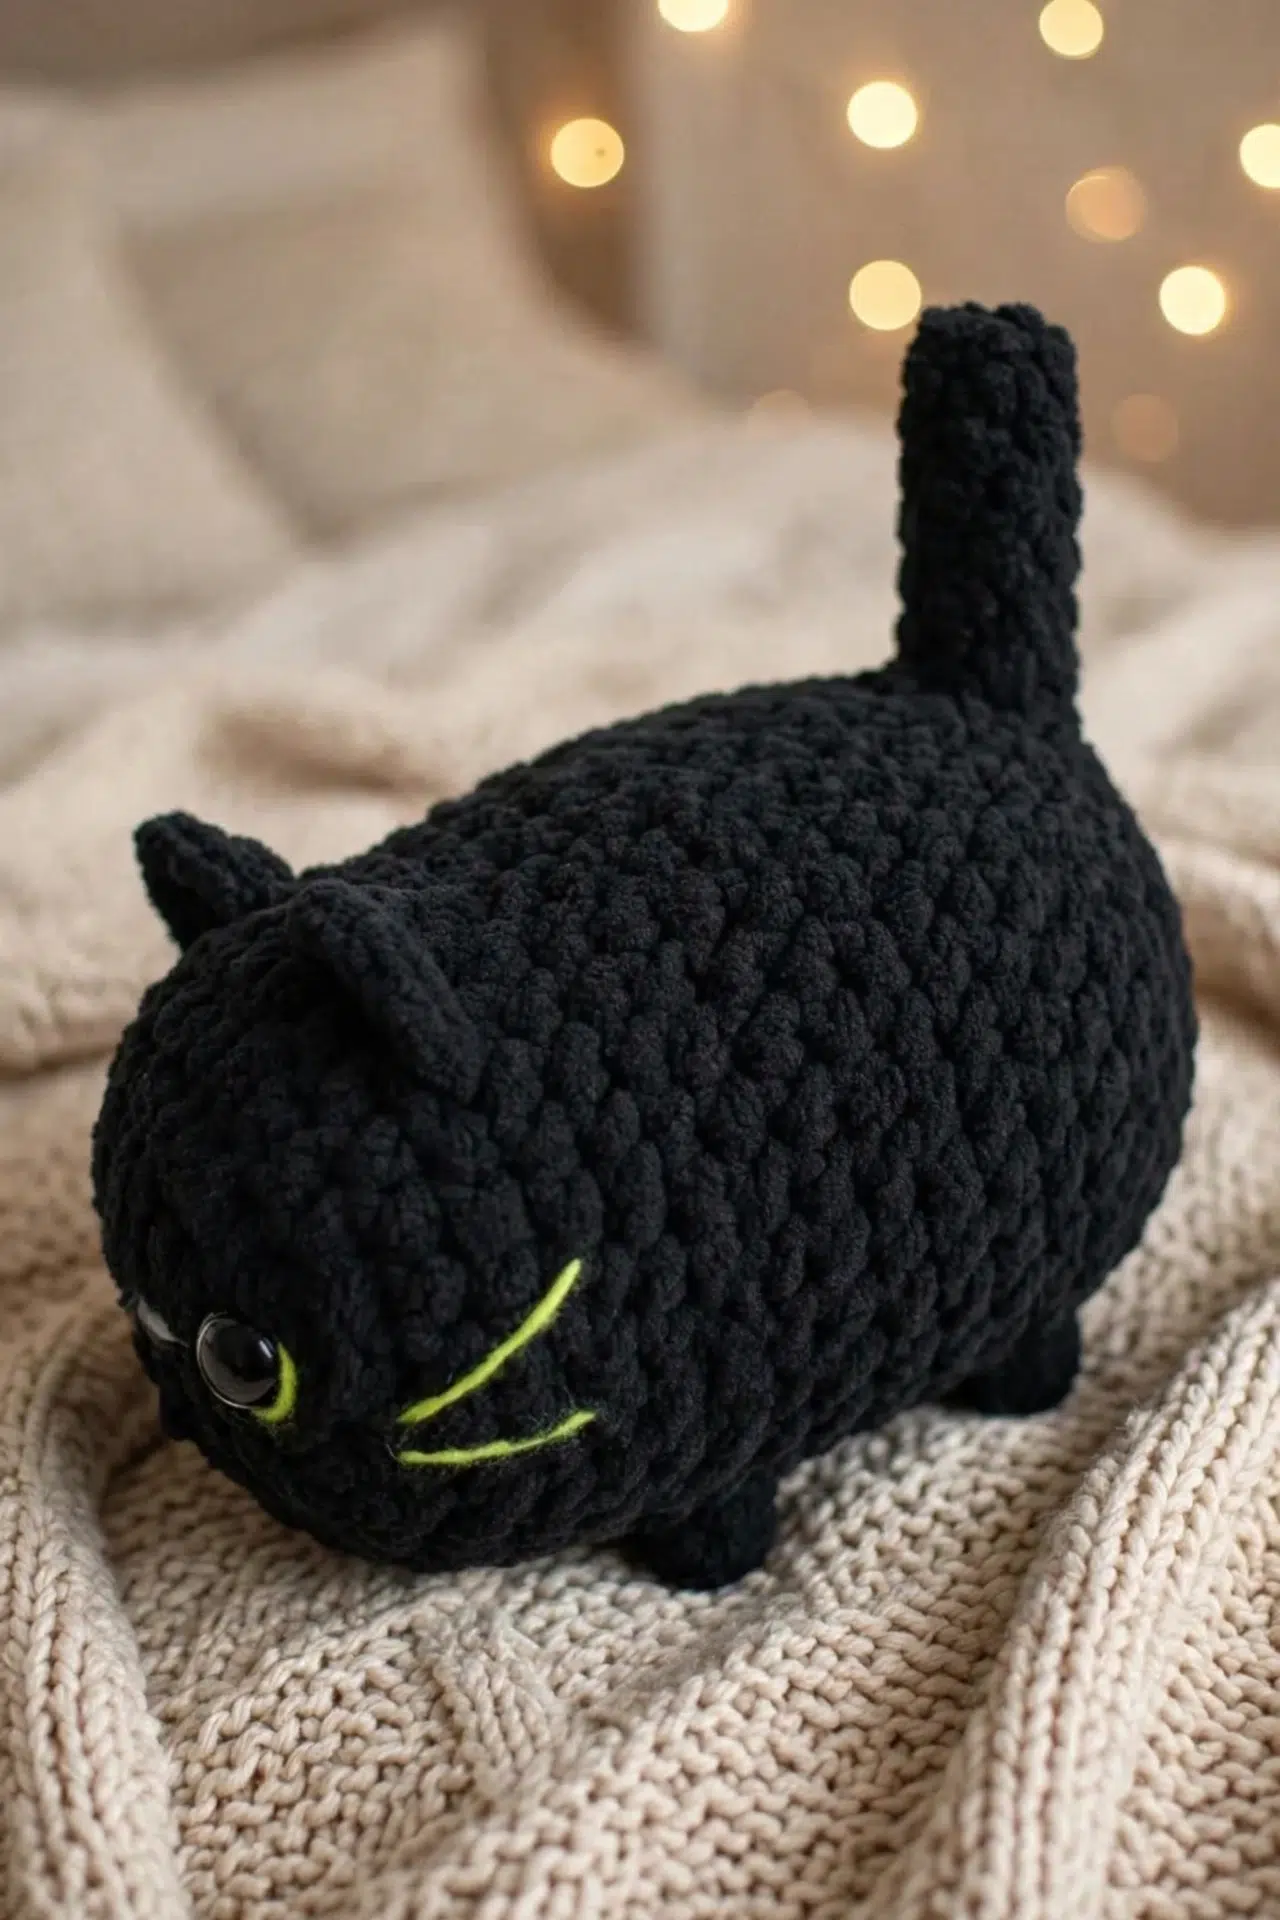
At a Glance
This little amigurumi works up fast in super bulky yarn, and the ears, arms, and tail are all built right into the piece so there's no sewing at the end.
| Skill Level | Easy |
| Pattern Gauge | Gauge is not critical for this project. Use a hook size that creates a tight, firm fabric so stuffing does not show through. |
| Finished Size | Approx. 8 in (20 cm) tall. |
| Yarn Weight | 6 Super Bulky |
| Terminology | US |
Stitch Guide & Abbreviations
Most of these will already be familiar, with one textured stitch thrown in.
- ch = chain
- dc = double crochet
- dec = decrease (sc2tog)
- FLO = front loop only
- inc = increase (2 sc in same stitch)
- sc = single crochet
- sl st = slip stitch
- popcorn st = popcorn stitch
Special Stitches
- Popcorn Stitch: Work 5 dc in the indicated stitch. Drop the loop from your hook, then insert the hook into the first dc of that 5-dc group. Pick up the dropped loop and pull it through to close the popcorn.
Pattern Notes
This is a no-sew construction. The ears, arms, and tail are worked directly as part of the piece rather than made separately and attached later, so there's no assembly step at the end. I work in continuous rounds throughout. Place a stitch marker at the beginning of each round and move it up as you go. Count your stitches at the end of every round. With decreases happening across multiple sections of the body, a missed stitch is a lot easier to catch early than it is to fix three rounds later.
How to Make the Black Cat Amigurumi Crochet Pattern
Follow the sections below in order and you'll have a complete black cat amigurumi from the first magic ring to the finished tail.
Body (Including Ears, Arms, and Tail Opening)
The body is the main piece of this pattern and it does a lot of work. The ears are built directly into the rounds as you go, the arm bumps are formed with popcorn stitches, and a small chain opening is left for the tail. Stuff the body firmly before you close it up.
Round 1: 8 sc in magic ring. [8 sc]
Round 2: inc in each st around. [16 sc]
Round 3: (inc, sc in next st) repeat around. [24 sc]
Round 4: (inc, sc in next 2 sts) repeat around. [30 sc]
Round 5: sc in each st around. [30 sc]
Round 6: sc in each st around. [30 sc]
Round 7: sc in next 12 sts, working in FLO, (sc, dc) in next st, ch 1, (dc, sc) in next st, sc in next 3 sts, work in FLO, (sc, dc) in next st, ch 1, (dc, sc) in next st, sc in next 13 sts. [38 sc] This is where the ears form. Working into the front loops only lets you build the ear structure while keeping the back loops free for the next round to pass behind them.
Round 8: sc in next 12 sts, sc in next 2 sts behind the first ear, sc in next 3 sts, sc in next 2 sts behind the second ear, sc in next 11 sts. [30 sc] You're working into the back loops left behind from Round 7, essentially stepping around the ears and continuing the body as normal.
Round 9: sc in each st around. [30 sc]
Round 10: sc in each st around. [30 sc]
Round 11: sc in next 2 sts, popcorn st in next st, sc in next 26 sts, popcorn st in next st, sc in next 2 sts. [32 sc] The two popcorn stitches here form the arm bumps on either side of the body. Make sure your popcorn stitches are pulled snug so they pop outward.
Round 12: sc in each st around. [32 sc]
Round 13: sc in each st around. [32 sc]
Round 14: sc in each st around. [32 sc]
Round 15: sc in each st around. [32 sc]
Round 16: sc in each st around. [32 sc]
Round 17: sc in next 4 sts, popcorn st in next st, sc in next 26 sts, popcorn st in next st. [32 sc] A second pair of popcorn stitches, this time offset slightly from the first pair to suggest the lower legs.
Round 18: sc in each st around. [32 sc]
Round 19: sc in next 16 sts, ch 3, skip 3 sts, sc in next st, sc in next 12 sts. [32 sc] The chain-3 over the skipped stitches creates the tail opening. Keep track of which side this falls on so you know where to attach the tail later.
Round 20: sc in each st around, sc in each ch. [32 sc] Working into the chains closes the opening into a clean loop of stitches.
Round 21: (dec, sc in next 2 sts) repeat around. [24 sc] This is where the decreasing begins. Start stuffing now if you haven't already — it gets harder to fill evenly once the opening is too small.
Round 22: (dec, sc in next st) repeat around. [16 sc]
Round 23: dec around. [8 sc]
Round 24: dec twice, finish off. [6 sc]
Tail
The tail works up quickly from the opening you left in Round 19. You're just joining yarn and crocheting a small tube in continuous rounds.
Round 1: Attach yarn in any st of tail opening, 6 sc around. [6 sc]
Round 2: sc in each st around. [6 sc]
Round 3: sc in each st around. [6 sc]
Round 4: sc in each st around. [6 sc]
Round 5: sc in each st around. [6 sc]
Round 6: sc in each st around. [6 sc]
Round 7: sc in each st around. [6 sc]
Fasten off, weave in ends.
Care Instructions
Because this cat has 18 mm safety eyes, I'd skip the washing machine entirely and hand wash it gently in cool water if it ever needs a refresh. The eyes can hold up, but the locking washers on the back can loosen with agitation, and that's not a risk worth taking. Squeeze out the water carefully without wringing the body out of shape, then let it air dry completely before setting it back on a shelf. The stuffing takes longer to dry than you'd think, so give it a full day.
Baby & Child Safety Notes
The 18 mm safety eyes in this pattern are large enough that they're not a concern for older kids, but for toddlers and babies, I'd leave the eyes out entirely and embroider them with yarn instead. The locking washer holds the safety eye in place from the inside, and I always press mine on as firmly as I can before closing up the piece, but no safety eye is completely choke-proof if a determined little one gets hold of it. If you're making this for a young child, embroider the face details and you're good.
Frequently Asked Questions
Insert the safety eyes before you close up the body. Once the opening gets too small to fit your hand inside, you've missed your window and it becomes a real struggle to get the locking washer seated properly. I usually attach mine around Round 21 or 22, when the decreases have started but there's still enough room to work comfortably.
Start adding stuffing before the decrease rounds, not after. I add a little at a time as I go so I can control the firmness. If you wait until the end, the opening is too small and you end up with a lumpy, under-stuffed result. Stuff firmly enough that the body holds its shape but not so hard that it distorts the stitches.
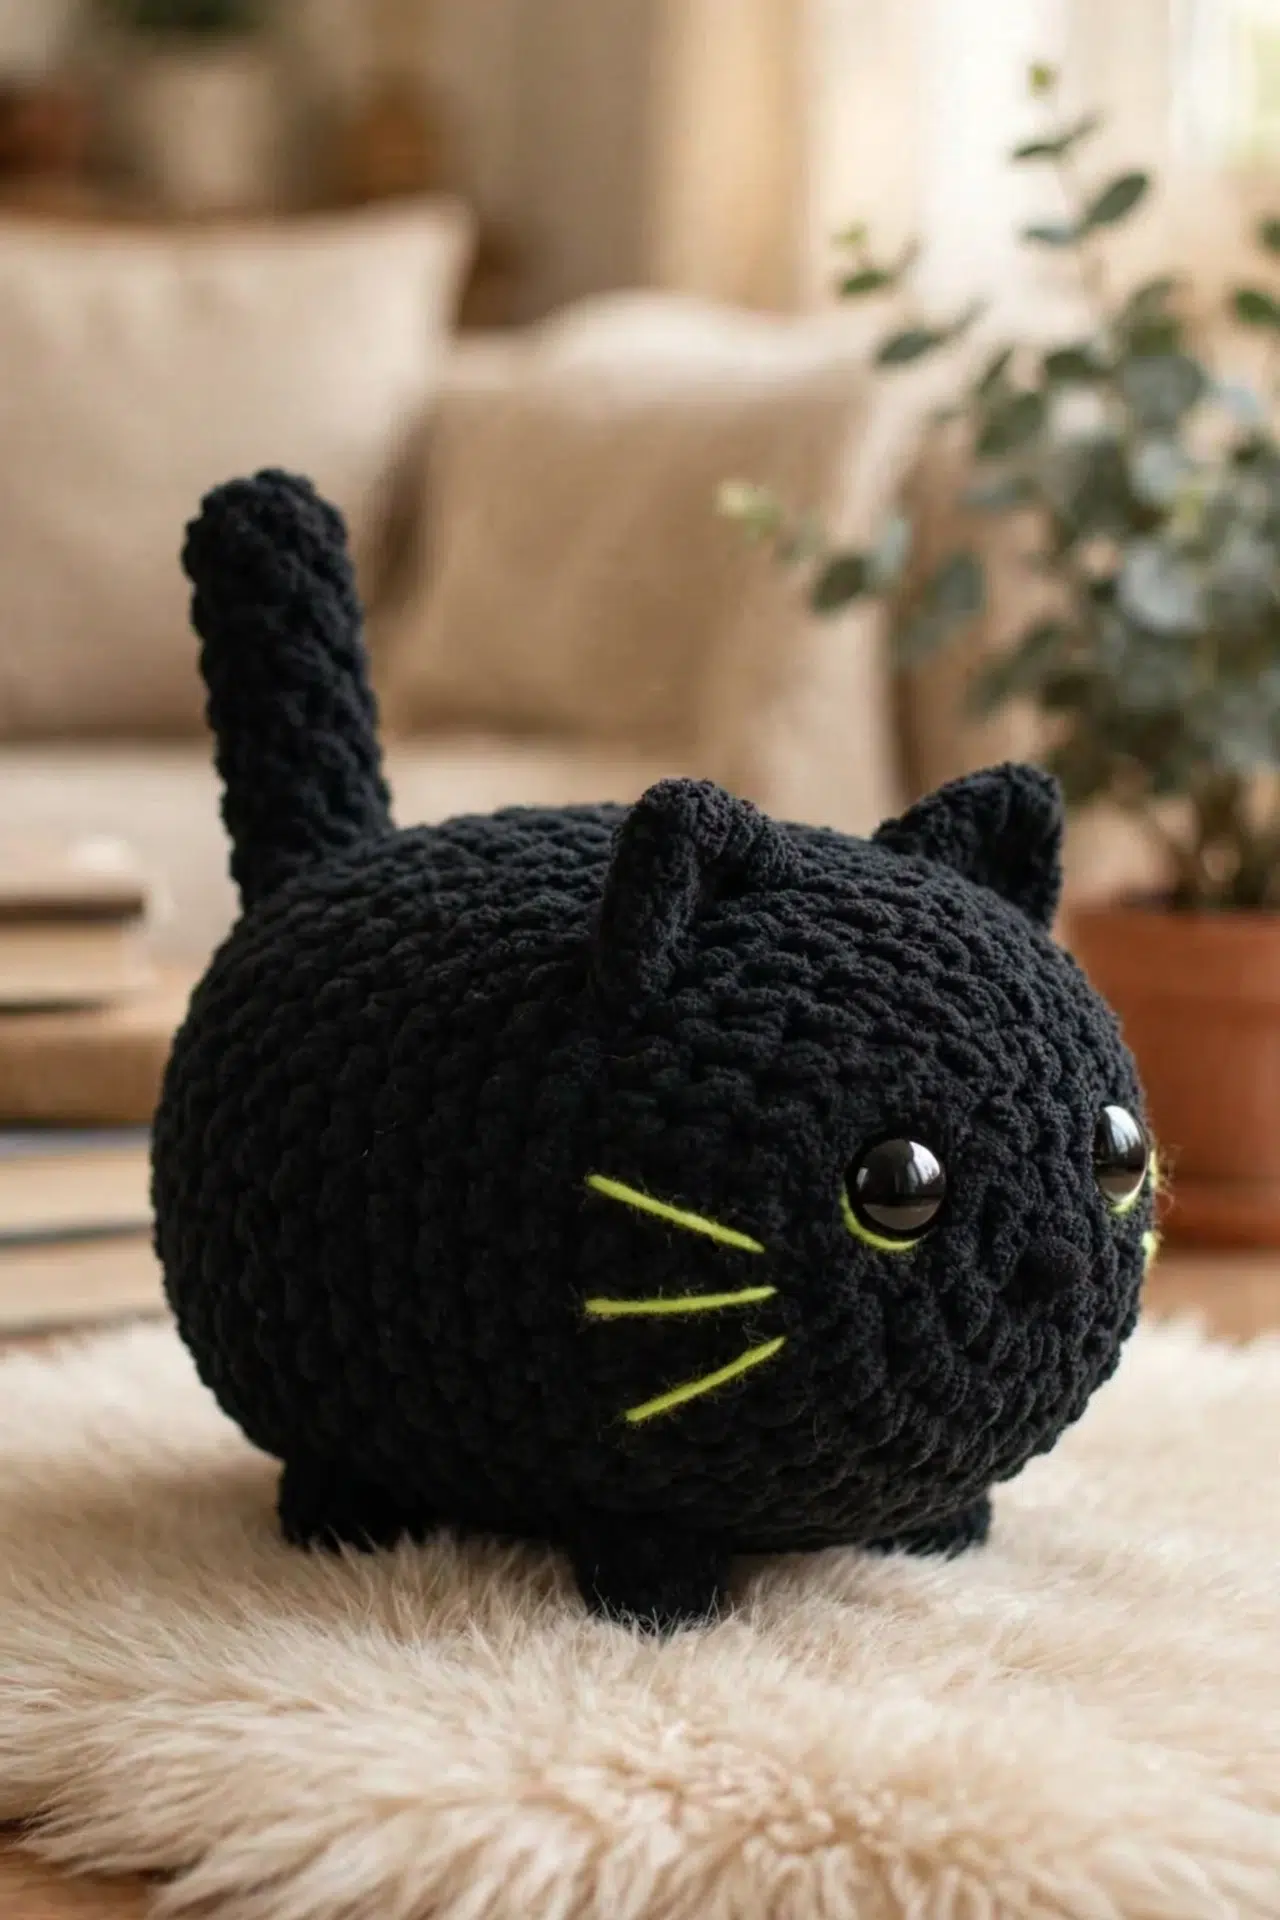
The popcorn stitches create the raised paw bumps on the front of the body. There are two sets: one pair worked in Round 11 and another in Round 17. They're a small detail but they make a big difference in how the finished cat looks, so I'd recommend not skipping them even if popcorn stitches feel fiddly at first.
The ears are worked directly into the body in Round 7 using front loops only. There's no separate piece to sew on. You work a small shell-style cluster on each side of the round, then in Round 8 you continue crocheting behind those ear clusters to close the round back up. It's a clever bit of construction and it means no sewing.
Round 19 creates a small chain gap in the body by chaining 3 and skipping 3 stitches. That gap becomes the tail opening. Once the body is finished and stuffed, you attach your yarn into that opening and work the tail in rounds from there. The tail is 7 rounds of 6 single crochets, so it's a quick finish.
Hot glue is listed as optional. It's there in case any of your finished details need a little extra securing, like if the tail base feels loose where it meets the body. I didn't end up needing it on mine, but it's handy to have nearby just in case. Don't stress about it if you don't own a glue gun.
Happy Crocheting
This little black cat is one of those projects that comes together faster than you expect, and the no-sew construction makes the whole thing feel surprisingly satisfying. If you make one, I'd love to see it: tag me on Instagram or drop a photo in the comments below. And if you're saving patterns for later, this one pins really well on Pinterest for Halloween season or any time you want a quick amigurumi that actually looks like something.



