
I've been on a bit of a granny square kick lately, and this project is honestly one of my favorites to come out of that obsession. The Granny Flower Water Bottle Cozy Crochet Pattern combines that classic granny motif with something actually useful, and the result is the kind of thing you'll want to make more than once. It works up beautifully as a gift, and it's the perfect project to bring along to your next crochet night.

Jump to:
About the Design
What I really love about this one is how the construction keeps things interesting. You're not just crocheting a tube and calling it a day. The base works up in the round, the body builds from there, and the granny flower motif gives you something to actually think about as you go. It's the kind of project that keeps your hands busy without making your brain hurt.
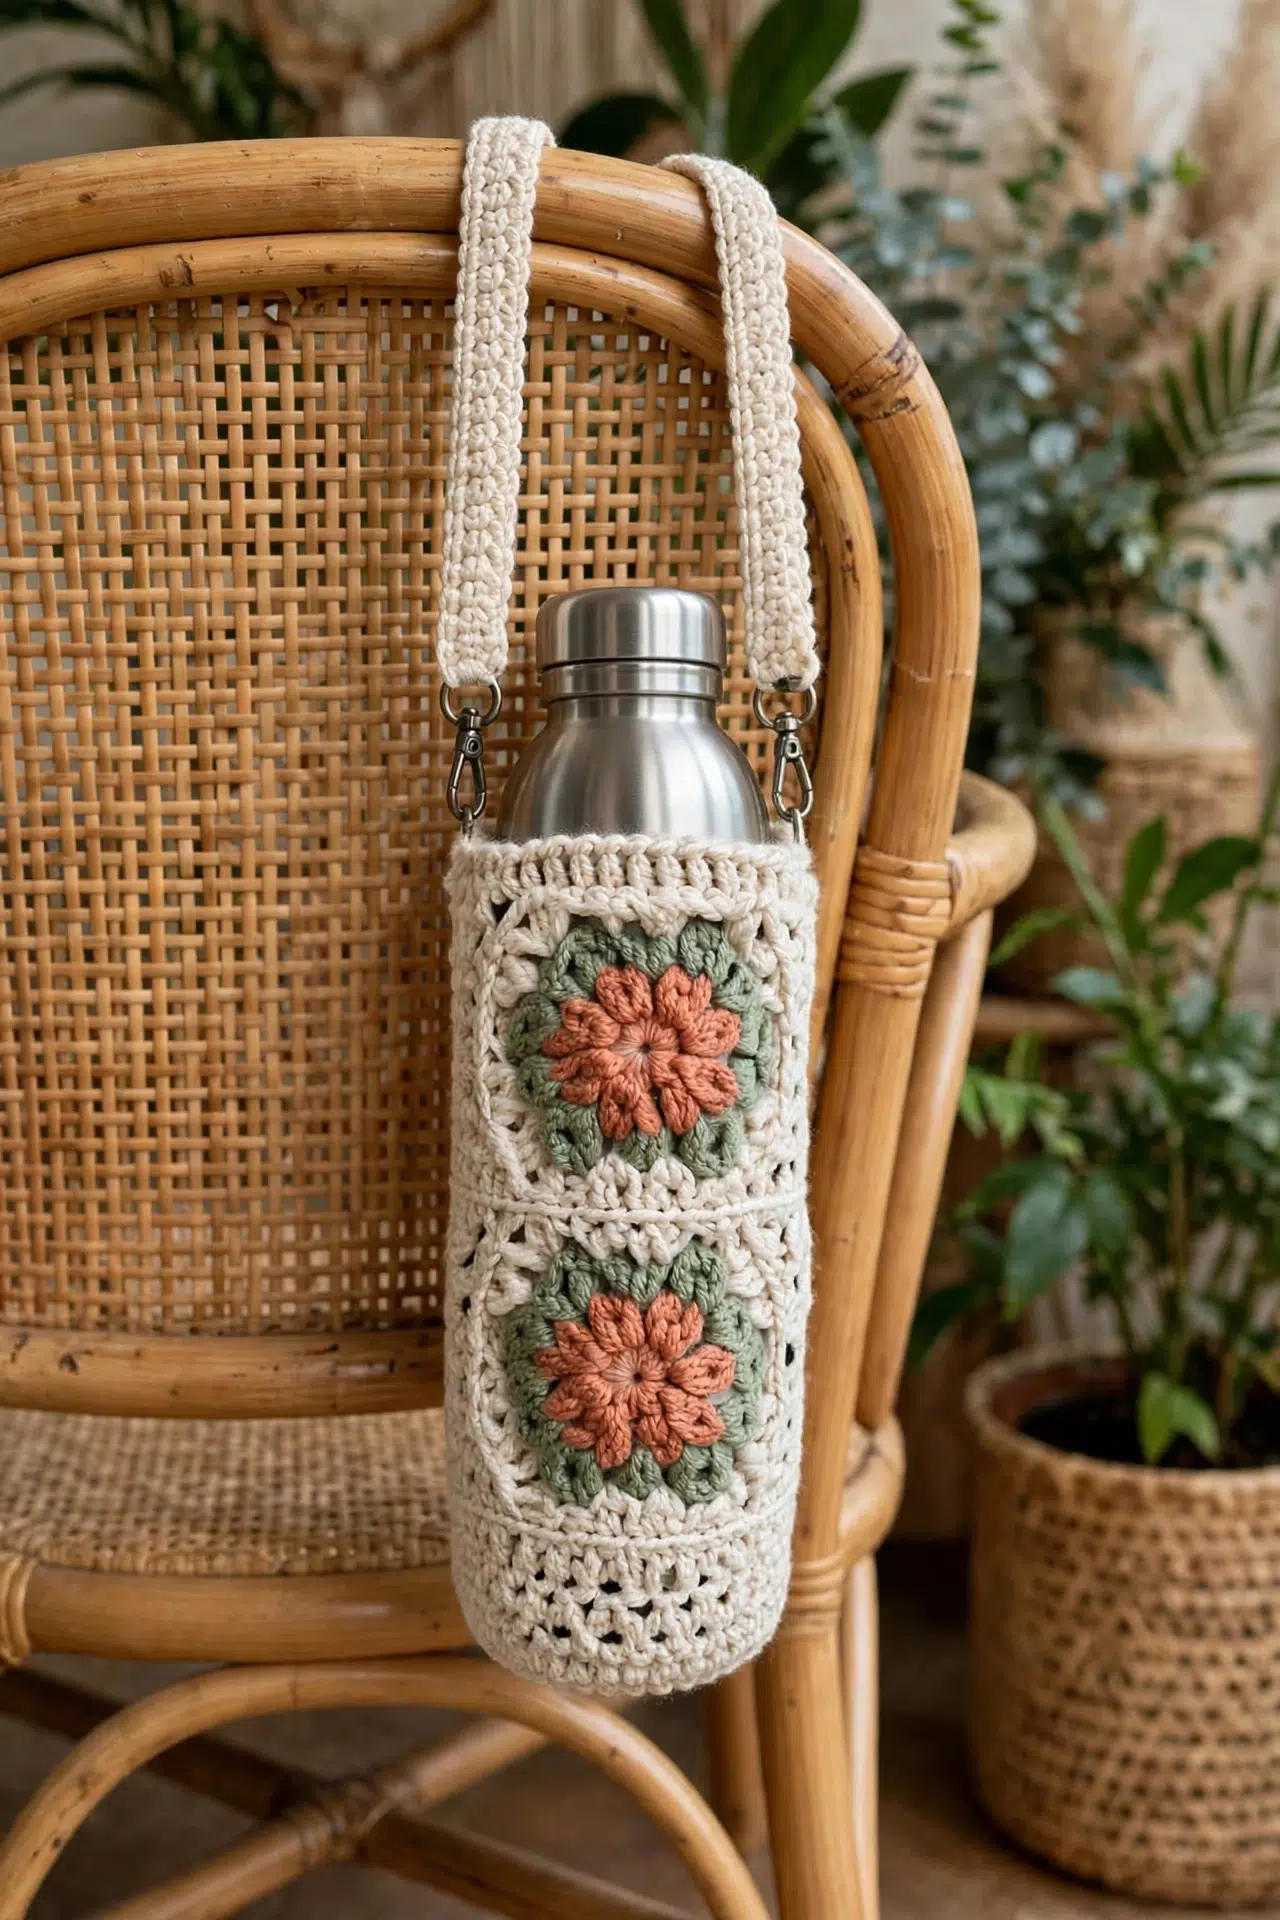
I'd make this for pretty much anyone who carries a water bottle around, which is basically everyone I know. It's a really satisfying gift because it looks thoughtful and it's genuinely practical. The long strap is a nice touch too. Makes it easy to carry hands-free, which is something people actually appreciate once they have it.
Why This Pattern Stands Out
A granny motif meets everyday function in the most satisfying way possible.
- Skill level: Intermediate, so you'll want some granny square experience before diving in, but it's no trouble at all if you have it.
- Gifting potential: This one is genuinely great as a gift, practical enough that people actually use it and pretty enough that they want to.
- Technique value: You get to practice working in the round, building a base, and constructing a strap, all in one compact project.
- Sizing flexibility: It fits most standard water bottles in the 500–750 ml range, so you're not making something that only works for one specific bottle.
- Time investment: Compact enough to finish in a weekend, which makes it a really good pick when you want a quick win.
Materials You'll Need
Three colors, one hook, and a water bottle sitting on your desk — that is the whole list.
- Worsted weight cotton or cotton-blend yarn (Color A, B, and C): Cotton is the right call for a water bottle holder. It holds its structure without stretching out under the weight of a full bottle, and it doesn't get slippery the way acrylic can. You'll need about 150 g of your cream or ecru main color, around 20 g of sage green for the outer petals, and just 10 g of terracotta or rust for the flower centers. That terracotta amount is so small that a leftover scrap ball will cover it with yarn to spare.
- 5 mm (US H/8) crochet hook: This size pairs well with worsted cotton, giving you a fabric that's firm enough to support the bottle without being stiff or hard to work with. Cotton tends to show every stitch clearly at this gauge, so the floral details come out looking neat.
- 500–750 ml (17–25 oz) water bottle: Keep one nearby while you're working. The holder is sized around a standard bottle, and checking the fit as you go is the easiest way to catch any gauge issues before you've finished the whole tube.
- Stitch marker: The pattern works in joined rounds rather than a continuous spiral, so you're not using the marker to track the start of each round the way you might in amigurumi. It's still useful for marking a reference point if you lose your place, especially on the petal rounds where the stitch logic shifts a bit.
- Also needed: yarn needle, scissors
Color Sequence & Yarn Changes
The cream does the heavy lifting here. It covers the base, the background rounds, the petals, and the strap, so Color A is in your hand for most of the project. The sage green and terracotta come in only for the floral motif rounds, and because the amounts are small, it's worth cutting and joining rather than carrying them across the back. Weave in the ends as you go on those color changes and you won't have a pile of them waiting for you at the end.
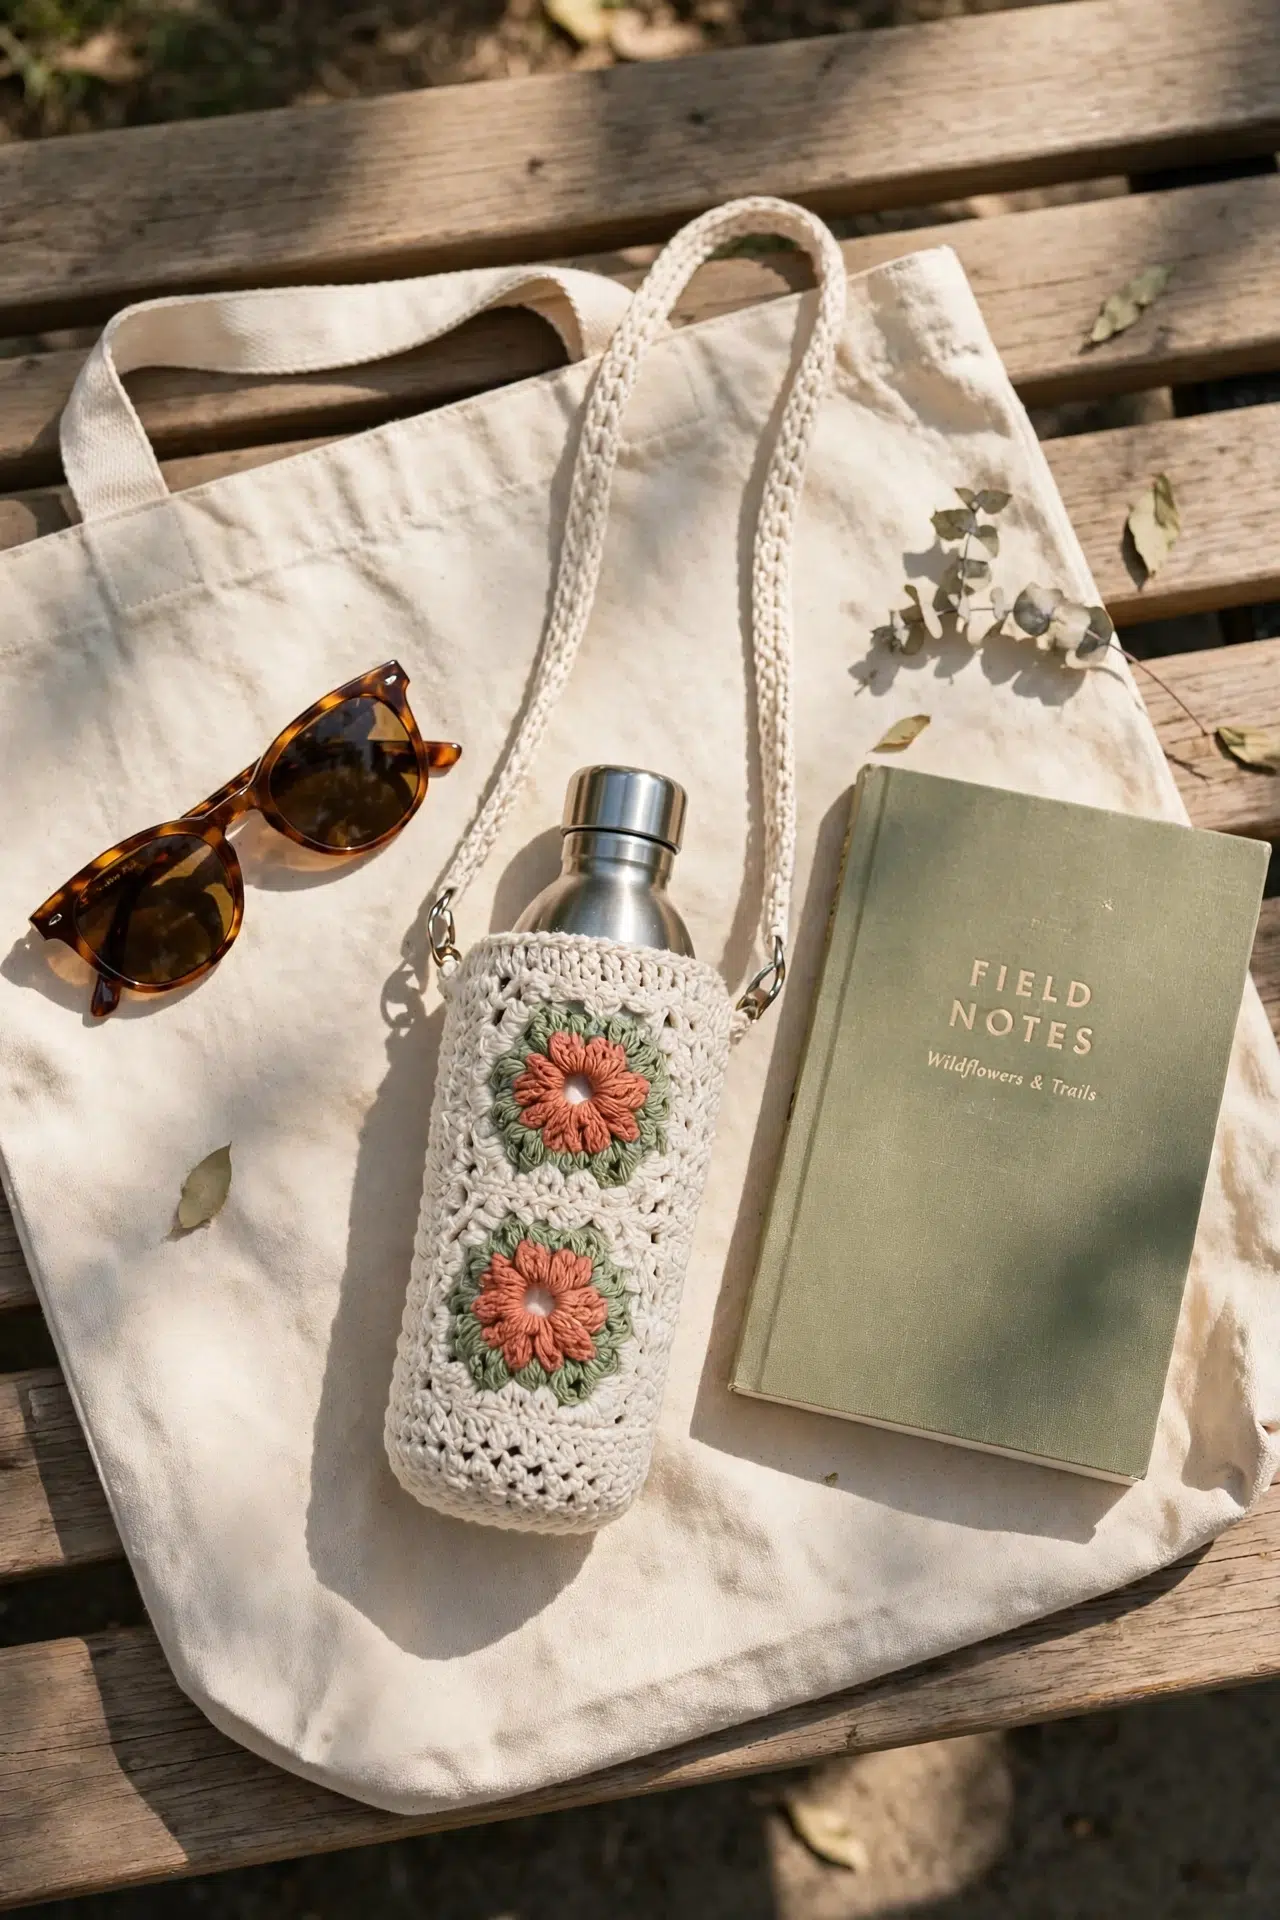
Project Info
A crocheted bottle carrier worked in the round from the base up, with a long attached strap so your hands stay free.
| Skill Level | Intermediate |
| Pattern Gauge | Gauge is not critical for this project. Use a hook size that creates a firm fabric for the tube so it holds its shape and fits snugly over the bottle. |
| Finished Size | Finished size: base diameter approx. 7.5 cm/3 in; body height approx. 20 cm/8 in; fits most 500–750 ml (17–25 oz) bottles. Strap is approx. 115 cm/45 in unstretched. |
| Yarn Weight | 4 Medium / Worsted |
| Fiber | 100% cotton or cotton-blend |
| Terminology | US |
Abbreviations & Stitches Used
Standard stitches all the way through — nothing unusual here.
- ch = chain
- sc = single crochet
- hdc = half double crochet
- dc = double crochet
- tr = treble crochet
- sl st = slip stitch
- MR = magic ring
- st(s) = stitch(es)
- rnd(s) = round(s)
- rep = repeat
- sk = skip
Special Stitches
- Standing sc: With a slip knot on hook, insert hook in indicated st/space, yarn over, pull up a loop, yarn over, pull through both loops. Counts as 1 sc. Use this to join a new yarn color or strand without a starting chain.
Before You Begin
This pattern is written in US terminology throughout. I work it in joined rounds from the base up — not a continuous spiral. Each round ends with a slip stitch join to the first stitch of that round. Stitch counts appear in brackets at the end of each round so you can check your work as you go.
One thing worth knowing before you start: on the petal rounds, stitches are worked into spaced anchor points (ch spaces or stitch posts) rather than into every stitch of the previous round. The count at the end of those rounds reflects how many petals were made, not the full width of the tube fabric. The round that follows each petal round brings the stitch count back to the standard tube count, so don't be alarmed when the numbers look off mid-section.
The Granny Flower Water Bottle Cozy Crochet Pattern Steps
Work through each section in order and the cozy comes together from the bottom up, finishing with the strap and handle loop attached at the rim.
Base (Color A)
This is the flat circular bottom of the cozy. I work it in joined rounds, increasing evenly each round to build a disc that will sit flat under the bottle.
Round 1: MR, ch 1 (does not count as st), 8 sc in ring, sl st to first sc to join. [8 sc]
Round 2: Ch 1, 2 sc in each st around, sl st to first sc to join. [16 sc]
Round 3: Ch 1, *sc in next st, 2 sc in next st; rep from * around, sl st to first sc to join. [24 sc]
Round 4: Ch 1, *sc in next 2 sts, 2 sc in next st; rep from * around, sl st to first sc to join. [32 sc]
Round 5: Ch 1, *sc in next 3 sts, 2 sc in next st; rep from * around, sl st to first sc to join. [40 sc] Each increase round adds one more plain stitch before each increase point — that's the pattern that keeps the circle flat.
Sides: Set-Up Round (Color A)
This single even round is where the work transitions from flat circle to vertical tube. No increases, no decreases — just one round that sets the stitch count for the sides.
Round 6: Ch 1, sc in each st around, sl st to first sc to join. [40 sc]
Flower Band 1 (Rounds 7–10)
This is the first decorative flower section, and it's worked in four rounds using three colors. The flower petals are built in layers: a foundation net round, a front petal round, a back petal round worked behind those petals, and then a closing round that brings everything back to a clean 40-stitch edge. Keep your dropped colors loose at the back so the tube doesn't pucker.
Round 7 (join Color C): Standing sc in any st, *ch 3, sk next 4 sts, sc in next st; rep from * around, ending ch 3, sl st to first sc to join. [8 sc, 8 ch-3 sps]
Also forms 8 ch-3 sps.
Round 8 (join Color A): Sl st into first ch-3 sp, ch 1, (sc, hdc, dc, hdc, sc) in same sp and in each ch-3 sp around, sl st to join at base of first petal. [40 sts] This shell sequence worked into each ch-3 space creates the front layer of petals.
Round 9 (join Color B): Working around the post of each Round 7 sc (behind the Round 8 petals), (sc, hdc, dc, tr, dc, hdc, sc) around the post of the first Round 7 sc; rep around each of the 8 Round 7 sc posts, sl st to join. [56 sts] You'll need to push the Round 8 petals forward to reach the Round 7 posts behind them — that's intentional. The treble at the center of each back petal gives it a little extra reach.
Round 10 (Color A, closing round): Ch 1, sc in each of the 40 sts across the tops of the Round 8 petals around, sl st to first sc to join. [40 sc] This round works only into the front petal tops, not the back layer, which is why the count returns to 40.
Plain Spacer Rounds (Color A)
Three quiet rounds of plain sc between the two flower bands. This gives the eye somewhere to rest and keeps the overall structure from feeling too busy.
Rounds 11–13: Ch 1, sc in each st around, sl st to first sc to join. [40 sc each round]
Flower Band 2 (Rounds 14–17)
The second flower band repeats the same four-round sequence as the first. The construction is identical, so if the first band went smoothly, this one will feel familiar.
Round 14 (join Color C): Standing sc in any st, *ch 3, sk next 4 sts, sc in next st; rep from * around, ending ch 3, sl st to first sc to join. [8 sc, 8 ch-3 sps]
Also forms 8 ch-3 sps.
Round 15 (join Color A): Sl st into first ch-3 sp, ch 1, (sc, hdc, dc, hdc, sc) in same sp and in each ch-3 sp around, sl st to join at base of first petal. [40 sts]
Round 16 (join Color B): Working around the post of each Round 14 sc (behind the Round 15 petals), (sc, hdc, dc, tr, dc, hdc, sc) around the post of the first Round 14 sc; rep around each of the 8 Round 14 sc posts, sl st to join. [56 sts]
Round 17 (Color A, closing round): Ch 1, sc in each of the 40 sts across the tops of the Round 15 petals around, sl st to first sc to join. [40 sc]
Neck and Top Band (Color A)
These final rounds finish the top of the cozy with a clean, even rim. Round 21 is the last round — I leave the yarn attached until I know where I want to position the strap and handle loop before fastening off.
Rounds 18–20: Ch 1, sc in each st around, sl st to first sc to join. [40 sc each round]
Round 21 (rim): Ch 1, sc in each st around, sl st to first sc to join. Do not fasten off. [40 sc]
Small Front Handle Loop (Optional, Color A)
This little loop sits at the front rim and gives you a place to clip a carabiner or hook a finger. It's optional, but I like having it. Work it as a separate piece and set it aside for assembly.
Step 1: Ch 12, sl st into first ch to form a ring, ch 1, sc evenly around the ring (approx. 14 sc), sl st to first sc to join. Fasten off leaving a tail for sewing. [approx. 14 sc]
Fasten off leaving a tail for sewing.
Crossbody Strap (Color A, Worked Flat)
The strap is worked flat in rows — a simple rectangle that you just keep going until it reaches the length you need. I find it helpful to drape it across my body as I go to check the length before fastening off.
Row 1: Ch 8, sc in 2nd ch from hook and in each ch across, turn. [7 sc]
Row 2: Ch 1, sc in each st across, turn. [7 sc]
Row 3: Repeat Row 2 until the strap measures approx. 115 cm/45 in, or desired length. Fasten off leaving a long tail. [7 sc]
Fasten off leaving a long tail.
Finishing and Assembly
With all pieces made, it's time to put everything together. I do the ends first, then the fit check, then attach the hardware.
Step 1: Weave in all ends from the base rounds and each flower band's color changes as you go, rather than leaving them all for the end.
Step 2: Slip the finished tube over your bottle to check fit.
Step 3: Pin one short end of the strap to the rim at one side of the cozy (directly opposite where the handle loop will sit) and sew securely in place.
Step 4: Sew the other end of the strap to the rim at the opposite side.
Step 5: Sew the small handle loop to the front of the rim, next to one strap attachment point.
Step 6: Lightly steam block the flower panels to help the petals lie flat; keep the base and rim unblocked to preserve structure. Let cool over the bottle to hold its shape.
Finishing & Assembly
The cozy body, strap, and handle loop are all separate pieces that come together at the rim. I pin the strap ends in place first — one short end directly opposite where the handle loop will sit, the other end at the opposite side of the rim — and sew both down securely before touching the loop. Once the strap is fixed, I sew the handle loop to the front of the rim right next to one of those strap attachment points. Using the long tails left on each piece for sewing means the joins are sturdy without adding extra bulk.
Blocking
The flower panels are the one part of this cozy that really benefit from a little attention. I lightly steam block just those sections to coax the petals into lying flat and opening up properly. Cotton holds a shape well with steam, so it doesn't take much. I keep the base and the top band completely unblocked so the fabric stays structured enough to grip the bottle. Let the whole thing cool draped over your actual bottle so it dries into the right shape.
Care Instructions
Cotton and cotton-blend yarn handles washing pretty well, but the strap seams are the part I'd be most careful with. Machine washing on a gentle cycle is fine, but I'd skip the dryer entirely. The strap is sewn on rather than crocheted in one piece, and repeated heat and tumbling can stress those attachment points over time. Lay it flat or hang it over the bottle to dry. If the petals flatten out after a few washes, a quick pass with a steam iron on low will bring them back.
Frequently Asked Questions
That's completely normal for how this pattern is constructed. On rounds 7 and 14, you're only crocheting into every fifth stitch to create anchor points for the petals, so the count drops to 8. The following plain round brings everything back to 40. The count in brackets reflects what's actually worked that round, not the total fabric width.
On rounds 9 and 16, you're inserting your hook around the vertical post of the round 7 or 14 sc stitches, working behind the petals you already made. It feels a little awkward at first because you're reaching past the front layer of petals to get there. The result is a second, larger ring of petals sitting behind the first ones.
The base works out to about 7.5 cm (3 in) in diameter and the body is about 20 cm (8 in) tall, fitting most 500 to 750 ml bottles. Cotton has a little give, so it can stretch slightly for a snugger bottle. If yours is wider than 750 ml, the cozy will fit but may sit looser than intended. I'd slip your bottle in before sewing on the strap, just to check.
The strap works out to about 115 cm (45 in) unstretched, which is long enough for a crossbody carry on most people. You can absolutely make it shorter for a shoulder bag length instead. Just keep working Row 2 repeats until it hits the length you want before fastening off.
You can make the whole thing in a single color if you want a simpler project. The terracotta is only about 10 g total and the sage green is 20 g, so they're both small amounts. Skipping the color changes means the flower centers and outer petals will blend into the background, but the texture of the petals will still read clearly.
It's a short crocheted ring sewn to the front of the rim, right next to one strap attachment point. It gives you a grab point to pull the cozy on and off the bottle quickly without tugging on the strap. It's listed as optional, so leave it off if you'd rather keep the top edge clean.
Happy Crocheting
I hope you love how this one turns out. There's something about carrying a handmade cozy that makes even a plain water bottle feel like a whole thing. If you make one, I'd love to see your color choices, especially if you swap out the cream for something bolder. Drop a photo in the comments or tag me on Instagram so I can see it. And if you're saving this for later, pin it to your crochet accessories board so it doesn't get lost in a tab somewhere.



